About this mod
Inventory Icon Sorting Mod, Merged Patches for other Stuff and Optional Textures.
- Requirements
- Permissions and credits
- Changelogs
Without further ado, I present you an Inventory Icon Sorting Mod, patches and other stuff for various Mod Combos.
Installation:
NMM or manual. Obligatory: Check below for detailed installation instructions.
Disclaimer: I'm not going to provide any help whatsoever (probably). There are excellent guides on Nexus and offsite that will help you with anything. For instance check Fallout 4 Mod List and Load Order Guide where BiRaitBec explains things wonderfully. You can of course always write in the discussion tab. Also, I used to use Valdacil Item Sorting and Radrose off of which my mod is based. You will end up with those name tags for mods like Synth Overhaul or any that use Food, Armor, Clothes, Weapons, Chems and the like. That can be a deal breaker for you and I would have to reply: though luck. Yet you can always FO4edit the entries back to "normal" yourself and I suggest you do so if it bothers you. (But why should it!?)
Uto's Usability Enhancements
This mod is inspired by Valdacil's Item Sorting, DEF_UI and Radrose Usability Enhancements. Now, what can you expect?
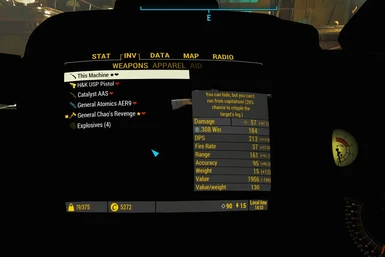
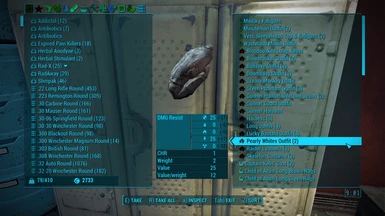
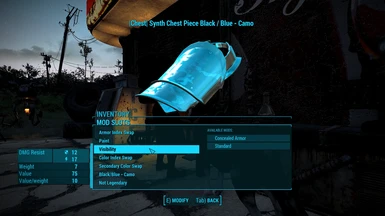
Quest tags, inventory tags, 0 weight bullets and chems, reduced weight, mod fixes, better mod descriptions, UFO4P fixes, other fixes, weapon tags (for optional Weaponsmith Extended 2), armor tags and even the CC Kits and Sets are now in the Mods Tab! Less Radiant Quest (like Lowered Minutemen Expectations).
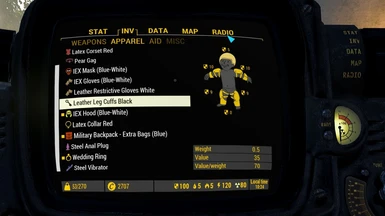
This mod comes with my library tags and adjusted and NEW icons. Total compabilty with any mod that adds a "VIS-Patch" (e.g. "VIS Patch for Raider Overhaul", "IEX Suit AE VIS patch", etc). Total incompabilty with mods that edit the Vanilla entries.
Requirements: All DLC, Unofficial Fallout 4 Patch, Armorsmith Extended, DEF_UI, NAC (visual drug effects!) and the base files from Weapon Mod Fixes.
For optimal compability: Download and install my Armorsmith Extended and my Weaponsmith (if you have those).
1. Install Weapon Mod Fixes GOTY, either regular or the VHD setup. (The rest from WMF is optional).
Now you can either rename or extract:
2a) RENAME
Weapon Mod Fixes - Main.ba2 into Uto's Usability Enhancements - Main.ba2 and
Weapon Mod Fixes - Textures.ba2 into Uto's Usability Enhancements - Textures.ba2
OR
2b) EXTRACT the Weapon Mod Fixes - Main and - Textures.ba2 files into your Data Folder.
AFTER that everything else follows normaly:
3. Delete the esp Weapon Mod Fixes.esp
4. Install my Uto's Usability Enhancements. Overwrite when prompted. Place it towards the mid-bottom, check my load order.
5. OPTIONAL: Install my Armorsmith Extended.esp, Weaponsmith Extended.esp or the other ones over the original to get the full icon shinanigans.
6. Colored Pipboy Display
For a Color Pipboy add or adjust these lines in your \Documents\My Games\Fallout4\Fallout4Custom.ini:
[Pipboy]
bPipboyDisableFX=1
For a too bright Power Armor Pipboy Hud try these lines (also Fallout4Custom.ini):
[Display]
fPipboyScreenEmitIntensityPA=1
fPipboyScreenDiffuseIntensityPA=0.15
Armor and Weapon Related Patches
1. Armorsmith Extended.
Merely adjusted some clothing classes so that they would go with my library tags: see Uto's Usability Enhancement. Use to overwrite.
2. Concealed Armorsmith DLC
This is a merged pluging combining Concealed Armor.esp and Armorsmith ALL DLC Patch.esp, as well as including fixes from UFO4P and VIS-Tags.
Requirements: Concealed Armors, Armorsmith and UFOP4.
1. Install via NMM.
2. Delete: Concealed Armor.esp and Armorsmith ALL DLC Patch.esp
3. Place towards the bottom.
3. Field Scribe Backpacks
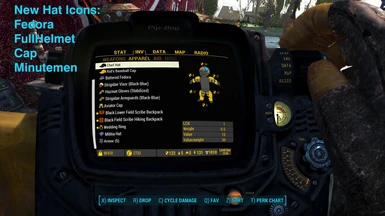
Merges the main esp with the Minutemen Leveled List entries. This also utilizes my icons for lower backpack, upper backpack and full packpack.
0. Have my Inventory Library Tags and its dependencies installed.
1. Install: Field Scribe Backpacks, just the main file.
2. Overwrite with my FSB
4. Immersive Paint Job Unlocks
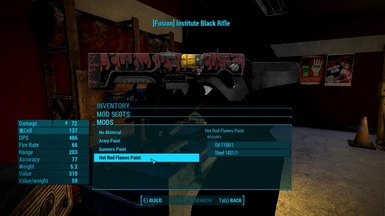
Merges and advances Immersive Paint Job Unlocks and Immersive Creation Club Weapons (all). Now with Valdacil-/Radrose compability (weapons, armor and stuff sorted!), quest icon ready (get Quest Tags ), 0 weight for mods and ammo, immersive weapon and armor paint job unlocks (even the new ones!), paint jobs for better sneaking fix, Armorkeywords means AE ready with Horsepower compability and and and... The original IPJU still needed!
1. Install Immersive Paint Job Unlocks
2. Overwrite with my mod.
All Creation Club items to date (24.04.2018) needed. These are:
ccbgsfo4001-pipboy(black).esl
ccswkfo4002-pipnuka.esl
ccswkfo4003-pipquan.esl
ccrzrfo4003-pipover.es
ccbgsfo4003-pipboy(camo01).esl
ccbgsfo4004-pipboy(camo02).esl
ccrzrfo4004-pipinst.esl
ccbgsfo4006-pipboy(chrome).esl
ccbgsfo4014-pipboy(white).esl
ccbgsfo4005-bluecamo.esl
ccbgsfo4020-powerarmorskin(black).esl
ccbgsfo4022-powerarmorskin(camo01).esl
ccbgsfo4023-powerarmorskin(camo02).esl
ccbgsfo4024-pacamo03.esl
ccbgsfo4025-powerarmorskin(chrome).esl
ccbgsfo4033-powerarmorskinwhite.esl
ccgcafo4001-factionws01army.esl
ccgcafo4012-factionas01acat.esl
ccgcafo4002-factionws02acat.esl
ccgcafo4013-factionas02bos.esl
ccgcafo4003-factionws03bos.esl
ccgcafo4014-factionas03gun.esl
ccgcafo4004-factionws04gun.esl
ccgcafo4015-factionas04hrpink.esl
ccgcafo4005-factionws05hrpink.esl
ccgcafo4016-factionas05hrshark.esl
ccgcafo4017-factionas06inst.esl
ccgcafo4006-factionws06hrshark.esl
ccgcafo4007-factionws07hrflames.esl
ccgcafo4018-factionas07mm.esl
ccgcafo4008-factionws08inst.esl
ccgcafo4009-factionws09mm.esl
ccgcafo4020-factionas09rr.esl
ccgcafo4021-factionas10hrflames.esl
ccgcafo4010-factionws10rr.esl
ccgcafo4011-factionws11vt.esl
ccgcafo4022-factionas11vt.esl
ccgcafo4023-factionas12army.esl
ccawnfo4001-brandedattire.esl
ccfrsfo4001-handmadeshotgun.esl
ccfsvfo4001-modularmilitarybackpack.esl
ccfsvfo4003-slocum.esl
ccbgsfo4016-prey.esl
ccbgsfo4018-gaussrifleprototype.esl
ccbgsfo4019-chinesestealtharmor.esl
ccbgsfo4038-horsearmor.esl
ccbgsfo4041-doommarinearmor.esl
ccbgsfo4042-bfg.esl
ccbgsfo4044-hellfirepowerarmor.esl
ccbgsfo4045-advarccab.esl
ccbgsfo4053-dggoldr.esl
ccbgsfo4051-dgbox.esl
ccbgsfo4036-trnsdg.esl
ccbgsfo4052-dgdal.esl
ccbgsfo4054-dggreatd.esl
ccbgsfo4059-dgpit.esl
ccbgsfo4060-dgrot.esl
ccbgsfo4061-dgshiinu.esl
3. Improved BoS
CC Paints, Far Harbor, Automatron, Armorsmith Extended, UFO4P fixes, quest tags and Unique NPC compability. Requirements: DLC, AE and Unique NPC.
1. Install the original Improved BoS (only the main mod).
2. Overwrite.
5. Raider Overhaul
Unleveled NPCs (can now be tougher than you), fixes, UFO4P fixes, merges, better mod descriptions - even for ALL weapon mods, mod fixes!, VIS-taged, restored content, repaired Demitrus Armor (was overpowered and had incorrect level setting; it has now the right stats for Mk.3 = no more cheating), utilizes Unique NPCs looks...
Requirements: Visual Reload, Unique NPCs. If you installed the Concealed Armors Version, well.. you'll need Concealed Armors.
Installation:
1. Only install RaiderOverhaul - Textures.BA2 from Raider Overhaul. (Delete esp.s and RaiderOverhaul - Main.ba2 as you only need my stuff).
2. Only install textures from Raider Overhaul Restored Content Full File
3. Optional: Install HD Raider Armor
4. Install Visual Reload Main file.
5. Install only the meshes from Visual Reload - Raider Overhaul v12.4.
6. Install my Raider Overhaul.
Note: I don't use and won't support Super Mutant Redux as it has too many errors and incompabilities that I don't wanna deal with.
6. Synth Overhaul - C.A.S.T.
This plugin requires Synth Overhaul - C.A.S.T and works together with: Armorsmith Extended, Concealed Armor, and of course the main file as in the title. There is seperate version that requires Loads and is fully compatible with Weaponsmith Extended. You will not only receive the benefits from the above listed mods, but also will be able to craft white, black AND regular Institute Lasers, as well as get those Paint Jobs (Creation Club) working. Load this AFTER these mods or any that overwrites the entries from Synth Overhaul.
7. Weaponsmith Extended 2
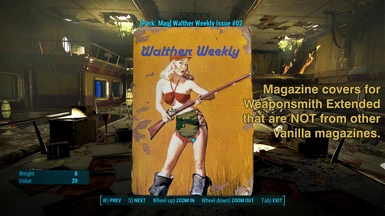
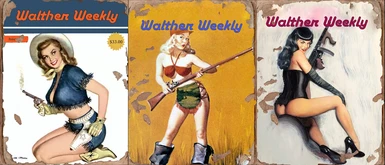
Some fixes, mod weight 0, mod descriptions for EVVEERYYTHANNGG, standalone Walther Weekly magazine covers, etc. Recommended: use along with my library tags: see Uto's Usability Enhancement.
1. Install High Poly Vanilla Weapons Main Mod. We need the alternative Minigun.
2. Now you can either
a) leave it there with WeaponsHD.esp checked.
OR
b) Unpack the WeaponsHD - Main.ba2 (and the textures if you have them) and add them as loose files and delete WeaponsHD.esp.
OR
c) Unpack them and then repack them into your Weaponsmith Extended 2 - Main.ba2. Delete the .esp and .ba2. See: Packin'it up at the bottom of the page.
3. Install my Weaponsmith Extended 2.esp and let it overwrite.
4. What the Mod descriptions mean
Reading the statistics:
All types of Damage = The higher the better.
All types of Accuracy = The higher the better.
Fire Rate = How fast you generally shoot.
Hip-Fire = Concerns all fired shots not aiming.
Sighted = Concerns all shots aiming.
Recoil = You're weapon jerking aroununununun...gd... The lower the better.
Reload Time = How long you need to reload. The lower the better.
Range = Concerns only the maximum (Sniper) range. The higher the better.
Stability = How easy it is to keep your gun under control (with aiming). The higher the better.
Trigger Finger = How fast you can shoot the next shot. The higher the better. (more important for Non-Automatic)
VATS Cost = The lower the better (more AP).
Focus Transition = How long it takes to aim and how much it costs mainting it. The lower the better.
Generell Values: All values as they are, except accuracy values: they represent an average, a mean of max and min.
For Modders who want to add or modify functions:
ADD = Adds a fixed value.
REM = Removes a fixed value.
-> ADD 5 Rounds => You're Mag Size just got 5 extra bullets/charges.
-> These are absolute numbers NOT %.
MUL+ADD = MULtiplies by a number and ADD this to the base.
-> MUL+ADD Damage = 1.00 = 100% => Base + 100% (of the base). This adds 100 % to the weapon giving it 200% Attack Damage.
-> This is a procent type calculation.
SET
-> SET = Sets the property to a specific, fixated number.
-> SET 20 Mag Size = You're Mag Size has now 20 bullets/charges.
-> This is an override setting, that cancels MUL+ADD out. (Not sure about just ADD)
-> Also uses absolute numbers
Hair, Face and Body Patches
1. More Hairstyles
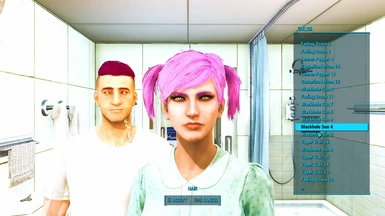
This plugin MERGES these files: Commonwealth Cuts - KS Hairdos - ApachiiSkyHair, Misc Hairstlyes by Atherisz, MoreHairstyles-MoreBeards, Lots more Facial Hair, Lots More Female Hairstyles, Lots More Male Hairstyles, Ponytail Hairstyles (Loose Files), The Sophisticate Collection, Ponytail Variations and 512 Standalone Haircolors.
0. Install F4SE
1. Download and install all these files.
2. Unpack any ba2 files.
Optional repack all these files: Materials & Meshes into MoreHairstyles - Main.ba2 and resp. all Textures into MoreHairstyles - Textures.ba2 Recommended. Check at the bottom of this page: Packin' it up
3. Install More Hairstyles. esp and FEE Folder.
4. If you have any dependencies, like Wasteland Heroine or any other mod editing NPCs with any of the above Hairstyles, you'll need to FO4edit Master-dependencies and files. Make MoreHairstyles.esp a master of the mod (Wasteland Heroine), go to "Non-Player Character Actor" and change the hairstyles like "Azar Ponytail 4" from KSHairdos.esp to "Azar Ponytail 4" from MoreHairstyles.esp. After all dependencies have been altered to match MoreHairstyles.esp use the "Clean Masters". If you got everything the mod (here KSHairdos.esp) will disappear as a dependency. Save the mod (Wasteland Heroine).
5. Delete manually all the following files.
HairVariations_Elegant.esp
HairVariations_FairyTails.esp
HairVariations_Sophisticate.esp
HairVariations_YoungAtHeart.esp
KSHairdos.esp
Lots More Facial Hair.esp
Lots More Female Hairstyles.esp
Lots More Male Hairstyles.esp
MiscHairstyle.esp
MoreBeards.esp
MoreHairstyles4Female4.1.esp
MoreHairstyles4Male3.1.esp
The Sophisticate Collection.esp
512StandaloneHairColors.esp
6. Have fun, look great.
2. The Eyes of Beauty
This plugin MERGES The Eyes of Beauty, The Eyes of Beauty - Looking Stranger, Looking Stranger (with jimtownirish's True Eyes Texture Pack), Mean Machine Eyes, Anime Eyes, Super Natural Eyes, Illusive Man's Eyes and Glowing Eyes.
1. Download and install all these files.
For installing The Eyes of Beauty make sure to select on the first page "Select all". On the second page select "Standalone Plugin" and "Looking Stranger Standalone" From the third page onward choose whatever you prefer.
2. Unpack the ba2 files from Illusive Man Eyesand Looking Stranger! Without these there you'll have buggy eyes. I do NOT recommend repacking eye files into the ba2-format. I've sadly had strange results with buggy textures showing up.
3. Delete manually all the .esp files from the Data-Folder.
ChrisAnimeEyes.esp
Crimsomrider's Illusive Man's Eyes.
Glowing Eyes.esp
LookingStranger.esp
MeanMachineEyes.
SuperNaturalEyes.esp
The Eyes of Beauty Looking Stranger.esp
4. Install either my The Eyes of Beauty.esp. If you have dependencies to another mod like Wasteland Heroine or any other mod editing NPCs with TheEyesOfBeauty.esp you'll have to manually delete the spaces or change the dependency to the "spaced" version! Also if you have any dependencies to any of the above eye-mods you'll need to FO4edit Master-dependencies and files. Make my The Eyes Of Beauty.esp a master of the mod (Wasteland Heroine), go to "Non-Player Character Actor" and change the eyes like "aaAllenEyes" from ChrisAnimeEyes.esp to "aaAllenEyes" from The Eyes Of Beauty.esp. After all dependencies have been altered to match my .esp use the "Clean Masters". If you got everything the mod (here ChrisAnimeEyes.esp or the former TheEyesOfBeauty.esp) will disappear as a dependency. Save the mod (Wasteland Heroine).
Sim Settlements
1. Sim Settlements - Mega Pack Year One
Merges Mega Pack Year One and Building Plan Previews. Also adds VIS Tags and removes ingame author references where not immersive, like "this mod is brought to you by xx in the real world".
Installation
1. Install Sim Settlements Mega Pack Year One
2. Install Building Plans Preview - Mega Pack - One Year v1.0.3 Preview. Extract the SS MegaPackOneYear-Previews - Main.ba2 folder.
3. Delete both the SS MegaPackOneYear-Previews.esp and SS MegaPackOneYear-Previews.ba2.
4. Install my Sim Settlements Mega Pack Year One.esp over the original.
5. (Optional) Install my Inventory Library Tags to get the right icons.
2. Sim Settlements - Sim Settlements and Wasteland Ventures AIO
This is a VIS-tagged file that has immersive description, Armorsmith Recipes (Chembench for chems, not for clothes and other stuff), increased yield for Homemaker plants, IDEKS Logistic VIS-tagged, Snap'n'Build tagged, and and and. This is my Settlement 'dumpfile'.
Required Files: Sim Settlements (Three-in-One), IDEK's Logistic, Settlement Preview Building Plans (Newest Version) and Wasteland Ventures AIO. Install all.
1. Optional: Extract from SimSettlements Previews Newest - Main.ba2 the folder Tinuvia with all of its contents into meshes. You should end up with something like this Data/Meshes/Tinuvia (See Packin' it up at the bottom of the page)
Uninstall Settlement Preview Building Plans, if you don't need anything further or just extract all of it. (My mods will - when they are all up - have the esps merged, so you'll just need meshes...)
2. Install my mod and let it overwrite WVSimSAddon.esp.
Sim Settlements - Industrial City Add-On
VIS-tagged, immersive description and merged with its Dispatcher Radio Option. Required: Armorkeywords!
1. Install only the main file from Industrial City Sim Settlements Add-On .
2. Overwrite with my mod.
Sim Settlements - Ruined Homes and Gardens Add-On
VIS-tagged, immersive description.
1. Install Sim Settlements - Ruined Homes and Gardens Add-on.
2. Overwrite with my esp.
3. Sim Settelments - Scrappers
VIS-tagged, immersive description and so on.
Required Files: Sim Settlements, and Sim Settlement Scrappers. Install both. Download but don't install Settlement Preview Building Plans (Oldies Version). Highly recommended are my Library Tags.
Installation:
1. Install the requiered files.
2. DON'T install Sim Settlements Building Plan Previews Oldies v1.9b. Instead open the file with 7zip, winrar, whatev and navigate to meshes/setdressing/SSPreviews. Extract the folder 'Scrappers' into your Data/Meshes/SSPreviews (if not there create it). You should end up with something like this Data/Meshes/SSPreviews/Scrappers/....nif-files
3. Install my Sim Settelment - Scrappers, overwrite.
NPC related Mods
1. Tales from Commonwealth - 3DNPC
This plugin merges the 3DNPC_FO4.esp and 3DNPC_FO4_DLC.esp, adds inventory and quest tags, and also makes it AE compatible.
1. Download and install main files (3DNPC_FO4) Tales from the Commonwealth - 3DNPC.
2. Extract 3DNPC_FO4_DLC - main.ba2 into Data/
Navigate to Data/Sound/Voice/3DNPC_FO4_DLC.esp/
There are 3 folders, cut and paste them into Data/Sound/Voice/3DNPC_FO4.esp/. (if it doesn't exist just create the folders). There, done.
3. Install my patch, let it overwrite.
2. Unique NPCs - Nude Male Raiders
Why are all females naked and males have CK underwear? WTF!? This texture replacer of the male models rectifies this. 4K! Unique NPCs - An Overhaul of the Commonwealth required.
1. Download and install
2. Optional: Unpack Unique NPCs - Textures.ba2 file, copy my loose files into that folder, let it overwrite. Repack. See for further instructions: Packin' it up.
Known issues: Very seldom bodys'n'faces mismatch. That is sadly a problem with the original esp and distribution of heads and bodies. I can't do nothing about this.
Workshop Related Mods
1. Alternate Settlements
Armorsmith-VIS-Tagged-configuration files from Homemaker and Snap'n'Build. Increased yield from Homemaker plants and generators.
Required: Alternate Settlements, Homemaker, Snap'n'Build, SKE
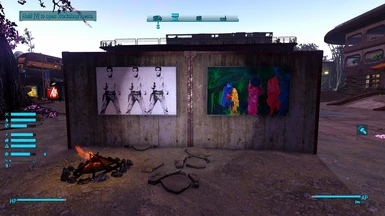
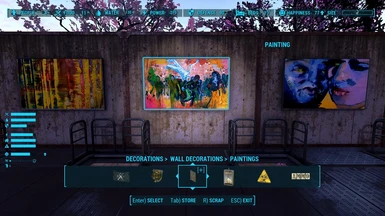
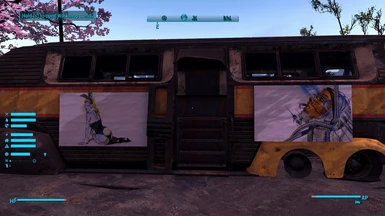
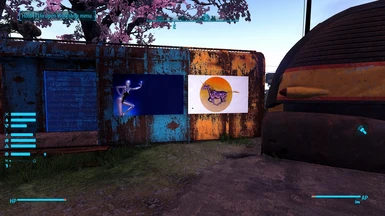
2. Better Paintings
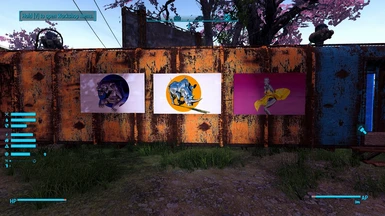
I've added texture replacements for the abstract paintings (since the Bethesda employes only know Joan Miró and choose to use his worst paintings) and for the institute paintings. The latter also received a separate .esp so that you can now craft institute paintins (mine, vanilla, or whatever replacer you got in check).
Install with NMM one, two or all.
GUIDE: Packin' it up
To repack things you will need Archive2.exe, Archive2Interop.dll, Microsoft.WindowsAPICodePack.dll and Microsoft.WindowsAPICodePack.Shell.dll (not sure about the last two but what the hell). Get it from the Creation kit or from the Workbase from Fallout 4 Mod List and Load Order Guide. Make a Folder and drop those four files into it. Open Archive2.exe and drag and drop a .ba2 file onto it. Extract the folders, add, edit things. To get a new ba2 you must click file/new and
a) for Textures change the format to DDS. Drop the Textures folder into the Archive2.exe-window. Save as "YOURMODNAME - Textures.ba2"
b) for Materials, Meshes, Sound, Scripts and whatnot keep the format at General. Drop these folders into the Archive2.exe-window and save as "YOURMODNAME - Main.ba2"
c) Put them together with your Mod into Fallout4/Data. Activate with NMM or whatever you use or do.
