


0 of 0
About this mod
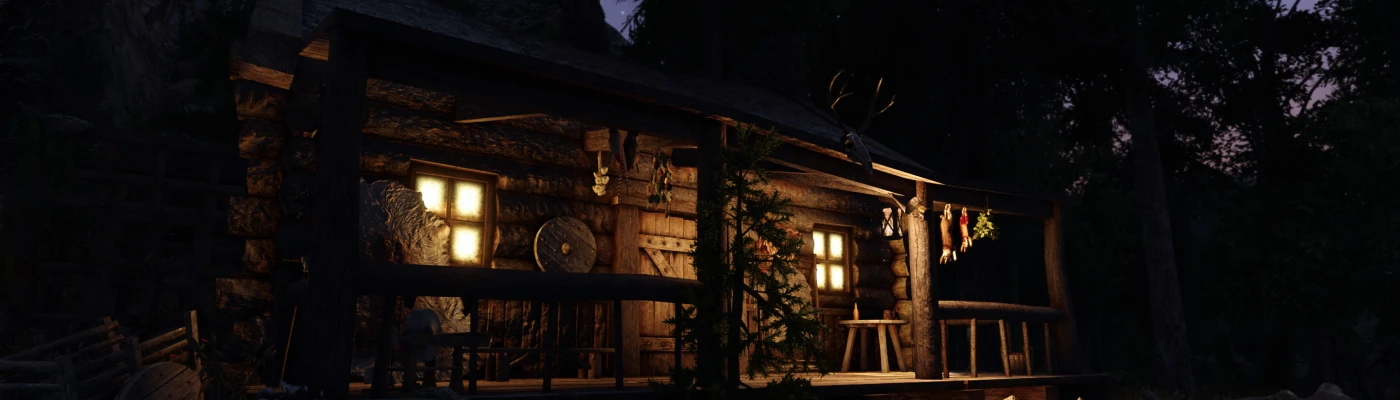
Removes visible map markers from all kinds of mod added locations. The goal of this modpage is - what else - immersion! Mod added locations should behave just like the vanilla ones - no location and no fast travel until you've discovered the place.
- Requirements
- Permissions and credits
General Description
Were you every annoyed by the fact that so many mod added locations come with visible map markers right from the beginning? To some you can even fasttravel right away. This might be useful if you want to roleplay a character that starts with a certain player home or under some other really special circumstances. But in all other cases its just unimmersive as f in my eyes.
I understand that mod authors want people to be able to get to their location right from the start. But if you're like me and end up with really large mod builds a totally cluttered map at the start of the game is just annoying. Why would I have two dozen random locations marked on my map without ever hearing or reading about them before?
How it works aka how you can do it yourself
The process of creating your own 'hidden map markers' patches is really simple. I just put these up as in my experience the majority of people hasn't even touched xEdit apart from maybe cleaning stuff according to a guide.
Map markers are nothing but objects placed on the map just like barrels or trees. What I did was finding the respective 'Placed Object' record, which is easy as the 'Name' in xEdit is the same as the name of the location on the map. That record got an entry 'Map Marker' and under that 'FNAM - Map Flags' where you can set certain flags.
- Visible = the map marker is visible from the start of the game
- Can Travel To = fasttravel is enabled from the start of the game
- "Show All" Hidden = dont dare to ask me what exactly this does, we won't need it
- Nothing = the map marker is invisible
So all I've done was removing the 'Visible' and - if present - the 'Can Travel To' flags, thats literally it. Now you got a nice, immersive, vanilla behaving map marker.
C'mon, I still don't get it, how does it work step by step?
Allright, remember that group of people knowing nothing but the very very basics of xEdit from above? Here you go, step by step:
1) Start xEdit (the x is a placeholder btw, in this case I'm talking about SSEdit) through your mod manager (which is hopefully MO2 or Vortex)
2) When it asks you which modules should be loaded, loading the mod you want to patch is enough

3) Once loading is finished (the last message in the log on the right should be 'Backgroundloader finished') expand the mod you want to patch by double clicking on it and look for 'Worldspace' at the bottom, thats where all the objects that are added to the world are in
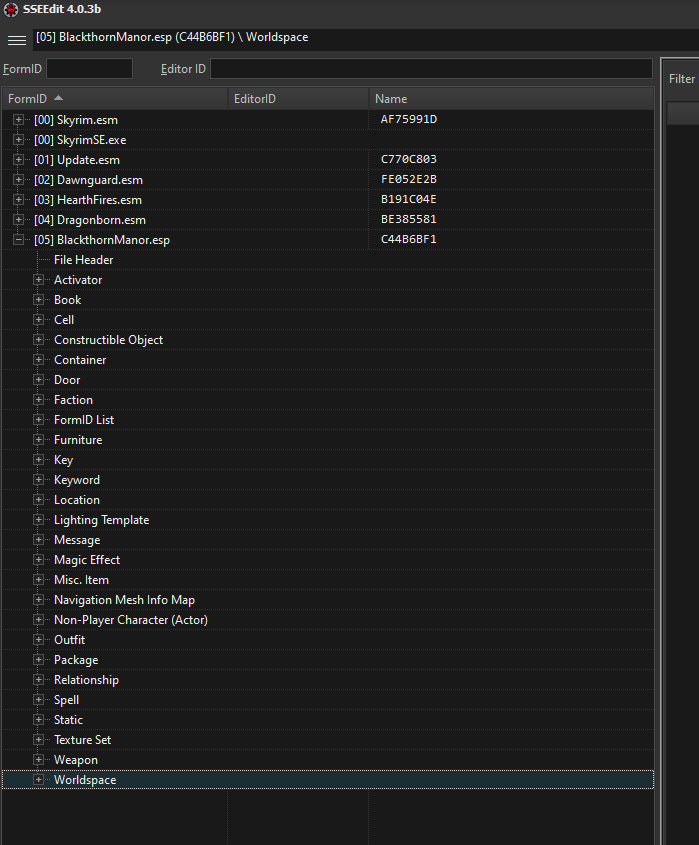
4) Now expand 'Worldspace' with double click while holding the left Alt key, that way everything inside 'Worldspace' will expand, not just the top level on entries like before
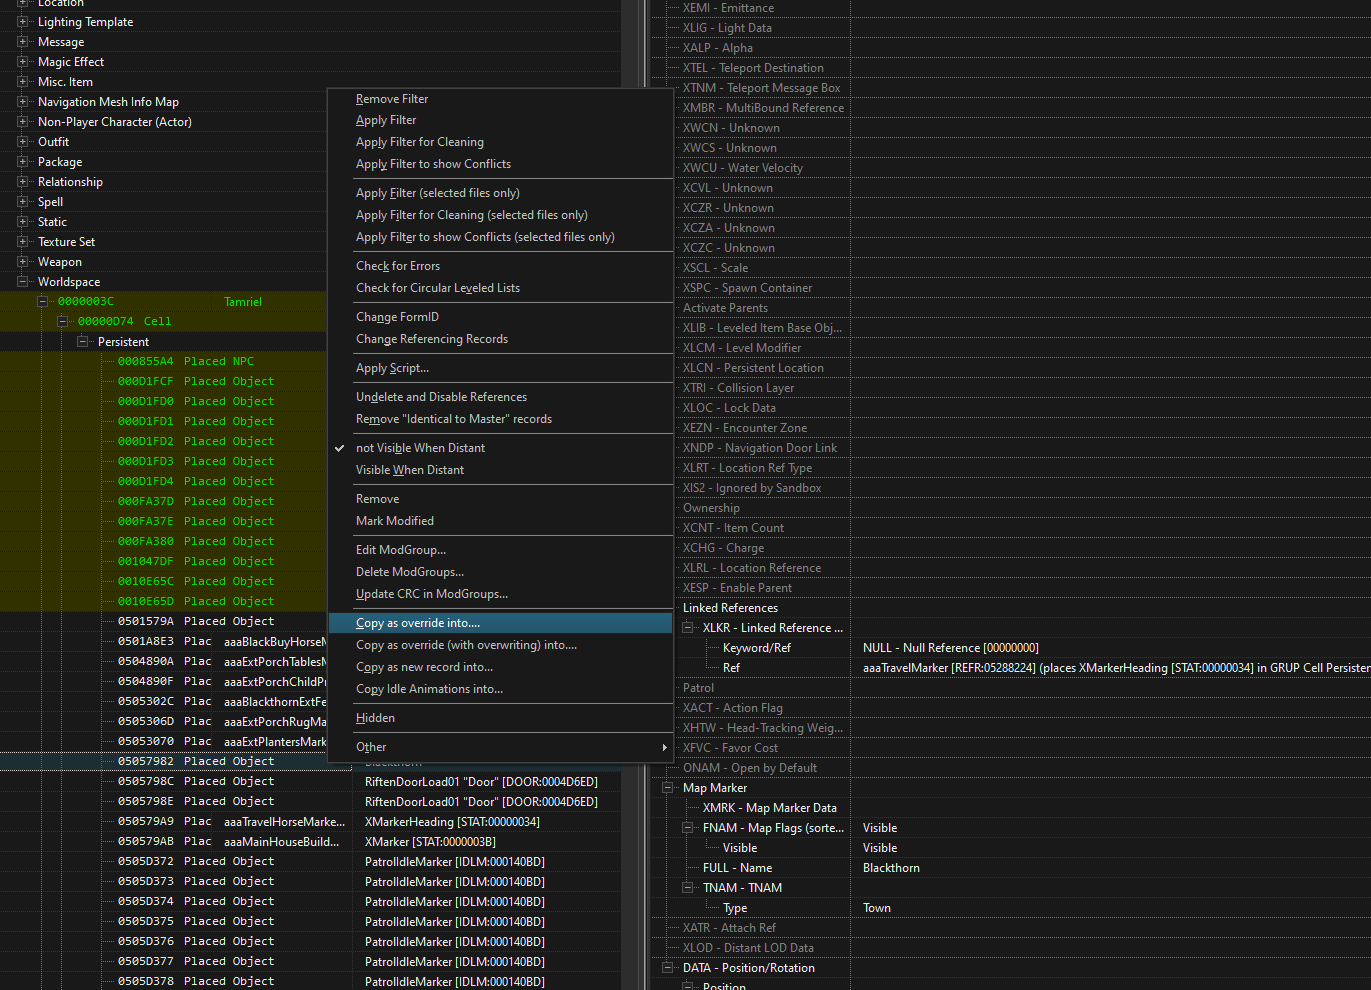
5) Go through the names until you find one that is identical to how the location appears on the map, in our example that's Blackthorn. If you're not entirely sure note that map marker records got just their name as 'Name' in the list on the left while all the other entries got their IDs right next to them like [STAT:0000003B] in our example. Once you think you've found the right one click on it and check the right side of xEdit, there it should say 'NAME - Base MapMarker'.

6) When you scroll down on the right side you can already see the 'FNAM - Map Flags' entry you need to edit to make map markers invisible. But you don't want to edit the original plugin, instead you'll want to create your own patch. Why? Every update for the mod would destroy the changes and after a few edits you'd simply forget what you've already changed in your plugins, patches are way more convenient. So rightclick the map marker record we just found in the list on the left and select 'Copy as override into...'
7) In the next window you can choose where to copy that record to. Copying it into an existing plugin makes no sense (in case others should show up), you'll want your own little patch so choose <new file>.esp [Template] ESL. The first option would be a regular .esp file as we all know it but an .esp file with the ESL flag is way smarter for little patches like that as they don't count towards the 255 plugins limit, that's why you should pick the 3rd option

8) xEdit will ask you for a name so give it a reasonable one like 'Blackthorn Hidden Map Marker' and confirm. After that you can see the map marker record you've just copied into your new plugin. At the top on the right side of xEdit we can now both see good old BlackthornManor.esp and your new patch Blackthorn Hidden Map Marker.esp. Right now the record looks identical in both plugins as you did nothing but copy the record into the new plugin. So scroll down a bit, find the 'FNAM - Map Flags' line, rightclick where it says 'Visible' (in the NEW plugin, not in the original BlackthornManor.esp one) and click 'Edit'
Hint: if the right side of xEdit should be absolutely empty, rightclick into that emptiness and untick 'Hide no conflict and empty rows'. That option is very useful when you just want to see things that conflict between plugins but right now the map marker record is still identical to the original one so that filter got nothing to display.
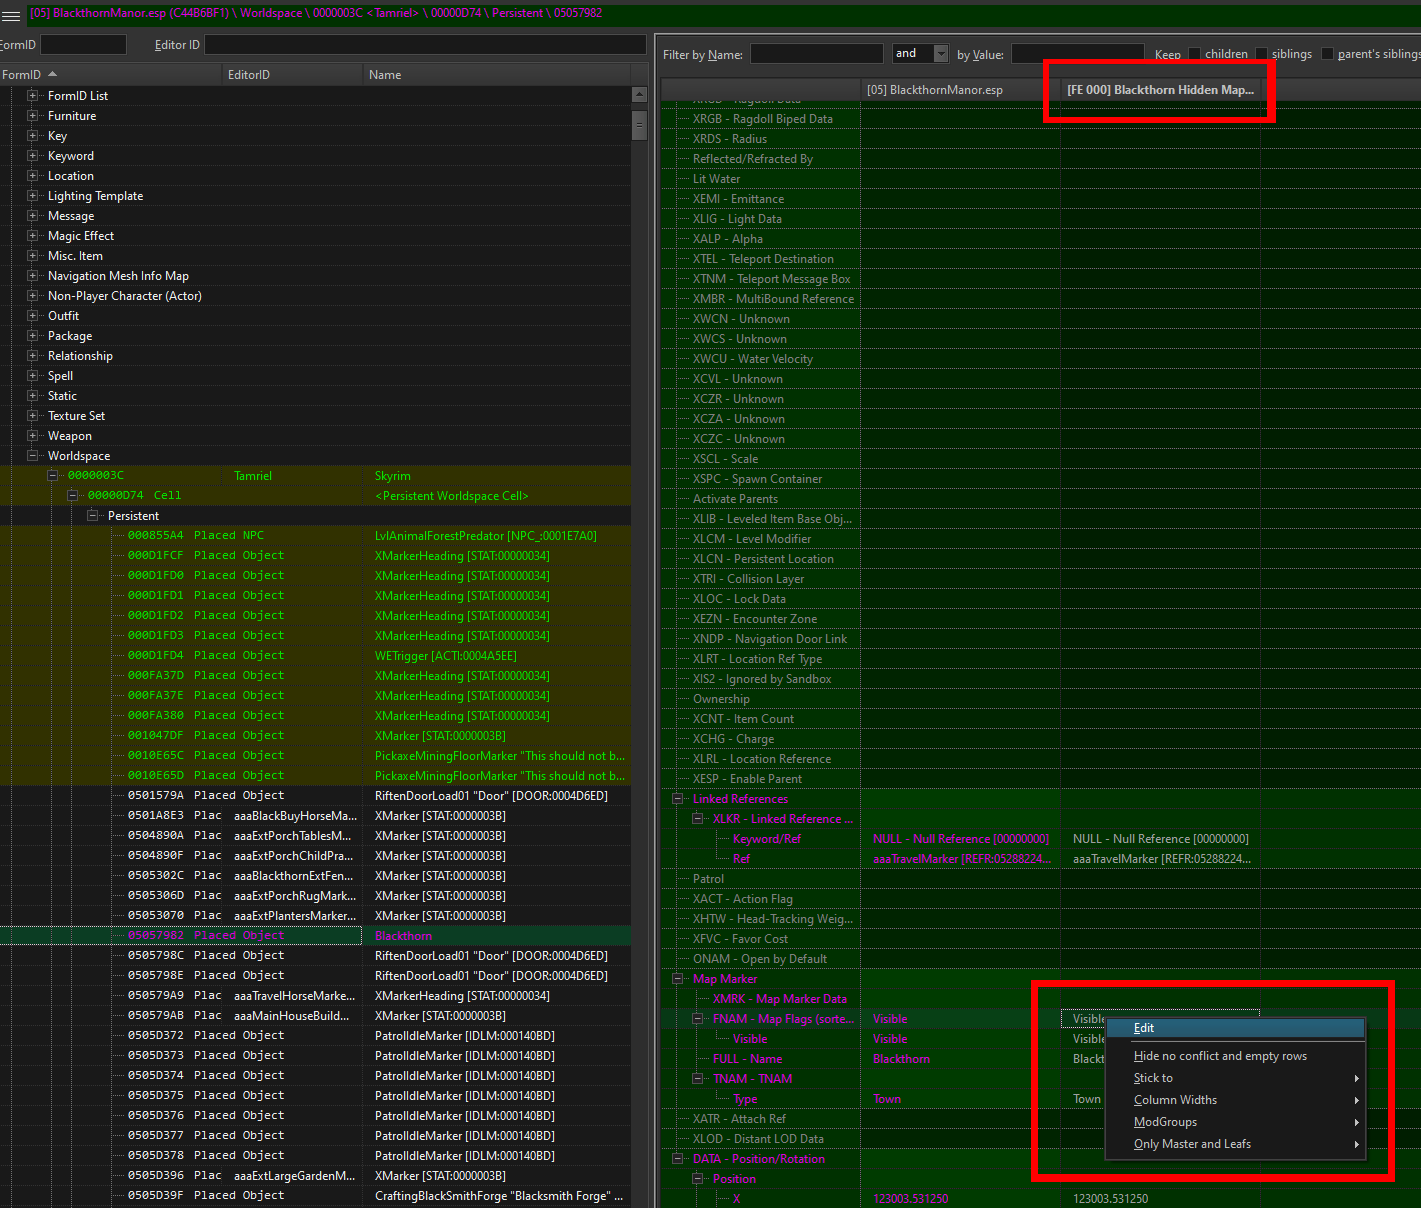
9) Now in the new window untick all boxes. Blackthorn only got 'Visible' ticked (which means you can see the map marker right away but fasttravel is disabled), some other mods got 'Visible' aswell as 'Can Travel To' enabled. Just make sure both are unticked and confirm. You should now see a difference between the original and your patch, the FNAM line should be empty in the patch

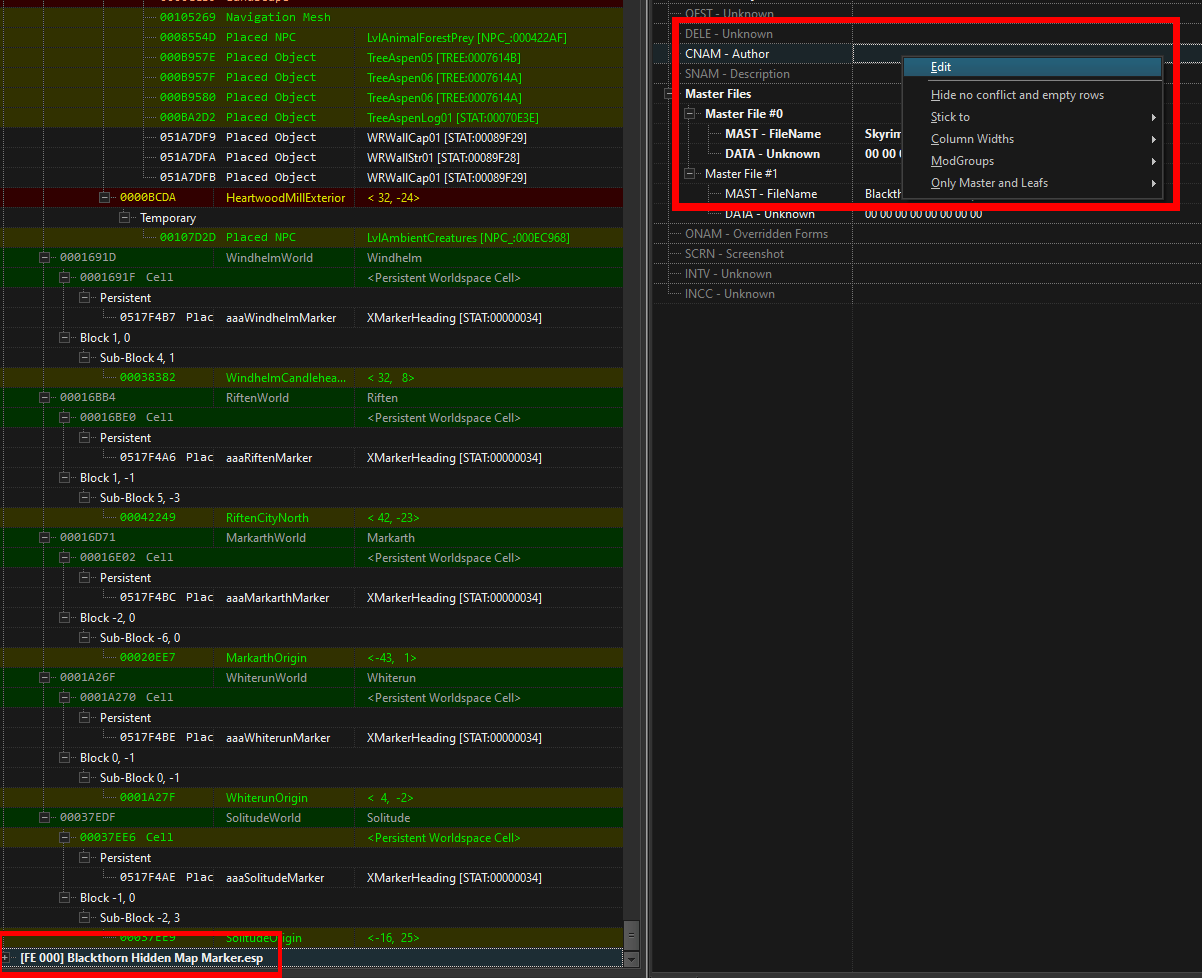
10) You're moments away from completing your very own first little mod. If you scroll to the bottom on the left side, the last entry should be your new patch. It is written in bold as it hasnt been saved yet, we'll do that in a second. For now just click on it and look for the 'CNAM - Author' line on the right side. Rightclick, Edit, put in your name, confirm. Congratulations, now you not only know how to do basic stuff in xEdit but on top you're officially a mod author :)
11) Exit xEdit like any other program. Don't worry, your patch won't be lost. A new window will pop up, showing all plugins that haven't been saved yet. In your case that should just be your new patch. Make sure it is ticked (else it won't get saved) and hit OK

12) Once you're back to MO2 (sorry, not using Vortex, but I guess things are similar there) go to the bottom of the left pane and double click your 'Overwrite' folder. When MO2 isn't told where a tool (or mod or the game itself) should output its stuff it will end up in Overwrite. I would always clean up there, else it'll be totally cluttered at some point and you don't know which files belong to which mod anymore. In my case the new patch is the only thing in there, thats perfect.

13) Now that you know the new patch is the only thing in there, rightclick Overwrite and 'Create Mod...'. If you got other stuff lying around in Overwrite make sure to clean up before creating the new mod as everything in Overwrite will end up in that mod. In the new window give it a reasonable name, I've named it 'Blackthorn - A Buildable Town in The Rift [ADDON Hidden Map Marker]' but that's just my naming scheme.

14) Voila, there it is. You just need to tick the box in the left pane to activate it and its ready to go
