


0 of 0


About this mod
Removes restrictions on headmorphs in the Toolset: combine features, use features from all heads, put beards on all heads, and bypass feature snap in the CC. Restores unused sliders and makes hair selection easier.
- Requirements
- Permissions and credits
- Changelogs
Version 1.3 and later fixes a significant bug in earlier versions of this mod. After updating, MRHs made with an older version (not vanilla) may require correction if they use certain sliders. Please see the update actions article under Version 1.3 for more details.
Please make sure to read the installation instructions below. Only one of the files goes in your override folder.
This mod loosens some of the restrictions governing making headmorphs in the Dragon Age Toolset. There are two options available with different levels of control. It does not change any restrictions in the in-game character creator, though presets made with it can circumvent a lot of them.
When you're making headmorphs in the Toolset, have you ever wanted to...
Well now you can! And more! Other fixes and tweaks include circumventing the "white scalp issue", restoration of several unused morph targets, and renaming some sliders.
This mod has two options available: one where it's possible to ignore or avoid all of the changes or additions, and one more advanced one (that also includes the previous option's features) where some previously-automatic things can (and must) be controlled manually. I've provided a summary of each option's features, followed by more details that explain more about the use and workings of each feature.
If you enjoy this mod and want to submit screenshots of what you've made with it, I would be delighted! Similarly, if you publish any headmorphs or headmorph packs, please feel free to drop a link!
Note: If you have an existing MOR or MOP that you want to edit in some of the same ways as this mod but don't have the MRH, please see the Manual Workarounds article on this mod. For a short tutorial on how to make head presets and get them into the CC, please see this article.
Please do not ask me to create new morph targets from scratch or to edit morph target meshes: the Toolset and game are very particular about morph target meshes and I do not have the correct software and import/export script to create working targets.
Notes on file distribution for headmorph creators
This option makes a lot of changes, but leaves some automation in so that it's possible to ignore any of the changes; you don't have to use the Toolset differently.
Summary of features
Full details
This option removes nearly all remaining automation, granting more freedom but requiring more care and involvement to use.
Summary of features
(In addition to and replacing some of those from Option 1)
Full details
If you want to use presets that someone else made using this mod
To uninstall, simply delete the erf.
If you want to use this mod to make and edit headmorphs yourself
This mod requires the Dragon Age Toolset to be installed; if it is not, see Installing the Toolset below for links to resources.
Uninstallation
To uninstall, reverse the process: delete "DefaultSettings.xml", then restore the original file by either re-renaming it or restoring it from where you moved it to. Delete the erf from your override folder if you don't have MOPs that rely on it.
Installing the Toolset
The Toolset can be downloaded from the Bioware CDN. The wiki has instructions for installation, installation troubleshooting, known issues, and getting started. It is useful to apply the 4GB/LAA patch to the Toolset exe once it's installed. Unfortunately I am unable to help with installation troubleshooting.
This mod is compatible with anything that modifies the base head or morph target meshes but retains their vanilla names, eg Brumbek's Realistic Teeth (except for the completely new targets, eg the 3 targets derived from Elf Update), tmp7704's Elf Update or Sapphim's elf-blooded ears (which replaces one of the missing teeth targets with the vanilla "Elf ear shape" target, available here).
This mod will clash with other mods that edit the DefaultSettings.xml file in the tools folder. However, if permission is given then the differences can be merged if there isn't a conflict of intent.
Compatibility patches in Optional Files
Patch for Dragon Age 2 Character Creator by IceBuckets
Mods shown prominently in screenshots
Please make sure to read the installation instructions below. Only one of the files goes in your override folder.
This mod loosens some of the restrictions governing making headmorphs in the Dragon Age Toolset. There are two options available with different levels of control. It does not change any restrictions in the in-game character creator, though presets made with it can circumvent a lot of them.
About
When you're making headmorphs in the Toolset, have you ever wanted to...
- select custom hairs easily?
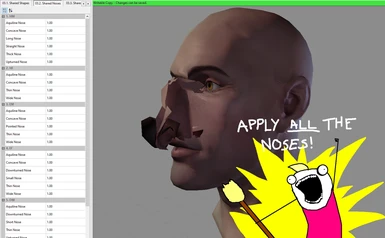
- combine multiple nose/eye/head shape sliders in the Feature Selection section?
- put a beard on more than just male humans, dwarves and qunari?
- stop the in-game character creator from snapping features to 100%?
- change the mouth/cheeks/jaw of a head with a beard on?
- select the tattoos from the in-game character creator easily?
- use nose/eye/head shapes from one base head on a different base head?
- choose a different scalp hair pattern (or not have any) under a hair model?
- put elf ears on non-elf heads?
- change the eyebrow style, skin tint map or accessory colour for one character in particular?
- add a scalp tattoo?
- move nostrils up and down?
Well now you can! And more! Other fixes and tweaks include circumventing the "white scalp issue", restoration of several unused morph targets, and renaming some sliders.
This mod has two options available: one where it's possible to ignore or avoid all of the changes or additions, and one more advanced one (that also includes the previous option's features) where some previously-automatic things can (and must) be controlled manually. I've provided a summary of each option's features, followed by more details that explain more about the use and workings of each feature.
If you enjoy this mod and want to submit screenshots of what you've made with it, I would be delighted! Similarly, if you publish any headmorphs or headmorph packs, please feel free to drop a link!
Note: If you have an existing MOR or MOP that you want to edit in some of the same ways as this mod but don't have the MRH, please see the Manual Workarounds article on this mod. For a short tutorial on how to make head presets and get them into the CC, please see this article.
Please do not ask me to create new morph targets from scratch or to edit morph target meshes: the Toolset and game are very particular about morph target meshes and I do not have the correct software and import/export script to create working targets.
Notes on file distribution for headmorph creators
Spoiler:
Show
MOR files (compiled headmorphs)
All of this mod's features will work perfectly in MOR files, as they are a "final" compiled format. No files from this mod are needed for others to use MORs made with it.
MOP files (character creator presets)
Beards on non-HM/DM heads: MOP files will internally store beards on female heads, but they will be invisible (but present) in the CC. The best way to resolve this is to export a MOR as well and have users use a face-replacing tool to apply the MOR's data to their save as soon as they gain control of their warden. EM heads will display beards in the CC.
Features requiring users to have my targets erf: Use of my workarounds for sliders snapping to 100% and beards changing face shapes, plus the "Elf ear shape DA2" slider will all require the user of the MOP to have my "Duplicate Morph Targets" in their override (see below in Option 1 for more details). Please direct them to download and install only that file from this page; they do not need any of the XML files.
MRH files (source files edited in the Toolset)
MRHs that have had unlocked features applied (eg beards on non-HM/DM/QM for Option 1, custom scalp hair tints for Option 2, etc) will lose these features if they are loaded without at least the same version of this mod installed (not permanently unless they are saved like that).
If you are distributing MRH files please let users know which version of this mod you used where necessary.
All of this mod's features will work perfectly in MOR files, as they are a "final" compiled format. No files from this mod are needed for others to use MORs made with it.
MOP files (character creator presets)
Beards on non-HM/DM heads: MOP files will internally store beards on female heads, but they will be invisible (but present) in the CC. The best way to resolve this is to export a MOR as well and have users use a face-replacing tool to apply the MOR's data to their save as soon as they gain control of their warden. EM heads will display beards in the CC.
Features requiring users to have my targets erf: Use of my workarounds for sliders snapping to 100% and beards changing face shapes, plus the "Elf ear shape DA2" slider will all require the user of the MOP to have my "Duplicate Morph Targets" in their override (see below in Option 1 for more details). Please direct them to download and install only that file from this page; they do not need any of the XML files.
MRH files (source files edited in the Toolset)
MRHs that have had unlocked features applied (eg beards on non-HM/DM/QM for Option 1, custom scalp hair tints for Option 2, etc) will lose these features if they are loaded without at least the same version of this mod installed (not permanently unless they are saved like that).
- MRHs that use Option 1 features will lose them in a vanilla toolset, but Option 2 will load them fine.
- MRHs that use Option 2 features will lose them in either Option 1 or vanilla. (Blended shapes won't entirely disappear, but only the slider that comes first in the internal order will be retained; all others will be set to 0 and locked.)
- The only feature in either option that will not have issues with backward compatibility is hair/beard/tattoo selection, since it is only an aid to selecting a file that is compatible anyway.
- MRHs made in the vanilla toolset will load fine in either option.
If you are distributing MRH files please let users know which version of this mod you used where necessary.
Option 1: Easy Unlock
This option makes a lot of changes, but leaves some automation in so that it's possible to ignore any of the changes; you don't have to use the Toolset differently.
Summary of features
- All modded hairs and beards show up in the default filter in the hair/beard picker. All tattoos show up in the tattoo mask picker.
- Feature Selection has an expansion where all the eye/nose/head sliders from all base heads are available to all heads, can be blended together, and will not snap to 100% in the CC. (Requires Duplicate Morph Targets erf to be in override for use on MRH and MOP but not for MOR.)
- You can put beards (or earrings masquerading as beards) on everyone. (Of the heads that are not HM/DM, these will only be visible on EM MOPs in the CC, but will work on all heads in MORs.)
- Beards won't lock mouth/cheek/jaw sliders on anyone. There are additional sliders to avoid specific head shape changes in the CC. (The latter requires Duplicate Morph Targets erf to be in override for use on MRH and MOP but not for MOR.)
- Some hairs (Duncan's and a few from tmp7704's Tucked Hair mod) have different or removed scalp hair so as not to exceed their hairlines.
- Specific hair tint mods that have renamed prefixes will no longer have the "white scalp issue".
- Restoration of 13 unused morph targets and expansion of two head-specific sliders to be available on all heads (Elf Ear Shape and Neck Apple). The Elf Ear Shape edit from tmp7704's Elf Update also gets its own slider in addition to the vanilla Elf Ear Shape. The other components of Elf Update (nose, eyes) get their own head-exclusive sliders.
- Cosmetic renaming of some sliders.
- Ability to add scalp tattoos, and to change some head and scalp textures that were previously restricted to the MAO, eg skin tint map, eyebrow texture, scalp texture, etc, on a per-headmorph basis. Ability to change accessory textures on a per-headmorph basis for compatible accessories.
- Not headmorph-related: Longer tint file names, texture filter for icons, expanded model filters for level-making.
Full details
Spoiler:
1. Finding hairs, beards and tattoos
Many modded and some unique vanilla hairs and beards can only be found by changing the file picker's filter from "Level 0 Model Files" to "All Model Files", necessitating scrolling through lots of additional irrelevant files, and a lot of clicking if you're not sure which one you want.
In the same vein, several perfectly good tattoo files can only be found by changing the filter from "Head Tint Mask Files" to "All Tint Mask Files", which involves scrolling through every single tint map in the game.
Why does this happen?
Solution
I've changed the default hair filter to "##_har_*_0" and the default beard filter to "##_brd_*_0" (ie not requiring the leading "h" or "b" in the rest of the name). It will therefore pick up all hair and beard models, without having to sift through the level 2/3 files.
For the tattoos, I have added "uh_pct_*_0t", "uh_pmt_*_0t", and "uh_hed_tat*_0t" to the default filter; this will allow easy access to all tattoo files.
2. Feature Selection expanded
Head, nose and eye shape sliders under Feature Selection are mutually exclusive and can't be blended together or used on different base heads. If nose/eyes are used on a MOP at less than 100%, it will snap to 100% once in the CC.
Why does this happen?
Solution
I have largely left the original Feature Selection alone (aside from renaming detailed further down), because my solution to both issues involved creating new sliders, and I didn't want to remove existing functionality. However, Feature Selection is now called "CC Features".
Instead there are now three new tabs just after CC Features: Shared Shapes, Shared Noses and Shared Eyes. This contains all of the sliders for that feature from all the different heads, and none of them are mutually exclusive. This means that, for example, you can combine two different nose shapes from the HM head together, and add a nose shape from the HF head and the DF head. Or even all the nose shapes from all the heads (probably inadvisable xD). Some cross-head shapes work better on certain heads and worse on others; you will have to experiment. The sliders are divided into sections named for which base head they came from; thankfully these sections are collapsible, because they ended up being quite long.
CC usage
Crucially, these sliders are considered additional by the CC: it will not recognise them as positions on the feature sliders, and so will not reset them or snap them to 100%. This feature absolutely requires the "Duplicate Morph Targets" erf: they are (internally and externally) renamed duplicates of the vanilla morph target MMH files that point to the existing vanilla morph target MSH files (if you want, you can therefore apply the same morph target twice: once in CC Features and once in Shared features). Without these files, the new sliders will not work in MOP or MRH. See Section 4 for details of two more sliders that have been duplicated to thwart the CC.
Unique shapes
The "Unique Shapes" tab has also been moved closer to just after "Shared Eyes" rather than at the end of the tab list (because they're useful for variety and it's a more accessible place for them for the point in the workflow where they would be used), and has been similarly expanded to have all unique shapes from all heads. Ever wanted to put a little of Zathrian's face on a HM? Now you can! These shapes were never affected in the CC and have not needed to be duplicated.
3. Beard restrictions
You can only apply beards to male humans, dwarves and qunari.
Why does this happen?
Solution
I've added code that allows beards! Now you can apply them to anyone you like: the previously-allowed HM/DM/QM heads, plus male elf heads, female heads of any race, and children. (I know, I know, why would kids need beards? My thinking is that rather than Actual Beards for kids, this will allow the creation and application of accessories in the same vein as Earring Beards.)
This mod does not actually come with beards, but you can now apply Earring Beards and any other beards made in the future in the toolset!
Please be aware that some hair/beard mods appear as a solid blue/yellow mesh in the toolset rather than showing their texture; this will not affect their in-game appearance at all. For any hair/beard modders who are not aware, Risibisi has a de-blueing tutorial here.
CC problems
When exported to a MOP and used in the CC, beards will disappear on female heads, due to the CC's restrictions. (Yes, EM beards will stay!) The CC is aware of the invisible beard, however, and if you change any of the sliders (other than portrait/voice) you'll immediately get that sad old hollow-cheeked look. Fine Dwarven Beards' hair-beard combos are currently the only way to have a beard on (dwarf) female heads in the CC, since they add the beards to the hair models.
Beards and "beards" available for non-HM/DM/QM
(Let me know if there's more I should have on this list!)
4. Beard slider locking
If the head has a beard applied, you can't alter most settings on the mouth, cheeks or jaw, or apply some head shapes. If you've already altered them and then apply a beard, they will reset to default. If head shapes from Feature Selection or two specific jaw sliders are used on a bearded MOP, they will reset to zero in the CC.
Why does this happen?
Solution
I've removed all restrictions that beards had on sliders. It's now possible to edit the mouth/cheeks/jaw and head shapes freely whether a beard is present or not. You'll have to manage clipping manually, but that's pretty easy when you can see what you're doing!
If you want to emulate vanilla behaviour you can click the "Reset" button at the bottom of the mouth/cheek/jaw slider tabs (except for the slider that moves the cheekbones up), and manually reset any head shapes to zero.
MOP/CC usage
If you want to use head shape sliders with a beard on a MOP in the CC, to avoid them being removed in the CC, you will need to use the sliders under Shared Shapes rather than Feature Selection (now CC Features) (see Section 2 above for more details). Because these sliders' morph targets have different internal names to the originals, the CC will not know to reset them.
There are two more sliders that have duplicates to circumvent the CC resetting them when a beard is present: Jaw Lower and Jaw Triangle Shape (previously Jaw Square Shape). These are in a new section at the bottom of the Jaw tab "CC Beard Workarounds", just above the Reset button.
Be aware that again, if you change any of the sliders (other than portrait/voice) on a bearded preset, even with these workarounds, you'll still immediately get hollow cheeks.
5. Permanent scalp hair
When a hair model is applied, the scalp almost always has a hair texture covering it fully. This is to conceal gaps in the hair model, but is less useful on hair models with receding hairlines or shaved areas.
Why does this happen?
Solution
There's no way to do this automatically, but I have hardcoded a few extra exceptions:
The sliders will appear active, but they will not be able to be changed.
It would be impractical to try to cover every hair mod out there past present and future (and impossible to accommodate hairs where you might want mutliple options, such as mohawks) in this way, so if you want manual control over the scalp hair, please either check out the workarounds article or consider using Option 2 below!
6. The white scalp issue
The "white scalp issue" is when a modded hair tint is applied, but the stubble texture covering the scalp is black in the toolset and bright white in-game, often showing through gaps in the hair.
Why does this happen?
Solution
As far as I know there's no "forever" automatic fix for this one. (I only have the constructs used in the vanilla XML to go by, and there's no sign of RegEx usage.) So I've tried to find all hair tint mods that would be affected, and hardcoded their conversions in. This only works if the corresponding stubble tint actually exists, of course.
How tint modders can avoid this:
7. Slider restoration and expansion
Restored sliders
There are several vanilla morph targets (the meshes that control headmorph changes via sliders) that were not used in the final Toolset or the CC; I have restored some of them. All should work on both MOR and MOP, though they are of varying levels of polish. As with many vanilla sliders, most of them look pretty silly at 100% and should be used more subtly in practice. All have been excluded from the randomiser.
Expanded sliders
Two existing sliders, "Elf ear shape" and "Neck Apple" were made available on all heads, not just elves/males respectively.
The vanilla elf ear shape slider used on other heads produces exactly the same effect as can be seen in Visibly Elf Blooded, as that mod is done by duplicating and renaming the elf ear shape slider to replace one of the missing teeth sliders. If you want a different elf ear look, consider using the "Elf Boy" or "Elf Girl" sliders from the kid head (KN) section of Shared Shapes, as they also produce pointed ears (but also change other aspects of the face). Elf ear shape will change in appearance if you have Elf Update installed, since that mod changes the morph target mesh (see below for more options).
New sliders
8. Slider Renaming
Multiple sliders have been renamed. This has no effect on internal headmorph or Toolset functions and is purely cosmetic.
CC/Shared Features list
General list
Other sliders' names have been tweaked for clarity, brevity, readability, spelling or alphabetical ordering, and a few have been deliberately moved. All general slider name/location changes can be seen in the mod images, but some explanations are here:
9. Texture expansion
Many head textures are either solely defined in the base mesh's MAO, either as a default or effectively blank, even though they have the ability to be changed and stored in the headmorph. I have made several of these editable; selecting a texture will make the headmorph use that texture without affecting any other headmorph, allowing a lot more individual customisation.
In all cases, leaving a texture field blank (ie vanilla behaviour) will cause the texture to be read from the base head's MAO, whatever that may be (you can see this behaviour in the vanilla toolset where the Base Skin Texture is blank by default, being read from the base head's MAO).
Editable textures: face and scalp
Editable textures: accessories
Head or face accessories are usually made as part of a hair or beard mesh. Sometimes, as with Duncan's vanilla hair and earring combo, they are part of the same mesh chunk as the hair itself and share the same hair material and colour. But if the accessory is on a different chunk it can use its own textures and a completely different material so that it looks like an object rather than hair. The textures will be defined in the accessory's MAO file(s).
I have created texture pickers so that many accessories on their own chunk can be assigned different textures for different headmorphs (as long as they don't use the Hair material themselves). For example you could have a bandana be a different colour for every character wearing it, or change the metal and gem colours of specific characters' jewellery without affecting others. These texture pickers are all in the new "15. Accessory textures" tab at the end of the tab list.
This will only work on the node names listed in the pickers:
You will have to check which node name an accessory uses in order to know which texture picker to use:
For example Calpernia Circlet uses accm1.
For each node there is a Diffuse slot and a Normal Map slot. If the diffuse slot is filled it will link automatically to a specular texture by replacing the "d" on the end of the texture filename with an "s" (this is almost exactly how the face diffuse textures are automatically linked to their normal maps). The normal map slot is standalone. Either slot can be left blank to keep the accessory's default texture for that slot (for example if you only want to change the colour, put a texture in the diffuse slot (which will also change the specular), and leave the normal slot blank).
Note for mesh creators: accm# (beard) and acchm# (hair) are new node names specifically intended to free up mesh creators to use the full HairM1-3 and BeardM1-3 for their actual hair/beard and still have room for their accessories. (Unlike armour, which will only tint on M1, Hair and Beard M1-3 will all have the correct hair tint -- though HairM1 is reserved for the scalp.) They are lowercase (sadly case sensitive) to make manual editing quicker as the mesh will output by default with Hair/BeardM# as its node names.
Notes for texture creators: The texture picker's main filter is acc_*_0?, where ? is d/s/n and * is free text. The pickers also have "all" filter options where they will display all diffuse/specular/normal maps available to the game, but since that is a huge list I encourage you to adhere to the main filter's naming convention; the prefix is deliberately short to provide maximum free text (since it's also sensible to indicate what accessory mod the texture is for) while still being distinct. Remember that the toolset restricts resources to 28 character filenames (32 if you count the ".dds" at the end); it will not detect or display files with longer names.
Make sure to provide an equivalently-named specular file for any diffuse if the accessory's MAO uses the Character material; if it uses the Face material (which has the specular in the diffuse's alpha channel), the missing discrete specular file will be ignored and the alpha channel used correctly.
Toolset-chosen textures will not utilise LOD textures (since these have to be defined by a LOD mesh's MAO), so they do not need to be created for alternate textures; only direct replacements (if they existed in the original).
X. Non-headmorph related
Longer tint filenames
Tint filenames are now limited to 32 characters total rather than 10. Originally I put this up to 128 but discovered that, like many other resources, the toolset (and possible the game) will not accept tint filenames longer than 32 characters. This limit includes the extension ".tnt" and the various tint prefixes, and in practice imposes a 21 character limit on the tint name suffix. The toolset will not actually stop you when you reach the limit; it will just deduct characters from the beginning while you type, so keep an eye on the length.
Extra file filters
I have added some extra file filters (unrelated to headmorphs) to make file selection a bit easier in certain circumstances.
Show
1. Finding hairs, beards and tattoos
Many modded and some unique vanilla hairs and beards can only be found by changing the file picker's filter from "Level 0 Model Files" to "All Model Files", necessitating scrolling through lots of additional irrelevant files, and a lot of clicking if you're not sure which one you want.
In the same vein, several perfectly good tattoo files can only be found by changing the filter from "Head Tint Mask Files" to "All Tint Mask Files", which involves scrolling through every single tint map in the game.
Why does this happen?
Spoiler:
Show
The main vanilla file filter for hairs is "##_har_h*_0", where ## is the race/gender code (eg HM = human male, etc) and * is any text. The vanilla beard filter is "##_brd_b*_0". This means that hairs named with a leading "h" in the free text section will show up (eg "hm_har_hname_0"), but hairs named without it will not (eg "hm_har_name_0"). The unique hairs and beards (eg Morrigan's hair (hf_har_mora) and Duncan's beard (hm_brd_duca_0)) don't use this naming convention, and neither do many modded hairs and beards.
Changing the file filter to "All Model Files" makes it "##_har_*". This does cover hair and beards that don't start with h/b, but it also shows all Level 2 and 3 model files (that end with 2/3 instead of 0). These are models that are automatically applied at a distance and shouldn't be directly applied to the head, and so are irrelevant when choosing a hair in the Toolset.
For the tattoos, the vanilla file filter is "uh_tat_*_0t", and there are some tattoos that do not conform to this naming convention. The "All Tint Mask Files" filter shows all files ending in "_0t", which is a lot of files.
Solution
I've changed the default hair filter to "##_har_*_0" and the default beard filter to "##_brd_*_0" (ie not requiring the leading "h" or "b" in the rest of the name). It will therefore pick up all hair and beard models, without having to sift through the level 2/3 files.
For the tattoos, I have added "uh_pct_*_0t", "uh_pmt_*_0t", and "uh_hed_tat*_0t" to the default filter; this will allow easy access to all tattoo files.
- uh_pct_dc1: Dwarf commoner CC tattoos
- uh_pct_dn1: Dwarf noble CC tattoos
- uh_pct_h01/2: Human and city/mage elf CC tattos
- uh_pmt_001: Unique companion tattoos (Morrigan, Zevran, an unused dwarven-style tattoo, and the casteless tattoo on its own used in the CC).
- uh_hed_tata/b: These tattoo files are extremely unfinished. They are in the wrong format (dxt5 rather than uncompressed) and so the uh_hed_tata file has really bad compression artefacts on several of its tattoos (one of which was clearly a precursor to one of the dalish tattoos). The uh_hed_tatb file was only spared the artefacts because none of its tattoos overlap (they seem to be designed to be combined). Both files' tattoos are solid colours rather than having skin texture.
2. Feature Selection expanded
Head, nose and eye shape sliders under Feature Selection are mutually exclusive and can't be blended together or used on different base heads. If nose/eyes are used on a MOP at less than 100%, it will snap to 100% once in the CC.
Why does this happen?
Spoiler:
Show
There are conditions in the XML that reset and disable the other sliders in the group when one is active.
The features snap to 100% because they are multiple points on a single slider in the CC rather than a 0-100% slider for each.
The mutual exclusivity seems to be designed to avoid combinations that won't hold up in the CC because of the snapping.
The features snap to 100% because they are multiple points on a single slider in the CC rather than a 0-100% slider for each.
The mutual exclusivity seems to be designed to avoid combinations that won't hold up in the CC because of the snapping.
Solution
I have largely left the original Feature Selection alone (aside from renaming detailed further down), because my solution to both issues involved creating new sliders, and I didn't want to remove existing functionality. However, Feature Selection is now called "CC Features".
Instead there are now three new tabs just after CC Features: Shared Shapes, Shared Noses and Shared Eyes. This contains all of the sliders for that feature from all the different heads, and none of them are mutually exclusive. This means that, for example, you can combine two different nose shapes from the HM head together, and add a nose shape from the HF head and the DF head. Or even all the nose shapes from all the heads (probably inadvisable xD). Some cross-head shapes work better on certain heads and worse on others; you will have to experiment. The sliders are divided into sections named for which base head they came from; thankfully these sections are collapsible, because they ended up being quite long.
CC usage
Crucially, these sliders are considered additional by the CC: it will not recognise them as positions on the feature sliders, and so will not reset them or snap them to 100%. This feature absolutely requires the "Duplicate Morph Targets" erf: they are (internally and externally) renamed duplicates of the vanilla morph target MMH files that point to the existing vanilla morph target MSH files (if you want, you can therefore apply the same morph target twice: once in CC Features and once in Shared features). Without these files, the new sliders will not work in MOP or MRH. See Section 4 for details of two more sliders that have been duplicated to thwart the CC.
Unique shapes
The "Unique Shapes" tab has also been moved closer to just after "Shared Eyes" rather than at the end of the tab list (because they're useful for variety and it's a more accessible place for them for the point in the workflow where they would be used), and has been similarly expanded to have all unique shapes from all heads. Ever wanted to put a little of Zathrian's face on a HM? Now you can! These shapes were never affected in the CC and have not needed to be duplicated.
3. Beard restrictions
You can only apply beards to male humans, dwarves and qunari.
Why does this happen?
Spoiler:
Show
The other heads simply lack the code to choose beards (in the case of EM it is there, but the code is inactive), even though the headmoprh file structure would permit it.
Solution
I've added code that allows beards! Now you can apply them to anyone you like: the previously-allowed HM/DM/QM heads, plus male elf heads, female heads of any race, and children. (I know, I know, why would kids need beards? My thinking is that rather than Actual Beards for kids, this will allow the creation and application of accessories in the same vein as Earring Beards.)
This mod does not actually come with beards, but you can now apply Earring Beards and any other beards made in the future in the toolset!
Please be aware that some hair/beard mods appear as a solid blue/yellow mesh in the toolset rather than showing their texture; this will not affect their in-game appearance at all. For any hair/beard modders who are not aware, Risibisi has a de-blueing tutorial here.
CC problems
When exported to a MOP and used in the CC, beards will disappear on female heads, due to the CC's restrictions. (Yes, EM beards will stay!) The CC is aware of the invisible beard, however, and if you change any of the sliders (other than portrait/voice) you'll immediately get that sad old hollow-cheeked look. Fine Dwarven Beards' hair-beard combos are currently the only way to have a beard on (dwarf) female heads in the CC, since they add the beards to the hair models.
Beards and "beards" available for non-HM/DM/QM
(Let me know if there's more I should have on this list!)
- Elves Don't Grow Beards
- Fine Dwarven Beards - Separate Dwarf Beards file
- Earring Beards (piercings for all heads)
4. Beard slider locking
If the head has a beard applied, you can't alter most settings on the mouth, cheeks or jaw, or apply some head shapes. If you've already altered them and then apply a beard, they will reset to default. If head shapes from Feature Selection or two specific jaw sliders are used on a bearded MOP, they will reset to zero in the CC.
Why does this happen?
Spoiler:
Show
There are conditions in the XML that reset and disable specific sliders when the beard field is not empty. I imagine this restriction is to avoid clipping more easily, though it's particularly frustrating to have it present even on the beard that's literally just sideburns.
Solution
I've removed all restrictions that beards had on sliders. It's now possible to edit the mouth/cheeks/jaw and head shapes freely whether a beard is present or not. You'll have to manage clipping manually, but that's pretty easy when you can see what you're doing!
If you want to emulate vanilla behaviour you can click the "Reset" button at the bottom of the mouth/cheek/jaw slider tabs (except for the slider that moves the cheekbones up), and manually reset any head shapes to zero.
MOP/CC usage
If you want to use head shape sliders with a beard on a MOP in the CC, to avoid them being removed in the CC, you will need to use the sliders under Shared Shapes rather than Feature Selection (now CC Features) (see Section 2 above for more details). Because these sliders' morph targets have different internal names to the originals, the CC will not know to reset them.
There are two more sliders that have duplicates to circumvent the CC resetting them when a beard is present: Jaw Lower and Jaw Triangle Shape (previously Jaw Square Shape). These are in a new section at the bottom of the Jaw tab "CC Beard Workarounds", just above the Reset button.
Be aware that again, if you change any of the sliders (other than portrait/voice) on a bearded preset, even with these workarounds, you'll still immediately get hollow cheeks.
5. Permanent scalp hair
When a hair model is applied, the scalp almost always has a hair texture covering it fully. This is to conceal gaps in the hair model, but is less useful on hair models with receding hairlines or shaved areas.
Why does this happen?
Spoiler:
Show
The scalp hair options are determined by the texture's channels: 0 is bald, 2 is a sparse crew cut called "Sheppard" after the Mass Effect character, 3 is a receding hairline and 4 is a balding hairline. 1 is a version of 2 with more opaque coverage that is used for covering the bald scalp so that hairs with accidental gaps in the meshes don't just show bare skin. In the vanilla toolset it is hardcoded to be 1 when any hair is applied, except for the bald scalp and the vanilla cornrows hairs, which set it to 0. Of course this means that for any modded hair, it is still automatically 1. The slider is invisible.
Solution
There's no way to do this automatically, but I have hardcoded a few extra exceptions:
- Duncan's hair (##_har_duca_0) will now use the "receding hairline" cut.
- The female version of the male vanilla cornrows in Tucked Hair (#f_har_hdt5a_0) will not have any scalp hair.
- The "Orsino" hair in Tucked Hair (##_har_orsa_0) will not have any scalp hair.
- The "##_har_hda2a1a_0" hair in Tucked Hair will use the "receding hairline" cut.
- The "concept art Cassandra" hair in Tucked Hair (##_har_cass_0) will use the "receding hairline" cut.
The sliders will appear active, but they will not be able to be changed.
It would be impractical to try to cover every hair mod out there past present and future (and impossible to accommodate hairs where you might want mutliple options, such as mohawks) in this way, so if you want manual control over the scalp hair, please either check out the workarounds article or consider using Option 2 below!
6. The white scalp issue
The "white scalp issue" is when a modded hair tint is applied, but the stubble texture covering the scalp is black in the toolset and bright white in-game, often showing through gaps in the hair.
Why does this happen?
Spoiler:
Show
This is a missing tint, usually caused by tint files that have had their names edited in a way to disrupt the naming convention. For each hair tint (t3_har_*.tnt) there should be a stubble tint (t1_stb_*.tnt). The stubble tint can be directly applied to the eyebrows and facial hair stubble, but it is also automatically separately applied to the stubble covering the scalp when the corresponding hair tint is applied to the hair. This is done by removing the "t3_har" part of the name and replacing it with "t1_stb" to find the stubble tint. If the tints have been renamed to a point where they don't start with the right naming convention (eg replacing t1 and t3 with a modder's initials), they won't match, and the result is a black/white scalp due to a "missing" stubble tint.
Solution
As far as I know there's no "forever" automatic fix for this one. (I only have the constructs used in the vanilla XML to go by, and there's no sign of RegEx usage.) So I've tried to find all hair tint mods that would be affected, and hardcoded their conversions in. This only works if the corresponding stubble tint actually exists, of course.
- CC Extra Tints and Tones by jaylo101, using the prefix "cc".
- Pineappletree s Vibrant Colors by Pineappletree, using the prefix "pt".
- CS - NEW tints for hairs and CS - Eyebrows Color by ChingShih, using the prefix "cs".
- Lovely Tints by Barnzi88, using the prefix "bz".
How tint modders can avoid this:
Spoiler:
Show
If you make hair tints, please include equivalent stubble tints, and keep the original naming convention by not replacing the t3/t1 in the name! This will avoid the "white scalp issue" entirely. Consider adding your initials in a different location (rather than replacing the t1/t3), such as the start or end of the "free text" area in the name. For example if my initials are AH and my tint name is "colour": t3_har_AH_colour and t1_stb_AH_colour or t3_har_colour_AH and t1_stb_colour_AH.
7. Slider restoration and expansion
Restored sliders
There are several vanilla morph targets (the meshes that control headmorph changes via sliders) that were not used in the final Toolset or the CC; I have restored some of them. All should work on both MOR and MOP, though they are of varying levels of polish. As with many vanilla sliders, most of them look pretty silly at 100% and should be used more subtly in practice. All have been excluded from the randomiser.
Spoiler:
Show
Nose -> Nostrils Back (UH_NOS_23a_0)
Moves the nostrils further back into the cheeks.
Nose -> Nostrils Down/Up (UH_NOS_19a_0 and UH_NOS_20a_0)
This slider already existed in the code, I just put it on all heads. Down moves the nostrils and septum while the tip mostly remains still, and up moves the nostrils alone. (Found this one thanks to IceBuckets, which sent me on the journey of finding the other unused targets!)
Nose -> Nose Shape 7 (UH_NOS_24a_0)
Moves the nostrils down, the tip up, and the bridge out a little.
Nose -> Nose Shape 8 (UH_NOS_25a_0)
Moves the nostrils down, the bridge in, and the tip in a little.
Mouth -> Debug Show Tongue (UH_TEE_11a_0)
This was originally part of an unused two-way slider called Teeth Close/Separate; Teeth Close overlaps the upper and lower teeth significantly, and Teeth Separate moves them far apart. I don't think that either are useful for actual headmorphs because they'll just look odd with the way DAO's mouths work, but I've implemented Teeth Separate for this slider so that texture artists can use it to check the tongue/inside of the teeth. Must be used with Teeth Debug in order to see into the mouth, and, like Teeth Debug, will not show up on MOP/MORs even if left applied.
Eyes -> Eye Bags In (UH_EYE_01a_0)
The vanilla Eye Bags slider was originally a two-way slider that had an "in" target as well as the "out" target that was kept. I have restored it to this form. The "Eye Bags In" target is extremely subtle and can only really be seen from the side; it makes the lower eyelid appear puffier by drawing the vertices beneath it in and up (contrast "Eye Bags Out", which pulls those vertices out and down).
Eyes -> Eyelids down (UHM/ULM_EYE_31a_0)
Lowers the upper eyelids significantly and flattens the lower eyelid. Unlike the Squint slider, this moves the entire top eyelid mesh down, not just the lower edge of it. This results in clipping with the eyeballs on the EF head beyond about 0.45; all other heads seem to be fine.
Eyes -> Eyes Tilt Down/Up (UHM/ULM_EYE_23a_0 and UHM/ULM_EYE_24a_0)
Moves the inner and outer corners of the eye up/down and down/up. Named for the direction in which the outer eye corners are moved; moves the eyebrows a bit too.
Jaw -> Jaw Square Shape (UH_Jaw_12a_0)
This has taken the name of an existing slider that is now called Jaw Triangle Shape (see section 8 below), as it seemed a lot more...square. It lowers and widens the corners of the jaw.
Jaw -> Under Jaw Lower (UH_JAW_08a_0)
Lowers the skin under the jaw in a curve.
Ears -> Earlobes Lower (UH_EAR_10a_0)
Lowers the earlobes.
Expanded sliders
Two existing sliders, "Elf ear shape" and "Neck Apple" were made available on all heads, not just elves/males respectively.
The vanilla elf ear shape slider used on other heads produces exactly the same effect as can be seen in Visibly Elf Blooded, as that mod is done by duplicating and renaming the elf ear shape slider to replace one of the missing teeth sliders. If you want a different elf ear look, consider using the "Elf Boy" or "Elf Girl" sliders from the kid head (KN) section of Shared Shapes, as they also produce pointed ears (but also change other aspects of the face). Elf ear shape will change in appearance if you have Elf Update installed, since that mod changes the morph target mesh (see below for more options).
New sliders
Spoiler:
Show
Ears -> Elf ear shape DA2
This is a renamed duplicate of the Elf ear shape from Elf Update (again, requiring the Duplicate Morph Targets erf). It allows you to blend both the vanilla and DA2 elf ear shapes.
If you have Elf Update installed, it will replace the vanilla shape with the DA2 shape; to have both, you need to open the da2_elf-head folder in your Elf Update directory and delete uh_ear_08_0.msh and uh_ear_08a_0.mmh. It will not work with Realistic Teeth.
EM and EF only -> Nose -> DA2 Elf Nose
EM and EF only -> Eyes -> DA2 Elf Eye
These morph targets are also made from tmp7704's Elf Update meshes (again, requiring the Duplicate Morph Targets erf); they allow you to use the DA2 nose shape on a sliding scale in order to get it to combine better with other nose shapes, and to set different iris sizes.
These targets are based on the specific heads rather than on the generic base head like other morph targets are; this means that they will only work on EF/EM heads, and they will have no effect if Elf Update's base heads (in the "da2_elf-head" folder, ef_uhm_bas_0.msh and ef_uhm_bas_0.mmh and their EM counterparts) and eyes (both files in the "da2_elf-eye" folder) are installed. They will also not work with Realistic Teeth.
DA2 Elf Eye does have some oddities due to how the mesh works (and it does not look the same as when Elf Update is installed) and is best used in small amounts to add on to Debug Cornea set to 1.0; otherwise it moves the eyeball mesh in a way that hides the shading at the corners of the eye. Please see the mod images for visual reference. If this does not appeal but you want to use DA2-style elf eyes, please keep (and instruct any users of your mod to keep) the "da2_elf-eye" folder of Elf Update.
8. Slider Renaming
Multiple sliders have been renamed. This has no effect on internal headmorph or Toolset functions and is purely cosmetic.
CC/Shared Features list
Spoiler:
Show
HM
HF
EM
EF
DM
DF
- Pig nose -> Upturned nose
- Eastern nose -> Aquiline nose
- Flat nose -> Concave nose
HF
- Asian nose -> Concave nose
- Down nose -> Aquiline nose
EM
- Head01 Face -> Head shape 01
- Bent nose -> Aquiline nose
- Straight nose -> Pointed nose
- Round nose -> Concave nose
EF
- Big and large nose -> Concave nose
- Large and wide nose -> Wide nose
- Strong nose -> Aquiline nose
- Thin and long nose -> Thin nose
- Thin and small nose -> Small nose
- Witch nose -> Downturned nose
DM
- Upward nose -> Upturned nose
- Downward nose -> Aquiline nose
- Full nostrills nose -> Short nose
- Big nose -> Downturned nose
- Patato nose -> Wide nose
DF
- Defined nose -> Aquiline nose
- Down nose -> Downturned nose
- Up nose -> Upturned nose
General list
Other sliders' names have been tweaked for clarity, brevity, readability, spelling or alphabetical ordering, and a few have been deliberately moved. All general slider name/location changes can be seen in the mod images, but some explanations are here:
Spoiler:
Show
- Jaw Square Shape is now Jaw Triangle Shape because it's not really "square" and I found an unused target that is (see section 7 above).
- Eyelash selectors: For all female heads, eyelashes were in the 3 position (confusingly, the same as Eye Texture); male heads had them in the 7 position (just above the eyelash texture in 8, which appears to be the correct position). I renamed "Eye Lashes" to "Eyelashes" and moved the female ones to the 7 position.
- Teeth Wide/Narrow is now in the main Targets section of the Teeth tab rather than under Debug.
- The scalp hair slider numbers now match their "cut" numbers. (This means that they start at 2 in this option, but see Option 2 for exciting hidden slider shenanigans.)
9. Texture expansion
Many head textures are either solely defined in the base mesh's MAO, either as a default or effectively blank, even though they have the ability to be changed and stored in the headmorph. I have made several of these editable; selecting a texture will make the headmorph use that texture without affecting any other headmorph, allowing a lot more individual customisation.
In all cases, leaving a texture field blank (ie vanilla behaviour) will cause the texture to be read from the base head's MAO, whatever that may be (you can see this behaviour in the vanilla toolset where the Base Skin Texture is blank by default, being read from the base head's MAO).
Editable textures: face and scalp
Spoiler:
Show
This can be used to change the makeup, facial pigment, eyebrow style etc on specific heads without changing what the other heads use, and to apply a scalp tattoo. For any texture that links to a normal map, the normal maps are auto-detected from the name of the selected textures in the same way as the face complexions.
01. Material -> 01. Face -> 01.1. Makeup/Skin Color Mask
Default: uh_hed_maka_0t || Filter: uh_hed_mak*_0t
01. Material -> 01. Face -> 01.2. Scalp Skin Color Mask
Default: pn_har_blda_0t || Filter: pn_har_bld*_0t
These textures control makeup (in the former's case) and how the skin tint is distributed.
Example: Standalone files on Real Pigment. Previously the Character Variance Kit filled this function, but changing the texture inside the toolset is much easier, more efficient, and instantly visible.
01. Material -> 04. Scalp Texture -> 01. Base Scalp Texture
Default: pn_har_blda_0d || Filter: pn_har_bld*_0d
01. Material -> 04. Scalp Texture -> 02. Blend Scalp Texture
Default: pn_har_blda_0d (MAO default is Default_Gray50) || Filter: pn_har_bld*_0d
These are the "complexion" textures for the scalp, made in much the same way as the vanilla ones for the face. There are two blending sliders, one for the diffuse and one for the normals. This allows for different scalps, or the creation of seamless face-and-scalp textures and scars.
Example: Axed Face to Scalp Scar (only texture files needed)
02. Part Selection -> 4. Brow and Stubble -> 00. Brow/Stubble Mask
Default: uh_hed_stb_0t || Filter: uh_hed_stb*_0t
02. Part Selection -> 5. Crew Cut Selection -> 00. Crew Cut Mask
Default: pn_har_stb_0t || Filter: pn_har_stb*_0t
These textures provide the four eyebrow and facial hair options, and the four scalp hair options. This allows for most headmorphs to use whichever texture you installed as default, while using a different texture on the headmorphs you change it on -- for example to use a different eyebrow style.
Example: Standalone files on HQ Eyebrow Stubble and Scalp Hair Replacers
02. Part Selection -> 6. Scalp Tattoo -> 00. Scalp Tattoo Mask
Filter: pn_tat_bld*_0t
This is the tattoo picker for the scalp, made in much the same way as the vanilla one for the face. It is completely separate from the face tattoo and can have a different channel selected and a different tint applied, or matching face and scalp tattoos that appear as one continuous tattoo can be created.
Example: None yet. (Note to tattoo creators: you must save the tattoo dds without compression, either 8 bit or 4 bit (u8888 or u4444); otherwise the areas where the tattoos intersect will have terrible compression artefacts.)
Editable textures: accessories
Head or face accessories are usually made as part of a hair or beard mesh. Sometimes, as with Duncan's vanilla hair and earring combo, they are part of the same mesh chunk as the hair itself and share the same hair material and colour. But if the accessory is on a different chunk it can use its own textures and a completely different material so that it looks like an object rather than hair. The textures will be defined in the accessory's MAO file(s).
I have created texture pickers so that many accessories on their own chunk can be assigned different textures for different headmorphs (as long as they don't use the Hair material themselves). For example you could have a bandana be a different colour for every character wearing it, or change the metal and gem colours of specific characters' jewellery without affecting others. These texture pickers are all in the new "15. Accessory textures" tab at the end of the tab list.
This will only work on the node names listed in the pickers:
- accm1, accm2 and accm3 -- intended for accessories attached to beards.
- acchm1, acchm2 and acchm3 -- intended for accessories attached to hair.
- HairM3 and HairM4 -- these nodes have often been used for accessories on existing hairs (such as those by Risibisi and LotC), so I've grandfathered them in.
You will have to check which node name an accessory uses in order to know which texture picker to use:
- The mod author may have specified in their description.
- You can try putting a texture in different slots and see which one changes the accessory.
- To check manually, open the accessory's MMH file(s) and go to MMH_CHILDREN -> MMH_CHILDREN; the accessory will be in one of the last nodes on the list, hopefully named something obvious. The node name is the first entry inside that, called MMH_NAME. If it's not one of the supported node names you may need to edit it if you have permission.
For example Calpernia Circlet uses accm1.
For each node there is a Diffuse slot and a Normal Map slot. If the diffuse slot is filled it will link automatically to a specular texture by replacing the "d" on the end of the texture filename with an "s" (this is almost exactly how the face diffuse textures are automatically linked to their normal maps). The normal map slot is standalone. Either slot can be left blank to keep the accessory's default texture for that slot (for example if you only want to change the colour, put a texture in the diffuse slot (which will also change the specular), and leave the normal slot blank).
Note for mesh creators: accm# (beard) and acchm# (hair) are new node names specifically intended to free up mesh creators to use the full HairM1-3 and BeardM1-3 for their actual hair/beard and still have room for their accessories. (Unlike armour, which will only tint on M1, Hair and Beard M1-3 will all have the correct hair tint -- though HairM1 is reserved for the scalp.) They are lowercase (sadly case sensitive) to make manual editing quicker as the mesh will output by default with Hair/BeardM# as its node names.
Notes for texture creators: The texture picker's main filter is acc_*_0?, where ? is d/s/n and * is free text. The pickers also have "all" filter options where they will display all diffuse/specular/normal maps available to the game, but since that is a huge list I encourage you to adhere to the main filter's naming convention; the prefix is deliberately short to provide maximum free text (since it's also sensible to indicate what accessory mod the texture is for) while still being distinct. Remember that the toolset restricts resources to 28 character filenames (32 if you count the ".dds" at the end); it will not detect or display files with longer names.
Make sure to provide an equivalently-named specular file for any diffuse if the accessory's MAO uses the Character material; if it uses the Face material (which has the specular in the diffuse's alpha channel), the missing discrete specular file will be ignored and the alpha channel used correctly.
Toolset-chosen textures will not utilise LOD textures (since these have to be defined by a LOD mesh's MAO), so they do not need to be created for alternate textures; only direct replacements (if they existed in the original).
X. Non-headmorph related
Longer tint filenames
Tint filenames are now limited to 32 characters total rather than 10. Originally I put this up to 128 but discovered that, like many other resources, the toolset (and possible the game) will not accept tint filenames longer than 32 characters. This limit includes the extension ".tnt" and the various tint prefixes, and in practice imposes a 21 character limit on the tint name suffix. The toolset will not actually stop you when you reach the limit; it will just deduct characters from the beginning while you type, so keep an eye on the length.
Extra file filters
I have added some extra file filters (unrelated to headmorphs) to make file selection a bit easier in certain circumstances.
Spoiler:
Show
Icon texture filter for UTIs
The generic texture resource selector lists every single texture in the game/override. This is particularly frustrating when selecting an icon for a UTI. I have added a filter called "Icons" that shows only dds files beginning with "ico_". It's at the bottom of the list, so you'll still have to wait a couple of seconds for it to load everything in the universe before you can change the filter -- I didn't want to change the default behaviour for other uses of the selector.
Model filters for level creation
The only vanilla options for selecting models while creating or editing a level are to use the models tab in the Palette window or to use Insert -> Spawn Model, both of which require the user to either know the name of the model they want or guess its relevance by its prefix. I have added many new filters to the Spawn Model selector, ranging from Exterior/Interior to architectural usage (eg Tevinter), specific places (eg the Fade) or specific uses (eg water/lava).
Option 2: Manual Mode
This option removes nearly all remaining automation, granting more freedom but requiring more care and involvement to use.
Summary of features
(In addition to and replacing some of those from Option 1)
- Scalp hair pattern is chosen manually instead of being locked to full coverage when a hair is applied. (It will show up as full coverage initially on a new headmorph but can be removed/changed.)
- Scalp tint is chosen manually instead of being generated from the hair tint's name, making it possible to avoid all instances of the "white scalp issue". (When you do need it to be the same as the hair tint, you will need to do this; it will no longer do it automatically.) This feature has a different implementation to the "white scalp issue" fix in Option 1.
Full details
Spoiler:
1. Manual Scalp hair
Replaces 5. Permanent scalp hair in Option 1.
The slider for the default scalp hair is now visible, named "Thick Crew Cut", and no longer acts automatically. It can be turned off even when a hair is applied, and a different crew cut (or none) can be applied instead. This is mostly useful for hairs with receding hairlines or undercuts.
The slider is set with an initial default value of 1, which means that a new blank headmorph will appear with the thick crew cut at first, but you may remove it if you wish -- I only did this so that people applying hairs wouldn't forget to turn it on to cover the scalp, since it no longer will turn on automatically. This default value will have no effect on existing MRHs, only new ones.
Each of the crew cuts is mutually exclusive with each other.
How to emulate automatic behaviour:
Set the "Thick Crew Cut" slider to 1 unless using the bald scalp or the #m_har_hd4a_0 hair (male cornrows).
2. Manual Scalp colour
Replaces 6. The white scalp issue in Option 1.
The remaining problems are that some hair tints don't come with an associated stubble tint, and that for the ones that do, modders are locked into having the scalp be equivalent to the hair, unless they edit the MOR manually.
I've made the scalp colour picker visible, listed as "4.1. Scalp Color", immediately below "4. Hair and Beard Color" and immediately above "5. Hair". I have disconnected it from the hair tint, so it's now possible to pick a different tint -- maybe your chosen hair tint is missing a corresponding stubble tint and you want to pick the closest one you can find, or maybe your warden's green mohawk isn't their natural hair colour!
How to emulate automatic behaviour:
Manually select the stubble tint that matches the hair tint: with the hair tint name as a base, replace "_har_" with "_stb_" and "t3" (if present) with "t1". Either use the tint picker, type directly into the box, or copy/paste the hair tint name and edit it.
Show
1. Manual Scalp hair
Replaces 5. Permanent scalp hair in Option 1.
The slider for the default scalp hair is now visible, named "Thick Crew Cut", and no longer acts automatically. It can be turned off even when a hair is applied, and a different crew cut (or none) can be applied instead. This is mostly useful for hairs with receding hairlines or undercuts.
The slider is set with an initial default value of 1, which means that a new blank headmorph will appear with the thick crew cut at first, but you may remove it if you wish -- I only did this so that people applying hairs wouldn't forget to turn it on to cover the scalp, since it no longer will turn on automatically. This default value will have no effect on existing MRHs, only new ones.
Each of the crew cuts is mutually exclusive with each other.
How to emulate automatic behaviour:
Set the "Thick Crew Cut" slider to 1 unless using the bald scalp or the #m_har_hd4a_0 hair (male cornrows).
2. Manual Scalp colour
Replaces 6. The white scalp issue in Option 1.
The remaining problems are that some hair tints don't come with an associated stubble tint, and that for the ones that do, modders are locked into having the scalp be equivalent to the hair, unless they edit the MOR manually.
I've made the scalp colour picker visible, listed as "4.1. Scalp Color", immediately below "4. Hair and Beard Color" and immediately above "5. Hair". I have disconnected it from the hair tint, so it's now possible to pick a different tint -- maybe your chosen hair tint is missing a corresponding stubble tint and you want to pick the closest one you can find, or maybe your warden's green mohawk isn't their natural hair colour!
How to emulate automatic behaviour:
Manually select the stubble tint that matches the hair tint: with the hair tint name as a base, replace "_har_" with "_stb_" and "t3" (if present) with "t1". Either use the tint picker, type directly into the box, or copy/paste the hair tint name and edit it.
Installation
If you want to use presets that someone else made using this mod
- Download the "Duplicate Morph Targets" file and place the erf in the usual override folder (\Documents\Bioware\Dragon Age\packages\core\override) (whether you put it in a subfolder or not does not matter). You do not need to extract the files within the erf.
- Enjoy!
To uninstall, simply delete the erf.
If you want to use this mod to make and edit headmorphs yourself
This mod requires the Dragon Age Toolset to be installed; if it is not, see Installing the Toolset below for links to resources.
- Download the "Duplicate Morph Targets" file and place the erf in the usual override folder (\Documents\Bioware\Dragon Age\packages\core\override) (whether you put it in a subfolder or not does not matter). You do not need to extract the files within the erf.
- Decide which option you wish to use from the descriptions above. If you change your mind later (or only want to use one of the options for specific heads) you can just replace the file with the other option whenever you like.
- Go to the "tools" folder in your installation directory (ie "Dragon Age Ultimate Edition\tools" or "Dragon Age\tools" or something similar depending on the version of the game that you own). The file that will be replaced is "DefaultSettings.xml". Back up this original file first by moving it to your personal folders or by renaming it -- for example to "DefaultSettings_old.xml".
- Extract this mod's "DefaultSettings.xml" file into the tools folder.
- Restart the Toolset for the changes to take effect.
Uninstallation
To uninstall, reverse the process: delete "DefaultSettings.xml", then restore the original file by either re-renaming it or restoring it from where you moved it to. Delete the erf from your override folder if you don't have MOPs that rely on it.
Installing the Toolset
The Toolset can be downloaded from the Bioware CDN. The wiki has instructions for installation, installation troubleshooting, known issues, and getting started. It is useful to apply the 4GB/LAA patch to the Toolset exe once it's installed. Unfortunately I am unable to help with installation troubleshooting.
Compatibility
This mod is compatible with anything that modifies the base head or morph target meshes but retains their vanilla names, eg Brumbek's Realistic Teeth (except for the completely new targets, eg the 3 targets derived from Elf Update), tmp7704's Elf Update or Sapphim's elf-blooded ears (which replaces one of the missing teeth targets with the vanilla "Elf ear shape" target, available here).
This mod will clash with other mods that edit the DefaultSettings.xml file in the tools folder. However, if permission is given then the differences can be merged if there isn't a conflict of intent.
Compatibility patches in Optional Files
Patch for Dragon Age 2 Character Creator by IceBuckets
- Based on the "Additional Teeth Options" v1.1 file. You will still need IceBuckets' "Dragon Age 2 CC Core Files" file and the core files in the "Additional Teeth Options" file. My DefaultSettings file should replace his, and you will still need my "Duplicate Morph Targets" erf.
- I have fixed a tiny bug that made the DAO side's Blend Skin Texture look for DA2 files, and moved "Beard Color" up to 6.1 (just below Beard) instead of 9 (below Lashes Texture), but otherwise his edits are unchanged.
- These have separate hair/beard tint selectors on the DAO side as well, and even though this means you can apply separate tints to the hair and beard inside the toolset (and the MRH will keep them), only the hair tint will actually be exported into both MOR and MOP for DAO.
Mods shown prominently in screenshots
- Lovely Tints
- Tucked Hair
- Elf update
- NewSea's Frizzy and Equi hair ports by Risibisi
- Fine Dwarven Beards
- Earring Beards
- Calpernia Circlet
- Natural lighting for the character creator
- Glossy Hair and Beard
- My own eyebrows and scalp hair, skin tint fix, and WIP eye, hair texture and complexion mods