The most comprehensive and complete guide to successfully modding The Witcher 2 into the modern day. Excellent for both newcomers and veterans alike.
Permissions and credits
Author's instructions
THIS MOD IS FREELY DISTRIBUTED, AND I GIVE PERMISSION TO ANYONE TO DO ANYTHING WITH IT :)
File credits
This author has not credited anyone else in this file
Donation Points system
Please log in to find out whether this mod is receiving Donation Points
Changelogs
Version 2025/02/20
[MOD \\ ADDED] --- Added Mod: "Upscaled Inventory Icons and Journal Images" to the [VISUAL ENHANCEMENTS] mod section.
[MOD INSTRUCTIONS \\ UPDATED] --- "DXVK" --- Updated instructions to include the option of using DXVK(GPL-async) over the original 2021 DXVK(-async) mod.
[MOD INSTRUCTIONS \\ UPDATED] --- "Character Collection" --- Updated instructions to point to the new mod: "Enhanced Characters Collection" and installation instructions written from scratch for the new mod files.S).
Version 2023/10/14
[FILE \\ UPDATED] --- Updated the file: "Swords and Roses - Reforged ENB Admin Files" to fix a clerical error that disabled dithering (REALY IMPORTANT). Embarrassing that this remained for 2 years this way before the fix...
Version 2023/02/01
[MOD INSTRUCTIONS \\ UPDATED] --- "DXVK" --- Updated instructions to use the latest version of the LAST branch (version 1.10.3).
Version 2022/04/17
[MOD \\ ADDED] --- Added Mod: "The Witcher 2 Character Collection" to the [VISUAL ENHANCEMENTS] mod section.
Version 2022/02/12
[MOD \\ ADDED] --- Added Mod: "Project Mersey - The Witcher 2 Unofficial Patch" to the [FIXES & QUALITY OF LIFE (QOL) IMPROVEMENTS] mod section.
[MOD INSTRUCTIONS \\ UPDATED] --- "AI Upscaled Textures" --- Updated instructions to use the X2 upscaled versions of the files (TO PREVENT CRASHES).
[MOD \\ Removed] --- Removed Mod: "Enhanced Mod Compilation" from the [FIXES & QUALITY OF LIFE (QOL) IMPROVEMENTS] mod section.
[MOD \\ Removed] --- Removed Mod: "Enhanced Mod Compilation (Upgraded)" from the [FIXES & QUALITY OF LIFE (QOL) IMPROVEMENTS] mod section.
[MOD \\ Removed] --- Removed Mod: "Melitele's Heart - Combat Stats Fixes" from the [FIXES & QUALITY OF LIFE (QOL) IMPROVEMENTS] mod section.
[MOD \\ Removed] --- Removed Mod: "Radovid Persuasion Fix" from the [FIXES & QUALITY OF LIFE (QOL) IMPROVEMENTS] mod section.
[MOD \\ Removed] --- Removed Mod: "Quest Fix - "Walls Have Ears" -and- "Suspect Thorak"" from the [FIXES & QUALITY OF LIFE (QOL) IMPROVEMENTS] mod section.
Version 2021/12/30
[FILE \\ UPDATED] --- Updated the file: "Swords and Roses - Witcher 2 Documents". I had to remove my personal saves from the archive (accidentally uploaded the one that had saves in it before). FIXED.
[MOD REMOVED \\ UPDATED] --- Removed Mod "Queen Endrega Quest Fix", due to incompatibility with EMCU. Mod's file archived.
Version 2021/10/27
[FILE \\ UPDATED] --- Renamed the file: "Swords and Roses - Base Admin Files" -to- "Swords and Roses - Reforged ENB Admin Files" for less confusion on what the files are for.
[MOD \\ MERGED] --- Merged Mod: "Swords and Roses - Base Admin Files" with the instructions for "Reforged ENB" in the [POST-PROCESSING] mod section in order to bring it more in line with the supportive purpose it was meant to be.
[MOD \\ RENAMED] --- Renamed Mod: "Alternate Triss" -to- "Alternate Outfit for Triss" in the [VISUAL ENHANCEMENTS] mod section in order to better depict what the mod is (via ther Title used in the mod guide)..
[MOD \\ REMOVED] --- (Temporarily) Removed Mod: "Hoodless Kinslayer Dark Mode Armor" to the [VISUAL ENHANCEMENTS] mod section due to an incompatibility with "Enchant All".
Version 2021/10/20
[FILE \\ UPDATED] --- Updated the file: "Swords and Roses - Witcher 2 Documents". NEW DEFAULT VALUES to improve Graphical Fidelity while keeping performance high. The BEST starting point for users.
Version 2021/10/09
[FILE \\ UPDATED] --- Updated the file: "Swords and Roses - Witcher 2 Documents". Corrected TEXTURE MEMORY BUDGET setting to 600, previously was 2048. 600 is a safe setting; higher numbers may cause more frequent CTDs.
[MOD \\ ADDED] --- Added Mod: "Alternative Triss (Outfit)" to the [VISUAL ENHANCEMENTS] mod section.
[MOD \\ ADDED] --- Added Mod: "EnVision ENB" to the [POST-PROCESSING] mod section.
[MOD \\ ADDED] --- Added Mod: "Quest Fix - "Walls Have Ears" -and- "Suspect Thorak"" to the [FIXES & QUALITY OF LIFE (QOL) IMPROVEMENTS] mod section.
[MOD \\ ADDED] --- Added Mod: "Wild Hunt Journal Entries Fix" to the [FIXES & QUALITY OF LIFE (QOL) IMPROVEMENTS] mod section.
[MOD INSTRUCTIONS \\ REVISED] --- "DXVK" --- Updated mod instructions to include using "dxgi.dll" as well as the d3d9 file.
Version 2021/10/08
[MOD \\ ADDED] --- Added Mod: "Aen Seidhe Eyes" to the [VISUAL ENHANCEMENTS] mod section.
[MOD \\ ADDED] --- Added Mod: "Blue Eyes for Triss" to the [VISUAL ENHANCEMENTS] mod section.
[MOD \\ ADDED] --- Added Mod: "Crash Fix for German Enhanced Edition (NEW)" to the [FIXES & QUALITY OF LIFE (QOL) IMPROVEMENTS] mod section.
[MOD \\ ADDED] --- Added Mod: "Radovid Persuasion Fix" to the [FIXES & QUALITY OF LIFE (QOL) IMPROVEMENTS] mod section.
[MOD \\ ADDED] --- Added Mod: "Extended Sex Scenes + Reworked Interactions" to the [DEEP MODIFICATION] mod section.
[MOD \\ ADDED] --- Added Mod: "Lore Dandelion" to the [VISUAL ENHANCEMENTS] mod section.
[MOD \\ ADDED] --- Added Mod: "Return of the White Wolf - Hair Texture Replacement" to the [VISUAL ENHANCEMENTS] mod section.
[MOD \\ ADDED] --- Added Mod: "Triss Natural Hair" to the [VISUAL ENHANCEMENTS] mod section.
Version 2021/10/07
[MOD \\ ADDED] --- Added Mod: "Enhanced Mod Compilation (Upgraded)" to the [FIXES & QUALITY OF LIFE (QOL) IMPROVEMENTS] mod section.
[MOD INSTRUCTIONS \\ UPDATED] --- "Enhanced Mod Compilation" --- Updated SECTION instructions for both mods.
[GUIDE \\ UPDATED] --- Improved the readability of many parts throughout the guide.
Version 2021/10/05
[GUIDE \\ ADDED] --- Initial Mod list Uploaded.
I N T R O D U C T I O N :
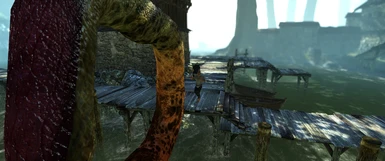
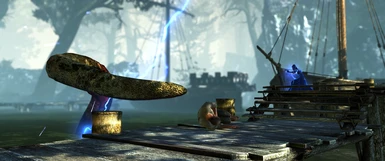
Hello and welcome to A Memoir of Swords & Roses. YOUR personal guide on how to make your Witcher™ 2 experience — a MEMORABLE one, courtesy of our "amaze-balls" modding community.
Thankfully, CD Projekt RED did an amazing job creating and shipping the PC version of the game (all I can attest to at least). Seriously, we don't have major corrections or reverse-engineering of ass-backwards corporate decision-making to fix here - only visual enhancements, quality of life improvements, and some game-changing mods to bring the beloved Witcher 2 experience into 2022.
Just follow this lovely worded Guide and you'll be experiencing this beautiful game with enough graphical fidelity to give your monitor a heart-attack, your "grafficks" card a heat stroke, and the brains of your poorly-cooled computer (ye' old CPU) a migraine.
Thanks to our modding community, this version is the de-facto version to play.
H E L P F U L S U G G E S T I O N S :
Spoiler:
Show
1 — Please for the love of all that is good in this world - follow my exact instructions and do NOT just SKIM sections (unless you like the bad life) - you will have a B R O K E N and/or INCOMPLETE™ Experience.
Spoiler:
Show
I have already exhausted countless amounts of time trying different combinations of installation (of mods) and I have ended up quite simply wasting all of that time just ruling out what does NOT work. Please allow me to save you this same amount of time in testing, diagnosing, and confirming theories.
2 — Green Mods. These are mods you MUST install in order to achieve the Swords & Roses™ Experience. 3 — Yellow Mods. (Optional). 4 — R-E-A-D the Official Mods' Descriptions to know what a specific mod does and how it functions in the game. Without these modders and their voluntary works you'd have been stuck playing at settings that were the best you could get in 2011. So I ask that you please endorse their work if you like what they made so that they can feed their children and remain off the streets.... kthx 5 — BACKUP / MAKE A FULL COPY of your original (vanilla) game folder in case you mess something up and want to return to a fresh install quickly.
Spoiler:
Show
I've messed up my installation quite a few times while trying different combinations and orders of installation (of mods) and you know what I had to show for it? (Approx.) 30 hours of my life gone. Thankfully, I had a full copy of the original game installation backed up on another drive. I will not bat an eye if you don't adhere to this and you "accidentally" rendered your game inoperable. If you mess up, just start over again --- this guide does not take very long to complete.)
6 — Always follow my EXACT instructions. Then once you have the game right where you want it (AKA achieved the Swords & Roses™ Experience), repeat step 5 and BACKUP / MAKE A FULL COPY of the *MODDED* game folder so you won't have to do this all over again :)
F A Qs / Frequently Asked Questions :
Spoiler:
Show
1 — TEXT HERE: "TEXT HERE" !!!
Spoiler:
Show
—
You will need the following items in order to proceed with this guide:
A decent computer that can run this game.
You need to know that the mod's TITLES are the [Links] to the mods themselves. You have to CLICK a mod's title in order to get to the mod's page.
Attention to Detail. You have to start the game oncebefore beginning this guide, so it can generate some files we need. That is a critical step.
The Witcher 2: Assassins of Kings Enhanced Edition — GOG -OR- STEAM — The instructions are the same for either version, ANY version of the game works here.
FIRST make a copy/backup of your The Witcher 2\CookedPC\movies folder. You should have made a copy/backup of The Witcher 2 before beginning this guide as is stated in STEP #5 in the "HELPFUL SUGGESTIONS" section of the guide. This way, if you ever need to return The Witcher 2 to it's original state - Steam or GOG won't make you re-download GBs of data. If you don't do this, it will be your own fault if you have to "verify files" on Steam or GOG and it makes you download basically the whole game again. You have been warned.
Download all 3 of the (MAIN) Files on this page.
[WINDOWS] "Right-click" on each file that finished downloading, click "properties", click "unblock" (If you see it, lower-right hand corner).
Extract the contents of each archive into the The Witcher 2\CookedPC\movies folder.
DXVK-async updated to work with newer dxvk versions and gpl. Async allows frames to be drawn before shaders finish compiling, giving reduced stuttering in many games. GPL is dxvk feature to reduce stuttering, and this patch enables using both of them with the goal of giving as little stuttering as possible.
Download the latest version here --- the archive you should download for the purposes of this guide will be under: "Packages" --- EXAMPLE FILE: "dxvk-gplasync-v2.5.3-1.zip".
Inside the archive you just downloaded, navigate to the folder \x32. Extract: "d3d9.dll", and: "dxgi.dll" into your The Witcher 2\bin folder.
Replace All (if asked).
(Only If You Will Be Using ENB) Rename the newly-created "d3d9.dll" to: "dxvk.dll".
Download and Install the latest VULKAN runtime (RT) "installer"---> HERE. (image below shows which one in the list of available downloads is the (VulkanRT) "Installer" --- just make sure you download the latest one):
Now, REBOOT YOUR COMPUTER and run the game (Then exit the game).
Done.
[From user MaartenVaanThomm] (If you're on a laptop and have AMD processor and AMD integrated GPU) Go to device manager and turn off integrated GPU and turn it on back. Vulkan libraries have something to do with those two and don't recognize correct entries (?). I'm not that technical, but had the same problem in RDR2, couldn't enable Vulkan API in the game until I restarted integrated GPU. You have to do it after every computer reboot if you want vulkan working.
A Vulkan-based translation layer for Direct3D 9/10/11; A more efficient translation layer using a more efficient graphics API. The Witcher 2 will run a LOT better and a LOT faster on your system.
Download version --- 1.10.3 --- (instructions inside image below):
Inside the archive you just downloaded, navigate to dxvk-async-1.10.3.tar.gz\dxvk-async-1.10.3.tar\dxvk-async-1.10.3\x32. Extract: "d3d9.dll", and: "dxgi.dll" into your The Witcher 2\bin folder.
Replace All (if asked).
(Only If You Will Be Using ENB) Rename the newly-created "d3d9.dll" to: "dxvk.dll".
Download and Install the latest VULKAN runtime (RT) "installer"---> HERE. (image below shows which one in the list of available downloads is the (VulkanRT) "Installer" --- just make sure you download the latest one):
Now, REBOOT YOUR COMPUTER and run the game (Then exit the game).
Done.
[From user MaartenVaanThomm] (If you're on a laptop and have AMD processor and AMD integrated GPU) Go to device manager and turn off integrated GPU and turn it on back. Vulkan libraries have something to do with those two and don't recognize correct entries (?). I'm not that technical, but had the same problem in RDR2, couldn't enable Vulkan API in the game until I restarted integrated GPU. You have to do it after every computer reboot if you want vulkan working.
ENBSeries is the project of graphic modifications for games. The main idea is to allow every gamer to configure how game looks like for their own taste, so every player could share settings with others. Many games may look much better and ENBSeries is the easiest way to improve them.
Download the latest release (v0.189 beta as of this writing) HERE
Inside the archive you just downloaded, navigate to enbseries_witcher2_v0189.zip\WrapperVersion\bin and Extract all files from there into your The Witcher 2\bin folder.
Significantly extended sex scenes and reworked interactions with women of the evening.
Download the Main File "More_Sexy_II"
(WINDOWS) Right-click on the downloaded zip file, click properties, then click "unblock" in lower-right hand corner(if it exists).
In the archive you just downloaded, Copy the folder “More_Sexy_II" to the folder “%UserProfile%\Documents\Witcher 2\UserContent\”. If the destination folder does not exist — create it. To quickly navigate to the folder, you can copy & paste %UserProfile%\Documents\Witcher 2\ into the address bar of windows explorer.
Mod changes the game’s FOV value (Field Of View) to any preference from 50 to 120 degrees.
Download the Main File "FOV-Mod.7z"
(WINDOWS) Right-click on the downloaded zip file, click properties, then click "unblock" in lower-right hand corner(if it exists).
In the archive you just downloaded, Copy the contents of the folder “FOV-Mod\UserContent” to the folder “%UserProfile%\Documents\Witcher 2\UserContent\”. If the destination folder is not exists — create it. To quickly navigate to the folder, you can copy & paste %UserProfile%\Documents\Witcher 2\ into the address bar of windows explorer.
An extensive fix pack spanning across all aspects of the game. Including bug fixes, restored journal entries, dialogues, even entire characters and equipment. Also aimed at removing most tedious aspects of the game. Currently contains 224 different fixes/improvements. More than 8 years after the last patch by CDPR, you get one more. So what are you waiting for? It's time to replay Witcher 2 again.
Download the Main File.
Extractthe contents of the archive into your The Witcher 2 primary game directory.
Done.
— (O N L Y for PlayStation Dual Shock 4 Controller Users)
This is the culmination of my tweaking of the Controller scheme over the 30hours I spent playing TW2. With one or two presses, it provides quick access to all spells, inventory, maps, journal, character, quick save and toggle UI visibility, a cursor in UI. XPadder and Steam Controller Mapping for XBox Ctrl Profiles available. GOG support via Steam.
INSTALLATION INSTRUCTIONS FROM MOD PAGE:
This mod requires XPadder or Steam (GOG Support via Steam as well).
Download the main file and follow the Instructions within:
Load the Xpadder profile OR, if you have Steam, load this profile (made by Hughuwa for this mod): steam://controllerconfig/witcher2/1214459997
Place xinput1_3.dll in the same dir that has the main executable. The purpose of this dll is to block the game from seeing the controller as it will interfere with my xpadder profile. The dll was made in xbox360ce (an open source software). You can make one yourself using this software by simply leaving everything empty.
Patch User.ini with my control scheme. Instruction on what to patch are included in mod.
Mod fist fights. My Xpadder profile is essentially a keyboard and mouse control scheme on a controller. This mean that you will be getting WASD prompts when fist fighting. I found those prompts very confusing, so I modded the Fist fights to give me prompts corresponding to to the controller buttons. There's a pre-compiled patch for vanilla and FCR2. There's also loose files version for anyone who can't use the pre-compiled patches. The fist fights need the generic magic button but seeing how B is already dedicated to Aard in my control scheme's default set, I had to make to make an alternate set for fist fighting that maps B to Magic. You have to switch to it by clicking the right stick and can switch out of it with the shoulder buttons, left trigger or back button (these are button you're likely to press soon after you're done with the fist fight, makes the switch back automatic and avoids you forgetting to switch back to main).
GOG USERS AND STEAM PROFILE: GOG users can enjoy access to Steam's Controller mapping API by adding their GOG game as a third party app in Steam:
Launch Steam (Regular, not sure if you can do this in Big Picture).
Click the Games menu, choose Add a Non-Steam Game to My Library.
Browse for games on your computer or put a check next to the game(s) you wish to add to the Library.
Click on "Add Selected Programs".
If you want to make yourself a shortcut, go to your steam Library and select the newly added program, right click and select "Create Desktop Shortcut" - the desktop shortcut will have an ugly icon, you can right click it and select change icon.
At this point you'll be able to launch game via steam (or the shortcut) and use the controller mapping as if it's a regular Steam game. I believe the mapping will only kick in if you launch the game through Steam (meaning that if you launch it via game's exe, it won't map).
This mod provides widescreen fixes for a lot of games on PC.
Download the File.
(WINDOWS) Right-click on the downloaded zip file, click properties, then click "unblock" in lower-right hand corner(if it exists).
Extract the folder "Widescreen Fixer" into your Witcher 2 game directory.
Now, go into Widescreen Fixer's folder and right-click "Widescreen Fixer.exe", and create a shortcut on your desktop AND/OR pin it to your START MENU / make it easily accessible to you whenever you want to play The Witcher 2.
Now, LAUNCH it. After double clicking on it or whatever you did to launch it, GO to your taskbar notification area (bottom right little icons) and double click on Widescreen Fixer's icon.
On the SETTINGS tab, click on the blank little box on the bottom-right of that window (in the Hotkey area) and press "ADD" on your keyboard; this should be the button labeled: "+" on the very right-side of your keyboard. This is going to be the button you press to activate/deactivate Widescreen Fixer.
On the MAIN tab, click on the drop-down menu and select: "The Witcher 2: Assassins of Kings".
Now, click on the little COGWHEEL next to the drop-down menu.
Under: "Select Game Version", select (1) of the TOP (2) choices. Either the v.3.4.0 (GoG) choice -OR- the v.3.4.0 (Steam) choice.
Under: "Options", select AMD. It doesn't matter if you have Nvidia or AMD here, we want to be able to specify the Horizontal Resolution at the bottom.
In the drop-down menu, select: "Cinema (2.39.1)".
In Horizontal Resolution, type your horizontal resolution. ("3440" for example is for me since I have 3440x1440 resolution).
When finished, click on the button SAVE SETTINGS, and then click on CLOSE WINDOW.
Done.
Now whenever you want to play the game, just LAUNCH Widescreen Fixer and THEN launch The Witcher 2. IF when you launch The Witcher 2 and are faced with a black screen that won't go away, PRESS the hotkey you assigned to Widescreen Fixer ("ADD") to toggle between on/off --- that should clear that black screen and reveal the main menu. Don't forget to press it again once you're in-game if it looks like it's not on.
More detail in textures thanks to artificial intelligence.
Download ONLY these (2) MAIN Files: "AI Upscale Characters Textures X2 VERSION OPTIMIZED" + "AI Upscale Environmental Textures X2 VERSION OPTIMIZED".
TW2 elves pretty much all use the same dark brown eye textures, which are also shared by humans. By contrast, elves in TW3 (and book lore) had very striking eyes, with bright vibrant hues that made them look slightly otherworldly. I wanted to recreate this exotic effect for TW2.
Download the Main File.
Extractthe contents of the archive into your The Witcher 2\CookedPC folder.
This is a small mod that replaces the blurry and confusing alchemy substance icons in several of the in-game GUI's, with those from the original Witcher game.
Download the Main File.
Extractthe contents of the "globals" folder inside the archive into your The Witcher 2\CookedPC folder.
TW2 elves pretty much all use the same dark brown eye textures, which are also shared by humans. By contrast, elves in TW3 (and book lore) had very striking eyes, with bright vibrant hues that made them look slightly otherworldly. I wanted to recreate this exotic effect for TW2.
Download the Main File.
Extract folder: "characters" from the archive into your The Witcher 2\CookedPC folder.
Done.
CHOOSE ONLY (1) THEN PROCEED TO THE NEXT SECTION; [PATCHES].
A modest graphics upgrade for The Witcher 2. Features: High quality replacement bloom. Neutral tone-mapping to raise the white-point and reduce the amount of clipping in the highlights substantially. Modified and fixed vignette, using the same vignette code as the original but with a broken feature fixed so it no longer makes highlights grey and modified to be round because I get annoyed when vignettes are stretched by your screen's aspect ratio. Cheeky chromatic aberration hiding out in out of focus areas to build on The Witcher 2's fantasy-esque aesthetic (and to make up for the reduced contrast from the tone-mapping). Dithering to fix banding which was occasionally visible in the sky. Leaves the game's original color correction fully in tact (this actually requires some work, which is why it is a feature and is not necessarily the case for every The Witcher 2 enb).
Download the Main File.
Extract folder: "bin" from the archive into your The Witcher 2 primary game directory.
Replace All when asked.
Now Download the Optional File.
Extract file: "enbeffect.fx" from the archive into your The Witcher 2\bin folder.
To use the in game ENB interface press SHIFT and ENTER.
To Enable / Disable ENB effects press SHIFT and F12 To Enable / Disable Sweetfx Effects press Scroll lock
Download the Main File.
Extract all files EXCEPT "dxgi.dll" into your The Witcher 2\bin folder.
(O N L Y If you accidentally replaced all files.) — IT'S OK! You just need to go back into the "DXVK" file you downloaded in the [DEEP MODIFICATION] section and extract the "dxgi.dll" file from the archive into your The Witcher 2\bin folder. Replace All when asked.
Replace All when asked.
Now, inside the The Witcher 2\bin folder, open the file: "SweetFX_settings.txt" with notepad and at the very bottom replace: "// external_d3d9_wrapper = none" with: // external_d3d9_wrapper = dxvk.dll
Nvidia Profile Inspector (NPI) is an open source third-party tool created for pulling up and editing application profiles within the Nvidia display drivers. It works much like the Manage 3D settings page in the Nvidia Control Panel but goes more in-depth and exposes settings and offers functionality not available through the native control panel.
Download the latest build:
Save and extract it to an appropriate permanent location.
Run "nvidiaProfileInspector.exe" to start the application. It may be worth making a shortcut and pinning it to your start menu or desktop.
Select "The Witcher 2: Assassins of Kings" in the GAME drop-down menu.
Make the settings that are HIGHLIGHTED, look like those in the picture below. Pay close attention to the helpful text in the yellow stickies; they indicate what settings you should use.
READ ME: When using The Witcher 2 Tweaker, the User.ini copied over from Swords & Roses - Witcher 2 Documents is what will be loaded under the [Advanced Graphics Options] tab. I also should point out that if you (The USER) have a different resolution other than 3440 x 1440 then you need to change it in the last option in The Witcher 2 Tweaker. Same thing goes for setting the Fullscreen option from 0 to 1if you prefer Fullscreen.
A Utility to Easily tweak all the graphics options of the Witcher 2.
Download the Main File.
Extract "The Witcher 2 Tweaker.exe" into your The Witcher 2 primary game directory.
LAUNCH the Witcher 2 Tweaker. ADJUST THE SETTINGS IN THE GREEN AREAS ONLY (Unless You Know What You're Doing) : (the screenshot below is just an example what the utility looks like)
INSTRUCTIONS FROM THE AI UPSCALED TEXTURES MOD PAGE:
For RTX and AMD cards, it is recommended to change TextureMemoryBudget value to 600 (the default Ultra setting), another setting causes texture and performance problems.
If someone has corrupted the user.ini or rendering.ini settings, simply delete the file from the documents and enable the game, the game will then create default settings files and you do not need to reinstall the game.
Recommended settings:
If you are editing User.ini and Rendering.ini files, do not use the settings from the game launcher, because values that have changed may return to the default settings.
TextureMemoryBudget=600 ---- that is the SAFEST number to try. - (The maximum value for card holders over 5 GB VRAM is 4084, when this value is exceeded, textures have problems with loading)
------------------------------------------------------------------------------------------------ 22 March 2023, 3:42AMhub997: According to my research, RTX cards divide the memory into 4 parts, and older cards divided into 2, so if we set the TextureMemoryBudget to 1000, it is actually 4000 on RTX cards.
So if we are understanding this correctly (since the game will only let you load up to 4084mb of VRAM before textures have problems loading): - If you have a non-RTX card: The most you should reliably set for "TextureMemoryBudget" on a card that has MORE than 5gb of VRAM (6gb or higher) is "2000" because the card will serve the game under 4084mb (the game's maximum limit) of textures via VRAM. The most you should reliably set for "TextureMemoryBudget" on a card that has LESS THAN 5gb of VRAM capacity is (4gb=2000, 3gb=1500, 2gb=1000, 1gb=500).
- If you have an RTX card: The most you should reliably set for "TextureMemoryBudget" on a card that has MORE than 5gb of VRAM (6gb or higher) is "1000" because the card will serve the game 4000mb (under the game's maximum limit of 4084mb) of textures via VRAM. The most you should reliably set for "TextureMemoryBudget" on a card that has LESS THAN 6gb of VRAM capacity is (4gb=1000, 3gb=768, 2gb=500, 1gb=250). ------------------------------------------------------------------------------------------------
If you ever mess up with this, just follow the instructions from the LAST mod: "Swords & Roses - Witcher 2 Documents" and it'll reset it to how I left it for you.