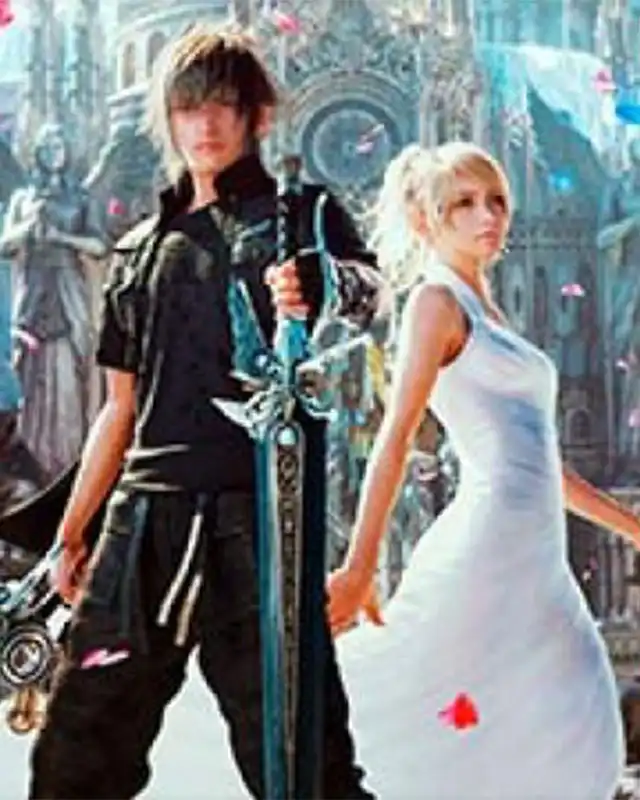
The most comprehensive and complete guide to successfully modding Final Fantasy XV to achieve the REAL "Royal Experience" - The most enjoyable and upgraded experience for Final Fantasy XV
Permissions and credits
Author's instructions
THIS MOD IS FREELY DISTRIBUTED, AND I GIVE PERMISSION TO ANYONE TO DO ANYTHING WITH IT :)
File credits
This author has not credited anyone else in this file
Donation Points system
Please log in to find out whether this mod is receiving Donation Points
Changelogs
Version 2025/02/15
[FILE \\ ARCHIVED] --- Moved file: "Special K (Dec 23 2023)" to the "ARCHIVED" file category. This mod causes crashing for users when attempting to camp.
[MOD INSTRUCTIONS \\ UPDATED] --- "RESHADE | SPECIAL K" --- Updated instructions to use the latest Special K archive due to users reporting game crashing with older SK versions while attempting to camp.
Version 2024/09/28
[FILE \\ ADDED] --- Uploaded file: "Special K (Dec 23 2023)" to the "MAIN" file category.
[GUIDE \\ UPDATED] --- Updated the guide to utilize a LOCAL installation of Special K rather than Global due to newer ReShade versions not working with SK Global installations. Revised various sections and mod instructions to that end.
[GUIDE \\ UPDATED] --- REMOVED SUPPORT FOR INSTALLING SPECIAL K GLOBALLY. I did however, leave Global-specific instructions intact for those who still wish to use Special K globally.
[FILE \\ REMOVED] --- Removed "Base Admin Files". Packaging these files for use with this mod guide is now obsolete; replaced with actual user instructions in their appropriate sections.
Version 2020/11/22
[MOD INSTRUCTIONS \\ UPDATED] --- Significantly revised the instructions for the mod: "ECO - Empire Character Overhaul"
[MOD INSTRUCTIONS \\ UPDATED] --- Significantly revised the instructions for the mod: "Noctis - Brown Hair Re-texture (Young and Old)".
Version 2020/10/05
[MOD \\ REMOVED] --- Removed "Drenched and Wild - Ignis Default Head Replacements" from the [VISUAL ENHANCEMENTS] section due to it accidentally replacing a higher priority mod (Detailed Complexions).
[MOD INSTRUCTIONS \\ UPDATED] --- Revised the instructions for the mod: "OUTFIT RETEXTURES" to reflect a change of which files to download..
Version 2020/09/11
[GUIDE \\ UPDATED] --- Made various visual changes throughout the guide in order to improve readability.
Version 2020/09/10
[FILE \\ ADDED] --- Uploaded file: "More Responsive NVIDIA Turf Effects Grass and Longer Lasting Trails" to the "UPDATES" file category.
[MOD INSTRUCTIONS \\ UPDATED] --- Updated mod instructions for: "More Responsive NVIDIA Turf Effects Grass + Longer Lasting Trails" to redirect to this guide's files tab for the mod since old links have become non-functional, in [FIXES & QUALITY OF LIFE IMPROVEMENTS] section.
[MOD \\ ADDED] --- "Bug Fix - Shadows (Galdin)" by Nsept0403, in the [Fixes & Quality of Life (QOL) Improvements] section.
[MOD \\ ADDED] --- "Bug Fix - Textures (Altissia)" by Nsept0403, in the [Fixes & Quality of Life (QOL) Improvements] section.
[MOD \\ ADDED] --- "Cherry Blossoms In Full Bloom" by Nsept0403, in the [Visual Enhancements] section.
Version 2020/08/11
Initial Release of Guide.
[FILE \\ ADDED] --- Added "Base Admin Files" to the "MAIN FILES".
[MOD \\ ADDED] --- Added "Final Fantasy XV - REVISED" to the [POST-PROCESSING] section.
DISCLAIMER: The mods included here are not ALL the mods that can and/or should be included in your own personal pursuit of a "Royal Experience". This mod list and guide represent only the ones I have included in my own modded play-through. I implore you to explore all of the available MODS for Final Fantasy XV because there are other beautiful works of creation (that others poured vast amounts of time into creating) that might have been created after the latest update of this list and/or not yet added due to real-life time constraints. Feel free to use this guide as a BASE in which to build your own modded experience upon.
I N T R O D U C T I O N :
Hello and welcome to your personal guide on how to make your Final Fantasy XV experience — the COMPLETE one you deserve. Unfortunately, (before patch 1.30) Square Enix as usual did a shitty job when they made the STEAM (PC) version of the game. They didn't botch the port as bad as their other games this time, so our work here is more of a light-duty UN-fuck than it is a complete overhaul and major repair job.
Just follow this Guide and you'll be experiencing this beautiful game exactly as we all should have experienced it if Square Enix just did their fucking jobs correctly (something they just can't get their heads out of their asses enough to do). Thanks to various members of the PC community AND our modding community, we all can actually feel OK about having bought this game on PC.
H E L P F U L S U G G E S T I O N S :
Spoiler:
Show
1 — Please for the love of all that is good in this world - follow my exact instructions and do NOT just SKIM sections (unless you like the bad life) - you will have a B R O K E N and/or INCOMPLETE™ Experience. 2 — Green Mods. These are mods you SHOULD install in order to achieve the Definitive™ Experience. 3 — Yellow Mods. (Optional) but heavily recommended. These are mods you OPTIONALLY install in order to achieve your own vision of what you'd like your experience to be. 4 — R-E-A-D the Official Mods' Descriptions to know what a specific mod does and how it functions in the game. Without these modders and their voluntary works you'd have been better off buying this game on console. So I ask that you please endorse their work if you like what they made so that they can feed their children and remain off the streets.... kthx 5 — BACKUP / MAKE A FULL COPY of your original (vanilla) game folder in case you mess something up and want to return to a fresh install quickly.
Spoiler:
Show
I've messed up my game installations quite a few times while trying different combinations and orders of installation (of mods). Thankfully, I had a full copy of the original game installation backed up on another drive. I will not bat an eye if you don't adhere to this and you "accidentally" rendered your game inoperable. If you mess up, just start over again --- this guide does not take very long to complete.
6 — Always follow my EXACT instructions. Then once you have the game right where you want it (AKA achieved the ROYAL Experience), repeat step 5 and BACKUP / MAKE A FULL COPY of the *MODDED* game folder so you won't have to do this all over again :)
F A Qs / Frequently Asked Questions :
Spoiler:
Show
1 — "CurrentPresetPath", "EffectSearchPath", and "TextureSearchPaths" in the ReShade.ini file, what should they be changed to?
Spoiler:
Show
— "CurrentPresetPath" (Leave this blank if you don't have any presets) = Wherever Your Final Fantasy XV install is: \FINAL FANTASY XV\NAME OF YOUR RESHADE PRESET.ini — "EffectSearchPath" = %USERPROFILE%\My Mods\SpecialK\PlugIns\ThirdParty\ReShade\Shaders — "TextureSearchPaths" = %USERPROFILE%\My Mods\SpecialK\PlugIns\ThirdParty\ReShade\Textures
2 — What settings should I choose in-game?
Spoiler:
Show
— Set FILTERING to "LOW".
— Start by setting all the options you want (GRAPHICS) that your computer can handle / that you want.
— Turn the NVIDIA-VXAO & NVIDIA ShadowLibs settings to "OFF" if you're unable to achieve a decent fps with your desired settings. Then start lowering Shadows if you still don't get decent performance.
— Every other setting is up to you.
3 — Do I need a High-End PC for this guide?
Spoiler:
Show
— If you'd like to follow the entire guide and achieve the ROYAL™ Experience, YES. — If you only want a playable game with quality of life improvements, NO.
You will need the following items in order to proceed with this guide:
A decent computer that can run this game.
Attention to Detail. — Please start the game oncebefore beginning this guide. — It is critical to go through the process very carefully because for one reason or another unless you do everything I say step by step, you'll likely encounter issues with the game NOT looking or feeling the way you want it to — so please pay attention to detail.
This mod will allow you to get into most of the places that you wouldn't normally be able to get into on a chocobo (Dungeon, base, Lestallum, etc.) However, in those places you cannot call a chocobo with a chocobo whistle. (Possible in Nebulawood). Also, when traveling by chocobo at these places, Ignis, Gladio, and Prompto may not follow HOWEVER, they will appear when they encounter an enemy and enter into battle.
Download the Main File "Enter_with_Chocobo".
[WINDOWS] "Right-click" on the file that finished downloading, click "properties", click "unblock" (If you see it, lower-right hand corner).
There are 3 folders inside. Go into each folder and Extract the "datas" folder from each one into your Final Fantasy XV game directory --- Steam\steamapps\common\FINAL FANTASY XV.
Removes invisible walls and some props collisions so you can explore the World of Eos in its entirety.
DELETE THESE FILES: — "autoexternal.earc" (in FINAL FANTASY XV\datas\environment\world\curve\collisions folder) — "wm_c_navi.earc" (in FINAL FANTASY XV\datas\environment\world\ebex\share folder) — "du_c_invisible.earc" (in FINAL FANTASY XV\datas\environment\world\ebex\duscae folder)
Download the Main File "altissia_cartanica no collision".
Navigate into the "edits" folder and Extract "al_al_b_base.earc" to the datas\environment\altissia\ebex\props folder.
Replace All.
Extract "p_wt_pr_stcartanica1.earc" to the FINAL FANTASY XV\datas\environment\world_train\prefab folder.
This utility allows you to narrow that nasty terrain blending (dithering) effect in FINAL FANTASY XV. Read more about it here.
This program requires .NET Framework 4.6.2. You likely already have it installed, but download and install it if you're having trouble running the program.
[WINDOWS] "Right-click" on the file that finished downloading, click "properties", click "unblock" (If you see it, lower-right hand corner).
Now open the File: "ffxvDitherPatch-1.0.zip" and EXTRACT ALL FILES from there into your Final Fantasy XV game directory --- Steam\steamapps\common\FINAL FANTASY XV.
Make sure your game is closed before continuing.
Run "ffxvDitherPatch.exe", wait for it to fully load, select one of the options, click Process.
Wait for the process to finish ("Status: Done").
Small edit to the responsiveness and longevity of flattened grass. Requires NVIDIA Turf Effects to be enabled.
Download the file HERE (NOW AVAILABLE UNDER "MAIN FILES" IN THE FILES TAB OF THIS MOD PAGE)
Now open the File: "null_TurfEffects_0.1.4.zip" navigate to: standard\FINAL FANTASY XV (or choose another version based on your preferences).
EXTRACT Folder: "TurfEffects from there and paste it into your Final Fantasy XV game directory --- Steam\steamapps\common\FINAL FANTASY XV.
Done.
READ ME:
Choose one of the flavours, copy FFXV folder over to yours. Enjoy. ===================================================== standard------------------best.version.tweaks.everything.carefully vanilla-------default.grass.stays.flattened.longer.flattens.faster taller-------------------------does.what.it.says.says.what.it.does flatten_forever-------grass.stays.flattened.forever.or.ten.minutes taller_forever-------------------------combination.of.previous.two ——————————————————————————————————————— If you FUCK UP, I got your back: Overwrite folder with ZEE BACKUP! ——————————————————————————————————————— version_0.1----------------------------------------initial.release version_0.1.1-----------------------------------------added.taller version_0.1.2-------------added.flatten_forever.and.taller_forever version_0.1.2b-------------------------------------added.ZEEBACKUP version_0.1.3-----------renamed.standard.to.vanilla.added.standard version_0.1.3b----------------------added.high.quality.screenshots version_0.1.4-------------standard.version.updated.more.responsive ====================================================== Standard is the one I use. It's the most up to date preset—always. ——————————————————————————————————————— By null_subject. All rights reserved for myself and my dope peeps.
— ReSHADE | SPECIAL K
Spoiler:
Show
COLORBLIND USERS: (G R E E N) colored-mod
This is the mod that allowed us to say the game on PC was not shitty anymore. Hands down a MUST install STILL, especially if you want to upgrade the game's textures and models, etc. Read more about it here.
For this guide, a LOCAL installation of Special K is the community-preferred method due to the ability to use ReShade alongside it with no problems. You can either install SPECIAL K locally (runs within the game's installation directory) as is written in the guide -OR- install SPECIAL K globally using it's installer (however you are on your own with this method since the guide is not designed around it). Pay close attention though, the method you choose to install SPECIAL K depends on whether or not you will be utilizing RESHADE for post-processing effects. — IF YOU WILL NOT BE USING RESHADE:
Download the latest public-release Special K "archive": HERE.
The absolutelatest version can always be found in the #nightly-builds channel (at the bottom --- download: "SpecialK64.dll") within the Special K Discord Server.
(WINDOWS) Right-click on the downloaded zip file, click properties, then click "unblock" in lower-right hand corner(if it exists).
Double-click on the file to open it.
Select: "SpecialK64.dll" and drag it / extract it into your Final Fantasy XV game directory --- Steam\steamapps\common\FINAL FANTASY XV.
Rename: "SpecialK64.dll" to: "dxgi.dll" AND:
Spoiler:
Show
(IMPORTANT!) After installing Special K, the game will crash on first launch (regardless if ReShade is installed or not). This is OK. After naming to "dxgi.dll" --- you must run it and let it crash. After the initial crash, a file called: "dxgi.ini" will be generated (same place where the .dll file is).
Edit dxgi.ini and change these lines: [Render.DXGI] UseFlipDiscard=false
[Textures.D3D11] Cache=false
Done.
— IF YOU WILL BE USING RESHADE:
Spoiler:
Show
INSTALLING SPECIAL K (WITH RESHADE) / LOCALLY:
Download the latest version of "ReShade" from reshade.me and run it.
Select Final Fantasy XV's .exe file, inside your Final Fantasy XV game directory --- Steam\steamapps\common\FINAL FANTASY XV..and click on "Direct 3D 10/11/12".
Follow the rest of the instructions in the installer to install ReShade for Final Fantasy XV.
(OPTIONAL) You can skip the installation of effect packages if you’re planning to use a premade preset from e.g. Nexusmods.
Launch the game. This will automatically create a "reshade.ini" file in your Final Fantasy XV game directory --- Steam\steamapps\common\FINAL FANTASY XV.
Get to the main menu (of the game) and then Fully Exit / Close the game .
Open the Final Fantasy XV game directory --- Steam\steamapps\common\FINAL FANTASY XV.
Rename "dxgi.dll" to "ReShade64.dll".
Now Install the required prerequisites for Special K: — Visual C++ 2015-2019 Redistributables (both 32-bit - AND - 64-bit) — DirectX End-User Runtime
Download the latest public-release Special K "archive": HERE.
The absolutelatest version can always be found in the #nightly-builds channel (at the bottom --- download: "SpecialK64.dll") within the Special K Discord Server.
(WINDOWS) Right-click on the downloaded zip file, click properties, then click "unblock" in lower-right hand corner(if it exists).
Double-click on the file to open it.
Select: "SpecialK64.dll" and drag it / extract it into your Final Fantasy XV game directory --- Steam\steamapps\common\FINAL FANTASY XV.
Rename: "SpecialK64.dll" to: "dxgi.dll".
Launch the game. It might hang on the first launch, NO WORRIES --- close it again.
Spoiler:
Show
(IMPORTANT!) After installing Special K, the game will crash on first launch (regardless if ReShade is installed or not). This is OK. After naming to "dxgi.dll" --- you must run it and let it crash. After the initial crash, a file called: "dxgi.ini" will be generated (same place where the .dll file is).
In the "dxgi.ini" file newly-created inside your Final Fantasy XV game directory --- Steam\steamapps\common\FINAL FANTASY XV. --- Find this section and edit the following (or add it if it does not exist): [Import.ReShade64] Architecture=x64 Filename=ReShade64.dll Role=ThirdParty When=Lazy --- and change these lines: [Render.DXGI] UseFlipDiscard=false
[Textures.D3D11] Cache=false
Done.
— Configuring SPECIAL K
Spoiler:
Show
COLORBLIND USERS: (G R E E N) colored-mod
ATTENTION: ORIGIN USERS ---- You do NOT need to Configure the Special K mod. Configuration is only needed for STEAM USERS because that version of the game is botched by SQUARE ENIX. For ORIGIN users, you can use RESHADE with the game (when you reach that section, ignore the warning). Skip to the next mod.
Inside the "dates" folder of the archive, Extract the "environment" folder --- placing it inside of your "datas" folder of your Final Fantasy XV game directory --- Steam\steamapps\common\FINAL FANTASY XV.
All new face and eye textures for Noctis, Gladiolus, Prompto, Ignis, and Cindy. The faces were completely redone from scratch in 4k, with a particular attention to skin and brow details.
Download ALL (4) Main Files.
Extract just the "datas" folder from each of the (4) files you just downloaded into your Final Fantasy XV game directory --- Steam\steamapps\common\FINAL FANTASY XV.
ECO, for now, is a re-texture mod of characters outfits inspired by older Final Fantasy games or completely own creations. This mod aims to recreate some character outfits to make them look, well, just different. I wanted to give those clothes a new design, a new feeling. Every re-texture of this mod will fit a theme. This might be an actual trend in fashion or with older Final Fantasy characters in mind.
Download the Main Files "ECO - Cindey Set 1" -AND- (CHOOSE 1): "ECO - Noctis Set 1" -OR- "ECO - Noctis Set 2". * IF YOU ARE GOING TO INSTALL THE BROWN HAIR MOD * :
Do nothing yet.
Proceed to the next MOD and then READ the instructions of the brown hair mod ONCE YOU GET THERE.
* IF YOU ARE NOT GOING TO USE THE BROWN HAIR MOD *
Extract just the "datas" folder from each of the (2) files you just downloaded into your Final Fantasy XV game directory --- Steam\steamapps\common\FINAL FANTASY XV.
A Retexture/Recolor model for Luna's models, which make them looks like Lucis-style.
Download the Main File: "Embrace by Night V1.0".
Extract the "datas" folder from the file you just downloaded into your Final Fantasy XV game directory --- Steam\steamapps\common\FINAL FANTASY XV.
A re-texture for Noctis Giving him light Brown Hair! Works for both Young and Old Noctis.
* IF YOU CHOSE: "ECO - Noctis Set 1" *
Do NOT use "Noctis Set 1". Instead we will make a custom version of it (that works with this brown hair mod): Download these files (from ECO - Empire Character Overhaul) : — "ECO - Noctis Set 2". — "Eco - Noctis navy-blue coat". — "ECO - blue shining eyes".
Open the .7z files of each of the downloads from the "ECO - Empire Character Overhaul" mod. — Choose either the 4K -OR- the 2K.
Extract the "datas" folder of your chosen quality into your Final Fantasy XV game directory --- Steam\steamapps\common\FINAL FANTASY XV.
Replace All.
Now Download the main file of this mod: "Nocits Brown Hair (Young and Old)".
Extract the "datas" folder from it into your Final Fantasy XV game directory --- Steam\steamapps\common\FINAL FANTASY XV.
Replace All.
Done. READ --- If you want Noctis's hair to be BROWN both when he is young and when he is old (what I do): — Extract the whole "datas" folder of this mod --- placing it into your Final Fantasy XV game directory --- Steam\steamapps\common\FINAL FANTASY XV. — Replace All. — Done.
* IF YOU CHOSE: "ECO - Noctis Set 2" *
Download the main file: "Nocits Brown Hair (Young and Old)".
READ CAREFULLY: — Extract the "datas" folder of "ECO - Noctis Set 2" into your Final Fantasy XV game directory --- Steam\steamapps\common\FINAL FANTASY XV.
Now Extract ONLY the "model_100" folder of "Noctis - Brown Hair Re-texture" mod --- placing it inside datas\character\nh\nh00.
Replace All.
Done. READ --- If you want Noctis's hair to be BROWN both when he is young and when he is old (what I do): — Extract the whole "datas" folder of this mod --- placing it into your Final Fantasy XV game directory --- Steam\steamapps\common\FINAL FANTASY XV. — Replace All. — Done.
Retextures for Gladio's casual outfit, Ignis' casual outfit, and Prompto's casual outfit.
Download all Main Files EXCEPT Noctis' outfit. That one is bugged.
Open all (3) of the files you downloaded --- for each File: (CHOOSE 1): "High Res Version" -OR- "Standard Res Version".
Extract the "datas" folder from your chosen version FROM ALL (3) files you just downloaded into your Final Fantasy XV game directory --- Steam\steamapps\common\FINAL FANTASY XV.
Texture mod for Iris that gives her the Shield's tattoo! Now she can match her big bro.
Download the main file "Tattoo for Iris".
Extract the "datas" folder (NOT the one inside "ORIGINAL FILES") --- placing it into your Final Fantasy XV game directory --- Steam\steamapps\common\FINAL FANTASY XV.
A photo-realism pass for Final Fantasy XV, bringing highly detailed photo-realism with immersive tones and heightened enjoyment!
Download Main File: "Aeonic ReShade - Final Fantasy XV"
Extract "Aeonic ReShade - Final Fantasy XV.ini" --- placing the file into your Final Fantasy XV game directory --- Steam\steamapps\common\FINAL FANTASY XV.
See SCREENSHOT in the gallery for how to activate the preset.
PCGamingWiki for their FFXV page HERE about installing the [FFXV Dither Patch] and the [Turf Grass] Mod.
Kaldaien for their discussion topic HERE regarding [Special K] FFXV Performance Fixes and just in general for being such a helpful person contributing their skills to help fix many games over the years.


 Disable Steam Enhancements. (Press CTRL+SHIFT+BACKSPACE to access the Special K Menu)")
.")