About this mod
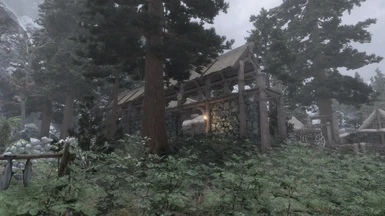
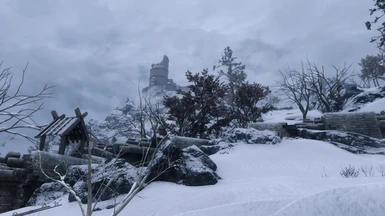
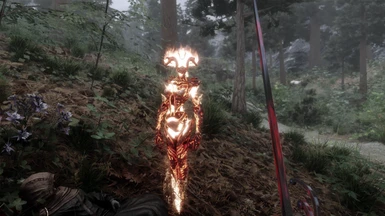
A guide which in 2024 is based of 13 years modding, and finding the collection of mods to get the most realistic feel and graphics. What is unique is that is not only a written tutorial, but also supported by video tutorial explanations. And whats even better... we now come with a Wabbajack!
- Permissions and credits
- Mirrors
- Changelogs
- Donations
Skyrim AE/SE 2024 Ultimate Graphics Overhaul Guide! - The 10 Year Modlist Anniversary is out now!!!
Links:
Next Generation Visual Overhaul - A Visual Baseline Modlist (NGVO)
System mods:
1: Penderix weather changer
2: Cheat engine
3: Auto input switch
4: Combat Gameplay Overhaul
Grass and trees mods:
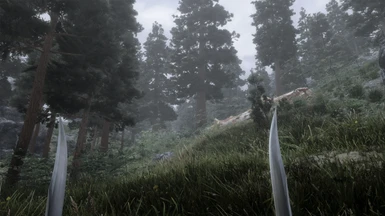
1: FolkVangr
2: Origins of forest
3: Folkvangr and Origins Of forest grass patch
Weapon mods:
1: Vanilla weapon replacer and patch
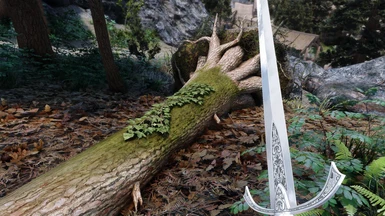
2: Silverthorn weapons
NPC mods:
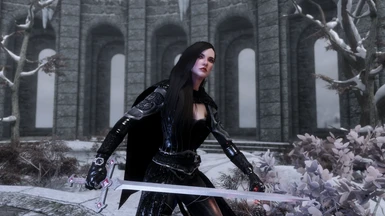
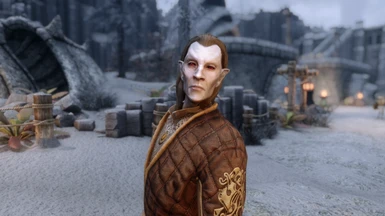
1: Bijin Redux+ Patch
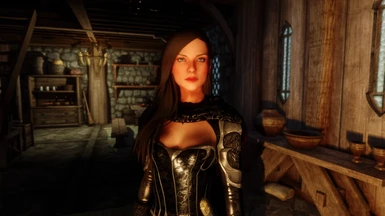
2: Seranaholic
3: Serana Dialogue Overhaul
****** 02/July/2024 - All of the below is legacy material and outdated. Don't use it anymore! *******
-------------------------------------------------------------------------------------
The 12 Years Of Skyrim 2023 Ultimate Graphics ModList 2.3 - For Skyrim SE/AE! (1.6.X.X)
V 2.3 = April 2023 release!
A Brand New Re-Release With Wabbajack Auto Installer Which Drastically Reduce Install Efforts!
-------------------------------------------------------------------------------------
V2.3 2023 End Result Videos:
Video's from other users:
About this modlist and the Wabbajack autoinstaller:
This is a 2023 modlist which is based on 12 years of mostly graphics modding, and finding the collection of mods to get the most realistic feel and graphics. What is unique is that I always created not only a written tutorial version, but also supported everything by video tutorial explanations. This time however for the first time in all these years after so many requests, I can say we finally have a Wabbajack auto installer and the guide is mostly focused on it ! :)
Wabbajack auto-installer? What is that?
Wabbajack is a tool that lets you install automated pre generated big mod lists.
Normally before Wabbajack the manual installs always took a huge amount of time since people had to download every individual mod, and I had to explain how to do the full guide install mod by mod.
This Wabbajack list is an auto installer for more or less 98% of the entire modlist we are going to use, so this means the install/modding effort has been drastically reduced compared with the previous tutorials! After the Wabbajack only a few manual steps have to be done which can be done in 5-10 mins.
But can I still add/remove/edit mods afterwards like I could before?
Yes! I would like to point out that Wabbajack is not just a dumb tool which can only download a 1:1 mod package, Wabbajack does literally everything including downloading Mod Organiser 2 and installing everything for you! So my Wabbajack modlist will download Mod Organiser 2 Portable, and will literally install all the mods from this list so you don't have to anymore!
This means that after the Wabbajack auto-installer is complete, feel free to install any mod on top, or change anything you want like you would normally do in Mod Organiser 2!
Will there be a manual tutorial for MO2 users?
There is no need for a manual tutorial anymore since Wabbajack will also setup Mod Organizer 2 and all the required (ini) settings.
Minimum requirements:
CPU: Recent(ish) i5/i7 with decent clockspeed
RAM: 16GB
GPU: RTX 2080 (RTX 3060 or higher recommended!!!!) Or something similar from AMD. Note that in general (older) AMD hardware has a harder time running ENB's and other mods than Intel/Nvidia does. Modern AMD hardware should be more than fine.
HDD/SSD: +-180GB (SSD recommended)
A Nexusmods account.Nexus Premium is not necessary, but definitely recommended a lot since you don't need to confirm everything 1 by 1, and have unlimited download speed. Also you can get premium for just a month only if you want to use it just for this Wabbajack/tutorial.
So yes, you do read this correctly! for guaranteed 60+ FPS with all these mods/ENB/ and 4k textures at least a RTX 3060 is Recommended! And this is for 1080p/1440p. For 4k I would even recommended a RTX 3070 or better! I want to point this out on forehand to prevent disappointing framedrops on older hardware. Indoor locations are usually smooth as butter, but outdoor areas with a lot of vegetation like Riften and Falkreath are very performance heavy with this mod list.
If you liked my tutorial, and if you would recommend it to other people please don't forget to endorse it! Thank you! :)

Liked the guide? then leave a comment here or on Discord! Would be greatly appreciated!
And if you really liked, it you can donate with the button below. :) Thanks big time if you do!

Current version: 2.3 (see change log for all the changes)

V2.3 April 2023 TLDR fast instructions
1: Install a new fresh unmodded version of Skyrim SE/AE (1.6.x.x) (This list will work for both AE/SE.) Start the game at least once, and in the Skyrim launcher set all settings to max.
2: Download the Wabbajack program here. (Preferably install everything from this tutorial on the same HDD/SSD as your Skyirm SE/AE is located on. However NOT the same folder!)
3: Download the 2023 - The 12 Years Of Skyrim Ultimate Graphics ModList Wabbajack 2.3 file in my files section on this mod page, and extract the .rar file. From this folder run the .wabbajack file to start installing the pack. Create a folder somewhere, and select this folder to have everything installed. (again Preferably install everything on the same HDD/SSD.)
4: Set your current version to Skyrim AE/SE 1.6.353.0 using the Unofficial Skyrim Special Edition Downgrade Patcher tool. (else we will have file conflicts) You can find your current Skyrim AE/Se version by right clicking your SkyrimSE.exe , select properties, and then check the details tab. So in example, if you have Skyrim SE/AE 1.6.640.0 you want the have the file: BestOfBoth_1.6.640.0-1.6.353.0.exe
5: Go the SKSE page here, and download SKSE: skse64_2_01_05 Install the contents in your main Skyrim AE/SE folder
6: Download the latest Skryim AE/Se ENB binaries here, open the folder, open the folder wrapper version, and extract the files d3d11.dll and d3dcompiler_46e.dll to your main game folder.
7: From this mod page download and extract the file The Perfect PredCaliber Approved ENB Cocktail from my files section in your Skyrim AE/SE main game folder.
8: Download from this mod SSE Engine Fixes the file (Part 2) Engine Fixes - skse64 Preloader and TBB Lib here. After that copy and paste the files from this mod to the Skyrim AE main game folder.
9: Skyrim 2021 Patch - Download the mod, add and activate it in MO2 and drag it in between the mods: Rally's Riekling Outposts and JS Lockpicking UI SE. Like this: File Mirror - (valid till 15/April/2023)

Go to MO2, go to the plugins tab, and click 'sort'. Press yes and let MO2 do its work. (see below) I know the plugins sorting isn't perfect in MO2, but it suits for now.

In the plugins section then drag and drop the Folkvangr and Origins Of Forest .esp plugins almost at the end of the load order, just above Alternate Start- live another life.

10: Reboot your PC. Then start the Mod Organizer 2 tool again from this installed Wabbajack Skyrim SE/AE folder. From there run the Skyrim Launcher again just to set your video settings to max again. Then close the Skyrim Launcher menu. (don't start the game with it)
11: Check that you have the SKSE Launcher option in your Mod Organizer 2 menu now, and create a shortcut to your desktop from now on and rename it to Skyrim AE. From now on ONLY start the game with this file! Never start it again with the regular Skyrim SE/AE from Steam!

12: Good practice now is to make sure to disable Steam overlay, and make sure you put the Skyrim AE auto-update on hold. The reason for this is that SKSE and some other mods will stop working, and need to be updated again, and that can take days. Yikes! So, make sure to disable updates in Steam. Do that by going to Steam, right click Skyrim:Special Edition , select properties, updates, and select only update this game when I launch it. We will launch game only with SKSE from MO2, Steam does not see that as a 'game launch' since Skyrim.exe or Skyrim laucher.exe are not being launched. While this should work fine, please also check out this extra method to make sure your game can not be updated anymore.
Setting ''only update this game when I launch it'' in Steam:

That's it! have fun!
F.A.Q (updated for 2.3 - The April 2023 update)
Q: Will this work with Skyrim LE? (Oldrim) If not, are you going to make an Oldrim version?
A: No and no. I don't find the Oldrim 32 bit environment stable enough anymore to support big modlists like these.
Q: Will this work only with Skyrim Anniversary Edition (AE) ? or also with the regular Skyrim Special Edition?
A: Short answer: Yes, it works on both versions.
Long answer: Yes, Note that Skyrim Special Edition upgraded to 1.6.x.x. is considered as Anniversary Edition already. The *real* purchased Anniversary Edition only contains extra Creation Club content and some minor other things. A full overview of the extra content that is included in the Anniversary Edition can be found here. But this has no effect on our modlist, and so it works for both AE and SE.
Q: Will this work with Skyrim VR?A: I have a dedicated modlist for Skyrim VR here. Most graphic mods work directly for Skyrim VR, but it has a different SKSE and other plugin system. Thats why you cant simply use it 1:1 to Skyrim VR
Q: What exactly changed from 2.2 --> 2.3?
A: Not much except for my instructions and making the decision to set the requirements to Game version 1.6.353.0 , and SKSE version to skse64_2_01_05. Also cleaned and improved instructions and this mod page itself to make things a bit more easier to understand.Q: Can I run other (gameplay) mods with this mod list? A: Yes, install on top of this graphics modlist in MO2, and make sure they are compatible with 1.6.353.0. (or just install and find it out for yourself ;) )
Q: My Wabbajack install keeps failing.
A: It for sure is possible and even normal sometimes that the Wabbajack install fails a couple of times which can be a bit frustrating. This can happen for example because a certain mod link times out or is temporarily not available to connect. But don't worry, everything is cached so you don't have to start all over again with indexing/compiling if Wabbajack fails. Usually the issue is fixed by just restarting Wabbajack, and run the installer again. If you are still experiencing errors when installing, click the logout button for NexusMods in the settings menu, wait 5 seconds, and log back in. The last thing you can try is a PC reboot and then try the above steps again.
Q: How are LOD's being handled? Are we not using DyndoLOD or SSELODGEN?
A: All the LODS are downloaded and generated already during the Wabbjack So running SSELodgen or DynDOLOD is not needed per se.
Q: Can I run this with CPU xx and GPU xx?
A: Check the system requirements section at the start of this page.
Q: I don't like the realistic camera shaking and the adjusted combat.
A: In Mo2, just uncheck the mod: Combat Gameplay Overhaul SE at the end of the installed mod order

For Legacy and reference, the old 1.2 manual 10 years of Skyrim modlist is also still available below the line here, adjusted to the Skyrim: AE framework where needed.
------------------------------------------------------------------------------------------------------------------------------------------------------------------------------------------

2021. A very special year for Skyrim (SE) modding, since Skyrim was released in 2011!
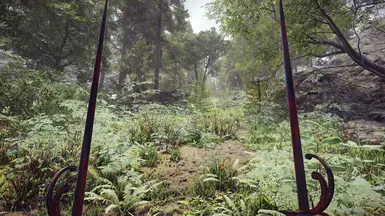
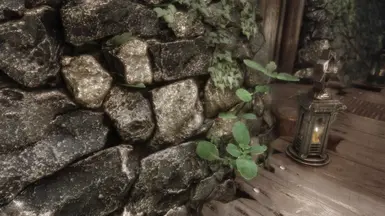
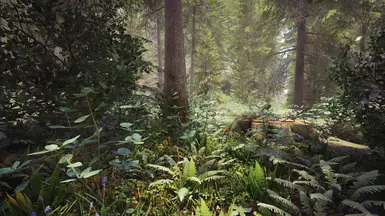
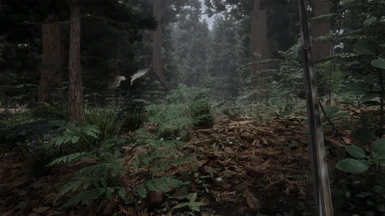
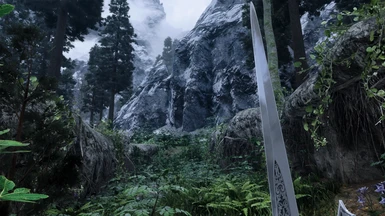
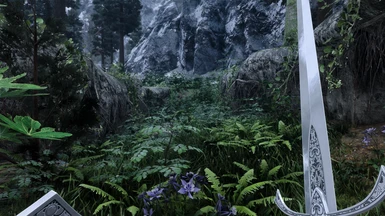
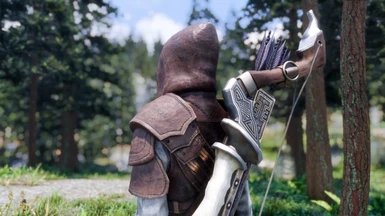
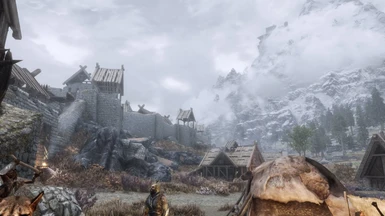
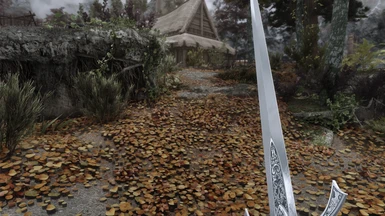
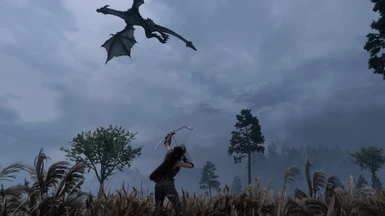
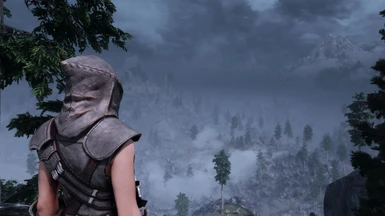
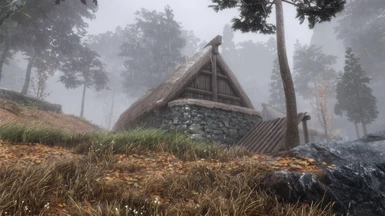
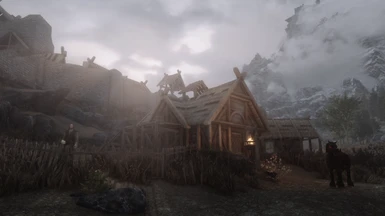
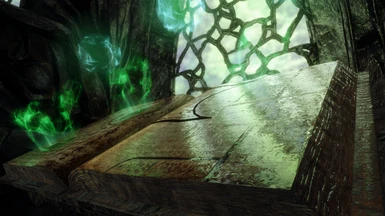
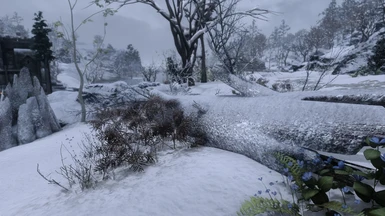
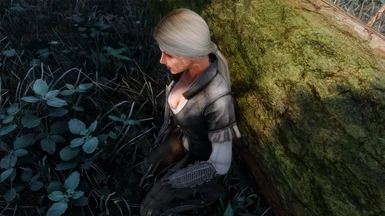
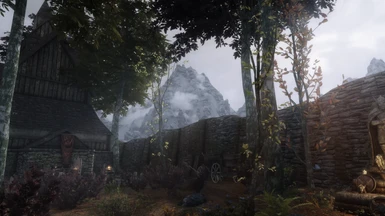
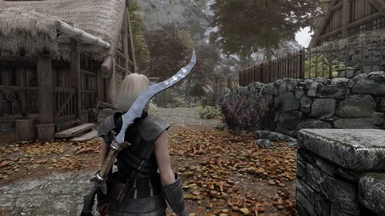
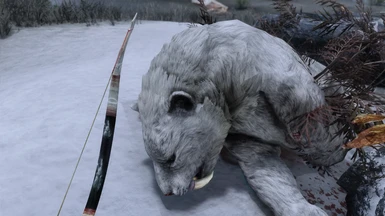
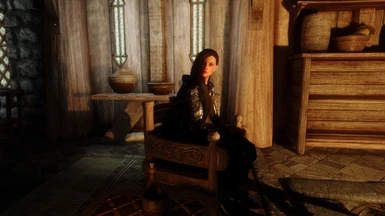
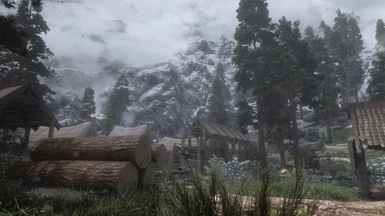
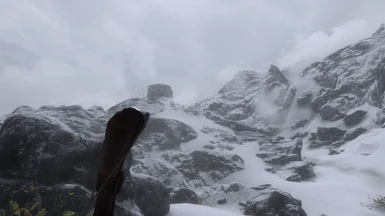
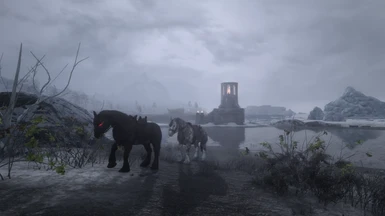
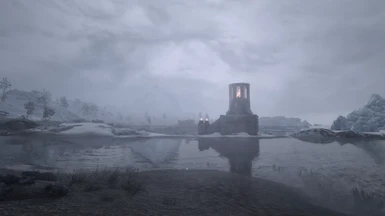
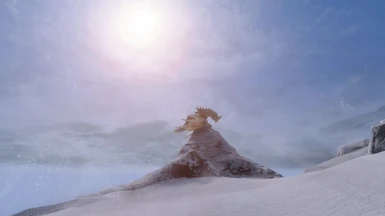
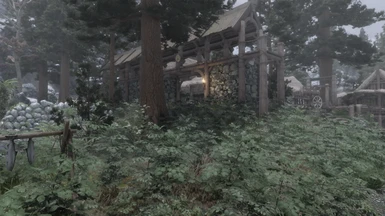
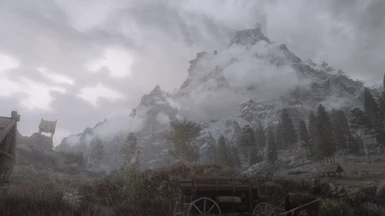
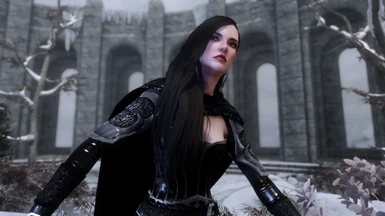
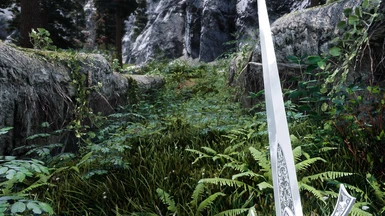
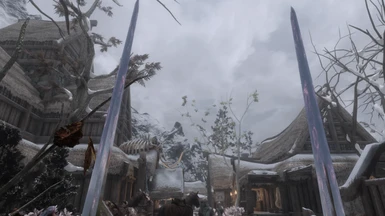
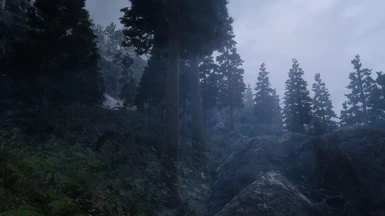
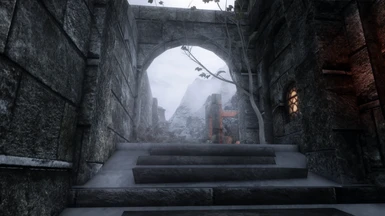
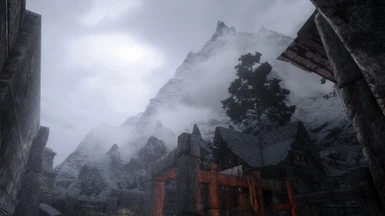
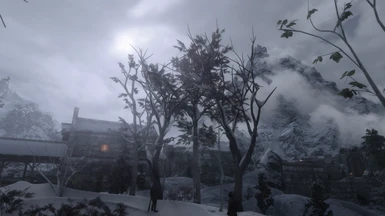
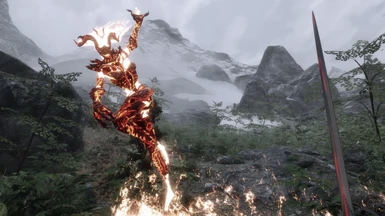
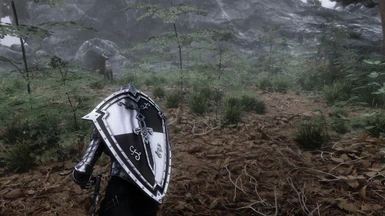
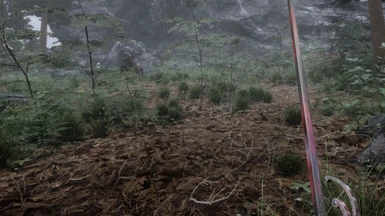
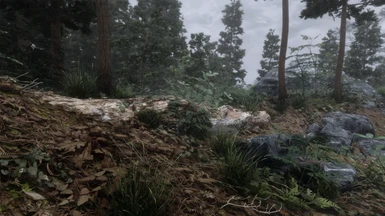
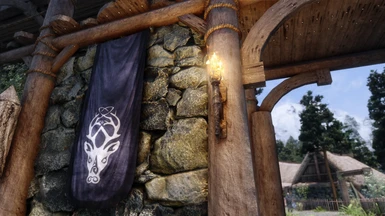
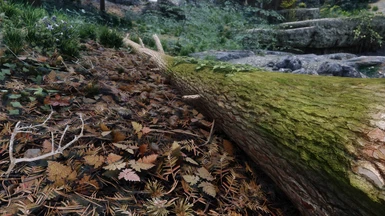
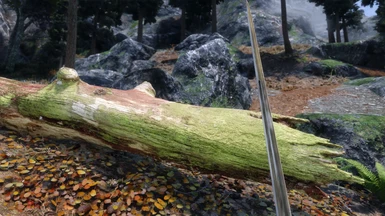
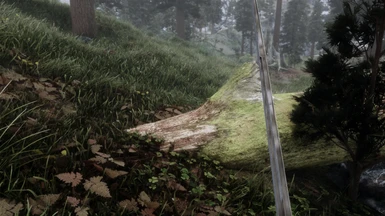
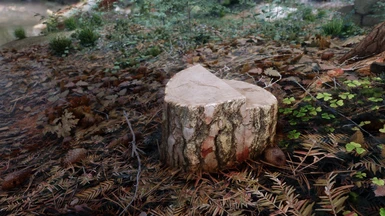
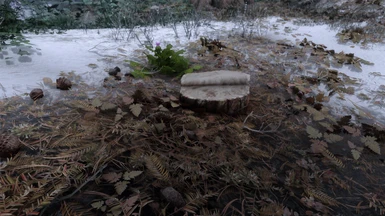
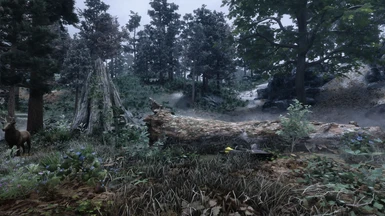
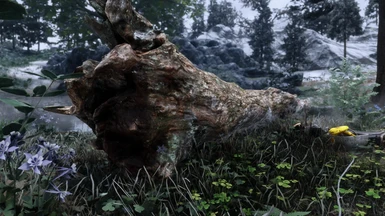
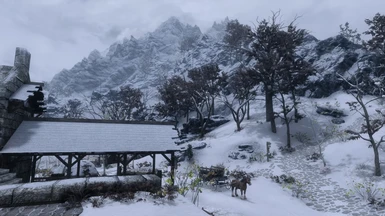
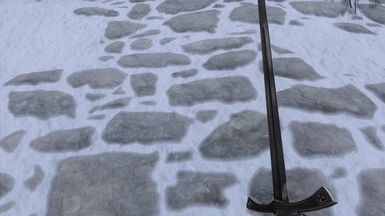
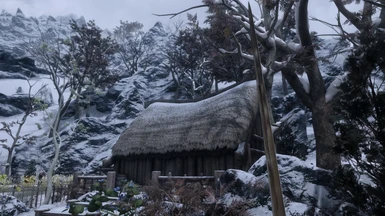
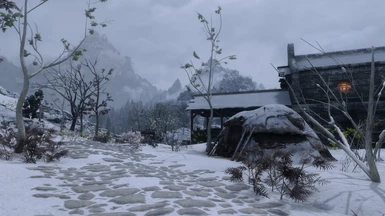
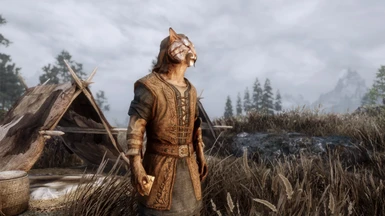
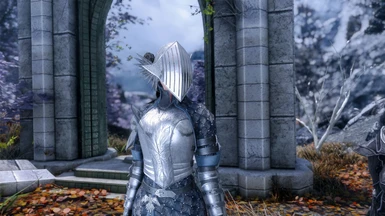
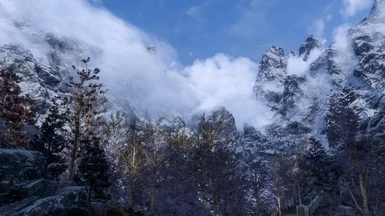
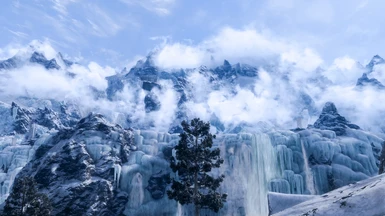
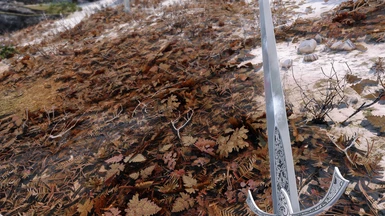
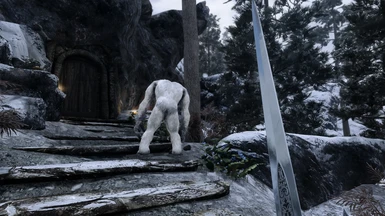
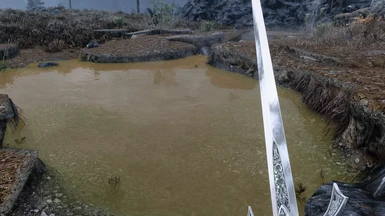
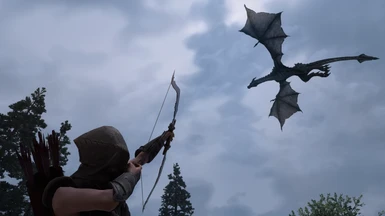
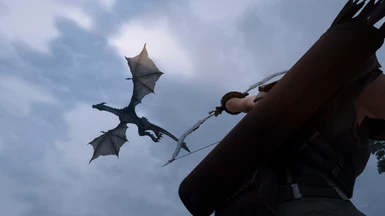
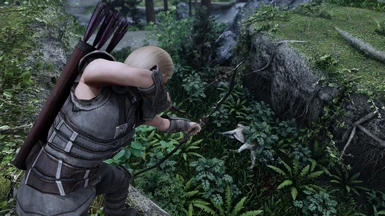
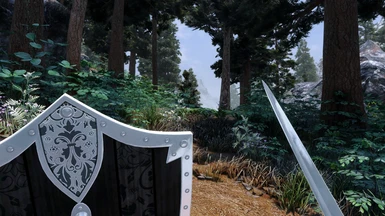
This means we now have the 10 year anniversary edition of Skyrim! For this, I wanted to do something special regarding this modding tutorial. For this guide, I am trying to get the best visuals from all the current mods/ENB's created so far, but also trying to stick to the original Skyrim graphics in terms of feel and realism. Check out the screenshots and videos on this page to get a bit of an idea what you can expect.
No Wabbjack or other autoinstaller?
** Updated 26/May/2022 - There is now :) See the new 2.x modlist above.**

But but, I am new to modding!
Well its your lucky day! Skyrim (SE) is the most stable and most easy mod-able game out there! (Hey, that's at least what I think ;) ) And also more luck! This tutorial has been covered by video tutorials where you can simply follow all the steps 1:1! We are using Mod Organizer during this tutorial. Mod Organizer is designed in a way to allow you to edit/install/uninstall mods at any point you want. So even if you ever need to do some troubleshooting, or you want to change some mods after this guide, you can select/deselect mods with a single mouse click.

F.A.Q. - Frequently Asked Questions
Q: Will this work with Skyrim anniversary edition?
A: In theory yes, but for now itwill most likely give issues. Even while there is already an AE SKSE version, a lot of older other SKSE plugins needs to be updated. The problem is that Bethesda will most likely also continue to update the game which breaks everything again. I would say best would be to wait till 2022 to upgrade to AE. If you already did upgrade, or you have no choice because you have to reinstall your Skyrim:SE, then please check the workaround at the beginning of this page.
Q: How long does this tutorial take to install?
A: Depends on download times of course, but best would be to take an entire rainy Sunday afternoon to perform this. ;) But don’t expect to be finished in an hour or two.
Q: How are LOD's being handled? Are you using DyndoLOD or SSELODGEN?
A: All the LODS are downloaded from the MOD pages provided lods directly. For some reason this works surprisingly well already out of the box, so I am already really happy with the end result, and no extra tool is needed anymore for LOD generation. Not sure if SSELodgen or DynDOLOD makes it any better, but feel free to try. (if not, just deselect/delete the Dyndolod generated LODS)
Q: How many mods/esp’s are installed in the end?
A: 290 mods/files, and 111 .esp files.
Q: Is there an auto-installer or Wabbajack?
A: No. See description why not ifyou want to learn more.
Q: Can I run this with CPU xx and GPU xx?
A: Check the system requirementssection at the start of this tutorial. Also you find more explanation on FPS in various regions. (Indoor vs outdoor, and heavy areas to run like Falkreath and Riften)
Q: Can I run other mods with this mod list?
A: Yes! Use this mod list as a basefor the graphics, and add all other mods you like on top of this. Especially gameplay, weapons, animations, and other mods of that kind are no problem! Only thing you should not add/change are lighting, ENB, weather, and tree mods. Also all overhauls which require new LODS are not really advised to install since LOD’s can mismatch and may look very odd. You can add/change body types, but remember that for some specific armors we already did pick CBBE body type. So either reinstall those or you might see some weird clipping.
Q: I am not able to hear my footsteps anymore?
A: If you are having no footsteps audio, check the in game audio slider for footsteps. If you still do not have footsteps audio, please uncheck the .esp : AOS_ISC_Integration.esp (Not mentioned in the video tutorial. Discovered this issue later)
Back to the guide!
This guide is mostly focused on graphics/texture quality, and requires a good pc!
Recommended specs:
CPU: Recent(ish) i5 with decent clockspeed
RAM: 16GB
GPU: GTX 1080 ti
(or something similar from AMD. Note that in general AMD has a harder time running ENB's and other mods than Intel/Nvidia.)
HDD/SSD: +-70GB Please take note that this will be installed on your SSD in the hidden appdata folder unless you change this! (will be explained later) Raw mod size is about 60 GB, but you can download and save these mods anywhere you like before the actual install.
So yes, you do read this correctly! for guaranteed 60+ FPS with all these mods/ENB/ and 4k textures a GTX 1080ti is Recommended! And this is for 1080p/1440p. For 4k I would even recommended a RTX 2080 or better! I want to point this out on forehand to prevent disappointing framedrops on older hardware. Indoor locations are usually smooth as butter, but outdoor areas with a lot of vegetation like Riften and Falkreath are very performance heavy with this mod list. So a free tip already from me, for some proper min/max fps testing, go to those areas. :)
If you have not have these recommended specs, then please stick to 2k textures only and see if you are happy with the framerate during the tutorial. A GTX 1070 in example might get 60 fps indoors, and 45+ outdoors. (For me personally that would be fine, but again that is up to you.)
Info about the author: (for the ones who care)
I am Roderick, (PredCaliber), born in 1986, and I am from The Netherlands. I have been playing videogames since the end of 80's, and modding games and creating stuff with its editor since the first Unreal back in 1998. I am probably mostly known from my Youtube channel which is also mostly still based on Skyrim Modding, with a lot of other content during the years. If you are interested, check out the YT channel here. I have always been creating Skyrim (SE) mod lists every year, and it seems I am one of the few who also does create tutorial videos to completely explain how to install/configure everything from the mod lists. These videos became very popular, and that is mostly what made my Youtube channel grew to what it is today (60k subs and 5500 Discord members at the time of writing. 13/Sept/2021)
Some end result videos

Explanation about the tutorial
Ah yes, we have a tutorial to do haven't we? Well, let me explain how it works. Every part is categorized in the below categories. Every category has a written explanation, and there is also a Youtube video explanation. It is recommended to follow the videos for your own ease, and you are more sure you are not forgetting anything. Experienced modders can of course just download and install the mods. I will not handle animations or gameplay mods. These can be very subjective, so feel free to add them on top of this mod list.
The core is still based on Dlizzio's 2021 guide
Dlizzio made a fantastic 2021 guide, but he pulled it offline for some reason. I think his guide was so perfect, that I am still using a big part of his mod list as a foundation for this tutorial. Most of his patch files are still available, so big thanks to him! Also I will be using some mod install instructions from his old guide but with new descriptions I think can be better explained at certain parts. As always follow my video tutorials for all the info and the full explanation. Especially if you are new to modding!
This will be the mod order:
- Tools, Essentials and ENB
- Fixes And Stability
- Base Texture Foundation
- World and Environment
- Player, NPC, and other overhauls
- Specific retexture mods
- Effects and patches
- Game changing addons
Can I support/thank you?
That would be greatly appreciated! To give you an idea, I literally spent 100th of hours for this guide. that includes mod picking and sorting, the tutorial writing here on Nexus Mods, checking mod compatibility, thoroughly stability testing for the final game, and doing everything over again by recording tutorials how to explain in video tutorials to do the full installation. Not to mention the almost full time job I have with support for this on YouTube, this page, and Discord. :) So a small donation would greatly be appreciated! If you don't want to spend any money, then please consider subscribing on my Youtube channel here. That will help me out big time as well!
Donation can be done here or via the button.

But enough E-begging! More important, my thanks to!
Thanks to:
Dlizzio -The author of the Dlizzio 2021 guide we are using as the base for this tutorial.
Hato -Discord user on the channel who pointed out there was a backup of Dlizzio's old guide which I could study/check.
Nelphaell -And the other good souls at Reddit, who were able to save a copy of Dlizzio's old guide for reference!
Special thanks to:
TDX - Discord admin who helped me out big time setting up the PredCaliber.com Discord!
SkyrimTuner -Realvision ENB creator for Oldrim. The most popular ENB for Skyrim! His modlist inspired me to start modding Skyrim!
FiremanAF - Creator of SkyrimSE Re-Engaged ENB, and many other ENB's! The most popular ENB for Skyrim SE! Great guy as well :)
And all the Youtube/Discord users of course! Thanks for the great support as always! Keep sharing your screenshots and other stuff on Discord! :)

This is the most boring but also the most essential part. Once you have completed this, the rest will be relatively simple. So lets get this over with!
Best practice is to always start with a fresh and clean install of Skyrim SE. If you have never modded your Skyrim:SE then great! You are good to go. If you already did mod Your Skyrim:SE make sure to properly uninstall everything. If you are going to complain that you dont want to re-download the 12GB from Steam you are going to be in a world of hurt anyway since the total mod size will be about 6x that. In that case get faster internet or stop the tutorial. Sorry! :/
Steps to uninstall properly:
- Make sure to first uninstall all mods from your mod manager you are using. (Nexus, Vortex, or Mod Organizer). In case of Mod Organizer(2) the other data you want to have removed is located in: X*:\Users\*your User*\AppData\Local\ModOrganizer Where X is your Windows drive, (usually C) and *your User* is your windows user account. In my case: C:\Users\PredCaliber\AppData\Local\ModOrganizer (I am pretty sure you know what I am talking about andget the idea, so I will not refer to this anymore from now on. :) )
- Go to your Steam, right-click Skyrim:SE and select uninstall. Delete the remaining stuff in your \Steam\steamapps\common\Skyrim Special Edition folder. (Save the screenshots if you created some ;) )
- Go to your X:\Users\*your user*\Documents\My Games\Skyrim Special Edition , and delete everything there. If you do NOT have the Steam version, just to be sure to make a back-up of your save game folder. If you have the Steam version Steam should automatically create a backup of your save games in the cloud.
Installing Skyrim:SE clean
Then once you have a clean sheet and no trace of an old modded Skyrim SE, you can now safely install Skyrim SE again from Steam. Please do not install it in X:\Program Files (x86)!!! Any other folder is fine.
- Start the launcher, and set everything to max settings in the launcher.
- Start the game at least once to create required .ini config files. If you have used mods before this tutorial, you most likely have a modded save game as well. If so, then preferably start a new game to be sure you wont get any compatibility issues. Use that new empty save game to test your mods until the end of the tutorial to be 100% sure you can easily troubleshoot if something might go wrong. (At the end of the tutorial feel free to load your old savegames of course.)
- Create a new folder somewhere where you will save your downloaded mods. This does not necessarily has to be the same drive where your game is installed. Create a shortcut to this folder on your desktop, and create a shortcut to your Skyrim SE game folder as well for quick access. (So that is the \Steam\steamapps\common\Skyrim Special Edition folder. ) Keep both folders open during the tutorial, you are going to need them!
Mod Organizer 2 And non MO2 manageable mods
- Download and install Mod Organizer 2 here. Run setup with default settings. Ideally create a folder somewhere where we willinstall all the modding programs. (in example: X:\programs\modding tools.) It is highly recommend to have Mod Organizer 2 and the game installed at the same SSD/HDD. Also here not in X:\Program Files (x86)!!! Please note that from now on Mod Organizer 2 will save the installed mods by default in X*:\Users\*your User*\AppData\Local\ModOrganizer. You should get an options from that you can change the directory however.
Total size will probably get about 80GB at the end, so please note that if you have installed everything on a SSD this can add up quite fast. . So make sure you have plenty of space available if you are using a smaller SSD! Its not needed to connect to Nexus if MO2 ask this. (we will add the mods ourself)
- SKSE - Download Current SE build 2.0.19 (runtime 1.5.97): 7z archive , Open the archive, open skse64_2_00_19 folder, drag all files to your Skyrim Special Edition main game folder. So your \Steam\steamapps\common\Skyrim Special Edition folder. In MO2, (We will call Mod Organizer 2 MO2 from now on) click in the drop down menu in the upper right corner where Skyrim special Edition, and Skyrim Special Edition Launcher are located, and click on edit. Click on the little plus icon, to ''add an executable'' and click ''add from file''. From there, browse to the SKSE64_loader.exe. So the location should be: \Steam\steamapps\common\Skyrim Special Edition\skse64_loader.exe
-
It should look something like this, in this order of 1,2,3:
Now do the following:
- Close and restart MO2. Make sure to click the dropdown menu again, and select 'SKSE'. Start SKSE with the big orange 'run' button. Skyrim Special Edition should start now with SKSE. load your new started save game if created a new save game. If it loads without issues, great, close the game.
- From the drop down menu now select Skyrim special edition launcher, (not the main game) and run it. (Yes, again) Make sure that all settings are still on the highest settings and have not reset for some reason. Make sure you save the settings if they are changed back to default to the highest settings again.
- Switch back to SKSE, and create a shortcut to your desktop if you like. (Under the big 'run' button)
- Go to the main toolbar in Mod Organizer 2 and select tools, “INI Editor” (its the second last icon on the top bar)
- Go to the “skyrimprefs.ini” tab and change “bEnableProjecteUVDiffuseNormals” to equal 1- Change “bDrawLandShadows” to equal 1 Don't forget to click save for both!
skyrim anniversary editio
- Skyrim SE ENB
- These are the ENB binaries. To download, open this page. Towards the bottom contains links you can click on. Click the link that is listed first. These are the latest binaries. However, this will change from time to time. Preferably the ENB binaries should match the Rudy ENB mod files. Else, just download the latest ENB binaries and latest Rudy ENB for cathedral weathers. (see mod below this one)- Once you clicked the link, scroll down to the bottom again and click the download button.- Open the archive, open Wrapper Version folder, drag only d3dcompiler_46e.dll and d3d11.dll to your Skyrim Special Edition main game folder.
- Rudy ENB for Cathedral Weathers
Download Rudy ENB SE for Cathedral Weathers in Main Files (Not the part 1 or Part 2 files) Open the archive, open Rudy for SSE… folder, open Cathedral weathers Version folder, open [ Skyrim SE folder ] folder, drag all files to the Skyrim Special Edition main game folder - ENB Tweak Pack
These are the ENB and other tweaks made by Dlizzio. I still am using these for my modlist, and I suggest you use them. By clicking on the link you will be linked to this page again, (open in a new tab to keep things easy) find and download the file there. Copy and overwrite if asked in the main game folder. - SSEEdit
SSEEdit is the Skyrim: Special Edition version of xEdit. It is recommended to run and clean the master files. This was normally a very boring and long process, but with version 4.0 this process has been simplified. After you did download SSEEdit, you need to add it the same way as you did with SKSE. We are going to follow this guide. Feel free to check yourself or just watch the tutorial video where I will show it to you.
Installing mods (Mod Organizer 2 manageable mods)
Yes! Everything looks good, and we can now finally start with adding mods to MO2! This will be the same process we are going to do a lot from now on, so pay attention. For every mod this is the way: Download the mods manually to a folder you did create somewhere. Best practice is to put numbers in front off the mods so you know in which order you need to install everything if you are losing track of all your downloaded mods.
So in example:

Then:
- Click on the ''install new mod from archive folder'
- Click on manual
- Make sure the folder/file structure looks good by checking the message: the content of <data> looks valid. In most cases this is not. Then you need to right-click the specific data folder, and choose 'set as data folder'. I would suggest you check the tutorial videos if you are unsure

After that, activate the mod in the left panel, and after that activate the .esp (if available) in the right plugins section of MO2.
So got that? Then lets start installing the remaining mods with MO2!
- Immersive HUD - iHUD Special Edition - main file
- Unofficial Skyrim Special Edition Patch - Download Unofficial Skyrim Special Edition Patch in Main Files
- Alternate Start - Live Another Life - SSE - main file. Now start your Skyrim Special Edition with SKSE in MO2, and start a new game. You should now see the effects of this mod by having a complete new start with many options. (Its a good test to check that SKSE is actually working.) Since the ENB binaries, ENB, and probably MCM will be started for the first time the first start up can take 60 seconds! So please be patient at first startup!
- Weather Control - Optional. I always use this mod to test out weather effects or for showcase recording purposes. FW console commands work fine as well if you would like to force weather effects, but this mod makes it a bit easier with a special ingame menu.
Testing your game after every part.
After every part, we want to test our game to make sure the game runs fine. If for some reason your game crashes during testing, you can easily troubleshoot with the way MO2 handles mods. Just de-select the mods one by one in reverse order, and test your game after every de-select of a mod. With that method, you are easily able to see what mod might cause issues. Everything is fine? Great! Then go to the next chapter.
Well that was the first and most boring part. You made it! From here the rest is just pretty much a lot of downloading and installing.


Lets practice your modding skills now by adding a load of new mods! These mods will provide a lot of fixes, improve stability, and will add some great mods like SkyUI!
Address Library for SKSE Plugins
Download All in one in Main Files
SSE Engine Fixes
This mod has changed! Download first part 1 and install it in the normal way. Then download part 2 and manually place these files in the main game folder.
Skyrim Priority SE - skse plugin
Download Skyrim Priority SE… in Main Files
Bug Fixes SSE
Download Bug Fixes SSE… in Main Files
.NET Script Framework (Still not compatible with AE :( )
Download NetScriptFramework SkyrimSE… in Main Files
Yes Im Sure
Download YesImSure in Main Files
Better Dialogue Controls
Download Better Dialogue Controls… in Main Files
Better MessageBox Controls
Download Better MessageBox Controls… in Main Files
Better Jumping SE
Download Better Jumping SE in Main Files
Fuz Ro D-oh - Silent Voice
Download Fuz Ro D'oh in Main Files
No Edge Glow
Download No Edge Glow - Magic and Transformations in Main Files
Download Enchantment Reload Fix SE in Main Files
Hearthfires Houses Building Fix
Download Hearthfires Houses Building Fix in Main Files
Fix Note icon for SkyUI
Download FixNotesForSkyUI SKSE64… in Main Files
SSE FPS Stabilizer
Download SSE FPS Stabilizer - MAIN FILE in Main Files
Dialogue Movement Enabler
Download Dialogue Movement Enabler in Main Files
Download NPC AI Process Pos Fix-SSE… in Main Files
Download Better Combat Escape - SSE… in Main Files
Download Simple Weapon Swing Parry - SSE… in Main Files
PapyrusUtil SE - Modders Scripting Utility Functions
Download PapyrusUtil SE - Scripting Utility Functions in Main Files
Unofficial High Definition Audio Project
Download Music – HQ in Main FilesDownload Voices EN - Part 1 in Main FilesDownload Voices EN - Part 2 in Main Files
Skyrim Landscape and Water Fixes
Download Skyrim Landscape and Water Fixes - FOMOD Installer in Main FilesInstallation Instructions:Select "Relighting Skyrim"Select "Landscape Fixes for Grass Mods"Select “Walkway Wall FIX SMIM”Leave everything else and install
Lightened Skyrim
Download Lightened Skyrim in Main FilesInstallation Instructions:Select "All In One"Select "Skyrim Landscape and Water Fixes"Install
Skyrim Fixes Collection
Download Skyrim Fixes Collection in Main Files
Guard Dialogue Overhaul SE
Download Guard Dialogue Overhaul SE in Main Files
Guard Dialogue Overhaul - UHDAP Patch
Download Guard Dialogue Overhaul - UHDAP Patch in Main Files
Relationship Dialogue Overhaul - RDO SE
Download Relationship Dialogue Overhaul - RDO Final in Main Files
RDO Patches Final
After double clicking to install it, rename to “RDO Patches Final” before pressing ok
Relationship Dialogue Overhaul - Update and MCM
Download Relationship Dialogue Overhaul - Update and MCM… in Main FilesDownload Relationship Dialogue Overhaul - UHDAP Patch in Optional FilesSelect “Merge” if asked
Weapons Armor Clothing and Clutter Fixes
Download Weapons Armor Clothing and Clutter Fixes in Main FilesDownload WACCF 4K Textures in Optional FilesSelect “Merge” if asked
Armor and Clothing Extension
Download Armor and Clothing Extension in Main FilesDownload WACCF_ACE 4K Textures in Optional FilesSelect “Merge” if asked
Less Aggressive Animals
Download Less Aggressive Animals in Main Files
Sky UI
Download SkyUI_5_2_SE in Main Files
SkyUI SE - Flashing Savegames Fix
Download SkyUI SE - Flashing Savegames Fix in Main Files
RaceMenu
Download RaceMenu Special Edition in Main Files
Auto Input Switch
*Optional* Download and install if you are using a Xbox controller on your pc. This mod allows you to real time switch between mouse/keyboard, and controller. (Yeah it took almost 10 years for a mod to made this available.. insane!
Testing your game after every part.
After every part, we want to test our game to make sure the game runs fine. If for some reason your game crashes during testing, you can easily troubleshoot with the way MO2 handles mods. Just de-select the mods one by one in reverse order, and test your game after every de-select of a mod. With that method, you are easily able to see what mod might cause issues. Everything is fine? Great! Then go to the next chapter.


The big texture mods we are going to use as a foundation, just like a house. On top of this foundation we will add more specific mods later. These mods are big, but very straight forwarded to install. You can just install them like all the other mods!
Skyrim Realistic Overhaul Part 1
3 parts in total and 1 patch. Download them all. Dlizzio usually recommends to merge these big parts in 1 mod. You can do that if you like, or just install it in individual 4 parts right after each other. (This doesn't really matter and has the same outcome.) I prefer to see what I have installed, especially with big mod packs like this. If you follow the video tutorials along with this guide, you will see that as well.
Skyrim Realistic Overhaul Part 2
Click Download Now!
Skyrim Realistic Overhaul Part 3
Click Download Now!
Skyrim Realistic Overhaul 1.8 Update
Click Download Now!
Skyrim Particle Patch for ENB
This file is now also hosted at Nexus
Assorted Mesh Fixes
Download Assorted mesh fixes in Main Files
Enhanced Textures Detail UV
After double clicking to install it, rename to “Enhanced Textures Detail UV” before pressing ok
Static Mesh Improvement Mod
Download SMIM SE 2-08 in Main Files
Installation Instructions:
Leave everything as is and install
Static Mesh improvement Mod - SMIM - Quality Addon
Download Smim - Quality Addon in Main Files
Unofficial Material Fix
Download Unofficial Material Fix in Main Files
Ruins Clutter Improved
Download Ruins_Clutter_Improved_SE_NMM_v3-1 in Main Files
Leave everything as is and install
Download Falmer Temple Chandelier in Update files
Download Ratway Wood Fix SE in Update files
Download Ruins Linen Normal Map Fix SE in Update files
Ruins Clutter Improved - Fixes
Download Ruins Clutter Improved - Fixes 1.1 in Main Files
TreesHD Skyrim Variation
Download TreesHD_Skyrim_variation_ULTRA_NEW in Main Files
Skyrim Flora Overhaul SE
Download Skyrim Flora Overhaul SE (FULL)… in Main Files
Noble Skyrim Mod HD-2K
Download A. Noble Skyrim - FULL PACK_2K in Main Files
Download NSM - SMIM Patch in Update Files
Skyrim Textures Redone - SkyHaven
Download STR - SkyHaven in Main Files
Skyrim Textures Redone - High Hrothgar
Download STR - High Hrothgar 4K in Main Files
Soul Cairn HD
Download Soul Cairn 4K in Main Files
Sovngarde HD
Download Sovngarde HD 4K in Main Files
CC’s Castle Volkihar Reborn
Download CC’s Castle Volkihar Reborn - 4K - 2.0 in Main Files
CC’s Fort Dawnguard Reborn
Download CC’s Fort Dawnguard Reborn - 4K - 6.0 in Main Files
Real 3D Walls
Download Real 3D Walls in Main Files
Download Real 3D Walls alternative normal map Optional Files
High Poly Project
Download High Poly Project in Main Files
Installation Instructions:
Select “Custom Installation”
Select everything except “Farmhouse Stone Walls” and “Candles”
Select everything
Select everything
DO NOT SELECT "No Snow Under the Roof Patch"
Install
Unofficial Material Fix - High Poly Project Patch
Download Unofficial Material Fix - High Poly Project patch in Optional Files
After double clicking to install it, rename to “Unofficial Material Fix - High Poly Project Patch” before pressing ok
Blended Roads
Download the main file Blended roads.
Majestic Mountains Darkside
After double clicking to install it, rename to “Majestic Mountains Darkside” before pressing ok
Cathedral - Improved Mountain LOD and Z Fight Patch
Download Mountain Z Fight Patch in Main Files
Better Dynamic Snow SE (Make sure to download v 2.11.0, and not the latest version! )
Download Better Dynamic Snow SE v2.11.0 in Miscellaneous files <<<<<<<<<<<<
Installation Instructions:
Choose only SMIM option
Leave everything else as is and install
Better Dynamic Majestic Mountains
Download Better Dynamic Majestic Mountains in Main Files
Better Dynamic Snow and Blended Roads Integration
Download Really Blended Roads - ESL flagged in Main Files
Better Dynamic Snow - Patches
Download Better Dynamic Snow - Patch in Main Files
Better Dynamic Ash SE
Download Better Dynamic Ash SE in Main Files
Blackreach Tentacle Mesh Fix
Download Blackreach Tentacle Mesh Fix in Main Files
High Poly Blackreach Mushrooms
Download High Poly Blackreach Mushrooms in Main Files
Word Wall Transparency Fix for ENB
Download Word Wall Transparency Fix for ENB in Main Files
Stockades of Skyrim 3D
Download Stockades of Skyrim 3D in Main Files
Riekling Barrels SMIM
Download Riekling Barrels SMIM in Main Files
Download Dragonsreach Balcony Landscape Fix in Main Files
Labyrinthian Shalidor’s Maze Fixes
Download Labyrinthian Shalidor’s Maze Fixes in Main Files
High Poly Soul Husks
Download High Poly Soul Husks in Main Files
High Poly Canticle Tree
Download High Poly Canticle Tree in Main Files
Dlizzio’s Mesh Fixes
Download Dlizzio’s Mesh Fixes in Main Files
Download HD LODs Textures SE Mesh Fix in Optional Files
Download Noble Skyrim Material Fix in Optional Files
Download Solitude Wall Clover Remover in Optional Files
Later, at the end of this tutorial I will provide you with some even more fantastic overhauls! They are performance heavy, so you can decide for yourself if you want to install them or keep your Skyrim SE as it is.
Testing your game after every part.
After every part, we want to test our game to make sure the game runs fine. If for some reason your game crashes during testing, you can easily troubleshoot with the way MO2 handles mods. Just de-select the mods one by one in reverse order, and test your game after every de-select of a mod. With that method, you are easily able to see what mod might cause issues. Everything is fine? Great! Then go to the next chapter.

''The people who are crazy enough to think they can change the world are the ones who do.'' So time for us to change and improve the world of Skyrim! :)

A Quality World Map
Download 8.4 A Quality World Map - Classic with All Roads in Main Files
The Northerner Diaries - Immersive Edition
**Optional! Download The Northerner Diaries - Skyrim and Solstheim in Main Files - Streamers beware! This is copyrighted music by Jeremy soule!
Audio Overhaul for Skyrim SE
Download Audio Overhaul Skyrim (3.3.2) in Main Files
Download Conflict Resolution for Enhanced Blood Textures in Miscellaneous files
Download Weather Patch for Cathedral Weathers in Miscellaneous files
Immersive Sounds – Compendium
This file is now also hosted on Nexus. Download the main file.
Audio Overhaul - Immersive Sounds Integration
Download Audio Overhaul Skyrim - Immersive Sounds Compendium Integration (1.0.1) in Main Files
**Update 15/Nov/2021** If you are having no footsteps audio, check the ingame audio slider for footsteps. If you still do not have footsteps audio, please uncheck the .esp : AOS_ISC_Integration.esp (Not mentioned in the video tutorial)
Cathedral Weathers and Seasons
Download Cathedral - Weathers in Main Files
Download Cathedral Weathers Unofficial Update in update files
Download Plockton’s Culling Data Glitch Fix for Square Holes in the Ocean in Optional Files
Enhanced Volumetric Lighting and Shadows (EVLaS)
Download the main file
Shadows Of Sunlight - In Small Exterior World Spaces
Download Shadows Of Sunlight - In Small Exterior World Spaces in Main Files
Relighting Skyrim - SSE
Download Relighting Skyrim SSE - Exteriors Only… in Miscellaneous files
Volumetric Mists
Download Volumetric Mists in Main Files
Installation Instructions:
Select “Balanced”
Leave everything else as is and install
ENB Helper SE
Download ENB Helper SE 1.5 for SSE 1.5.97 in Main Files
Clean Menu
Download Clean Menu – All in One (60 FPS) in Main Files
Immersive Loading Icon
Download Blank Loading Icon in Main Files
Water for ENB
Download Water for ENB in Main Files
Installation Instructions:
Click next
Click next
Select “4K”
Enhanced Landscapes - Grasses
Download Main File v1.65 in Old Files (Dont download the latest file, it has no options form!)
Installation Instructions:
Select “Grass Overhaul”
Leave everything else as is and install
Skyrim 3D Trees and Plants
Download Skyrim 3D Trees and Plants in Main Files
Download Skyrim3DTrees and Plants 3dLOD Resources in Optional Files <<<YOU MUST INSTALL THIS FOR 3D LODS TO WORK
Skyrim 3D Landscapes
Download Skyrim 3D Landscapes in Main Files
Fences of Skyrim
Download Fences of Skyrim in Main Files
Perfect Terrain LOD
Download Terrain LOD for Noble Skyrim in Main Files
HD LODs Textures SE
Download HD Lods Textures SE 1K V9.3 Standard version in Main Files
Good practice now is to reboot your PC if you haven't done that already in between. It might not be necessarily needed, but in my 10 years of modding experience I sometimes had MCM issues in game after modding for a long time, which were fixed after a PC reboot.
Testing your game after every part.
After every part, we want to test our game to make sure the game runs fine. If for some reason your game crashes during testing, you can easily troubleshoot with the way MO2 handles mods. Just de-select the mods one by one in reverse order, and test your game after every de-select of a mod. With that method, you are easily able to see what mod might cause issues. Everything is fine? Great! Then go to the next chapter.


No more potato faces once we did install these player and NPC overhauls! Also some other overhauls which we did not cover in the previous parts.
Forgotten Retex Project
Download Forgotten Retex Project in Main Files
Installation Instructions:
Select “Draw Knife - with Carvings”
Select “Silver Mold - with Silver Frame”
Install
Misc Retexture Project
Download Misc Retexture Project in Main Files
Download Retextured SMIM Ingredients in Main Files
Download 2.6 small update in Main Files
WICO - Windsong Immersive Character Overhaul
Download WICO Special Edition - VNL 0.9f in Main Files
Installation Instructions:
Select “Custom”
Select “USSEP Compatible Patch”
Leave everything else as is and install
Bed Head - A Vanilla Hair Replacement
Download Bed Head V.2.3 Brown Fabric in Main Files
Download Bed Head V.2.1 Ultra Matte Normal Map Replacer in Optional Files
Beards
Download Hvergelmir’s Aesthetics - Beards 5.0.1 in Main Files
Installation Instructions:
Select “Vanilla Only”
Select “Ultra: 4096"
Leave everything else as is and install
Beard stubble
Download Beard stubbles in Main Files
KS Hairdos SSE
download the complete package. You can also check out ApachiiSkyHair SSE if you like and even combine both, but I prefer KS Hairdos.
The Bijin overhaul mods
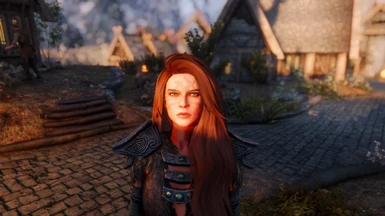
I personally really like the Bijin overhauls since the overhauled NPC's looks amazing, and I still find them lore friendly. Check the screenshots and decide for yourself if you like them as well. Else feel free to skip, and only use the WICO overhaul.
Bijin Warmaidens SE
Download the main file.
Bijin NPCs SE
Download the main file.
Bijin Wives
Download the main file.
Seranaholic
Seranaholic comes with many versions of Serana. Check the screenshots to see which one you like, and download that version. (I like 1.6 and 1.8 the most, but I probably stick to 1.6)
- Also download the high res textures for your specific Serana version.
- Then download Valerica SSE
- And finally download Valerica high res textures as well
PS: I personally don't care to merge the .esp for these packs to keep a better overview. But feel free to do of course if you want to.
Serana's Hood Fix
Optional. Seranaholic is just too good to let Serana wear her hood, but thats up to you of course ;) Download main mod.
Some extra optional followers
Toccata Follower SE (With Elisif Replacer Option)
Download main mod. Use as stand alone follower or as replacer in options form.
Chaconne Follower - SSE
Download main mod
Vivace Follower
Download main mod
Amazing Follower Tweaks
Download only the main mod. Improved controls and equipment management when using followers. You can now also use multiple followers with this mod!
Bellyaches Animal and Creature Pack SSE
Download Bellyaches Animal and Creature Pack SSE in Main Files
Installation Instructions:
Leave everything as is and install
HD Reworked Horses
Download HD Reworked Horses in Main Files
Horker by Pfuscher
Download Horker in Main Files
GOAT HD by Pfuscher
Download HD Goat by Pfuscher in Main Files
Highlandcow HD by Pfuscher
Download Highlandcow HD in Main Files
Glorious Doors of Skyrim (GDOS) SE
Download Glorious Doors of Skyrim SE
Installation Instructions:
Click next
Click next
Select “Sliding Door”
Click next
Select 4k
Select 4k
Select 4k
Select 4k
Select 4k
Select 4k Dark Non-Reflective
Select 4k Dark Non-Reflective
Leave everything else as is and install
Download Glorious Doors of Skyrim SE - Update 1.04 in Update Files
aMidianBorn Book of Silence SE
Download 1) aMidianBorn Book of Silence SE – COMPLETE in Main Files
Elven Weapons for Silence SE
Download Elven Weapon for Silence SE (Dark Obsidian) 2K in Main Files
Ebony Weapons for aMidianBorn Book of Silence Users
Download ebonyweap4bos in Main Files
Falmer Weapons for aMidianBorn Book of Silence users
Download falmerweapons4BoS in Main Files
Vanilla Weapon Replacer
Optional / alternative (Not used, but mentioned in the tutorial) You can install this on to see if you like the weapons from Vanilla Weapon Replacer more. If not, then simply just uncheck the mod. It is that easy with Mo2!
Silverthorn Weaponry
One of the best looking weapon packs in Skyrim AE/SSE! Download the main file
Ancient Dwemer Metal
Download Ancient Automatons 4K in Main Files
Download Ancient Dwemer Metal 4K in Main Files
Ancient Dwemer Metal - My patches for SMIM Dawnguard Dragonborn
Download Ancient Dwemer Metal - My patches - FINAL SE VERSION in Main Files
Download Ancient Dwemer Metal - My patches - FINAL VERSION Update v4 in Update Files
Download Ancient Dwemer Metal - My patches - GDOS Splendid Mechanized Dwemer Door in Optional Files
Select the 4k textures. (you have 2k/4k textures options)
Ancient Amidianborn Dwarven Armory
Download Ancient Amidianborn Dwemer Metal Armory in Main Files
Installation Instructions:
Leave everything as is and install
Falmer Texture Overhaul
Download 4K Falmer Overhaul in Main Files
Rally’s Riekling Outposts
Download Rallys Riekling Outposts 4K in Main Files
Skyrim 2021 PredCaliber Tutorial Patch
Hosted now at my own page with some improvements. (Click on files) After double clicking to install it, rename to “Skyrim 2021 Patch” before pressing ok
Testing your game after every part.
After every part, we want to test our game to make sure the game runs fine. If for some reason your game crashes during testing, you can easily troubleshoot with the way MO2 handles mods. Just de-select the mods one by one in reverse order, and test your game after every de-select of a mod. With that method, you are easily able to see what mod might cause issues. Everything is fine? Great! Then go to the next chapter.


All other specific re-texture mods which we did not handle in the previous parts. Things like animals, armors, and other miscellaneous items.
JS Lockpicking UI SE
- Download 4k Textures in Main Files
- Download 4k Textures in Main Files
- Download JS Barenziah SE - 4K Textures in Main Files
- Download JS Shrines of the Divines SE - 4K in Main Files
- Download JS Instruments of Skyrim SE - 4k in Main Files
- Download JS Purses and Septims SE – FOMOD in Main Files
- Installation Instructions:
- Select “Dirty - 4k Textures” under Coin Textures
- Select “Dirty - 4k Textures” under Coin Pile Textures
- Leave everything else as is and install
- Download RUSTIC WINDOWS - Special Edition - 2K in Main Files
- Download ETHEREAL CLOUDS SE - 4K in Main Files
- Download RUSTIC CLOTHING - Special Edition - 4K in Main Files
- Download PELTAPALOOZA Special Edition – FULL in Main Files
- Download RUGNAROK - Special Edition - 2K in Main Files
- Download RUSTIC SOULGEMS - Special Edition - 2K Unsorted in Main Files
- Download RUSTIC CLUTTER COLLECTION - Special Edition - 2K in Main Files
- Download RUSTIC COOKING - Special Edition - 2K in Main Files
- Download RUSTIC FURNITURE - SE - 4K in Main Files
- Download RUSTIC FURNITURE - SE - SMIM - 4K in Main Files
- Download RUSTIC DRAGON CORPSE SSE - 4K in Main Files
- Download RUSTIC DEATH HOUND AND GARGOYLE SSE - 4K in Main Files
- Download RUSTIC ELDERSCROLL - Special Edition - 4K in Main Files
- Download ELDERSCROLL SSE - FX - 2K in Optional Files
- Download RUSTIC SPRIGGAN - Special Edition - 4K in Main Files
- Download RUSTIC SPRIGGAN EFFECTS in Optional Files
- Download RUSTIC AZURA’S STAR - SSE - 4K in Main Files
- Download RUSTIC FROSTBITE SPIDER SSE - 4K in Main Files
- Download RUSTIC DAEDRA SSE - 4K in Main Files
- Download RAW SSE - 4K in Main Files
- Download Rudy HQ - Nordic Ruins SE version in Main Files
- Download 4K textures for the ruins chests urns and a wood in Optional Files
- Download Chests addon in Optional Files
- Download Pots addon SE version in Optional Files
- Download Ruin Levers addon SE version in Optional Files
- Download RUSTIC MAPS - 4K in Main Files
- Download RUSTIC RELIEFS in Main Files
- Download RUSTIC AMULETS SE in Main Files
- Download RUSTIC DRAGONS SE in Main Files
- Download Frankly HD Dragonbone and Dragonscale 4k in Main Files
- Download Frankly HD Dragonbone and Dragonscale - Mesh patch in Update Files
- Download Frankly HD Imperial Armor And Weapons 4k in Main Files
- Download Frankly HD Imperial Armor And Weapons - Sleeves and Pants Edition patch in Optional Files
- Download Frankly HD Thieves Guild Armors in Main Files
- Installation Instructions:
- Leave everything as is and install
- Download Frankly HD Miraak 1.0 in Main Files
- Installation Instructions:
- Leave everything as is and install
- Download Frankly HD Miraak HOTFIX 1.11 in Update Files
- Download FranklyHD Dawnguard Armor and Weapons in Main Files
- Installation Instructions:
- Leave everything as is and install
- Download Frankly HD Shrouded Armor _ 1.1 in Main Files
- Installation Instructions:
- Leave everything as is and install
- Download Frankly HD Nightingale Armor and Weapons 1.1 in Main Files
- Installation Instructions:
- Select “4K Resolution”
- Select “Less Saturated Weathering”
- Leave everything else as is and install
- Download Rudy HQ - Hay SE in Main Files
- Installation Instructions:
- Select “Rudy HQ - Hay SE 2K - Version01"
- Leave everything else as is and install
- Download Rudy HQ - Miscellaneous SE in Main Files
- Installation Instructions:
- Select “Rudy HQ Silverware for Rustic Silverware" under HQ Silverware
- Click next
- Select “Rudy HQ Imperial Candles” and “Rudy HQ Nordic Ruins Candles” under Additional HQ Candle Models
- Select “Rudy HQ Lanterns”
- Click next
- Select “Rudy HQ Glazed Pottery Classic Brown 4K” under HQ Glazed pottery
- Click next
- Select “Rudy HQ Brown Textures for Dungeon Pottery 4K”
- Click next
- Select everything on this page
- Click next
- Select “1K textures for the candles”
- Install
- Download Rudy HQ - More Lights for ENB SE - Patch for Rustic Soulgems in Optional Files
- Download Rudy HQ - More Lights for ENB SE - Chaurus Eggs and Sacs in Main Files
- Download Rudy HQ - More Lights for ENB SE - Glowing Mushrooms in Main Files
- Download Rudy HQ - More Lights for ENB SE – Bthardamz in Main Files
- Download Rudy HQ - More Lights for ENB SE - Moths and Fireflys in Main Files
- Download Rudy HQ - More Lights for ENB SE - Deathbells and Nirnroots
- Download Rudy’s More Lights Deathbells and Nirnroots For 3D Tress and Plants V 1.02 Fadingsignal’s Deathbell in Main Files
We are about halfway in this section now, lets take a short (coffee) break!
Particle Lights for ENB - Nordic Ruins Candles
- Download Particle Lights for ENB - Nordic Ruins Candles in Main Files
- Download Iconic Statues 8K in Main Files
- Installation Instructions:
- Leave everything as is UNTIL STEP 18
- At Step 18: Select “Skyforge (MM Version)”
- Leave everything as is and install
- Download Ennead - Banners 4K in Main Files
- Download Ennead Banners - RUGNAROK Patch in Main Files
- Download Werewolf Retexture - 4K in Main Files
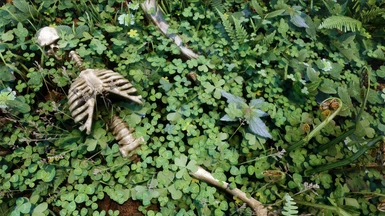
- Download Skeleton.and.Human.Bones.4k in Main Files
- Installation Instructions:
- Select “Skin, clutter without the sounds”
- Download Falmer.4k in Main Files
- Installation Instructions:
- Leave everything as is and install
- Download Wispmother.4x2k in Main Files
- Installation Instructions:
- Select “Full version – skin with a mesh fabric veil (RECOMMENDED)”
- Download Mammoth.4k in Main Files
- Installation Instructions:
- Leave everything as is and install
- Download Giant.4k in Main Files
- Installation Instructions:
- Leave everything as is and install
- Download Draugr.4k in Main Files
- Installation Instructions:
- Leave everything as is and install
- Download Sabrecat.4k in Main Files
- Installation Instructions:
- Select both and install
- Download Dragon.Priest.4k in Main Files
- Installation Instructions:
- Select “Full (Highly Suggested)”
- Download Troll.4k in Main Files
- Installation Instructions:
- Leave everything as is and install
- Download Hagraven.4k in Main Files
- Installation Instructions:
- Leave everything as is and install
- Download Landscape Fixes For Grass Mods in Main Files
- Download Patches for Arthmoor’s Town add-ons in Optional Files
- Installation Instructions:
- Select “Patch for Alternative Start – Live Another Life”
- Leave everything else as is and install
- Download No Spinning Death Animation MERGED in Main Files
- Download No Grass In Caves in Main Files
- Download Grass Control… in Main Files
- Download SSIRT SE v4.1 in Main Files
- Installation Instructions:
- Click next
- Select “Background - Irradiant Stars - HDR Nebula”
- Select “Perk Lines - Default”
- Select “Perk Line Colour - Default”
- Select “Constellations - Default”
- Select “Perk Stars - Default”
- Select “HD Masser and Secunda and More Stars”
- Select “HDR Nebula”
- Install
- Download Quality Cubemaps in Main Files
- Download Snazzy Bloody Rags in Main Files
- Download Snazzy Model Ship in Main Files
- Download Snazzy Quill of Gemination - Light Version in Main Files
- Download Business Ledger HD Retexture in Main Files
- Download Retexture for The Scroll FOMOD by -ren- (NMM or MO) in Main Files
- Installation Instructions:
- Click next
- Leave everything as is and install
- Download OH GOD BEES - HD Textures in Main Files
- Installation Instructions:
- Select “512x512” for HD Bee Texture
- Select “1024x1024” for HD Beehive Texture
- Select “2048x2048” for HD Apiary Texture
- Download EEKs Gildergreen in Main Files
- Download HD Stone Quarry and Clay Deposit SE - 4K v1.0.1 in Main Files
- Download HD Stone Quarry - Majestic Mountains Patch in Optional Files
- Installation Instructions:
- Select “Darkside”
- Download Enhanced Ore Veins - 4K - 8.0 in Main Files
- Installation Instructions:
- Leave everything as is until…
- Under Patches, select “Hearthfire”
- Click next then click install
- Download Enhanced Ore Veins - 8.0.1 – Patch in Update Files
- Download Vines in Main Files
- Download 2k GleamBlossom and glowing groun plants in Main Files
- Download Mammoth Cheese Retexture 4k in Main Files
- Download LESS SLIME 4k in Optional Files
- Download RUSTIC EAST EMPIRE COMPANY SIGNAGE - Dark Version in Main Files
- Download Windhelm Enhanced Metalwork 4k in Main Files
- Download Windhelm Enhanced Metalwork 4k Desaturated Diffuse in Optional Files
- Download Nordic tent in Main Files
- Download Small Nordic Tent 4K in Main Files
- Download HD Lava (4k) in Main Files
- Download Less Ugly Tundragrass in Main Files
- Download Unreal 8K Mammoth Skeleton ReTexture in Main Files
- Download Alduin of Embers in Main Files
- Download 3Ddoor
- Download BETTER FARMHOUSE FLOOR - 4k
- Download first Archery Target Retexture 4k , then Archery Target Retexture and Mesh file in optional files
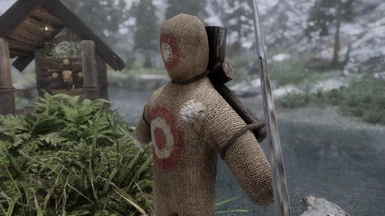
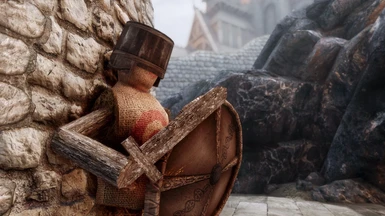
- Download Training Dummies Retexture 4k and 2k in main files
- Download HD Photorealistic Ivy in Main Files, then download Enhanced Textures Detail (UV-Tweaks) - Compatibility Patch in optional files.
Testing your game after every part.
After every part, we want to test our game to make sure the game runs fine. If for some reason your game crashes during testing, you can easily troubleshoot with the way MO2 handles mods. Just de-select the mods one by one in reverse order, and test your game after every de-select of a mod. With that method, you are easily able to see what mod might cause issues. Everything is fine? Great! Then go to the next chapter.


The icing on the cake with these mods! You are almost there!
ENB Light
- Download ENB Light 0.95 Release Candidate 2 in Update Files
- Installation Instructions:
- Select “Full install”
- Leave everything else as is and install
- Download Window Shadows RT in Main Files
- Installation Instructions:
- Select “Window Shadows”
- Click next
- Select “Brighter Window Glow Maps”
- Select “Light Fader”
- Click next
- Install
- Download Embers XD in Main Files
- Installation Instructions:
- Click next
- Click next
- Click next
- Select “Install Fire Magick Add-On”
- Select “Install Forges Add-On”
- Select “Install Torches Add-On”
- Select “Install Lava Craters Add-On”
- Leave everything else as is and install
- After double clicking to install it, rename to “Ultimate HD Fire Effects” before pressing ok
- After double clicking to install it, rename to “Voltage” before pressing ok
- After double clicking to install it, rename to “Arctic - Frost Effects Redux” before pressing ok
- Download Grindstones - Vanilla Sparks in Main Files
- Download Impact Effects - Vanilla Sparks in Main Files
- Download Water for ENB Particle Patch in Main Files
- Download DustEffectsSSE in Main Files
- Download Holy Wards - a retexture in Main Files
- Download FleshFX in Main Files
- Download Saw dust in Main Files
- Download 4K ElSopa HD - Dirt Blast in Main Files
- Download Ash Pile no bones in Main Files
- Download Animated Forge Water in Main Files
- Installation Instructions:
- Select “Slower Embers XD”
- Leave everything else as is and install
- Download Skyrim SE Improved Puddles FOMOD v1-4 for ENB users in Main Files
- Installation Instructions:
- Leave everything as is and install
- Download Enhanced Blood Textures SE in Main Files
- Installation Instructions:
- Click next
- Select “High Res / Darker Color” and “EBT Blurry Screen Blood”
- Leave everything else as is and install
- Download Deadly Spell Impacts v1_70 in Main Files
- Installation Instructions:
- Leave everything as is and install
- Download WEBS SE x2048 in Main Files
Testing your game after every part.
After every part, we want to test our game to make sure the game runs fine. If for some reason your game crashes during testing, you can easily troubleshoot with the way MO2 handles mods. Just de-select the mods one by one in reverse order, and test your game after every de-select of a mod. With that method, you are easily able to see what mod might cause issues. Everything is fine? Great! Then go to the next chapter.


These are some major overhauls, and will overwrite a lot of previous installed mods! In example, these mod packs can overhaul entire cities, forests, and other indoor and outdoor places! Some of these are quite performance heavy, so that's why I kept them till the end so you can decide for yourself if you like them.
First of all, read the description and check screenshots to see if you like the mods. Then feel free to download and install them. (Do it 1 at the time so you can do some good testing to see if you like the difference.) Don't like the mod, or want to compare it with your previous situation? The simply uncheck the mod in the left panel! Its that easy with Mod Organizer 2 :)
- JK's Skyrim all in one overhaul
A mod that overhauls most of the cities and villages to make them more interesting. Recommended! Download the main all in one file - CleverCharff's AIO or Skyrim 2020 Parallax by Pfuscher.
Very HQ texture overhaul packs, both look absolutely amazing! These HQ textures could take some big FPS hit, so test it first. 2020 Parallax textures look better, but require more special instructions. For that I prefer CleverCharff's AIO since it is just a simple download and install. Its also easy to select which overhauls you want the mod to overwrite and also looks great nevertheless. Check for yourself, or test both. (1 at the time)
For some reason, one of the CleverCharff's options will also overwrite Majestic Mountains. In my opinion Majestic Mountains look better, so to the easiest way to fix this, is by removing this folder in Clevercharff's pack after install so it wont overwrite Majestic Mountains anymore.
To do this: Double click the CleverCharff's AIO pack in the left panel, then browse to: Textures\Landscape , and delete the mountains folder. This should give you back the great Majestic Mountains.
See screenshot here:
- Folkvangr
Absolutely recommended if your PC can handle it! Great next gen looking grass types! Download the main file. - Origins Of Forest - 3D Forest Grass
Also absolutely recommended if your PC can handle it! For use in combination with Folkvangr. Download one of the Origins Of Forests versions you like from the main files. (make sure that you Install Folkvangr first if your PC can handle both)
Combat Gameplay Overhaul SE
Camera and light combat overhaul. Optional
For some reason, Steam/Bethesda still sometimes apply a minor update from time to time on Skyrim (SE). Even when I have no idea what they did update, (can't find any patch notes about it) we don't want our Skyrim:SE to be updated anymore from now on! The reason for this is that SKSE and some other mods can stop working, and need to be updated again, and that can take days.
Yikes! So, make sure to disable updates in Steam. Do that by going to Steam, rightclick Skyrim:Special Edition , select properties, updates, and select only update this game when I launch it. We will launch game only with SKSE from MO2, Steam does not see that as a 'game launch' since Skyrim.exe or Skyrim laucher.exe are not being launched. While this should work fine, please also check out this extra method to make sure your game can not be updated anymore.
Setting ''only update this game when I launch it'' in Steam:

Finally, it is best practice to reboot your PC one more time to prevent MCM and other issues.
One last test and then your game is good to go!
Are you ready to perform one last final test? To have a good idea of min/max FPS, visit indoor locations like shops and houses to see your minimal FPS since these are not performance heavy at all. From my experience, the most demanding areas in Skyrim are the forests around Falkreath and Riften. So see if you are happy with your FPS there. Or start upgrading your hardware ;)


Wohoo!! You have come a long way, but finally you can be proud of a fully modded, 10 years of Skyrim edition! Now it is time to play the game instead of constantly modding it!
Questions? Want to hang out with an awesome community? Want to see and share your screenshots of the game? Then join our awesome Discord server! We would love to see you there!


