


0 of 0

About this mod
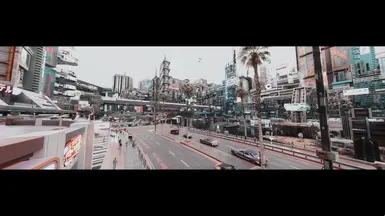
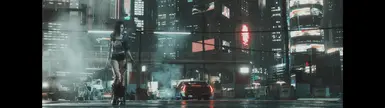
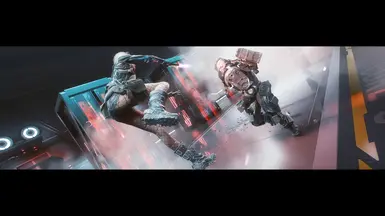
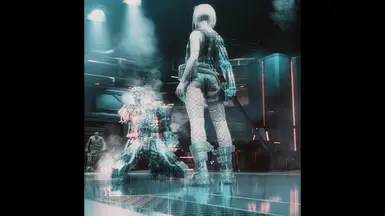
An extensive step-by-step lore friendly guide to modding Cyberpunk 2077.for mid to high end systems.
For beginner intermediate and experienced modders utilizing Mod Organizer 2.
- Requirements
- Permissions and credits
- Donations
SYSTEM SPECS:
The following mod list was compiled and tested on:
CPU:intel 10900k
GPU:Nvidia 3090 FE
RAM:32 GB
Resolutions tested: 5120x1440, 4096 x2160, 3840x2160, 2560x1440
HOUSE KEEPING:
Start with a fresh install of Cyberpunk 2077 and run it once to make sure everything is working normally. Make sure you have a backup of the original game files somewhere.
After downloading the installer, click on it and select your game. On the next screen select Microsoft DirectX 10/11/12 and then on the final screen check all the effect boxes. Load the game to make sure ReShade is installed correctly. You will know it is installed correctly by the notification on the top left-hand side of the screen and it is also togglable with the default "home" key. While here you can also go to the settings tab and set a "toggle effect" key.
UTILITIES:
To install mods, once downloaded just open the zipped folder and drop and drag the contents into MO2 or click on the "Install new mod from archive" button. Some mods aren't packed in the right paths as some authors assume users have read their mod installation description or already know what they are doing. If the mods are packed incorrectly, MO2 will usually notify you and help guide you to the correct installation path. Note: Some mods have to be installed manually so please make sure MO2 is closed when doing so otherwise they will not be detected if you try to run the game.
ESSENTIALS:
These next set of mods are essential for most other mods to run.
From here you can load the game again via MO2 to check to see if the mods have installed correctly. Note: the only visual changes you will see is when you first load up, Cyber Engine Tweaks (CET) will load and ask you to assign a hotkey. You will also notice you now have a "mod" option at the main menu screen.
TWEAKS:
The next set of mods are tweaks to the engine to alter performance and quality settings.
Congratulations if you made it this far you have just installed the boring but necessary part of this guide. I had a few more mods that tweaked settings, but I found I barely used them, so I chose not to include them in this guide.
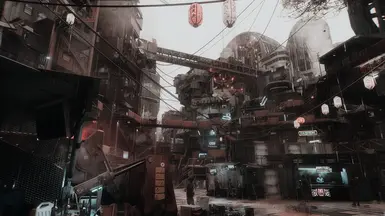
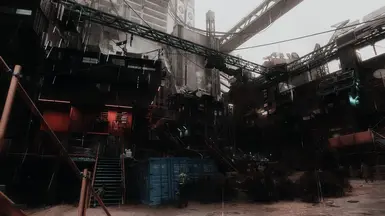
ENVIRONMENTAL TEXTURES:

Props:
MENU AND UI:
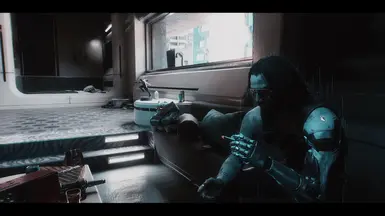
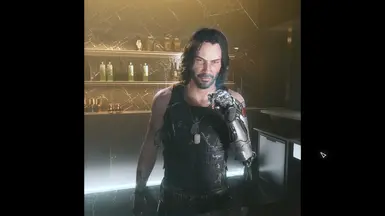
VISUAL:
From here almost all the next sections are optional as it comes down to individual taste so feel free pick and choose what you want.
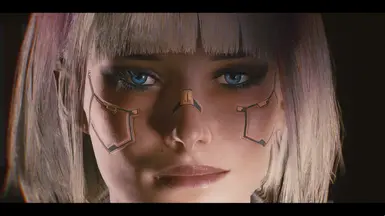
CHARACTER CREATION:
PHOTOMODE:
There are a veriety of mods for photomode. This next list is a basic set focusing on the games photomode utility.
SHOPS:
Note: Stores only contain items that are installed so only install stores that have items that you want. This list is just a small sample of store I currently use.
CLOTHING:
This concludes this mods list for now. I have many more mods installed however it would take too long to add them and a majority of them are optional. I did have some other section I also wanted to include such as vehicles and immersion but for now I hope you liked this mod list.
Thank you and please endorse and support the mod authors who brought much needed life into the game.
CREDITS:
The following mod list was compiled and tested on:
CPU:intel 10900k
GPU:Nvidia 3090 FE
RAM:32 GB
Resolutions tested: 5120x1440, 4096 x2160, 3840x2160, 2560x1440
HOUSE KEEPING:
Start with a fresh install of Cyberpunk 2077 and run it once to make sure everything is working normally. Make sure you have a backup of the original game files somewhere.
- Using a third-party monitoring tool such as MSI Afterburner such as FRAPS take note of your frames per second (fps) as this will serve as your baseline performance. Personally, I use Nvidia Geforce Experience as I also use the Freestyle and the photo mode packaged along with it as the in-game photo mode can be buggy or crash when using mods.
- (Important) Download and install ReShade . As we will be installing mods via Mod Organizer 2 (MO2), ReShade needs to be installed before modding with MO2. The reason for this is because MO2 assumes that all files inside the folder are stock and unmodified. By installing ReShade before running MO2, MO2 will automatically assume that the files are meant to be there. Installing ReShade later on can usually result in the shaders and effects not being loaded. You only need to install ReShade if you plan to use a preset. If not, you can skip this step.
After downloading the installer, click on it and select your game. On the next screen select Microsoft DirectX 10/11/12 and then on the final screen check all the effect boxes. Load the game to make sure ReShade is installed correctly. You will know it is installed correctly by the notification on the top left-hand side of the screen and it is also togglable with the default "home" key. While here you can also go to the settings tab and set a "toggle effect" key.
UTILITIES:
- Archive Conflict Checker ToolAs the description says, "A conflict-checker and load-order management app for Cyberpunk 2077 mods (archives)" A useful tool for managing load order like LOOT for Skyrim but not as comprehensive. You will need to link the executable with MO2 under the tool tab. Just click the tab and add the executable where you have it installed and then you can open it via MO2. Make sure to set the Archive directory.
- Mod Organizer 2 I usually do manual mod installations which is fast and easy however for the purpose of this installation we will be using MO2 as you have more control over conflicting archive asset conflicts and is a lot more user friendly when it comes to making mistakes as it does not physically install mods straight into your game folder. Once MO2 is installed, run the game again to make sure everything is working and that ReShade still loads.
To install mods, once downloaded just open the zipped folder and drop and drag the contents into MO2 or click on the "Install new mod from archive" button. Some mods aren't packed in the right paths as some authors assume users have read their mod installation description or already know what they are doing. If the mods are packed incorrectly, MO2 will usually notify you and help guide you to the correct installation path. Note: Some mods have to be installed manually so please make sure MO2 is closed when doing so otherwise they will not be detected if you try to run the game.
ESSENTIALS:
These next set of mods are essential for most other mods to run.
- Cyber Engine Tweaks (install manually)
- REDext
- ArchiveXL
- Codeware
- TweakXL
- redscript
- Native Settings UI
- Input Loader
From here you can load the game again via MO2 to check to see if the mods have installed correctly. Note: the only visual changes you will see is when you first load up, Cyber Engine Tweaks (CET) will load and ask you to assign a hotkey. You will also notice you now have a "mod" option at the main menu screen.
- Material and Texture Override
- Browser Extension Framework
- InplaceSectorsNulled (required for Improved Ads Draw Distance Mod)
- Cookedprefabs Nulled
TWEAKS:
The next set of mods are tweaks to the engine to alter performance and quality settings.
- Miscellaneous Settings Unlocker (There will be an error notification stating that the setting are corrupted but this isn't the case. It only appears the first time you run the game after installing the mod and you just have to reset the setting again and you will now notice the addition of psycho settings under the graphics tabs)
- PT reflections fix
- increased RainMap Batch Size
- Light Beams Fix
- Increased Level of Details Distance - Draw Distance
- Improved Ads Draw Distance
- Improved Vegetation LODs
- Cyberpunk Ultra Performance Plus Better Path Tracing and Stutter Fix (install manually) Open up the zipped folder until you come to a folder with numbered options. Refer to the mod page for explanations of the options best suited for your system. For this installation I only installed 1,2,3 and 6 however you can choose to install any additional option as you wish.
- DLSSTweaks (install manually and use the .ini from the previous mod instead of this mods one)
- Better Character Lighting
- Improved Vehicle Lights Draw Distance
- More pathtracing rays and bounces for Cyberpunk 2077 2.0 and Phantom Liberty
- Extended and Improved Headlights (optional) Note: some cars headlights get very bright when enabled so I just set the Headlight brightness to the lowest setting.
Congratulations if you made it this far you have just installed the boring but necessary part of this guide. I had a few more mods that tweaked settings, but I found I barely used them, so I chose not to include them in this guide.
ENVIRONMENTAL TEXTURES:
- Environmental Textures Overhaul
- Ultra Texture Remaster Repack
- Cyberpunk 2077 HD Reworked Project
- This is the first point where you will need to use the Archive Conflict Checker Tool to sort your load order. Load it through MO2 and place Ultra Texture (UTR) Remaster Archive down the bottom of the list. The reason for this is that it covers the most textures and not only environmental textures. You should always have UTR at the bottom of the load order so that more specific texture mods get higher priority than it.
- Manually Enhanced NC Plus HD V2 - Texture Overhaul Install this along with the Better Bump Mapping optional file
- High Res Graffiti
- Better Tree Textures
- Better Windows
- reMedia
- Enable Advert Animation (Ads)
- Always Best Quality _ Ads - Map - Hud - Photo Mode - Vending Machines and more
- Manually Enhanced Dust Smoke Fog and Light Gradients
- HOloGirl optional
- E3 2019 Geisha advertisement
- Stock Market and News System
- E3 Smart Windows
- Weathermancer
- Dog Town Upscaled Lasers 2k
- QoL - Fix for holotext shadows with RT or PT
- Nova City - Addons (Traffic and Population Density)
- Immersive Timeskip
- 4x Vending Machine Framework
- Air Traffic Visual Improvements
Props:
- RTDebis
- High-Res Stickers
- No Paper Bags From Vending Machines
- HQ Fruits
- HQ Fast Food
- HQ Fast Food - Fries
- Classic Drinks HD Textures and Meshes
- Immersive Food Vendors
- Immersive Food Vendors - Dogtown
- Night City TV (Remastered)
- QoL-Higher TV Quality
MENU AND UI:
- Replace the Pre-Intro cutscene with the 2013 Teaser Trailer.
- Cyberpunk Edgerunners - Dark HQ Main Menu Replacer install manually then install the patch, REDmod must be enabled for the video otherwise you will just get the music.
- Patch for Neurolepticer's Edgerunners Dark HQ mod
- Character Selection Screen (Remastered)
- Main Menu Splash Screen (Remastered)
- Splash Screen (Remastered)
- Edgerunner Braindance (Remastered)
- Spicy HUDs - More UI and HUD colors
- Pachinko Palor (Remastered)
VISUAL:
- GITS 3.x install the Feb 14 hotfix as well
- It's breathtaking - Sphiratrioth's Photorealistic Reshade - v.2.02 Install manually. Copy and paste the preset into your Cyberpunk. 2077/bin/x64 folder. Note: you can be used in gameplay just fine but sometimes I just prefer to turn it off and use it for screenshots.
- Nvidia Geforce Experience - Freestyle. This is only if you have an Nvidia GPU. I only use the "Details" shaders and leave everything stock but change the fake HDR to -50.
From here almost all the next sections are optional as it comes down to individual taste so feel free pick and choose what you want.
CHARACTER CREATION:
- Morph Texture Removal - Cleaner and better skin details
- Preem Hair (Optional Judy Hair Colors)
- Beautiful IRIS - Eyes Textures for NPC
- Facial Customisation Rig Fix - No more clipping Eyes also install the Morph Texture Removal Patch
- Appearance Change Unlocker - Character Preset Manager
- E3 2018 Haircut for Female V (optional)
- 4k Complexion and Body for Female V Install one of the complexions, bodies and microdetails as well.
- E3 - fuller Eyelashes
- Scarlett Johansson - AI Voice Enhancement Mod for Female V (optional) since it's an AI generation voice changer, the dialogue can sometimes sound like a bad robotic voice actor.
- NOSTRILS - Nasal Rextexture
- -KS- UV Texture Framework
- V Realistic Doll Body Cyberware (optional) Very cool skin replacer.
- WINGDEER HAIR COLLECTION (optional) Plenty of options for hairs here. Mainly for Female V. Just pick and choose what you like.
PHOTOMODE:
There are a veriety of mods for photomode. This next list is a basic set focusing on the games photomode utility.
- CharLi - Character Lighting Suite for Photomode Opens through CET
- Portrait Enhancer for Photo Mode
- Photo Mode Unlocker 2.0 XL Also install the Rig Patch-Face Fix
- Photomode Facial Expression Mega Pack - Masc and Fem
- Angy Pose Packs - Cute and Sexy for femV
- Zwei Custom PMU Pose Packs - Core
- PMU - Zwei Custom Poses - Fashion Set
- PMU - Zwei Custom Poses - Boudoir Set
- PMU - Zwei Custom Poses - Veruca's Dance Class
- Action Pose Pack - Archive XL (F and M)
- The Merc Life - PM Pose Set
- Solo pose pack (F) AXL
- Solo pose pack Vol.2 (f)
SHOPS:
Note: Stores only contain items that are installed so only install stores that have items that you want. This list is just a small sample of store I currently use.
- Virtual Atelier
- Veegee Shop
- Alvarix Custom Store
- MosterRaider - Victor Store
- Hyst Atelier Store - Virtual Atelier
- The Bean Cup - Virtual Atelier Store
- Seawright Optometry Shop - part of the Kwekshops network
- Tac Threads Atelier
- A.G.I.S. - All Game Items Store (Virtual Atelier) Also download the optional Blackwall Store.
- Asha's Accessories - Virtual Atelier
- ANE - Anrui's Netrunner Emporium - Virtual Atelier Store
CLOTHING:
- Pulleddown Glasses
- Netrunner Suitp2
- Equipment-EX
- Raiden Cyber Body
- Quiet OUtfit
- Monster Netwatch Legs
- Fishnet Tights V2 - Archive XL
- Cyberarms Collection 2.0 - Archive-XL
- Reed's Glasses - Archive XL
- Kwek's Neck Goggles With Physics - ArchiveXL EquipmentEX
- Comfy Boots - ArchiveXL
- Custom Panam Pants - ArchiveXL
- Military Vest - ArchiveXL
- Modular Military Accessories Pack 1 - ArchiveXL
- Modular Military Armor - ArchiveXL
- Modular Military Mask - ArchiveXL
- Dogtown Scarf - Archive XL
- CUSTOM NETRUNNER SUITS (UPDATE w EXOTICS)
- (ANE) Sleeveless netrunner suits - Volume 1 - Archive XL
- Wraiths Hood With Hair A replacer for the bandana. You will need to unpack the zipped file and choose the option you want before repacking it in the correct file path.
This concludes this mods list for now. I have many more mods installed however it would take too long to add them and a majority of them are optional. I did have some other section I also wanted to include such as vehicles and immersion but for now I hope you liked this mod list.
Thank you and please endorse and support the mod authors who brought much needed life into the game.
CREDITS:
- rfuzzo
- WopsS
- psiberx
- jac3km4
- NexusGuy999
- Jackhumbert
- yamashi
- NimRain
- r457
- TheManualEnhancer
- sosuine
- DBK01
- sammilucia
- emoose
- Schreedr
- Xerme
- nigeez
- HalkHogan
- XilaMonstrr
- shierkbark47
- nigeez
- BabaBooey88
- EmreHQ
- Dayn3n
- mk1234
- AK47OG
- deceptious
- JohnsonsStuff
- RaiderBV
- noha7ers
- 2077v2
- UrbanManiac
- Neurolepticer
- Natsji
- spicy2332
- sphiratrioth666
- Halvkyrie
- theCyanideX
- Arkhe0
- xBaebsae
- PotatoOfDoom1337
- Apzurv
- Avallonkao
- manavortex
- Xerxes99
- OminousVoice
- KnowSo
- Bourbibouze
- FreakaZ71
- beethy
- SilverEzredes
- rockergirlfriend
- Subleader100
- IronWings1994
- yuyu69
- theCyanideX
- nremind
- pacings
- VeegeeAlvarez
- AlvarixPT
- MONSTERaider
- LxRHyst
- beaniebby
- kweknexuss
- ScorpionTank
- Kryptolone
- AsheNoodle
- AnruiMurasaki
- Silverlags
- ygollonac
- Echorra