A guide and set of three modlists for TESIV: Oblivion to be used with Valve's Steam Deck gaming handheld.
Requirements
DLC requirements
DLC name
Shivering Isles
Knights of the Nine
Fighter's Stronghold
Horse Armor Pack
Mehrune's Razor
Orrery
Spell Tomes
Thieves Den
Vile Lair
Wizard's Tower
Permissions and credits
Credits and distribution permission
Other user's assetsSome assets in this file belong to other authors. You will need to seek permission from these authors before you can use their assets
Upload permissionYou are not allowed to upload this file to other sites under any circumstances
Modification permissionYou must get permission from me before you are allowed to modify my files to improve it
Conversion permissionYou are not allowed to convert this file to work on other games under any circumstances
Asset use permissionYou must get permission from me before you are allowed to use any of the assets in this file
Asset use permission in mods/files that are being soldYou are not allowed to use assets from this file in any mods/files that are being sold, for money, on Steam Workshop or other platforms
Asset use permission in mods/files that earn donation pointsYou are not allowed to earn Donation Points for your mods if they use my assets
Author notes
Individual mods included in the Presets retain the permissions shown on their pages. I do not give permission for the PFoCW Installer to be redistributed or modified in any capacity other than on this Nexus page. The PFoCW INI files may be freely edited and shared as they are just edited text files for mod configuration.
File credits
Thank you to Slowpard for permission to include slowLODgen with the installer. Thank you to all the mod authors who had open permissions for me to include their tools with the installer.
Donation Points system
Please log in to find out whether this mod is receiving Donation Points
A Pocket Full Of Cheese Wheels A Guide and Modlist for Oblivion on Steam Deck
Introduction
Cyrodiil, the Imperial province and the heart of the Empire. An ecologically diverse land filled with fantastical creatures, striking vistas and many places to discover. Its architecturally unique cities playing host to the many races and guilds found across Tamriel. A place as plentiful in magic and wealth, as it is in opportunity. It was here in Cyrodiil that I had found myself rotting in an Imperial City dungeon cell with no recollection of who I was, where I was, or why I was in prison to begin with.
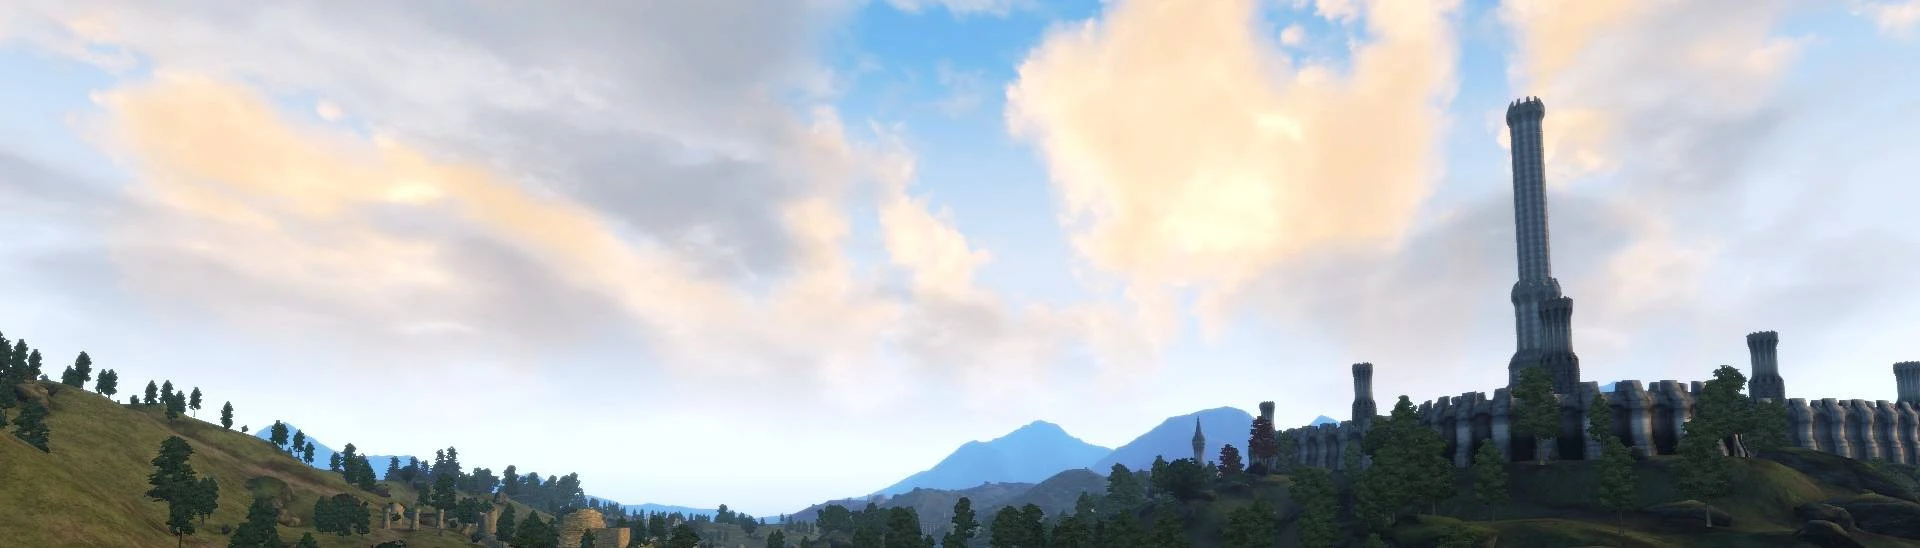
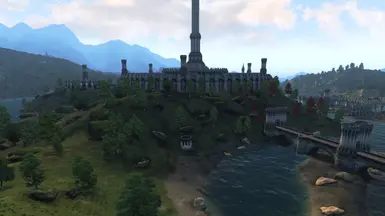
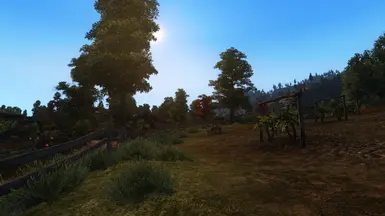
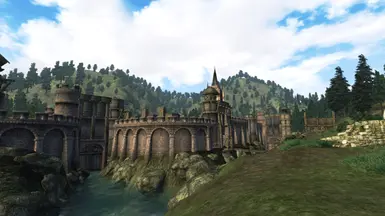
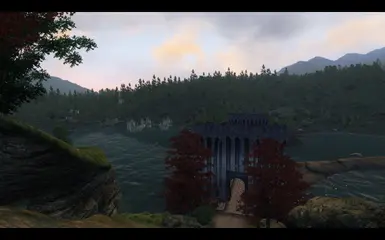
While the details leading up to my imprisonment are still lost to my memory, the memory of that prison cell remains intact. A small mix-up by the watch was all it took for me to be placed in that prison cell and to be mixed up in an assassination plot by a Daedric cult. Not to mention being sent on a quest that would determine the fate of Tamriel itself... But I'm getting ahead of myself here. The events between being placed in that cell and my impromptu freedom need not be mentioned. All you need to know is that it involved me making my way out of the dark city sewer system with nothing but scrounged up armor and a rusty iron sword. It was upon exiting those sewers though, that I was embraced by the warmth of the sun; its blinding light reflecting off the ethereal white clouds that accompanied it. As my eyes adjusted to the light, the view that followed could only be described as incredible. Before me lay a beautiful scene of tall mountains, rolling hills and flowing rivers. Littered amongst the hills and tree lines were distant villages, crumbling forts, and mysterious caves. In front of me, a simple fishing dock pointed towards a grand Ayleid ruin that was but a short swim away.
A quick glance behind me revealed steep hillsides leading back up to the outer walls of the Imperial City. The majestic White Gold Tower, nestled deep in the middle of the city, stood tall for everyone in the land to see. With no clear direction of where to go but determined to get my bearings; I took but one step forward.
I was immediately greeted by an incredibly angry mudcrab. Such horrible creatures...
The Elder Scrolls IV: Oblivion is an incredible game to experience, especially if it is your first time playing it. From its quest design to its beautifully crafted open world; the game still offers something unique that can’t be found in other titles. It’s not a perfect game, far from it in fact; but year after year, I find myself coming back to the world of Cyrodiil to roll a new character and mod the game.
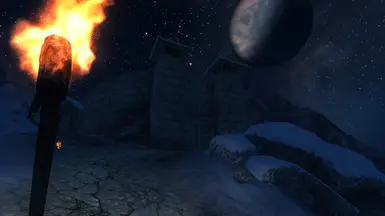
Don’t let the nostalgia fueled intro above fool you though, the game has not aged that well. Such is the fate of many games from that era. That intense blinding sunlight from the sky above? That is Oblivion’s bloom attempting to burn your retinas to a crisp. Those rolling hills and tall mountains littered with points of interest? Yeah, Oblivion doesn’t render much further than the Ayleid ruins you see when you exit the sewers.
As for the performance, it was troublesome back when it was released and has gotten worse as time marches on.
With the advent of portable handhelds such as the Steam Deck, I quickly came to the realization that I can now mod and play my favorite game on the go. A task that is much easier said than done.
I created A Pocket Full of Cheese Wheels with two goals: To make modding Oblivion as painless as possible on Steam Deck, and to make a modlist that others and I would want to play. After nearly nine months and over 1000+ hours of testing in and out of game; I feel that I have achieved both goals.
From conception, PFoCW was built with player choice at the core of its design. Why? Simply put, modding is a matter of taste. What I find to be perfect, you may think is terrible. With that said, I designed three separate presets to choose from. Each preset was designed to build off the previous one so that you can maintain what is most important: your ability to choose.
This means that if you want just a Vanilla Oblivion experience, you can have that without jumping through hoops for it. If you crave something with a little more depth, maybe Vanilla Plus is the preset for you.
My hope is that this guide and modlist serves you well and that you find countless hours of enjoyment playing Oblivion.
The spoiler button below lists the system requirements, information about the included installer, controller layouts, and the performance of PFoCW on the Steam Deck. I would highly encourage you take a few moments to read through this information as it is all very important. Especially as it relates to the included installer and performance.
Spoiler:
Show
System Requirements:
Any Steam Deck running SteamOS 3.5 or higher
Proton 9.0 or higher
Up to 50GB of free space (Dependent on chosen preset and if BSA file backup is chosen)
Please click below to view specific information for 64GB and OLED owners:
For Steam Deck 64GB Owners
Spoiler:
Show
I want to be clear and upfront with those of you who own the 64GB model of the Steam Deck: I have no clue how this will work for you. I have seen tons of information stating that the memory management on these models is terrible due to updates and shader files.
If you choose to use this guide, I wholeheartedly recommend only using Preset 1. It has the smallest space requirement and is least likely to eat up your limited space.
What about SD card installs?
I did not design this guide with SD card installations in mind for two reasons: the installer and performance. The installer was created with the install paths being explicitly defined and will either do nothing or place random files across your system unless Oblivion and Mod Organizer 2 are where they need to be.
Please do not attempt to use it if Oblivion is not installed to your internal storage drive.
Performance is something that was also at the forefront of decision making. Oblivion’s performance is problematic under even the best circumstances. There is so much that needs to be fixed with this game that it needs to be ensured that there is proper headroom for performance. A lower end SD card can cause loading issues, crashes, and overall just create an unenjoyable experience.
There is hope though, while there are too many variables involved to create an SD card version of the installer; I am making a manual setup guide. This guide originally started as 100+ pages of documentation and pictures that detailed every step of setup. At a later date, I will publish this to the files section for this guide as a downloadable PDF so that you can eventually move this all to an SD card without consequence.
For Steam Deck OLED Owners
Spoiler:
Show
This guide uses a mod named Oblivion Reloaded Combined which can provide extra graphical fidelity. This affects shadows, lighting, color and color saturation in the game. I currently only have the LCD version of the Steam Deck and have adjusted these settings to look their best for the screen brightness and color gamut available to the LCD model.
That said, my settings might look great on an OLED screen, or it could look awful due to color saturation settings or how the lighting/shadows were adjusted. I have no way of knowing currently. However, this guide will also have a section dedicated to adjusting these settings so you can make corrections to them.
I plan to buy an OLED model to correct this at some point when my finances allow for it.
PFoCW Installer
A Pocket Full of Cheese Wheels includes an installer that will automate the bulk of setup tasks for the user. Over the course of the eight months I spent making this guide, I ended up making a shell script that would set me up to test my next build. At some point along the way, it dawned on me that this would work for the end user since anyone using this guide is also on Steam Deck. Sure enough, I had a friend test the script on his Steam Deck and it worked flawlessly. For all of you who have had to deal with the headache of trying to set up Oblivion for modding in the past: Enjoy!
About the Installer:
Spoiler:
Show
The installer is a simple shell script solution to quickly setup the modding environment for Oblivion. This is by no means a perfect solution or the only solution for modding Oblivion on Steam Deck, but I would argue that it is the easiest route at this time.
I make no mistake when I say that this script is not a perfect solution. At the time of writing this guide, the script works flawlessly. However, it only works on Steam Decks that are running SteamOS. Let me repeat that one more time.
This installer will only work on a Steam Deck running SteamOS.
Now that that is out of the way, this is how it works and how it can eventually fail. Each Steam Deck is near identical as it relates to the file system structure and directories that are in place. Because of this, I can explicitly tell the script where files need to go without making assumptions or making a complicated script. Its simplicity is its greatest strength and weakness.
There is one hard requirement when using this installer. Oblivion MUST be installed on the internal storage device in the default install location. As I said before, this script is simple. For now, as long as Valve does not change where games are installed or the paths for other system locations; this script will work.
If you have issues getting the installer run you need to do the following steps. 1. Right click CheeseWheel.sh and select properties. 2. Check 'Is executable' 3. You will also need to do this for the uninstaller.
If the Protontricks installation asks you 'flathub' user or 'flathub' system; please choose 'user'. It has been reported that choosing 'system' will cause Mod Organizer 2's install to fail. If that fails, try the 'system' after.
Please reach out to me if you have any other issues.
What does the installer do?
Spoiler:
Show
PFoCW’s installer does the following:
Installs Mod Organizer 2 and its dependency (ProtonTricks)
Runs you through first time setup of Mod Organizer 2
slowLODgen (Special thanks to Slowpard for letting me include this mod as part of the installer
Creates a backup of Oblivion’s save file directory and config file (Placed on Desktop)
Automates decompression of the game’s BSA files for better game performance
Offers an (Optional) backup of the original compressed BSA files. (Placed on Desktop)
Cleans up after itself
Controller Layouts
A Pocket Full of Cheese Wheels has had three Steam Input controller layouts created for your convenience. These are listed below.
You should be able to search for these three presets at the time of this guide being published or they should be able to be found when scrolling the community layouts section.
Additional details are listed under the second image of each controller layout.
Spoiler:
Show
Gameplay Configuration
Spoiler:
Show
Standard gameplay layout. Use L4 to open the in game console, than invoke the on-screen keyboard to type console commands. Use the on-screen keyboard or R4 to submit console command.
L4 and L5 are used to zoom in and out when playing in third person.
On rare occasions you will need to use the right trackpad to interact with the game. So far this seems to be limited to changing quantity in the Alchemy menu and moving sliders in LINK Plus Plus.
To set hotkeys: While in inventory or spell menu, hold Y and then select item or spell with A. Use D-Pad while out of menu to select hotkey item. Diagonals are working with this setup.
Mod Organizer 2 Configuration
Spoiler:
Show
The on screen keyboard does not seem to work in desktop mode when using Mod Organizer 2. Opening a text editor (such as Kate) and copying and pasting text where needed has been the only known workaround for editing mod names and entering in other info.
Use the right trackpad mouse for movement; L2 (Right Click) and R2 (Left Click) to interact.
Select multiple mods for moving while holding L5 (CTRL key), or select the top of a group and the bottom of the group while holding R5 (SHIFT Key) to move mods in groups.
It's clunky but its the next best thing for those of you without access to a dock.
Oblivion Reloaded Combined Configuration
Spoiler:
Show
While in game, hold L4 (CTRL Key) and press R4 (C key) to bring up Oblivion Reloaded Combined's menu. Use L5 (Numpad '-' Key) to disable or reduce features and R5 (Numpad '+' Key) to enable or increase features.
Press (CTRL Key) on modified item to save the setting.
Hold L4 (CTRL Key) and press R4 (C key) to close menu when finished.
Performance
I want to start this section by giving some general info about Oblivion's performance: It's never been great. I first played this game in 2009 and even then there were issues at every corner. Crashes were a frequent occurrence and 25-30fps could be considered playable depending on your hardware setup. Not to mention the constant stutter that would plague most players. As the years have gone by it's getting harder to keep this game stable on modern Windows. Additionally, adding script heavy or memory intensive mods to your load order can worsen these issues further.
I want to say this to all new and returning players. You can mitigate the issues, but you can't fully eliminate them. Any "fix" you come across is either placebo at best, or will eventually break something else at worst.
The goal with this mod guide has always been to maintain 60FPS and mitigate the stutter and crashes. I have gotten the game to a very playable state with a little Proton Magic, a simple .ini tweak, and some help from Oblivion Reloaded Combined.
Performance Results are listed below: (I will attempt to get some charts/graphs when I find an easy method to do so.)
Spoiler:
Show
All Presets: Performance was the same across all presets. The game was tested with optional graphics mods and the following settings listed below:
Mods: OUT Decompressed BSA 4k Textures, ORC193
Launcher Settings: Ultra Preset, HDR on, V-Sync off
In-Game Settings: Maxed out with the following changes below
Actor Fade: 10 (Set by ORC193 Object Culling)
Item Fade: 10 (Set by ORC193 Object Culling)
Object Fade: 10 (Set by ORC193 Object Culling)
Int. Shadows: OFF
Ext. Shadows: OFF
Self Shadows: OFF
Shadows on Grass: OFF
Specular Dist: 50%
Bloom Lighting: OFF (Automatically disabled when using HDR)
Water Ripples: OFF (Must be disabled for ORC193)
Note: Shadows absolutely murder the framerate in this game. I struck a balance by using ORC193's Ambient Occlusion and leaving Tree canopy shadows enabled.
Handheld mode: 1280x800, 60FPS minimal stutter (Occasional FPS drops in heavy outdoor combat, small hitches when loading complex scenes on exterior cell load)
Docked Mode: 1920x1080, 45-50FPS (Disable SMAA in ORC193 to stabilize) (Occasional FPS drops in heavy outdoor combat, small hitches when loading complex scenes on exterior cell load)
Do not play in desktop mode: Color saturation and lighting is terrible and latency will suffer. Please only play in Gaming Mode while playing handheld or while docked to a monitor.
"A wealth of info for those of you who are unfamiliar with things"
Spoiler:
Show
Before you start modding Oblivion you must take the following steps to ensure everything goes smoothly.
Setting up a Password:
Spoiler:
Show
Complete in Desktop Mode
You may or may not need to do this. This just ensures you have admin privileges when we get to installing certain applications like Mod Organizer 2 and its dependency.
You may skip this step if you already have a password setup in desktop mode.
1. Enter Desktop Mode if you are not there already.
2. Launch a new Terminal (Konsole).
3. Type in the following and press enter.
passwd
4. Enter a password and then re-enter it when it asks you to confirm.
5. That’s it. You have set your password.
Existing Save File Backups:
Spoiler:
Show
Complete in Desktop Mode
If you need to backup any save files. You will need to do so in Desktop mode by going to the following directories. You may need to enable Show Hidden Files. A guide to do this is located in the ‘Final Steps’ section of this guide.
Since this guide is for the Steam Deck, I have only made this guide for the Steam store version of Oblivion.
Steps:
1. Please take a moment to review each of the three presets in this guide to determine which one you would like to use. Space requirements are listed for each preset.
Installation will be to the Internal Drive and you will need to confirm you have the space for it first.
2. Navigate to and select Oblivion and select the Install button on the main page. Install the game to the Internal Drive.
Note: For users with a modded install on a desktop, please ensure that File Transfer over Local Network is disabled.
This can be done by pressing the Steam button on your Steam Deck and navigating to:
Settings > Downloads > (Uncheck the Game File Transfer over Local Network)
3. Once installation has completed, from the game’s main page select the Gear Icon to the far right of the Play button. Select Properties.
4. From the newly visible screen, navigate down to the section titled Compatibility. Check the box for Force the use of a specific Steam Play compatibility tool.
5. A dropdown box will have appeared, ensure that the latest version of Proton 9.0 (or higher) is selected. Proton 9.0-3 was the latest at the time of writing. Do not select Proton Experimental.
6. Below the Compatibility section you will need to navigate down to Installed Files and select Verify integrity of game files. (This will double check that the game installed correctly the first time)
7. Now that we have this configured, we can get our controller profiles setup for modding and playing the game. Continue to the next section to setup these profiles.
Controller Profiles:
Spoiler:
Show
The following three controller layouts have been created and uploaded to the community layouts section on Steam.
These can be found by the following names:
Configuring the Game Launcher and In-Game Settings:
Spoiler:
Show
Complete in Gaming Mode
Use the PFoCW TESIV: Oblivion Controller Layout for this step. Only the Right Trackpad mouse will work for now.
1. The game’s launcher should appear after pressing play. Click on Options and configure exactly as shown below.
2. Once completed, Click ‘Okay’ and launch the game. Once you have reached the title screen, select ‘Options’ and go to ‘Gameplay’ first. Configure as show below.
The save options can be left on or off depending on if you are using a mod to handle saves. Leave these on if you are not.
3. Select ‘Return’ and then select the ‘Video’ menu. Match as shown below.
4. Exit the game after configuring these options.
Installing A Pocket Full of Cheese Wheels:
Spoiler:
Show
Complete in Desktop Mode
The PFoCW installer found in the files section of this mod page is a nifty little script I made to make the tedious process of setup a less daunting task for when I was testing new load orders. There is one critical step to using it though:
The installer must be in a folder on the Desktop titled PFoCW Installer. As shown below:
Once you are sure it is placed where it needs to be, you can go into the folder.
Right click in any blank space in the PFoCW installer folder and select ‘Open Terminal Here’
A terminal will open and you will need to type in the following command:
./CheeseWheel.sh
If you have issues getting the installer or Uninstaller to run you need to do the following steps. 1. Right click CheeseWheel.sh and select properties. 2. Check 'Is executable' 3. You will also need to do this for the uninstaller.
If the Protontricks installation asks you 'flathub' user or 'flathub' system; please choose 'user'. It has been reported that choosing 'system' will cause Mod Organizer 2's install to fail. If that fails, try the 'system' after.
Please reach out to me if you have any other issues.
This will begin the installer. Follow along and pay close attention to any instructions.
Note: If the installer fails at any point prior to the BSA decompressor (giant scrolling wall of yellow text, you’ll know it when you see it), you can safely exit the script and re-run it without consequence.
If the script fails during the decompression, you will need to run the uninstaller.sh script and start over. I have only had this happen one time and I believe it is fixed now.
Uninstalling A Pocket Full of Cheese Wheels:
Spoiler:
Show
Complete in Desktop Mode
To uninstall everything for a fresh start. Run the included Uninstaller script as shown below:
Right click in any blank space in the PFoCW installer folder and select ‘Open Terminal Here’
A terminal will open and you will need to type in the following command:
./Uninstaller.sh
Using Mod Organizer 2:
Spoiler:
Show
ONLY USE MOD ORGANIZER 2 IN DESKTOP MODE WHEN IN GAMING MODE, MOD ORGANIZER 2 WILL ONLY BE USED TO RUN THE GAME
This guide uses a combination of Mod Organizer 2 and Wrye Bash to mod the game. Mod Organizer 2 will be used to install our mods and Wrye Bash will be used to bring it all together with a Bashed patch.
Mod List vs. Load Order:
Spoiler:
Show
There are two panes you need to pay attention to. The pane on the left is your mod list which shows the categories and mods you have installed. This shows everything. The pane on the right shows your load order. This is the order in which mods that have plugins are loaded by the game. Only mods that have a plugin will show up here.
Translated even further, not every mod you have installed will show up in the right pane; that’s okay.
Most OBSE plugins and texture mods do not have a plugin because all they do is get added to the file system or overwrite something. You don’t need a plugin for stuff like that.
Mods that add quests or new content will have a plugin because they need to tell the game that something is there to be loaded.
Creating a Category Separator:
Spoiler:
Show
Each Preset has categories defined by a roman numeral. This is how we will organize our mods in Mod Organizer 2. The PFoCW installer already preinstalls these for your convenience. However, here is how to make one should you need to.
Click the button shown above and select Create Separator.
Enter in the text field what you want the category to be called and click ‘Okay’.
That’s it, you created a separator to keep your mods nice and organized.
Installing a Mod:
Spoiler:
Show
The image below shows the standard layout of a mod page download:
Notice that it says 'Mod Manager Download' and 'Manual Download'. For all situations, you will select ‘Mod Manager Download’ if it is available. Only Select ‘Manual Download’ if it is the only one available.
Note: On occasion, certain mods will need you to click an additional ‘Download’ button; this is an extra confirmation that you are aware of the prerequisite files. You will need to click this or it will not download to Mod Organizer 2 or your Downloads folder.
Manual Downloads will go to your device ‘Downloads’ folder.
Mods that are downloaded to Mod Organizer 2 will appear in the Downloads tab located on the right as shown below.
Installing a Mod from your Downloads Folder:
Spoiler:
Show
There are a few mods in this guide that don’t download directly to Mod Organizer 2. When this happens you have to install via mod archive using the following steps below.
Click this button here.
Navigating this menu can be tricky at times. Using the green up arrow and the back and forward arrows is the easiest way to navigate directories. Pressing the up arrow several times will eventually take you to where you can access your downloads folder.
After navigating to the mod you wish to install, either double click it or select it with a single click and select Open.
Proceed with the installation.
Manual Installs:
Spoiler:
Show
Occasionally, the guide will tell you to manually install a mod. Sometimes Mod Organizer 2 will tell you that something doesn’t look right or the guide will tell you to do a manual install.
The button on this dialog box that says 'Manual' will need to be selected for this in cases where this situation occurs.
I have included screenshots and simple instructions for mods that require this.
Enabling vs. Disabling a Mod:
Spoiler:
Show
Once a mod is installed it will be disabled by default. This is shown below with the checkbox unmarked. To enable a mod, simply click the white checkbox to mark it. All mods you wish to use will need to be enabled before proceeding with the Final Steps section of this guide.
Mod Disabled
Mod Enabled
Removing a Mod:
Spoiler:
Show
Maybe you downloaded the wrong mod and need to uninstall it. Here’s how to do that.
Right click the mod and select Remove Mod. Follow any prompts that come up.
Reinstalling a Mod:
Spoiler:
Show
Did you make a mistake installing a manual install? No worries, just do the following.
Right click on the mod and select Reinstall Mod.
When the prompt asks you what you would like to do, select 'Replace'. Otherwise it will create a second instance of the mod.
Sorting the Load Order:
Spoiler:
Show
Some mods take higher priority than others which means we need to sort them in a way that makes sense for the game. We don’t need to do this manually though. We have a tool called LOOT that will do the work for us.
Select the 'Sort' button when prompted by this guide.
Select 'Yes'
Load order is sorted and now you can click close on the dialog box.
Other Notable Items:
Spoiler:
Show
File Overwrite Certain mods will show a Lighting symbol with a + or - symbol on them. This indicates that based on the current order of mods, that a mod is overwriting the files of another mod.
In most situations this is fine; that is why the modlist is in the order it is in. However, it’s also a great way to begin troubleshooting if something is wrong.
Mod Cleaning Later in this guide you will proceed with cleaning a number of mods. After sorting your load order, you will see this symbol next to mods in the Load Order pane on the right hand side.
Preset I: Cheese for No One (Vanilla)
“Stabilizes the game and adds controller support, optional graphics upgrade included”
About This Preset
Spoiler:
Show
Goals:
A stable 60FPS
An updated vanilla UI with full controller support
Reduce potential for crashes
Optional QoL mods for the UI (Mods will be marked as optional)
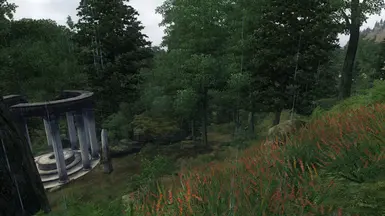
An (Optional) increase in graphical fidelity provided by high-resolution textures, generated LOD, and shader enhancements from Oblivion Reloaded.
Note: If you choose to use generated LOD than it is required to use Oblivion Reloaded to offset the performance hit that is incurred by it. This is to ensure that the performance target of this preset is met.
Contains:OBSE, OBSE Plugins, Unofficial Patches, UI modifications and controller support, (Optional) Oblivion Reloaded Combined for a performance increase and light shader usage, High-Resolution Textures and Generated LOD for view distance
Who it’s for:
First time players and purists
Those wishing for a fresh canvas to mod on
Pros:
Minimum amount of work needed
Authentic to the original vision of the game
Offer’s the best performance and battery life on Steam Deck
Leaves the user open to try new mods at their leisure and craft their own experience (You will still need to check for mod compatibility for the User Interface)
Cons:
Slightly larger space requirement with decompressed game files
Much larger space requirements if using the optional graphics upgrades
Space Requirements: Original Install Size: 5.58GB Vanilla Preset (Without Optional Graphics): 7.73GB Vanilla Preset (With Graphics Option): 33.1GB
Battery Life: ~2-3 hours of battery life. Varies drastically when indoors and outdoors in game.
Gameplay Changes
Spoiler:
Show
Gameplay for this preset is identical to the Vanilla game. All changes are to the UI elements and the added benefit of controller implementation.
User Interface
Nearly identical to Vanilla Oblivion, this UI now includes a larger map, a quest progress tracker found in the map menu, extra info provided by Extended UI, and additional skill perk info provided by Display Skill Perk Effects.
Additionally, the Keychain mod keeps your menu from being cluttered by an ever growing list of keys. Press 'A' to open it up and see all keys.
When not in the main menu, you will now have an MMO style loot feed if you are someone who likes to click 'Take all' and look later. The loot menu mod provides functionality similar to Fallout 4 when viewing containers and corpses.
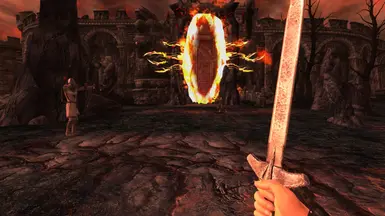
Map Marker overhaul provides more map markers and shows open and closed Oblivion gates.
Additional icons, color tweaks, and other intuitive features are included as well.
Preset II: A Pocket Full of Cheese Wheels (Vanilla Plus)
“Lore-friendly content, overhauls, gameplay tweaks, and upgraded graphics”
About This Preset
Spoiler:
Show
Goals:
A stable 60FPS
An updated vanilla UI with full controller support
Reduce potential for crashes
A balance of visual quality and performance within the scope of the Steam Deck’s hardware performance.
Balanced gameplay and systems
Contains: The entire Vanilla Preset, Oblivion Reloaded, High Resolution Textures, Updated Textures/Meshes, Generated LOD, Updated gameplay and systems overhauls.
Who it’s for:
First time players
Purists wanting just a little more
Returning players looking for a new experience
Graphics enthusiasts
Pros:
Excellent performance
High visual fidelity
Leaves the user open to try new mods and expand on what has been installed (You will still need to check for mod compatibility and refrain from mods that change gameplay and systems)
Cons:
Larger install size
Small potential for the occasional crash
Potential for small performance dips in the realm of ~5fps in taxing situations
Space Requirements: Original Install Size: 5.58GB Vanilla Plus Preset: ~35GB
Battery Life: ~2-3 hours of battery life. Varies drastically when indoors and outdoors in game.
Gameplay Changes
Spoiler:
Show
A Pocket Full of Cheese Wheels (Vanilla Plus) Preset incorporates the following mods to overhaul the vast majority of systems and gameplay in Oblivion. Heavily inspired by PushTheWinButton's "Through the Valleys" Guide and Modlist; this preset includes some additional mods to add to and improve the magic and alchemy system in the game.
General Gameplay:
Ascension - Please see PushTheWinButton's Mod Page for more info HERE I have made some changes to the config file for this mod to make it a bit more friendly for new players.
Noteable Changes: Restored the Vanilla Health System Restored the Vanilla Encumbrance system (My fellow kleptos and hoarders can rejoice!) Disabled key and lockpick weight
Balanced Creature Stats and Balanced NPC Level Cap - Implements fixed level caps for all NPCs and creatures in the game to fix the level scaling problem. Balanced Unleveled Rewards - Fixes issues with the leveled item system by giving them fixed values. Rebalanced and Unleveled Quest Gold Rewards - Makes gold rewards for quests less or more rewarding based on the type of quest Mercantile Experience Fix - Fixes the broken selling experience system SM DLC Plugin Refurbish - You will no longer get pop-ups immediately after the tutorial for DLC. Now, you will have to reach an appropriate level to start DLC content. (Configurable in LINK PLUS PLUS "Mods" menu while in game.)
Horse Armor DLC Must wait until you hear by rumor that will give you the note. Available at level 3 Orrery DLC Rumor and note can be provided from Mages Guild members or you can directly speak to Bothiel. Available at level 3 Wizards Tower DLC Sleep after joining Mages Guild as an associate, deed is mysteriously delivered to you. Available at level 5 Thieves Den DLC Must wait until you hear by rumor. Available at level 5 Mehrunes Razor DLC Must wait until you hear by rumor. Available at level 10 Vile Lair DLC Sleep after committing a murder, deed is mysteriously delivered to you. Available at level 10 Knights of the Nine DLC The church is not initially destroyed at the start of the game. Must wait until you hear rumor outside Anvil at which point church is now destroyed. Available at level 15 Battlehorn Castle DLC Must wait until you hear by rumor. Available at level 12 Shivering Isles DLC Must wait until you hear by rumor. Available at level 20
Vile Lair Vampirification - Become a vampire on demand in the Vile Lair DLC Vile Lair DLC Tweaks - See mod page HERE KotN Improved Infamy System - See mod page HERE Knights: Fewer Condescending Comments - See mod page HERE Guard Infamy Greeting Fix - See mod page HERE
(Settings for Av Latta Magicka can be tweaked in the 'Mods' section in game. My provided .ini file has these all set to a custom preset and have been set to reflect closest to Vanilla settings.)
De Rerum Dirennis Alchemy Overhaul - See mod page HERE Convenient Open Spells - Allows you to look at a locked container and have the spell be auto-selected for use. Magical Arrows - Enchanted arrows now display the relevant effect when fired.
About Combat: I have left the combat system untouched. I am personally satisfied with the Vanilla design and animations. This allows you to customize the combat with any mod of your choosing. Please be aware you must keep compatibility in mind as it relates to NorthernUI's control scheme, animations, and other gameplay overhauls.
About the Leveling System:
I spent too much time trying to figure out a mod that would properly overhaul the level up system in Oblivion and all paths led to some sort of massive change or issues. It hit me not to long ago that the biggest issue with leveling is that its a large effort to do it efficiently. Thanks to the following two mods, we can keep the level system intact and you don't need to think too hard about those coveted triple +5 attributes.
Attribute Progression Redesign - Attribute points will rollover across level ups. No more wasted attribute points.
Skill Diary Undone - Your attributes screen will now show the number of times a skill that pertains to that attribute has leveled up and will show you the attribute level up amount for when you sleep. (Note: If wanting to reconfigure, use Link Plus Plus in the mods menu of Oblivion. The icon feature does not work with the UI implementation.)
User Interface
Nearly identical to Vanilla Oblivion, this UI now includes a larger map, a quest progress tracker found in the map menu, extra info provided by Extended UI, and additional skill perk info provided by Display Skill Perk Effects.
Additionally, the Keychain mod keeps your menu from being cluttered by an ever growing list of keys. Press 'A' to open it up and see all keys.
When not in the main menu, you will now have an MMO style loot feed if you are someone who likes to click 'Take all' and look later. The loot menu mod provides functionality similar to Fallout 4 when viewing containers and corpses.
Map Marker overhaul provides more map markers and shows open and closed Oblivion gates.
Additional icons, color tweaks, and other intuitive features are included as well.
PFoCW ini files - Included in the Files Section of this mod page MANUAL DOWNLOAD - Install from downloads folder via Mod Organizer 2 Miscellaneous Patch Collection by Dispensation Installer:
Preset III: Cheese For Everyone (Vanilla Plus Plus)
“A custom preset containing overhauls, gameplay tweaks, upgraded graphics, and new content"
About This Preset
Spoiler:
Show
Goals:
A stable 60FPS
An updated vanilla UI with full controller support
Reduce potential for crashes
A balance of visual quality and performance within the scope of the Steam Deck’s hardware performance.
Balanced gameplay and systems
Add fun new content in the form of new quests, items, spells
Contains: The entire Vanilla Plus Preset, additional content that may or may not be lore friendly.
Who it’s for:
Returning players looking for a new experience
Graphics enthusiasts
Pros:
Excellent performance
High visual fidelity
New content and a variety of new visuals
Cons:
Larger install size
Small potential for the occasional crash
Potential for small performance dips in the realm of ~5fps in taxing situations
Limits user ability to add more mods. (Compatibilities will need to be heavily monitored.)
Space Requirements:
Original Install Size: 5.58GB Vanilla Plus Preset: ~40GB
Battery Life: ~2-3 hours of battery life. Varies drastically when indoors and outdoors in game.
Gameplay Changes
Spoiler:
Show
Modlist
Spoiler:
Show
Coming soon - This cheese needs a little more time to age before it's ready to eat.
Final Steps "Wrye Bash Bashed Patch, LOD Generation, ini Tweaks"
Show Hidden Files
Spoiler:
Show
To make it possible for you to navigate to certain file directories, you will need to enable one setting in Linux to allow you to view all file directories.
1. Open Dolphin (the default file explorer)
2. Click the hamburger menu (3 horizontal lines button) located on the far right of the window.
3. Check “Show Hidden Files” (There is an eyeball next to it)
That’s it. You can see all folders, subfolders, and files.
File Directories
Spoiler:
Show
The file paths for the following items has been provided for you to copy/paste into file explorer. You can also manually navigate to these after you have enabled Show Hidden Files.
In Mod Organizer 2, select the drop down list next to run and select MPGUI. Press Run. Do the following tasks:
1. Select 'File' and click on Open Batch.
2. Select CheeseTamriel.mpb
3. In the "Plugins" Tab, press the Plugins.txt button.
4. In the "Worldspace" tab, press the "Read Worldspaces" button. (If the MPGUI window crashes, keep trying until it works.)
5. Goto the Start Process Tab and press the "Click me if you are ready" button.
This will take a good amount of time. Once the dialog window says "Background Reader Finished"; Exit.
Repeat these steps again but select the CheeseShiveringIsles.mpb file.
LOD Generation
Spoiler:
Show
Complete this task in Desktop Mode.
In Mod Organizer 2, select the drop down list next to run and select slowLODgen. Press run and follow along until completion. This process should take about 10-15 minutes on Steam Deck.
Note: At the end, if it prompts you to press another key to exit and you are unable to do so due to on-screen keyboard issues; you can exit the CLI by clicking the X at the top of the window. It will not negatively impact the completion of this task.
Please keep in mind that the MergedLOD.esm will need to remain at it's designated load order spot. If you are unsure where this is, hover over MergedLOD.esm in the load order section of Mod Organizer 2. The description will state where this needs to be.
INI Tweaks
Spoiler:
Show
Complete this task in Desktop Mode.
For this step we will be changing a few values in Oblivion.ini. Please keep in mind that you have an additional backup located on your desktop from the installer.
Locate the following two settings and change them to the following values:
uInterior Cell Buffer=12 uExterior Cell Buffer=72
Mod Cleaning
Spoiler:
Show
Complete this task in Desktop Mode.
In Mod Organizer 2, select the drop down list next to run and select TES4EditQuickAutoClean. Press run. Click through the notifications until you have reached a list of all your mods. Select one of the following mods, and click 'Okay'. Exit.
Before building your Bashed Patch, make sure to use the 'Sort' button prior to completing these steps.
Steps:
Open Wrye Bash in MO2.
Select the 'Edit' drop-down menu located at the top.
Select Active Plugins.
Select Deactivate All
Go back to Active Plugins in Edit and select 'Activate Non-Mergeable'
In the mods tab, scroll to the bottom and right click on 'Bashed Patch, 0.esp' and select "Rebuild Patch"
Update Bashed Patch Screen:
On the left side list, locate the leveled lists category and uncheck 'Remove Empty Sublists'.
Enable the following categories. (Ensure everything matches the list below)
Below is a list of the categories that you have enabled. Select each category and change the settings in the right side pane to match what is listed below.
Import Names:
Enable
Guard_Names.csv
Tweak Actors:
Enable
Irresponsible Creatures [All Creatures]
Tweaks Assorted:
Enable
Armor Shows Rings
Clothing Shows Amulets
Clothing Shows Rings
Magic: Script Effect Silencer
Bow Reach Fix
Default Icons (Required for Av Latta Magicka)
No Light Flicker (Boosts FPS)
Reweigh Ammunition
Right click the option and select '0.1'
Right Hand Rings
Tweaks Clothes:
Enable
Gloves Show Rings
Max Weight Amulets
Right click the option and select '0.1'
Max Weight Hoods
Right click the option and select '0.2'
Max Weight Rings
Right click the option and select '0.1'
Tweak Settings:
Enable
Arrow: Speed
Right-click and select x2.6
Player: Horse Turning Speed
Right click the option and select custom.
iHorseTurnDegreesPerSecond value to 80. iHorseTurnDegreesRampUpPerSecond to 360.
Msg: Loading Area
Right click the option and select 'None'
Disable
UOP Vampire Aging And Face Fix (Fix provided by UOP).
Enable
Warning: Exterior Distance To Hostiles
Right click the option and set to 1000
Warning: Interior Distance To Hostiles
Right click the option and set to 1000
IMPORTANT INFO:
Always rebuild your Bashed Patch whenever you change your plugin load order. When in doubt, sort the load order and rebuild the patch.
Do not re-enable the mods in the right window of Mod Organizer 2. These are now enabled from the patch and do not need to be re-enabled after.
In-Game Settings for Link Plus Plus
Spoiler:
Show
Immediately after you have made your character, you will need to configure a few settings for some mods while in game. Going to the options menu and selecting 'Mods' will bring up Link Plus Plus configurations.
Change the settings for the following mods. Once done, Back out and create a new save to make the changes permanent.
Skill Diary Undone:
How to show attribute: Plain Text Number of skill-ups: Show
Progress Tracker:
Button Position - Stats Menu Set both sliders to the right so that they both read 1000
I want to take a moment to thank the people in my life who have seen this guide through to the end. Without them, this guide would not be possible.
To my lovely wife:
Thank you for your patience and support as I worked on this project. My sleepless, energy drink fueled nights are behind me and you no longer need to hear me rant about this game every day. At least, until I make a guide for another Bethesda title. Sorry, love.
To my incredible friends:
Thank you for your patience while I spent countless months working on this. We can finally get back to gaming and being degenerates.
To Yin, Slowpard, llde, GBR and the countless other modders, guide makers, and enthusiasts in the community:
Thank you for welcoming me into the community and the support you have provided. The work you do for the modding community is invaluable and appreciated. Lin The Witch ;)