


0 of 0
About this mod
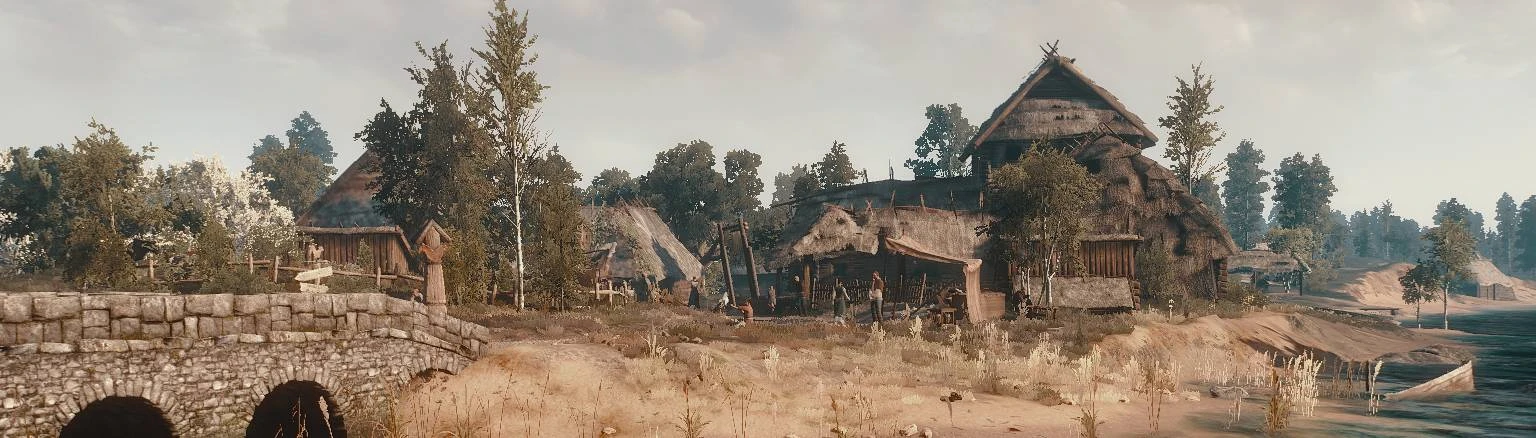
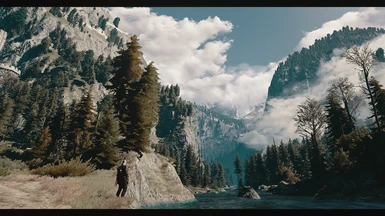
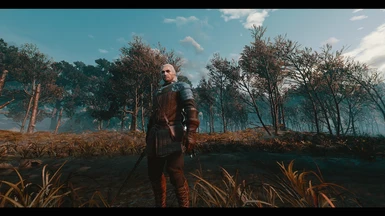
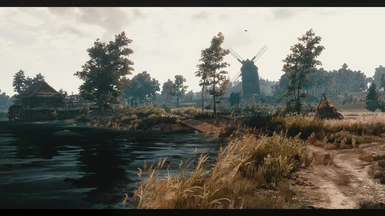
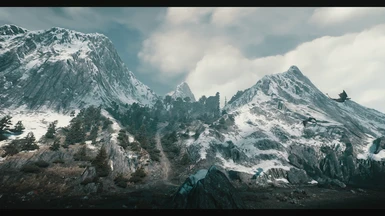
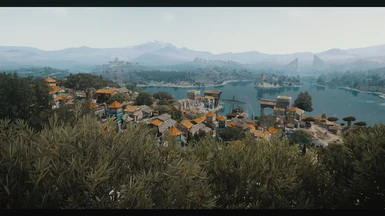
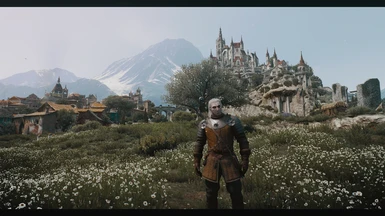
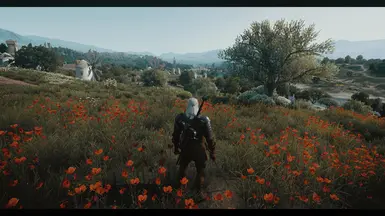
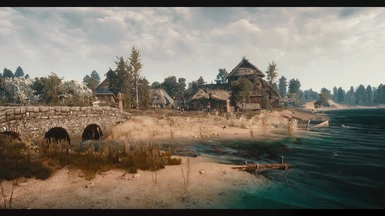
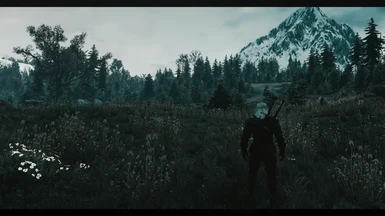
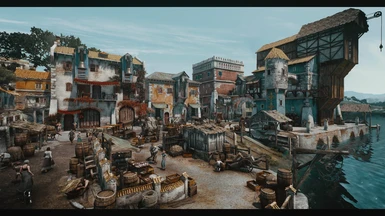
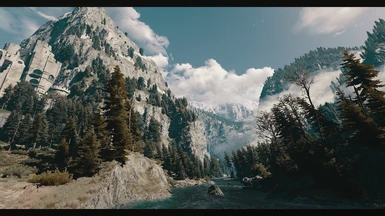
Cinematic and performance friendly visual modification for The Witcher 3 game, based on Reshade resources
- Permissions and credits
- Changelogs
- Donations
PLEASE: If you downloaded and liked my preset, don't forget to return here and click on "ENDORSE"! That's my only request to you! I've spent time and work with it, so endorsing my mod you will be helping me and I will appreciate it so much. Thank you all!!
Visions of a Witcher is a Reshade preset for The Witcher 3, for those who like a more cinematic atmosphere with a little different colors pattern. The performance impact should be minimal or inexistent, depending on your PC power. Reshade resources used: AmbientLight, Border, Curves, Deband, HDR, LumaSharpen, LUT, Technicolor2, Tonemap and Vibrance.
- REQUIREMENTS
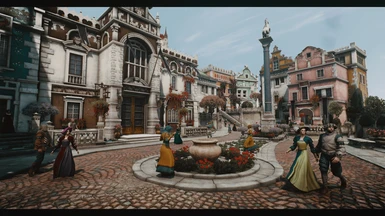
*Lighting Mods: This preset is avaiable in 2 versions, one for the the original base game Lighting (no lighting mod) and other for Phoenix Lighting Mod . The original lighting version seems to run fine with Super Turbo Lighting Mod and Wiedzmin Lighting Mod too, I made only few tests, so I cant ensure it at 100%, feel free to try. Despite of what lighting system you use for your base game, Serenity Lighting Mod is a ESSENTIAL REQUIREMENT if you have the Blood and Wine DLC, to get the intended look for Toussaint.
*ONLY for NVIDIA users: If you are using HDMI conection, Its VERY IMPORTANT to set your Dynamic Range in full, in the graphics card control panel (see this image).
*For AMD Users: open AMD control panel, click on Gaming tab > Games >Global
Graphics > Display > Pixel Format and set to: RGB 4:4:4 Pixel Format PC Standard (Full RGB).
*Optional: I would recommend New Clouds (the last old version on files tab) and AQUA mods for better clouds and water, respectively.
- INSTALLATION STEPS
1- Download the latest Reshade version from https://reshade.me/ ;
2- Run the executable to install the Reshade ----> Select the game OR browse until find the game executable .exe folder (usually [........Steam\steamapps\common\The witcher 3/bin/x64 ] ) and click on the game .exe file ----> Next ----> select DirectX10/11/12 ----> Next ----> In the shaders collections window check Legacy Effects box ----> Next ----> wait the download of the shaders ---> Finish...
ATTENTION: The firewall from some antiviruses can block the download of shader files during Reshade installation (Message: "Unable to Finish Download"). If it is happening to you turn off the firewall temporalily and try to install Reshade again. In some cases even Windows can block the installation and you will need to check the options in Windows Warning to go on with the install. There is not any viruses in these files, its a false positive.
3- Download my mod from files tab of this page (the correct version for your lighting setup), and extract the content to the ...........The witcher 3/bin/x64 folder, OK to overwrite, when prompted ;
4- Run the game, use "Home" key to open Reshade menu, click on continue and at the bar near the top, choose the file "Phoenix.ini" and click on Select (like the exemple in image bellow), so click on "continue" bars and "Finish" bar at the bottom of the menu,then "Home" key again to close it. NOTE: If you dont like the black bars at the top and the bottom of the screen, just uncheck Border.fx box in the menu.

5- (Optional) If you want to set a hotkey to Enable/Disable the Reshade Effects you can do it on Reshade menu
Settings tab > Effects Toggle Key (I use F3 key to turn ON/OFF all the effects, but it will not be activated by default after your installation, you will need to activate it by yourself if you want, cause Reshade does not allow to save it on the preset ini file which I shared here ).
* IMPORTANT: If you are using FPS monitoring or recording programs (like FRAPS, for exemple) the game
(with Reshade installed) maybe will not open if these kind of software is already running. If you want to use a program like that, open the game FIRST , and during title screen press alt + tab, so open the monitoring / recording software and go back to the game.
ENJOY AND PLEASE CLICK ON "ENDORSE" IF YOU LIKE THE PRESET!
- UNINSTALLATION :
To uninstall you need to delete: reshade - shaders folder, Phoenix.ini, dxgi.dll and any other file with "Reshade" in the name from [........Steam\steamapps\common\The witcher 3/bin/x64 ] folder .
- CREDITS
CD Projekt Red for The Witcher 3: Wild Hunt
Crosire et al for Reshade Frameworks
ALSO CHECK MY OTHER WORKS
PhoenixVivid ENB-Reshade for Skyrim SE
Phoenix Cinematic ENB-Reshade for Fallout 4
Phoenix Enhancer Reshade for The Elder Scrolls Online
Phoenix Luminance ENB for Dragon's Dogma DA
Drangleic Enhanced Reshade for Dark Souls II
Phoenix Undead Reshade for Dark Souls III
Imaginarium ENB for Skyrim SE
Insanity ENB for Skyrim LE
NCW ENB for Fallout 4
Visions of a Witcher is a Reshade preset for The Witcher 3, for those who like a more cinematic atmosphere with a little different colors pattern. The performance impact should be minimal or inexistent, depending on your PC power. Reshade resources used: AmbientLight, Border, Curves, Deband, HDR, LumaSharpen, LUT, Technicolor2, Tonemap and Vibrance.
- REQUIREMENTS
*Lighting Mods: This preset is avaiable in 2 versions, one for the the original base game Lighting (no lighting mod) and other for Phoenix Lighting Mod . The original lighting version seems to run fine with Super Turbo Lighting Mod and Wiedzmin Lighting Mod too, I made only few tests, so I cant ensure it at 100%, feel free to try. Despite of what lighting system you use for your base game, Serenity Lighting Mod is a ESSENTIAL REQUIREMENT if you have the Blood and Wine DLC, to get the intended look for Toussaint.
*ONLY for NVIDIA users: If you are using HDMI conection, Its VERY IMPORTANT to set your Dynamic Range in full, in the graphics card control panel (see this image).
*For AMD Users: open AMD control panel, click on Gaming tab > Games >Global
Graphics > Display > Pixel Format and set to: RGB 4:4:4 Pixel Format PC Standard (Full RGB).
*Optional: I would recommend New Clouds (the last old version on files tab) and AQUA mods for better clouds and water, respectively.
- INSTALLATION STEPS
1- Download the latest Reshade version from https://reshade.me/ ;
2- Run the executable to install the Reshade ----> Select the game OR browse until find the game executable .exe folder (usually [........Steam\steamapps\common\The witcher 3/bin/x64 ] ) and click on the game .exe file ----> Next ----> select DirectX10/11/12 ----> Next ----> In the shaders collections window check Legacy Effects box ----> Next ----> wait the download of the shaders ---> Finish...
ATTENTION: The firewall from some antiviruses can block the download of shader files during Reshade installation (Message: "Unable to Finish Download"). If it is happening to you turn off the firewall temporalily and try to install Reshade again. In some cases even Windows can block the installation and you will need to check the options in Windows Warning to go on with the install. There is not any viruses in these files, its a false positive.
3- Download my mod from files tab of this page (the correct version for your lighting setup), and extract the content to the ...........The witcher 3/bin/x64 folder, OK to overwrite, when prompted ;
4- Run the game, use "Home" key to open Reshade menu, click on continue and at the bar near the top, choose the file "Phoenix.ini" and click on Select (like the exemple in image bellow), so click on "continue" bars and "Finish" bar at the bottom of the menu,then "Home" key again to close it. NOTE: If you dont like the black bars at the top and the bottom of the screen, just uncheck Border.fx box in the menu.
5- (Optional) If you want to set a hotkey to Enable/Disable the Reshade Effects you can do it on Reshade menu
Settings tab > Effects Toggle Key (I use F3 key to turn ON/OFF all the effects, but it will not be activated by default after your installation, you will need to activate it by yourself if you want, cause Reshade does not allow to save it on the preset ini file which I shared here ).
* IMPORTANT: If you are using FPS monitoring or recording programs (like FRAPS, for exemple) the game
(with Reshade installed) maybe will not open if these kind of software is already running. If you want to use a program like that, open the game FIRST , and during title screen press alt + tab, so open the monitoring / recording software and go back to the game.
ENJOY AND PLEASE CLICK ON "ENDORSE" IF YOU LIKE THE PRESET!
- UNINSTALLATION :
To uninstall you need to delete: reshade - shaders folder, Phoenix.ini, dxgi.dll and any other file with "Reshade" in the name from [........Steam\steamapps\common\The witcher 3/bin/x64 ] folder .
- CREDITS
CD Projekt Red for The Witcher 3: Wild Hunt
Crosire et al for Reshade Frameworks