


0 of 0
About this mod
The Very Latest in Tactical Defensive Measures
- Permissions and credits
-
Translations
- Russian
- French
- Mirrors
- Changelogs
Shield Bubble
Version 1.2
Description:
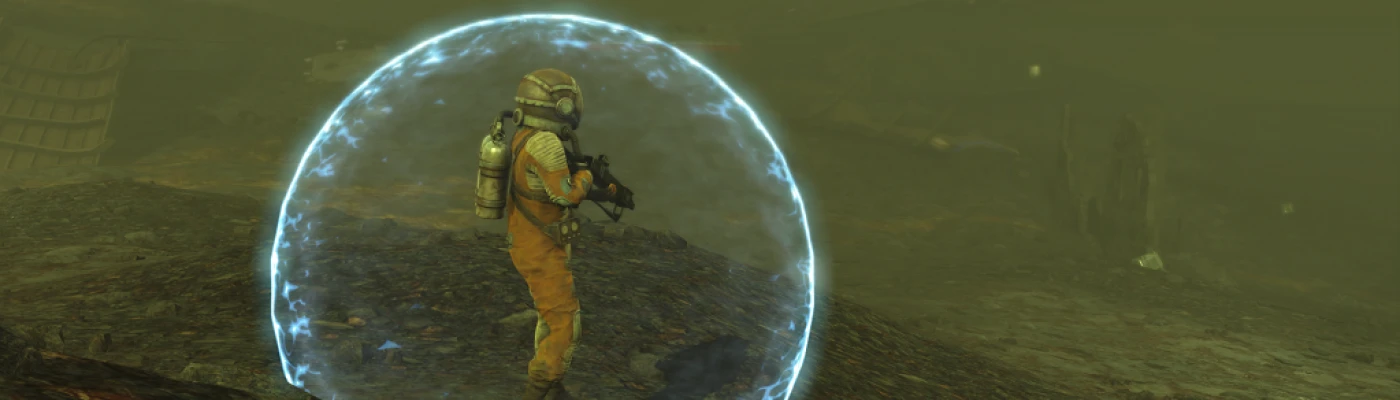
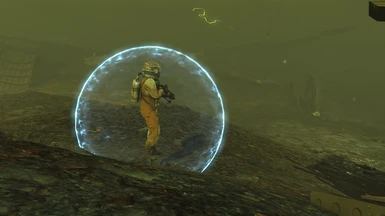
Shield Bubble: The Very Latest in Tactical Defensive Measures
Basic Characteristics:
Requires completion of a mission / quest. Can be started early-on, but the progression might prove to be difficult, or even very difficult, for low-level characters. Which would then necessitate some leveling-up and acquisition of better gear before continuing.
The mission normally begins after escaping from Vault 111 and achieving Level 2 or higher. For those using an "alternate start" mod, the mission begins when achieving Level 2 or higher and being outdoors somewhere in the Commonwealth (the main game area); for example, standing outdoors in Sanctuary.
NOTE: except for the initial steps, players will need to explore and investigate with minimal guidance towards completing objectives.
See the Walk-Through with Spoilers article Here for further details, or if having difficulty with a particular mission objective. It includes Key Features, Objectives, and How To Use.
Installation:
Install using a mod manager, or unpack the mod and copy the .ESP/.ESL and .BA2 files into the game's \DATA folder, then enable the mod.
Position this mod's .ESP/.ESL file to be as low as it will go in your "Load Order" sequence. This helps to ensure that it performs as best it can by overriding any conflicting mods. If you know with absolute certainty that there are no conflicting mods, then this mod can be positioned anywhere your installer normally allows.
Install ESP or ESL?
If you are reaching the maximum allowed number of .ESP installs, and want to install more mods, then install the .ESL versions of those new mods ...
Back-in-the-day, many players were reaching the maximum number of allowed .ESP installs, so Bethesda introduced a way to permit more via .ESL files.
The Light Master (.ESL) file is an optimized file format introduced in the Fallout 4 v1.10 update. Using Light Master files allows more plugins (mods and patch mods) to be installed than previously possible with .ESP files. For .ESP files there is a limit of 255, whereas a maximum of 4096 .ESL files can be loaded (but in practice is difficult to achieve due to other technical constraints).
Both file types can be used together, which means you can install just .ESP files if your install count remains below the .ESP maximum, or just .ESL files if your count remains below the .ESL maximum, or some of both such as using .ESP files initially and then adding .ESL files thereafter when the maximum for .ESP has been reached.
ESP/ESL Compatibility:
Saved games that currently use an .ESP mod are not compatible with an .ESL of that same mod. Similarly, saved games that are currently using the .ESL for a mod are not compatible with an .ESP of that same mod. That is a basic game restriction in terms of switching between .ESP and .ESL versions of a mod. There is no "fix" or workaround -- it is inherent in the game's design.
So, to switch from .ESP to .ESL, or from .ESL to .ESP, you must:
1 ) uninstall the mod
2 ) load the current saved game
3 ) create a new saved game (while that mod is not installed)
4 ) install the other download of that mod
5 ) resume play with that newly created saved game
Objects and NPCs provided by the mod will not be there now and must be created once more. Similarly, quests will need to be done again.
Requirements:
No special requirements. DLCs are not needed.
Compatibility Limitations:
This mod and my other mods might or might not work correctly with mods which adversely affect my mods by altering base-game locations and base-game content which my mods depend upon.
There is no support for compatibility issues with those, and there are no plans to provide compatibility patches.
Known Issues:
If this mod's initial quest is not starting for you after being installed with the Vortex mod manager, it might be because it has not been properly activated/enabled. If you click PLUGINS within Vortex, you will then see which mods are truly activated/enabled or not (whereas the MODS section Sometimes shows incorrect information). Within that PLUGINS interface you can activate/enable the mods that were not properly set when installed.
Known Conflicts:
WARNING: This mod requires access to Vault 111. There may or may not be a conflict with a particular "alternate start" mod depending on whether that mod allows or prevents entry.
The initial quest can be prevented from starting, or become stalled part-way through, when using a buggy "quick start" or "alternate start" mod. The quest normally begins a short while after exiting from Vault 111 for the first time, or a short while after loading a saved game when already outdoors in the Commonwealth. Otherwise, it might (or might not) begin when standing for a few minutes outdoors at the Sanctuary Hills workbench.
Not compatible with "eNse7en's BADASS 1911'S - RELOADED".
To Uninstall:
Uninstall with the mod manager that was used for the original install, or delete the .ESP and .BA2 files.
Permissions:
This mod may not be reused in part or whole for any purpose other than its original intent. It may not be uploaded to any other web site.
Get in touch with me if you wish to discuss translation into a non-English language; prior approval is mandatory.
Change Log:
See the Change Log to review what is included in each update.
Credits:
Special Thanks to Miss Grim whose suggestion it was to provide this mod which originated as a special feature for my Sparky companion.
Bethesda Softworks - for the original Models and Textures [I merely provided the ingenuity and scripting to bring this mod "to life"]
My Other Mods:
Workshop Menu Fixer can be found Here.
Qwirky can be found Here.
Sparky can be found Here.
Silver Streak can be found Here.
Silver Streak UFO can be found Here.
Whirly can be found Here.
Whirligig Sentry can be found Here.
Alien Disruptor can be found Here.
Settlement Radar Station & Drone Defender can be found Here.
Settlement Medic Bot: "Mister Medic" can be found Here.
Settlement Police Bot: "Mister Law" can be found Here.
Settlement Tidy Bot: "Mister Tidy" can be found Here.
Settlement Salvage Bot: "Mister Salvage" can be found Here.
Settlement Repair Bot: "Mister Mechanic" can be found Here.
Settlement Gardener Bot: "Mister Gardener" can be found Here.
Settlement Delivery Bots: "Mister Caravan / Mister Express / Mister Postman" can be found Here.
Carry-Your-Stuff Robots can be found Here.
Alien Disruptor can be found Here.
Alien Blaster Long-Barrel Fix can be found Here.
In Memoriam:
In memory of my Father (may he Rest In Peace) who was a model airplane maker (gliders & gas powered) and an RC enthusiast.
Enjoy!
Version 1.2
Description:
Shield Bubble: The Very Latest in Tactical Defensive Measures
Basic Characteristics:
Spoiler:
Are you sure you want to read this? It spoils the details ...
Show
Are you sure you want to read this? It spoils the details ...
Spoiler:
Key Notes:
• ElectroMagnetic Force-Field that provides exceptional protection against incoming weapon damage
• Effective Versus: Ballistic, Explosive, Energy, and Electrical
• Also reduces Limb Damage by 85%
• Duration: approximately 30 seconds
• Recharge Time: 20 minutes
Sounds pretty nifty, doesn't it? Could be quite useful during really tough fights.
This is a kind of Panic Button that will probably save your life. It is most effective when held in reserve for moments of extreme danger. It will not abate all injury while active, but does help ensure survival from what would otherwise be fatal damage. The duration, although brief, is long enough to either defeat that enemy or to facilitate retreat to a safer location
Show
Key Notes:
• ElectroMagnetic Force-Field that provides exceptional protection against incoming weapon damage
• Effective Versus: Ballistic, Explosive, Energy, and Electrical
• Also reduces Limb Damage by 85%
• Duration: approximately 30 seconds
• Recharge Time: 20 minutes
Sounds pretty nifty, doesn't it? Could be quite useful during really tough fights.
This is a kind of Panic Button that will probably save your life. It is most effective when held in reserve for moments of extreme danger. It will not abate all injury while active, but does help ensure survival from what would otherwise be fatal damage. The duration, although brief, is long enough to either defeat that enemy or to facilitate retreat to a safer location
Requires completion of a mission / quest. Can be started early-on, but the progression might prove to be difficult, or even very difficult, for low-level characters. Which would then necessitate some leveling-up and acquisition of better gear before continuing.
The mission normally begins after escaping from Vault 111 and achieving Level 2 or higher. For those using an "alternate start" mod, the mission begins when achieving Level 2 or higher and being outdoors somewhere in the Commonwealth (the main game area); for example, standing outdoors in Sanctuary.
NOTE: except for the initial steps, players will need to explore and investigate with minimal guidance towards completing objectives.
See the Walk-Through with Spoilers article Here for further details, or if having difficulty with a particular mission objective. It includes Key Features, Objectives, and How To Use.
Installation:
Install using a mod manager, or unpack the mod and copy the .ESP/.ESL and .BA2 files into the game's \DATA folder, then enable the mod.
Position this mod's .ESP/.ESL file to be as low as it will go in your "Load Order" sequence. This helps to ensure that it performs as best it can by overriding any conflicting mods. If you know with absolute certainty that there are no conflicting mods, then this mod can be positioned anywhere your installer normally allows.
Install ESP or ESL?
If you are reaching the maximum allowed number of .ESP installs, and want to install more mods, then install the .ESL versions of those new mods ...
Back-in-the-day, many players were reaching the maximum number of allowed .ESP installs, so Bethesda introduced a way to permit more via .ESL files.
The Light Master (.ESL) file is an optimized file format introduced in the Fallout 4 v1.10 update. Using Light Master files allows more plugins (mods and patch mods) to be installed than previously possible with .ESP files. For .ESP files there is a limit of 255, whereas a maximum of 4096 .ESL files can be loaded (but in practice is difficult to achieve due to other technical constraints).
Both file types can be used together, which means you can install just .ESP files if your install count remains below the .ESP maximum, or just .ESL files if your count remains below the .ESL maximum, or some of both such as using .ESP files initially and then adding .ESL files thereafter when the maximum for .ESP has been reached.
ESP/ESL Compatibility:
Saved games that currently use an .ESP mod are not compatible with an .ESL of that same mod. Similarly, saved games that are currently using the .ESL for a mod are not compatible with an .ESP of that same mod. That is a basic game restriction in terms of switching between .ESP and .ESL versions of a mod. There is no "fix" or workaround -- it is inherent in the game's design.
So, to switch from .ESP to .ESL, or from .ESL to .ESP, you must:
1 ) uninstall the mod
2 ) load the current saved game
3 ) create a new saved game (while that mod is not installed)
4 ) install the other download of that mod
5 ) resume play with that newly created saved game
Objects and NPCs provided by the mod will not be there now and must be created once more. Similarly, quests will need to be done again.
Requirements:
No special requirements. DLCs are not needed.
Compatibility Limitations:
This mod and my other mods might or might not work correctly with mods which adversely affect my mods by altering base-game locations and base-game content which my mods depend upon.
There is no support for compatibility issues with those, and there are no plans to provide compatibility patches.
Known Issues:
If this mod's initial quest is not starting for you after being installed with the Vortex mod manager, it might be because it has not been properly activated/enabled. If you click PLUGINS within Vortex, you will then see which mods are truly activated/enabled or not (whereas the MODS section Sometimes shows incorrect information). Within that PLUGINS interface you can activate/enable the mods that were not properly set when installed.
Known Conflicts:
WARNING: This mod requires access to Vault 111. There may or may not be a conflict with a particular "alternate start" mod depending on whether that mod allows or prevents entry.
The initial quest can be prevented from starting, or become stalled part-way through, when using a buggy "quick start" or "alternate start" mod. The quest normally begins a short while after exiting from Vault 111 for the first time, or a short while after loading a saved game when already outdoors in the Commonwealth. Otherwise, it might (or might not) begin when standing for a few minutes outdoors at the Sanctuary Hills workbench.
Not compatible with "eNse7en's BADASS 1911'S - RELOADED".
To Uninstall:
Uninstall with the mod manager that was used for the original install, or delete the .ESP and .BA2 files.
Permissions:
This mod may not be reused in part or whole for any purpose other than its original intent. It may not be uploaded to any other web site.
Get in touch with me if you wish to discuss translation into a non-English language; prior approval is mandatory.
Change Log:
See the Change Log to review what is included in each update.
Credits:
Special Thanks to Miss Grim whose suggestion it was to provide this mod which originated as a special feature for my Sparky companion.
Bethesda Softworks - for the original Models and Textures [I merely provided the ingenuity and scripting to bring this mod "to life"]
My Other Mods:
Workshop Menu Fixer can be found Here.
Qwirky can be found Here.
Sparky can be found Here.
Silver Streak can be found Here.
Silver Streak UFO can be found Here.
Whirly can be found Here.
Whirligig Sentry can be found Here.
Alien Disruptor can be found Here.
Settlement Radar Station & Drone Defender can be found Here.
Settlement Medic Bot: "Mister Medic" can be found Here.
Settlement Police Bot: "Mister Law" can be found Here.
Settlement Tidy Bot: "Mister Tidy" can be found Here.
Settlement Salvage Bot: "Mister Salvage" can be found Here.
Settlement Repair Bot: "Mister Mechanic" can be found Here.
Settlement Gardener Bot: "Mister Gardener" can be found Here.
Settlement Delivery Bots: "Mister Caravan / Mister Express / Mister Postman" can be found Here.
Carry-Your-Stuff Robots can be found Here.
Alien Disruptor can be found Here.
Alien Blaster Long-Barrel Fix can be found Here.
In Memoriam:
In memory of my Father (may he Rest In Peace) who was a model airplane maker (gliders & gas powered) and an RC enthusiast.
Enjoy!