


0 of 0


About this mod
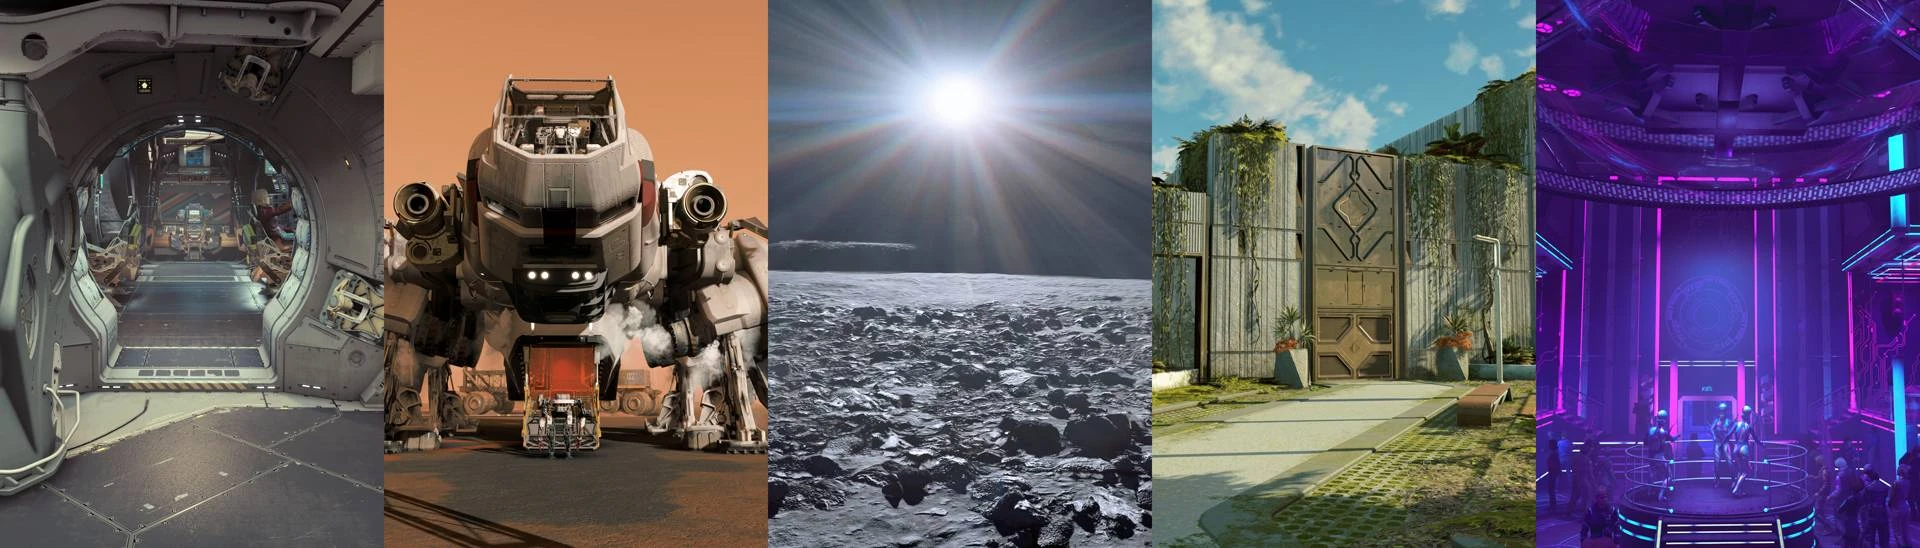
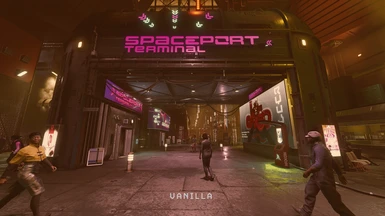
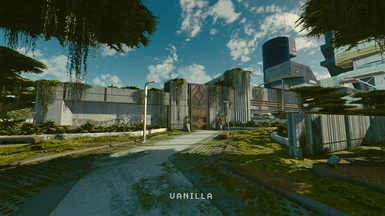
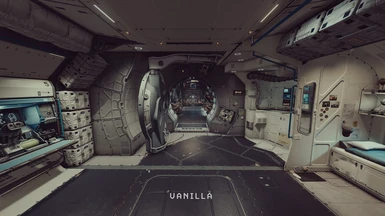
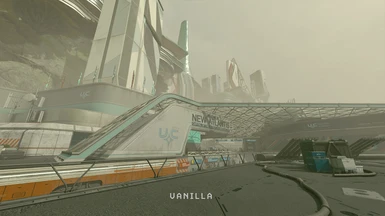
NOT A RESHADE! DOES NOT DISABLE ACHIEVEMENTS! These are custom processed LUTs that remove the game's washed out hazy green filtered look while maintaining the color grading and artistic direction of the original game. They ensure black levels always reach true black in the game's darkest shadows, so OLED users rejoice! READ INSTALL INSTRUCTIONS!
- Requirements
- Permissions and credits
- Changelogs

☼ Installation ☼
Please note: you should only perform the steps in 1.a. or 1.b., but not both. I am currently recommending manual installation over automatic mod manager installation as I am seeing comments that some users are having trouble with mod manager installation.
1.a. EITHER: Manual Installation to My Games directory (RECOMMENDED)
To install manually, extract the contents of the zip file directly into the "Documents\My Games\Starfield" folder. Even if it is not where files typically go for modding in other games, they must go there for this mod to work by default. The loose DDS files should end up in the following directory:
"...\Documents\My Games\Starfield\Data\Textures\effects\luts"
Once this is complete, go to either step 2.a. or 2.b. depending on whether you installed the game with Steam or PC Xbox Game Pass.
1.b. OR: Automatic Installation via Mod Manager Button (NOT RECOMMENDED)
IMPORTANT NOTE for Vortex Users
By popular demand I have enabled the Mod Manager download button. Please note that by default Vortex will not correctly install these files. To use the Mod Manager download with Vortex, you will need to force the game to load textures from the data folder in the game's directory, rather than in your Documents\My Games directory. Users have reported that Mod Organizer 2 works seamlessly and recognizes files, so these steps may not be necessary if you are using MO2. Back up anything you don't want to lose before proceeding.
First, back up your photos located in the following directory, as they may get removed during this process:
"...\Documents\My Games\Starfield\Data\Textures\Photos"
Next, add the following code to this file:
"...\Documents\My Games\Starfield\StarfieldCustom.ini"
[General]
bEnableMessageOfTheDay=0

[Display]
sPhotoModeFolder=Photos
Then, move all the files from the "...\Documents\My Games\Starfield\Data\Textures\Photos" directory to the game's Data directory (for Steam it may be "...\Steam\steamapps\common\Starfield\Data" but this may vary based on how you installed the game).
Finally, delete the "...\Documents\My Games\Starfield\Data\" folder.
Once this is complete, go to either step 2.a. or 2.b. depending on whether you installed the game with Steam or PC Xbox Game Pass.
2.a. EITHER: Steam .ini configuration
I found I needed to add the following to both of these locations, but you may only need them to the first location:
"...\Documents\My Games\Starfield\StarfieldCustom.ini" (you will need to create this file if it doesn't already exist)
"...\steamapps\common\Starfield\Starfield.ini"
[Archive]
bInvalidateOlderFiles=1
sResourceDataDirsFinal=
You may already have a line like this in your "Starfield.ini" file:
sResourceDataDirsFinal=STRINGS\
If so, simply replace it with the one above.
2.b. OR: PC Xbox GamePass .ini configuration
Users have reported only needing to add the following to this location:
"...\Xbox Games\Starfield\Content\Starfield.ini"
[Archive]
bInvalidateOlderFiles=1
sResourceDataDirsFinal=
You may already have a line like this in your "Starfield.ini" file:
sResourceDataDirsFinal=STRINGS\
If so, simply replace it with the one above.
Optional: Make space darker
If you would like space/stars to be darker while in spaceflight (not on planets at night), add these lines to the following file:
"...\Documents\My Games\Starfield\StarfieldCustom.ini"
[Display]
fSpaceGlowBackgroundScale=0.0
fStarIntensity=2500.0
fStarSystemFarViewDistance=10000000000.0
fStarfieldBackgroundScale=35.0
fStarfieldStarBrightnessScale=10.0
fStarfieldStarCoordScale=10.0
fSunScale=1.0
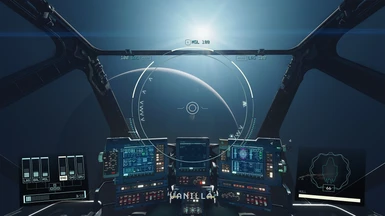
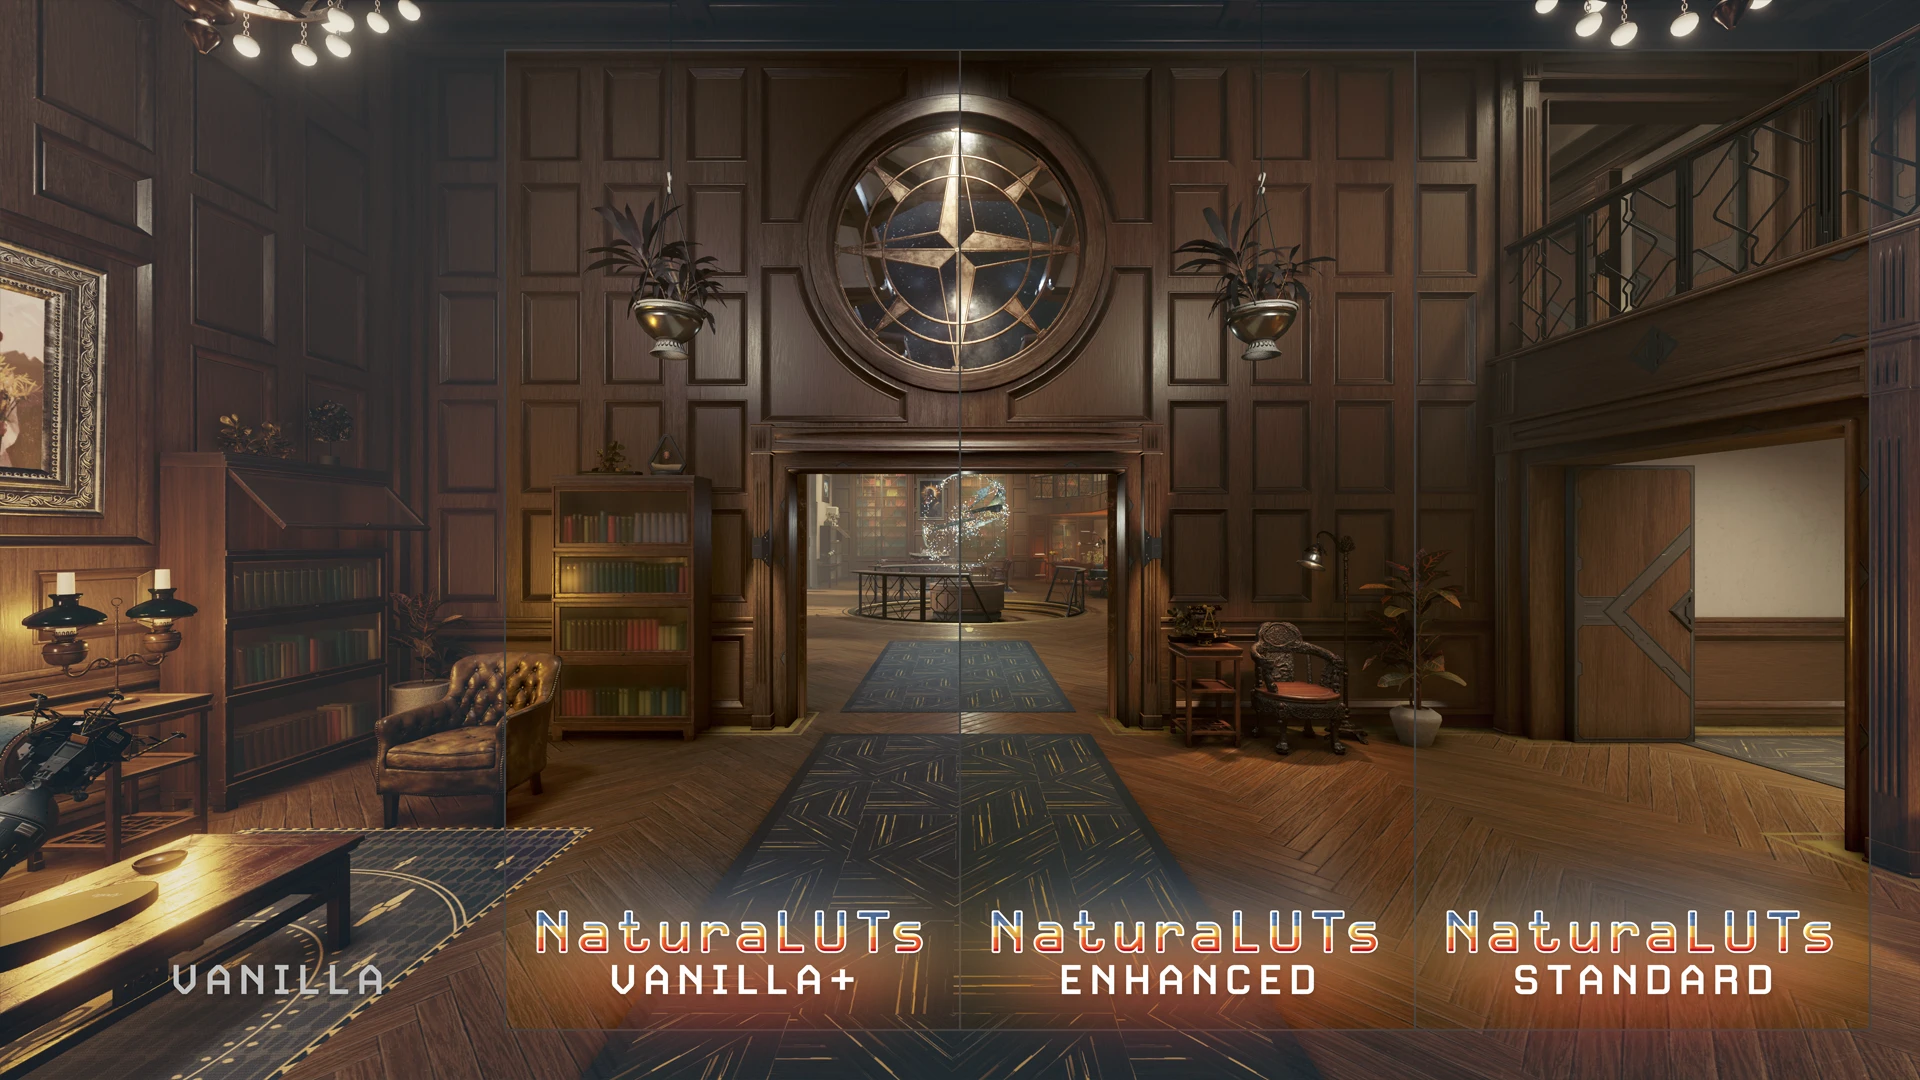
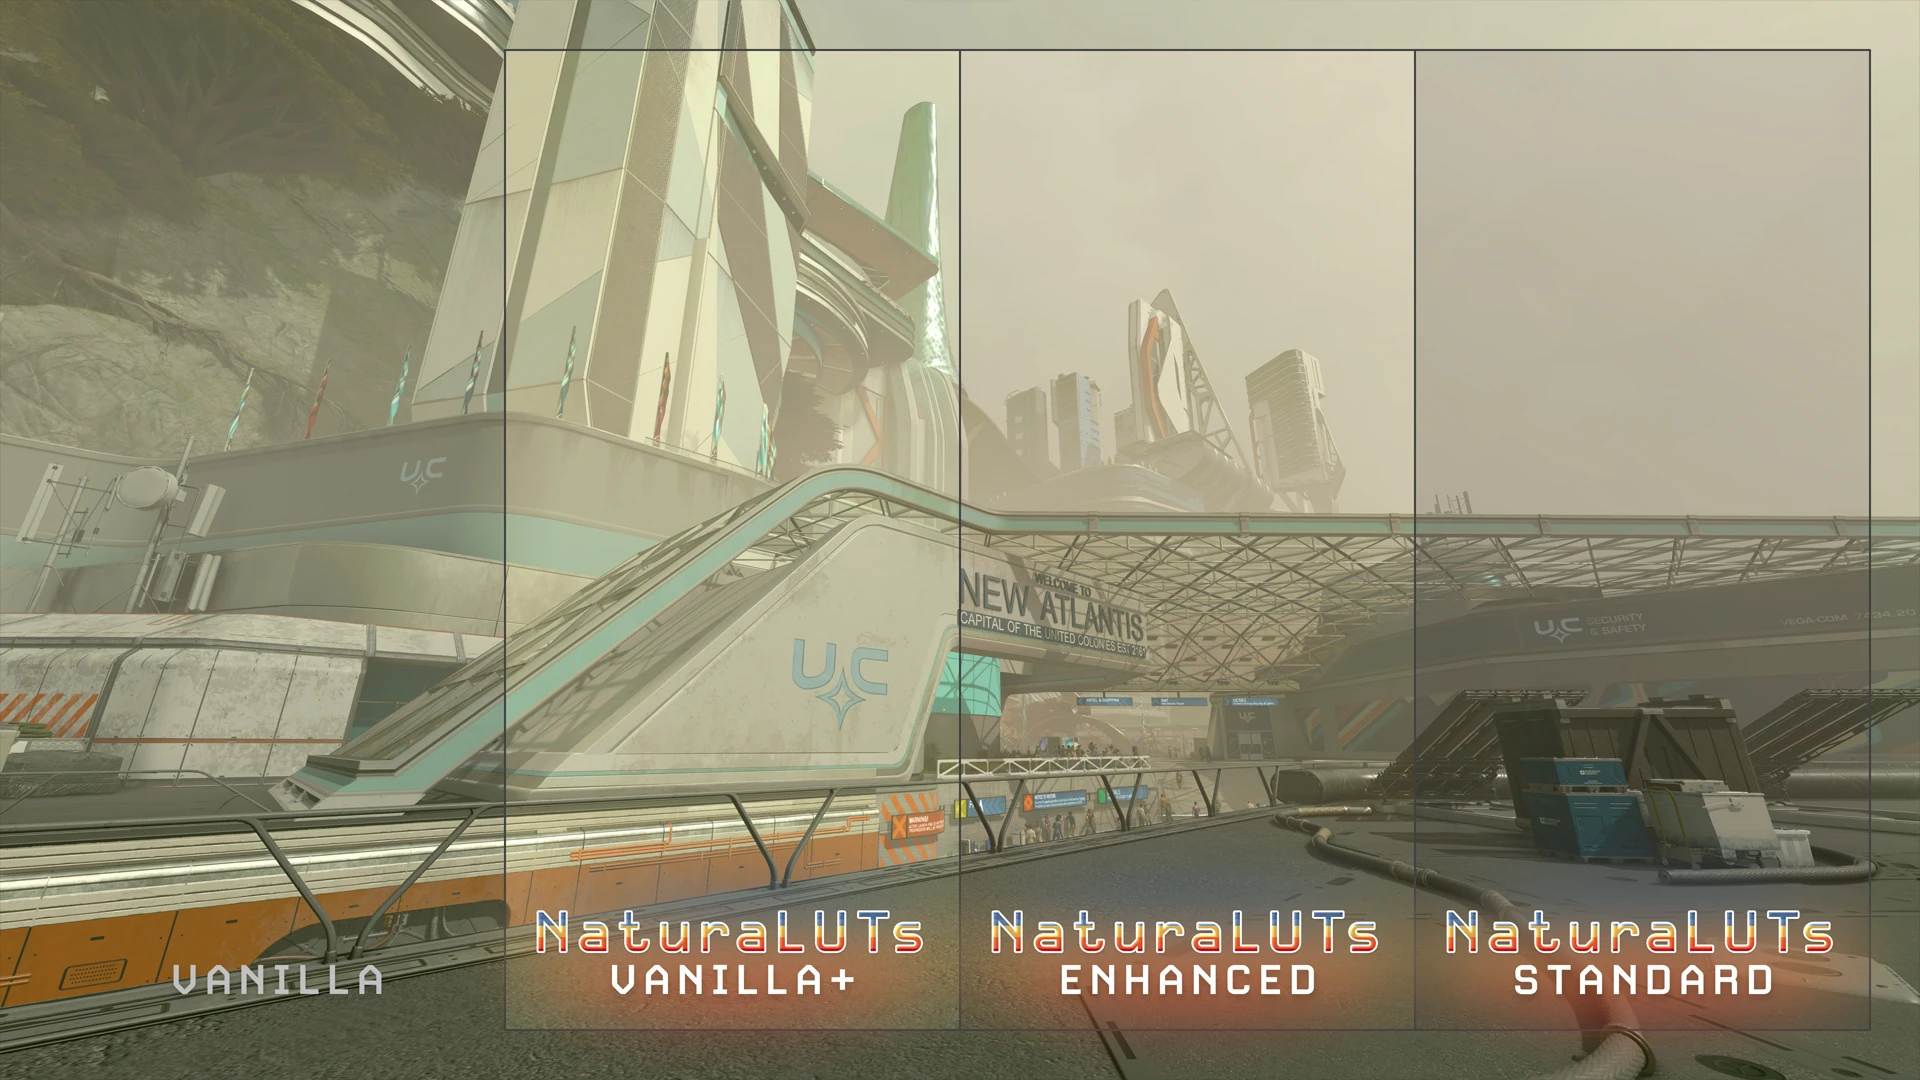
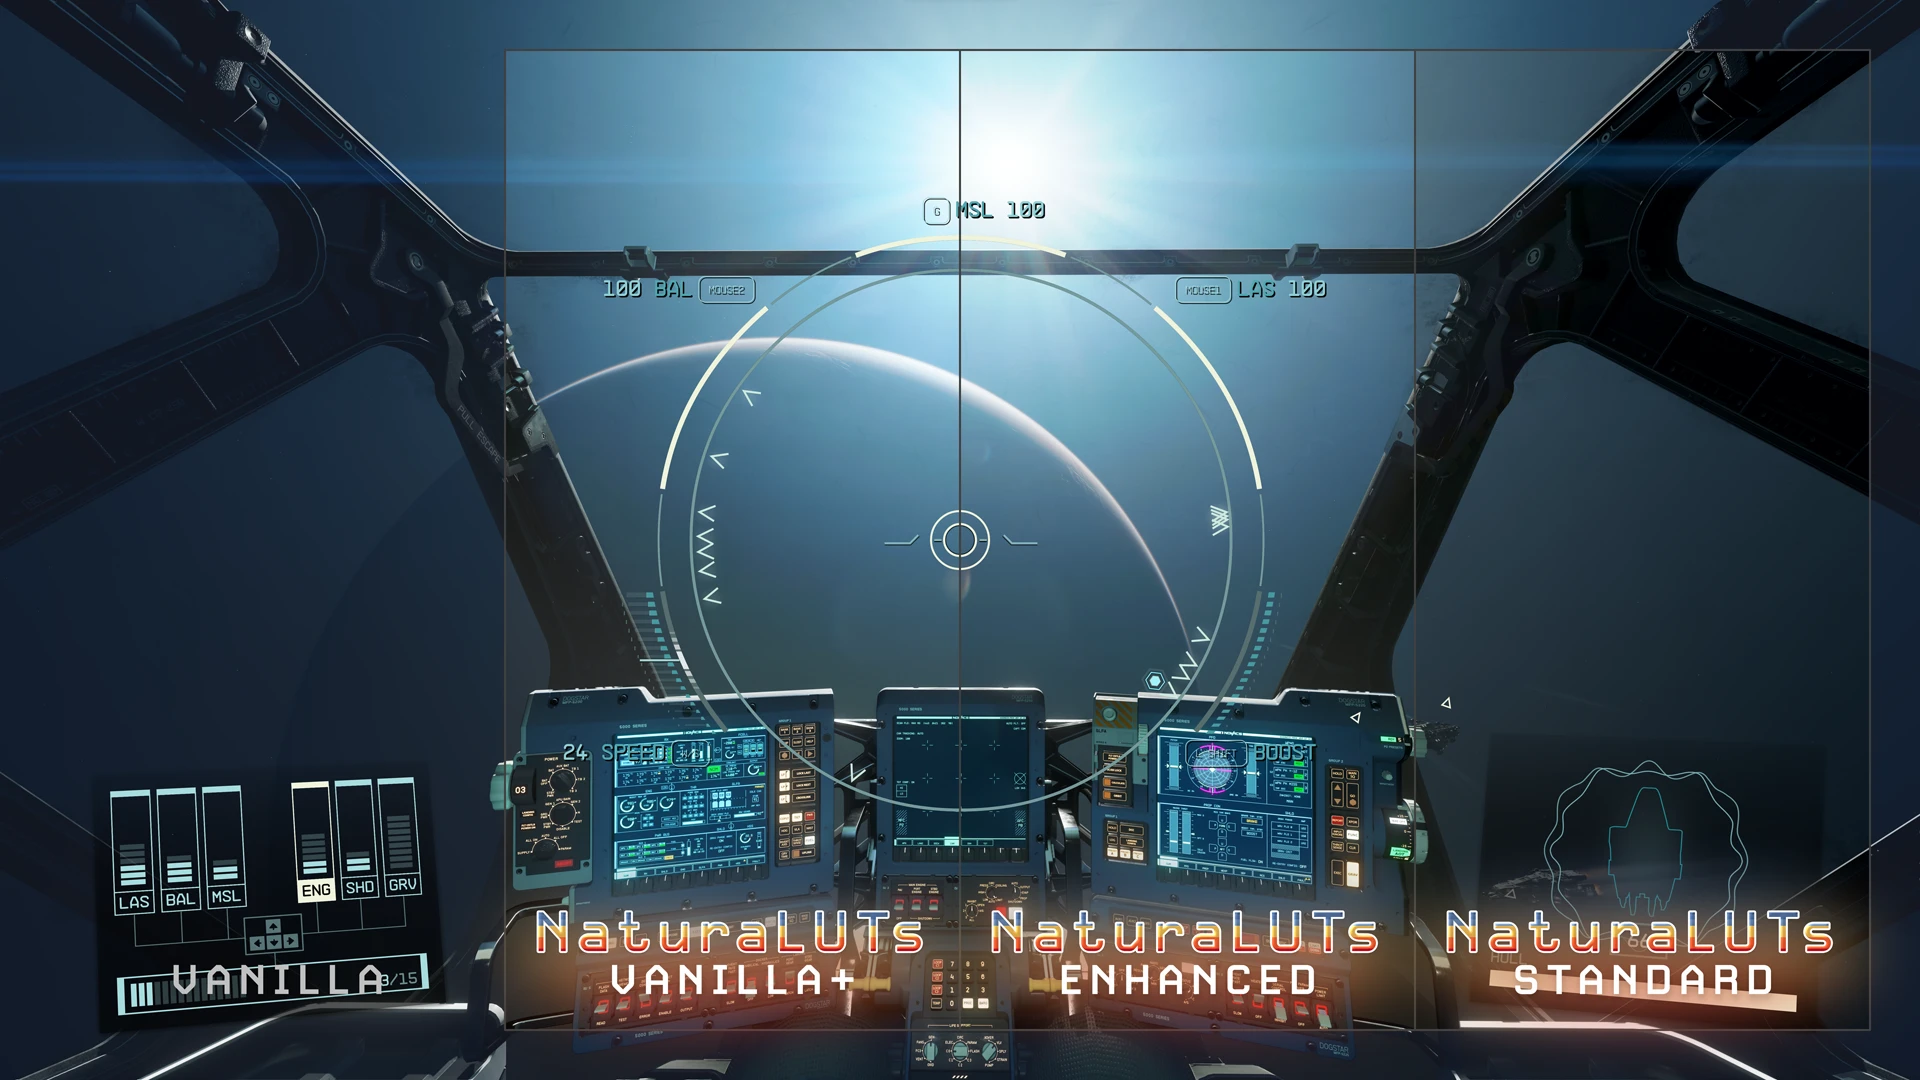
☼ What are the different versions of NaturaLUTs? ☼
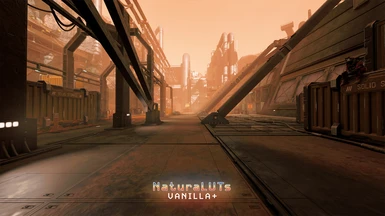
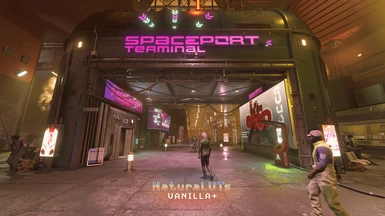
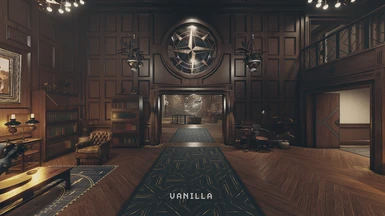
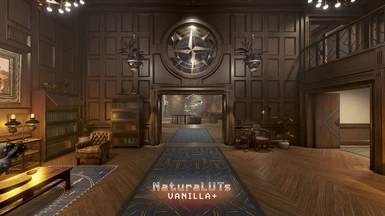
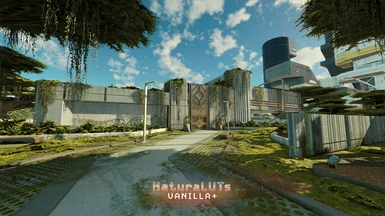
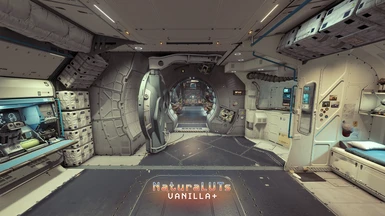
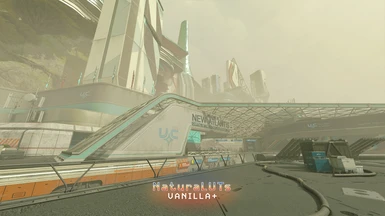
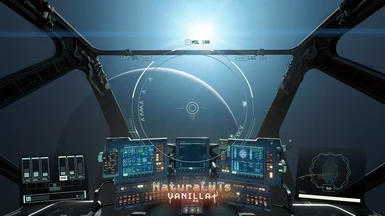
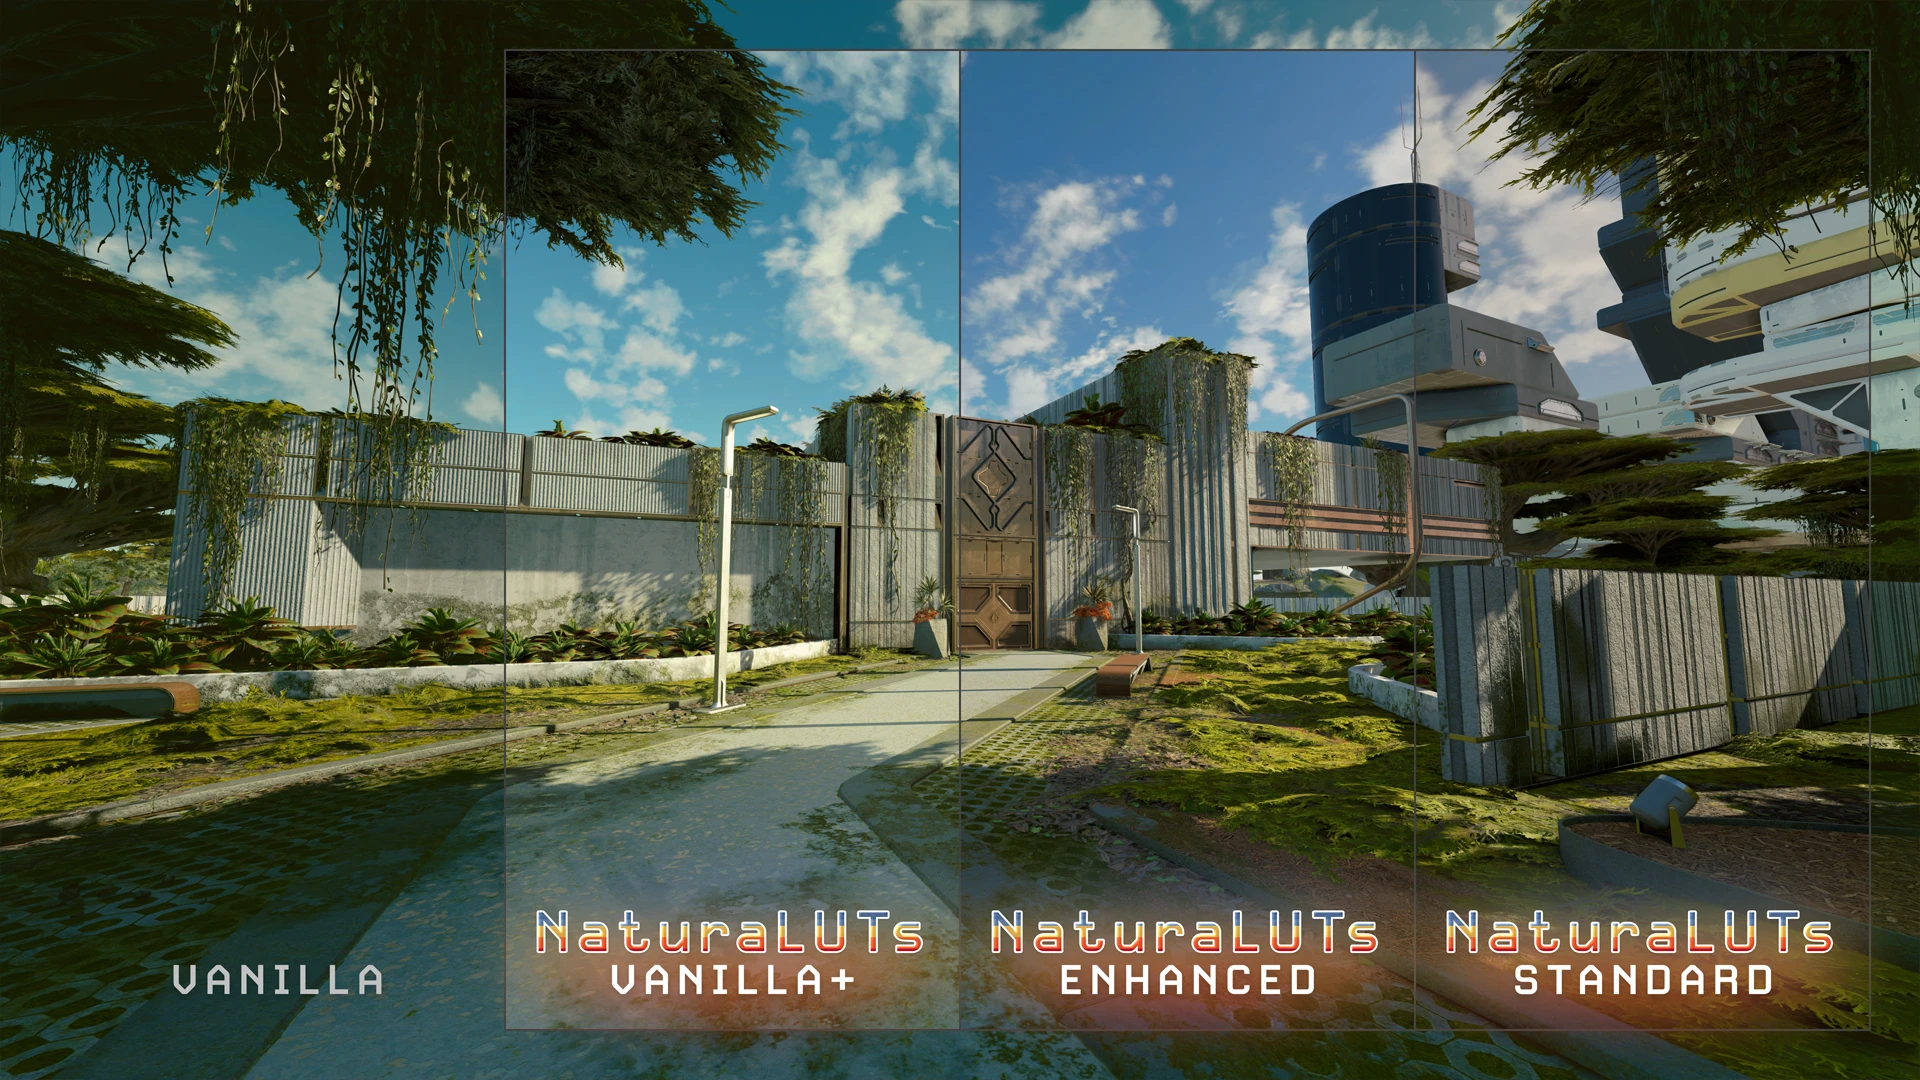
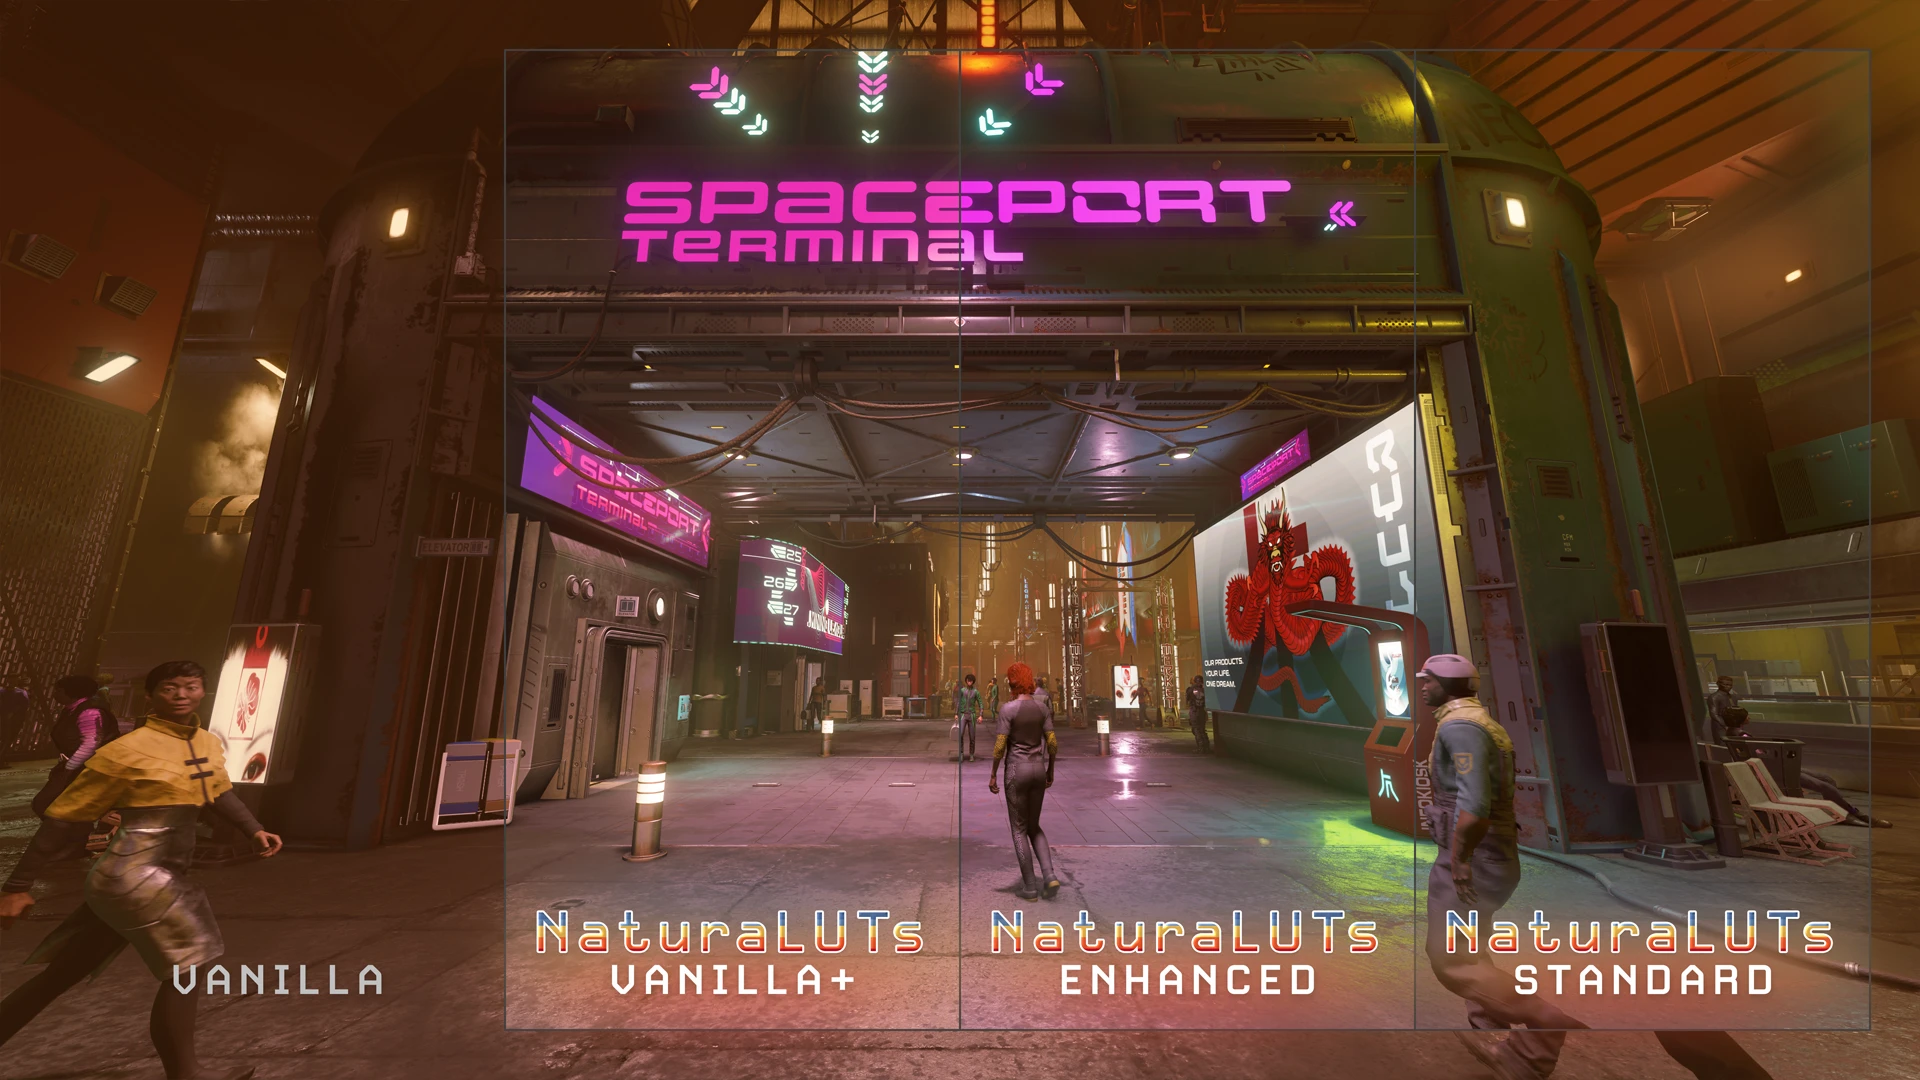
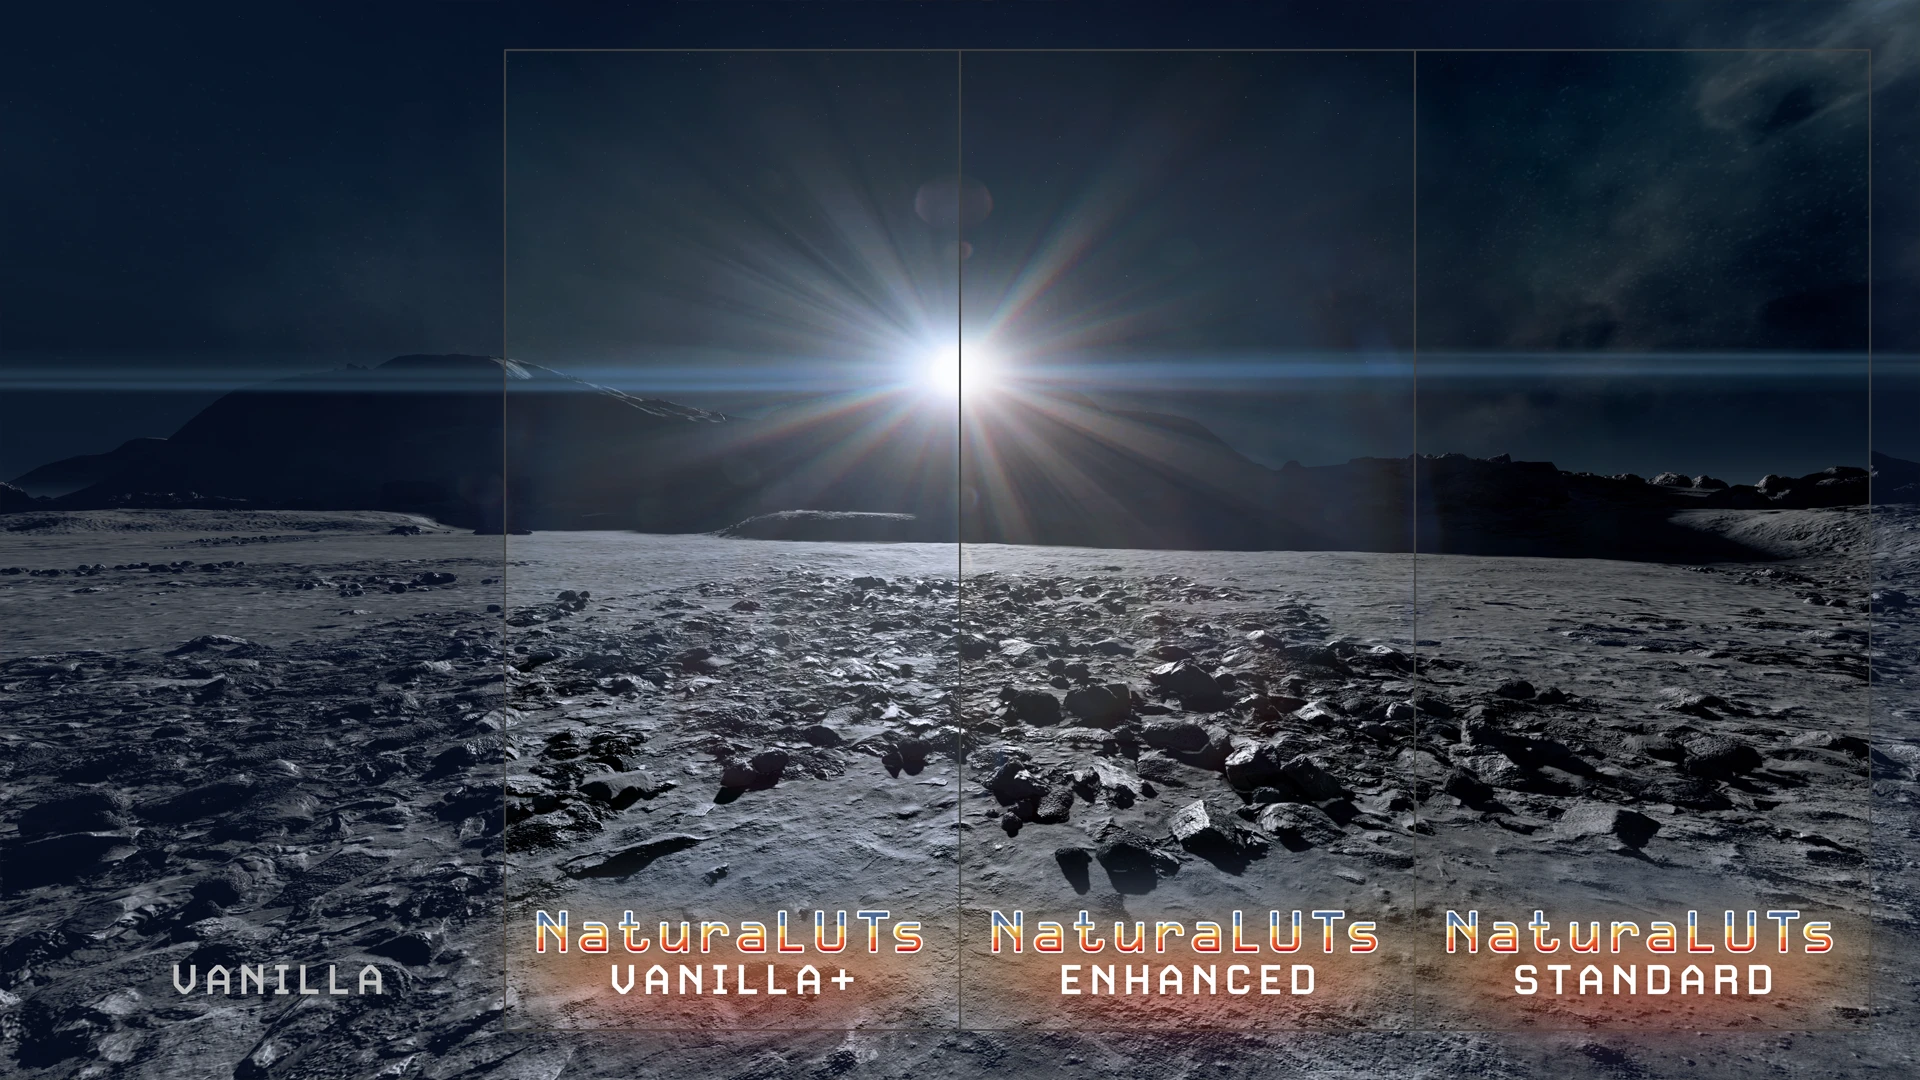
There are now three different versions of NaturaLUTs: Vanilla+, Enhanced, and Standard. Vanilla+ is the most recent version, and was created specifically to be as close as possible to the Vanilla color grade (even more so than either Enhanced or Standard). I have made Vanilla+ the new default going forward, as I believe it most closely achieves my original vision for this mod. All three versions will remain available and supported. Here is a brief breakdown of each:
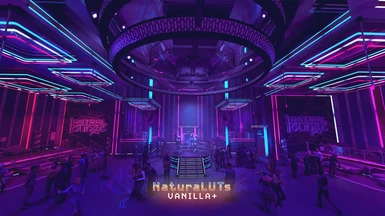
Vanilla+
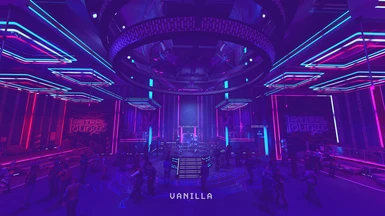
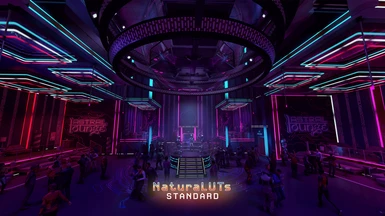
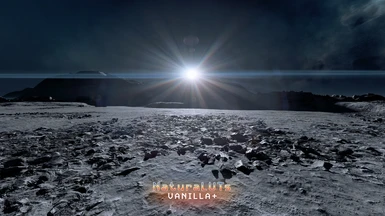
This is the newest version of NaturaLUTs. It was designed to be as close as possible to the vanilla experience, for players who wish to maintain the vanilla look and feel, but also to remove the filtered and lifted black levels. This version is bright and open like Enhanced, but is much, much closer to the Vanilla color palate (while still removing the vast majority of the green, purple, and otherwise unpleasant portion of the original color filters). This was the hardest version to create, and also contains the first pass of location specific tweaks (such as restoring the neon ambient lighting in the Astral Lounge). The other versions will receive these tweaks in upcoming releases.
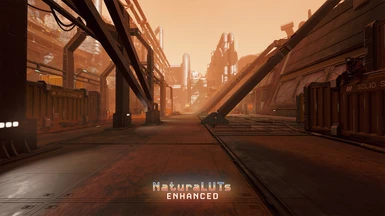
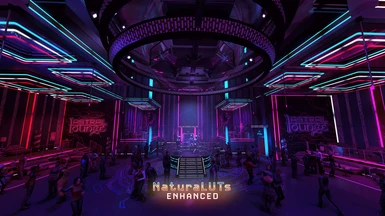
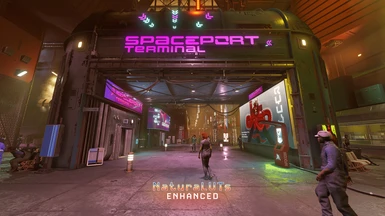
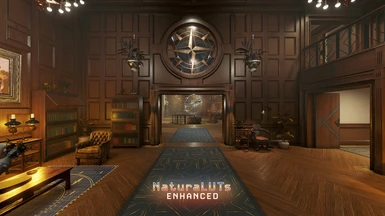
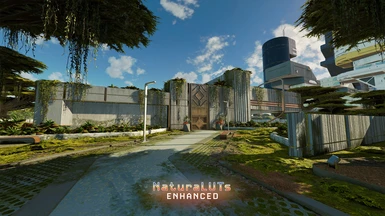
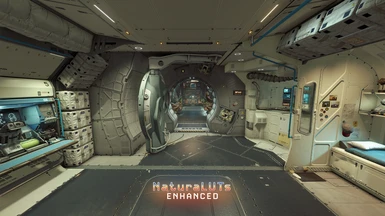
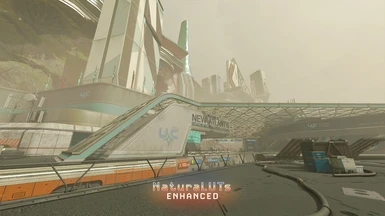
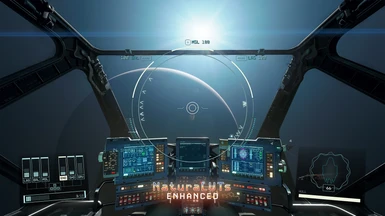
Enhanced
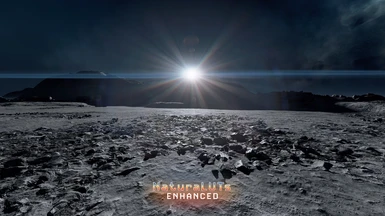
This was the second version of NaturaLUTs. It has more brightness, contrast, vibrance, and is overall punchier and more "finished" looking. It is designed to look as good as possible without the need for any further post processing. This version is also a bit more neutral overall than Vanilla, but like Standard also maintains the unique sense of color for each LUT.
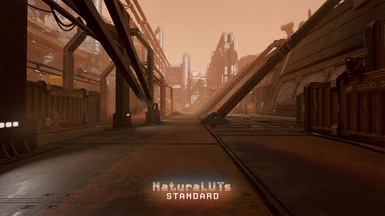
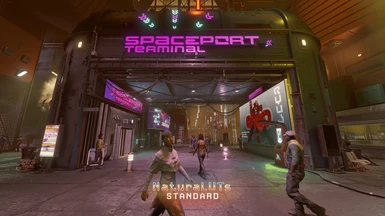
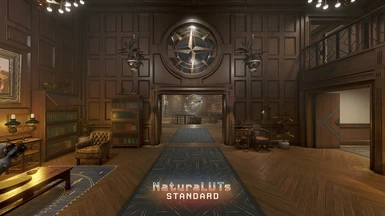
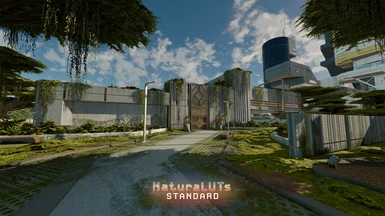
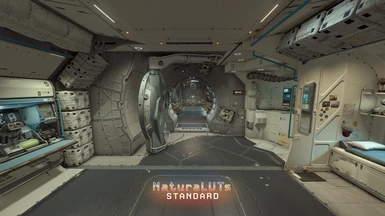
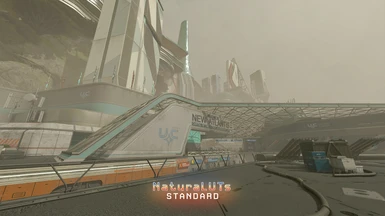
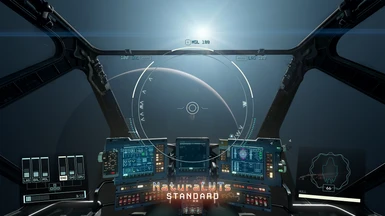
Standard
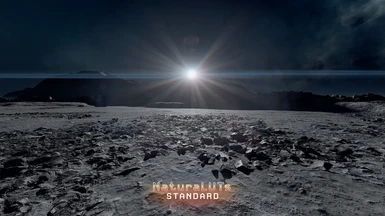
This was the original version of NaturaLUTs. It is a bit more neutral than Vanilla, but still maintains the general color grade for each LUT so that different locations have their own unique look and feel. It has a balanced look and feel, and fully removes the filtered look of the vanilla game. This version may benefit from a ReShade if you want to add your own set of post processing, but also looks good on its own.


☼ What makes these LUTs special? ☼
The LUTs all ran through a series of custom actions in Photoshop that performed several functions on each base LUT. For example, to generate the Standard version:
1) Create a static 50% blend of the Base LUT and the Neutral LUT
2) Create a Luminosity blend of the Base LUT and the Neutral LUT
3) Blend the Luminosity and 50% blends together
4) Stretch the contrast of the new blend
5) Add another Neutral LUT and perform a second static 50% blend
6) Add a final Neutral LUT and perform a Blend-IF function to ensure the darkest pixel is 100% black
7) Merge and export the new LUT
This is a rather complex process (and I simplified the steps as written), but in the end it ensured that each new LUT no longer has the sickly greenish filter, the black levels are fully restored, contrast is improved and stretched to max, and the original color grading and art direction is maintained. Each version has a different set of processing (with Vanilla+ being the most complex with something like 100 or more actions to stay as close as possible to vanilla color grading), but they all stick to the same basic set of principals. In my opinion this is the ideal set of LUTs to ensure the game looks as good as possible, while remaining authentic to the game's intent.

☼ Does this disable achievements? ☼
No! On its own, this mod will not disable achievements.
☼ Is this a ReShade preset? ☼
No! This mod does not require ReShade at all to function. In fact, it was designed specifically to make the game look as good as possible without needing ReShade or any other post-processing. It functions by replacing the game's built-in color lookup tables with the custom ones I've provided.
☼ Can I use ReShade with it? ☼
Yes! You can use ReShade alongside this mod if you wish to further tweak your colors. However, I think you'll find this offers an ideal blend of contrast, color, saturation, brightness, and black levels so you will likely not need to do so.
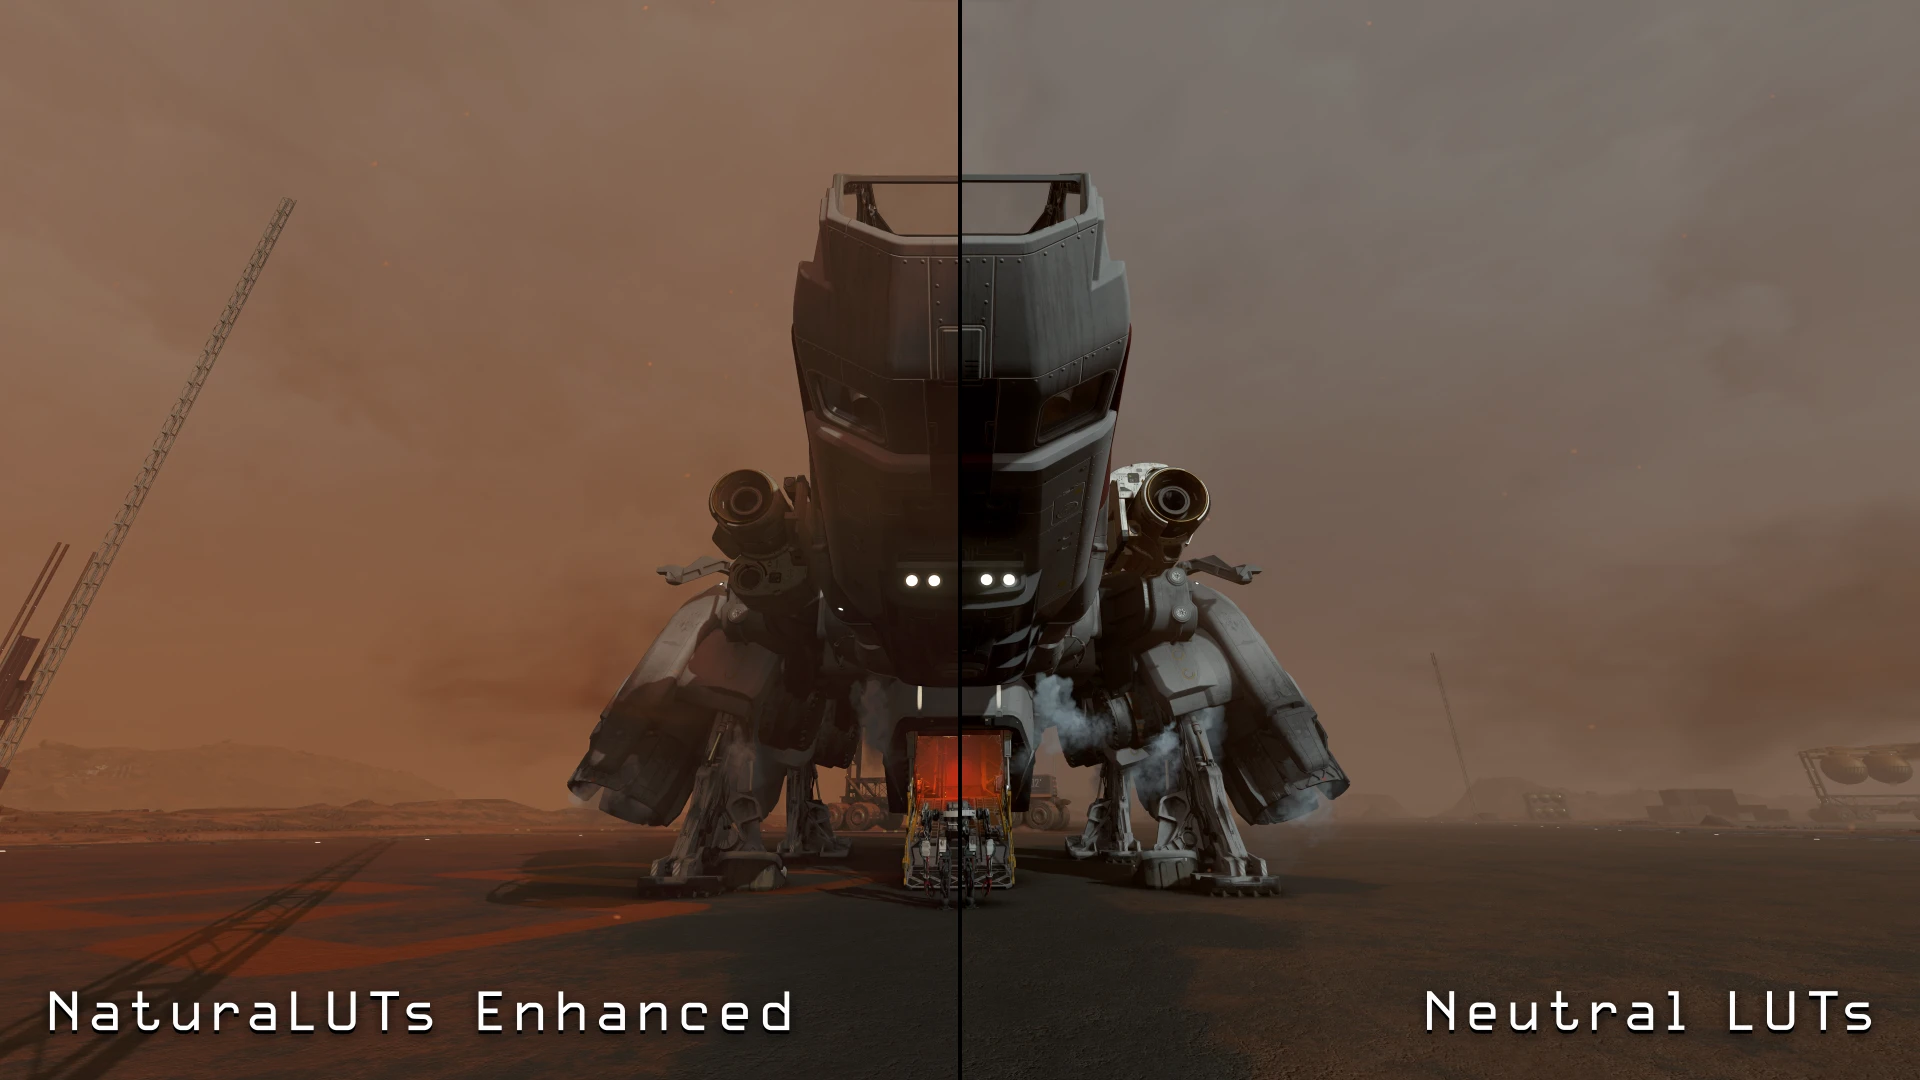
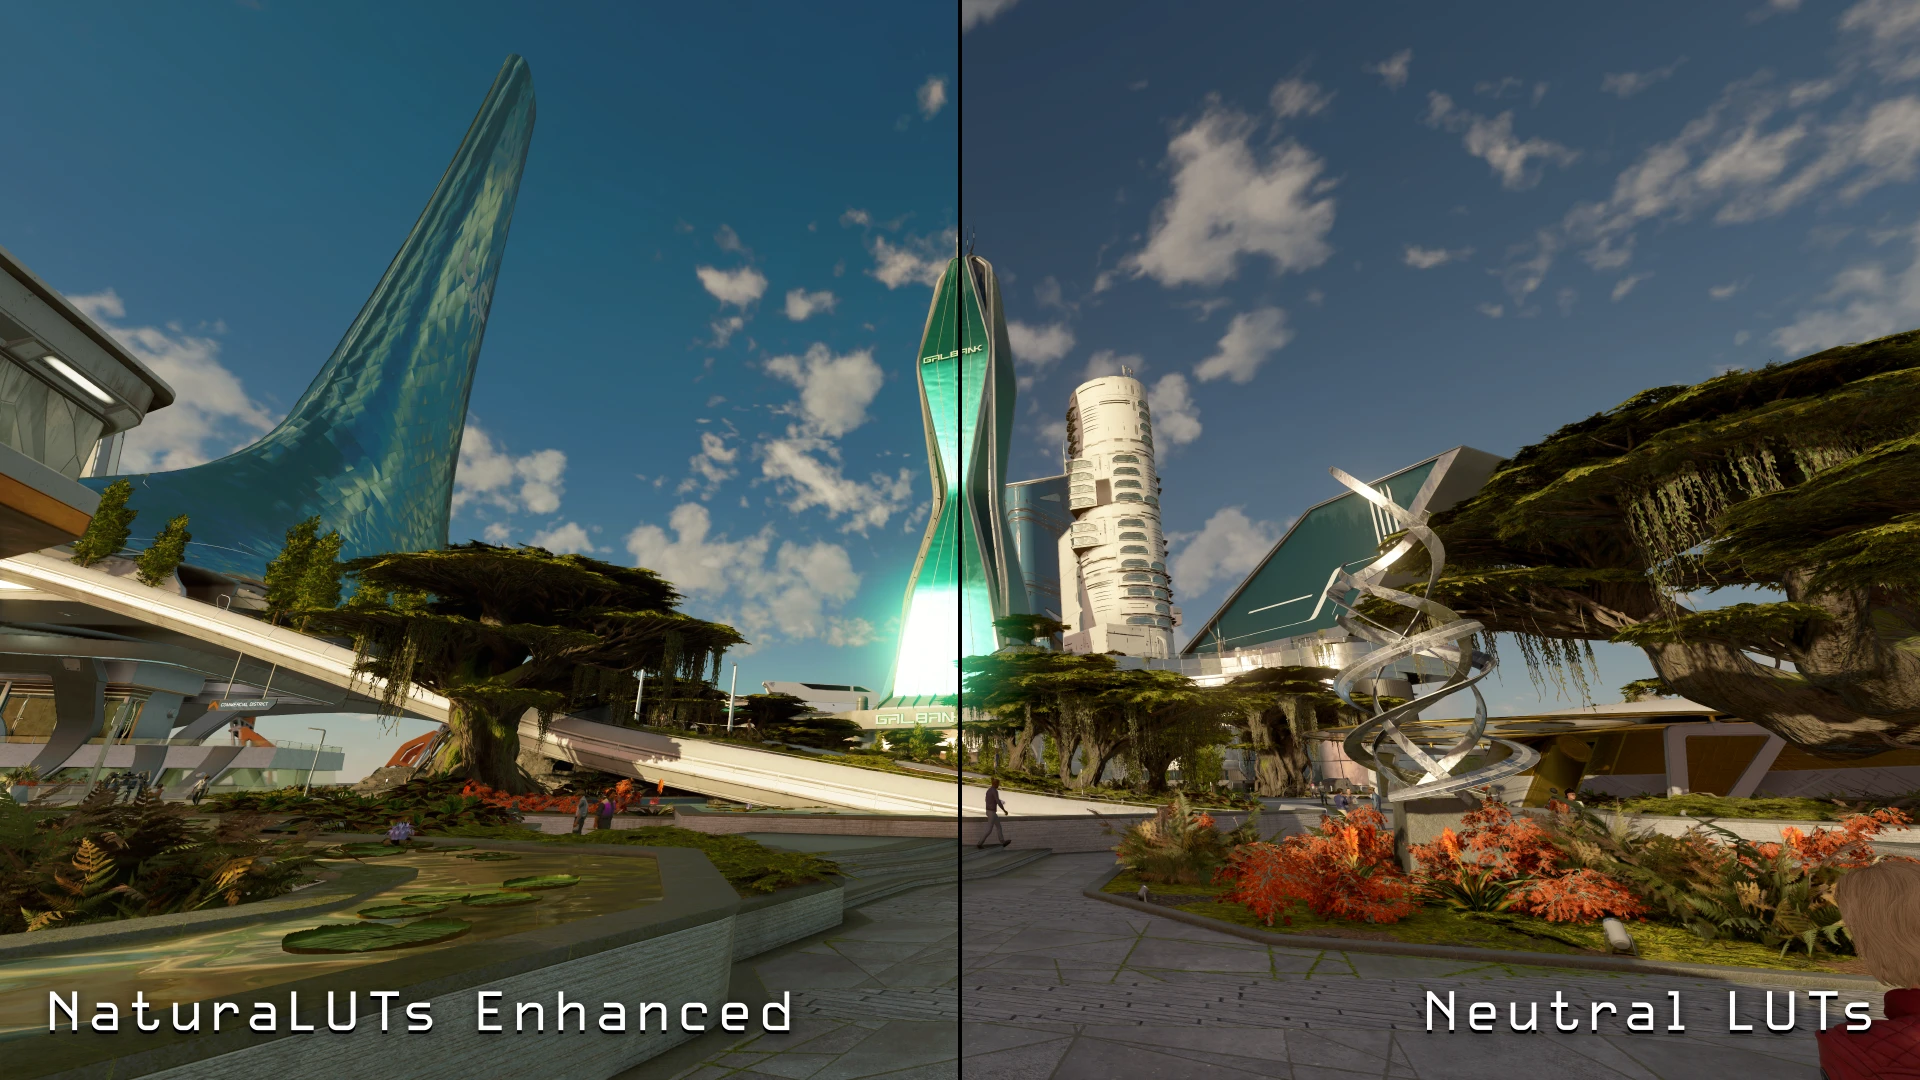
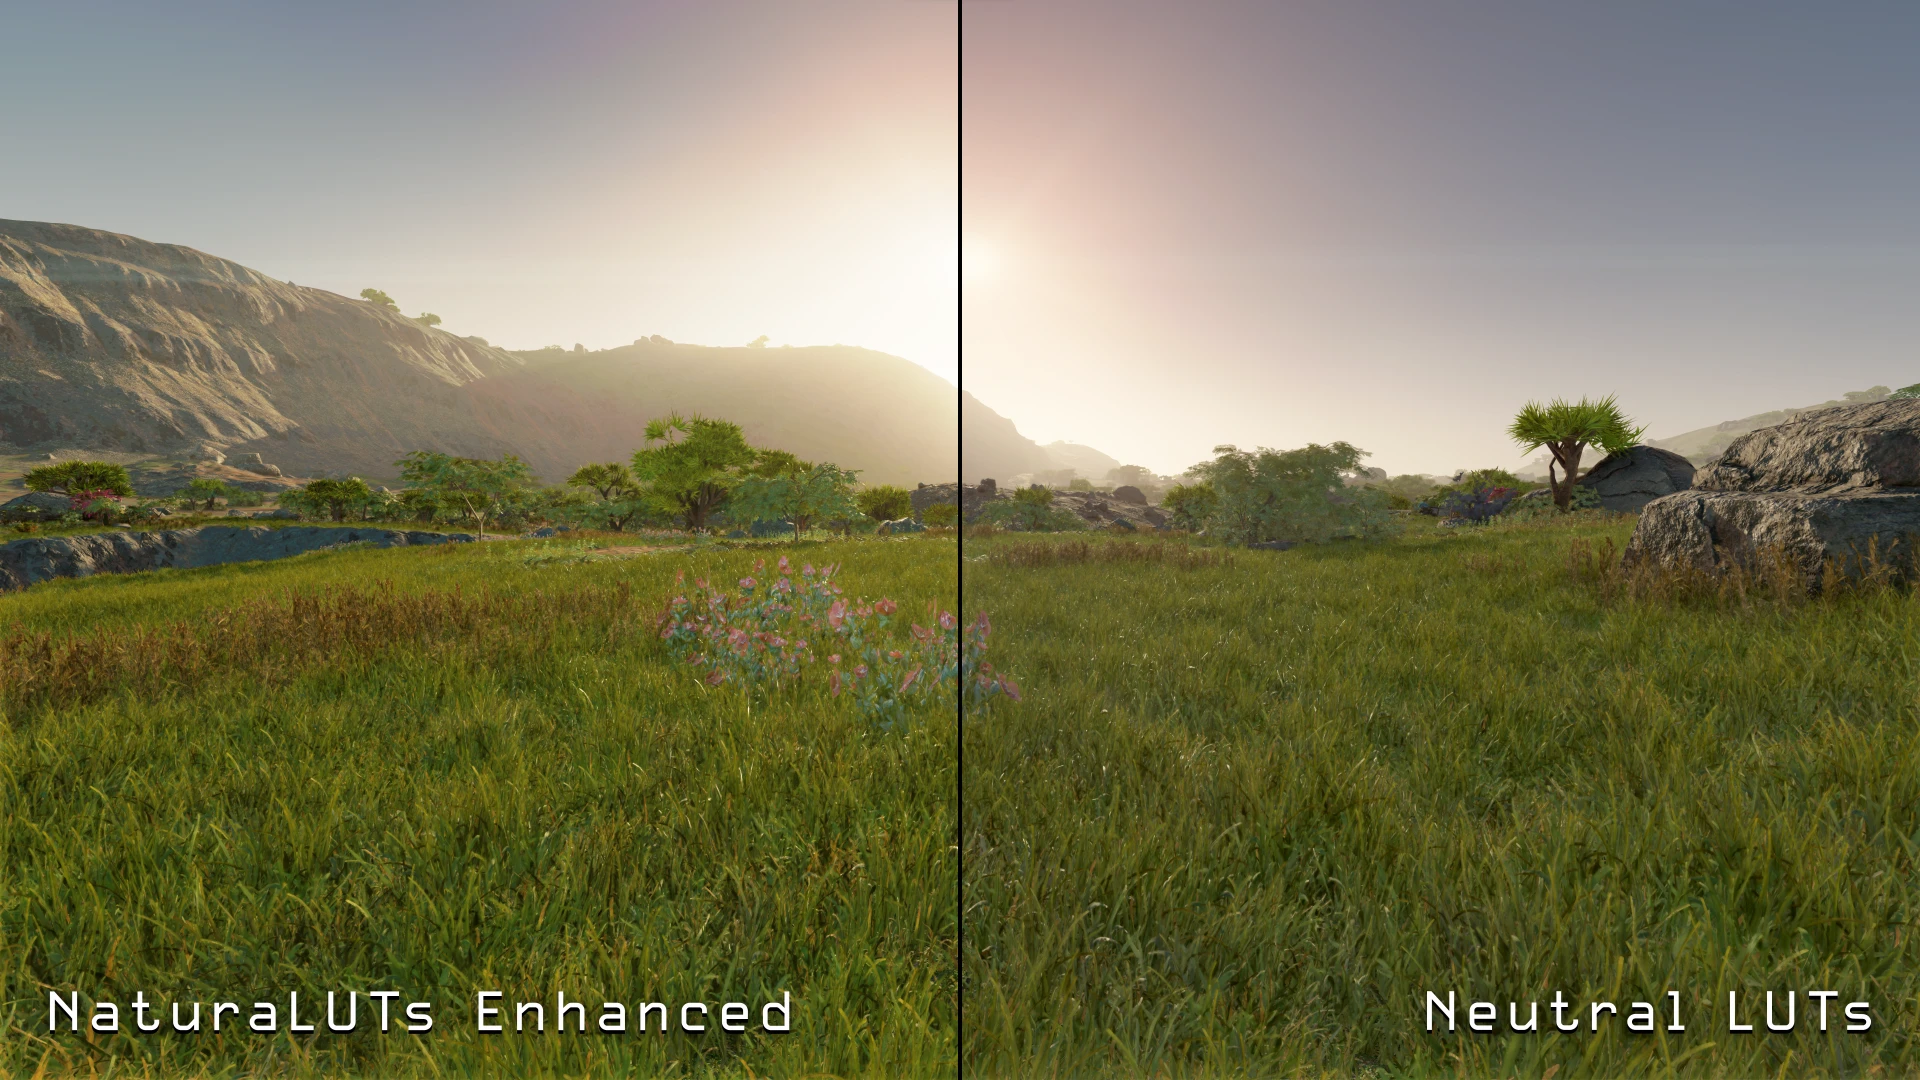
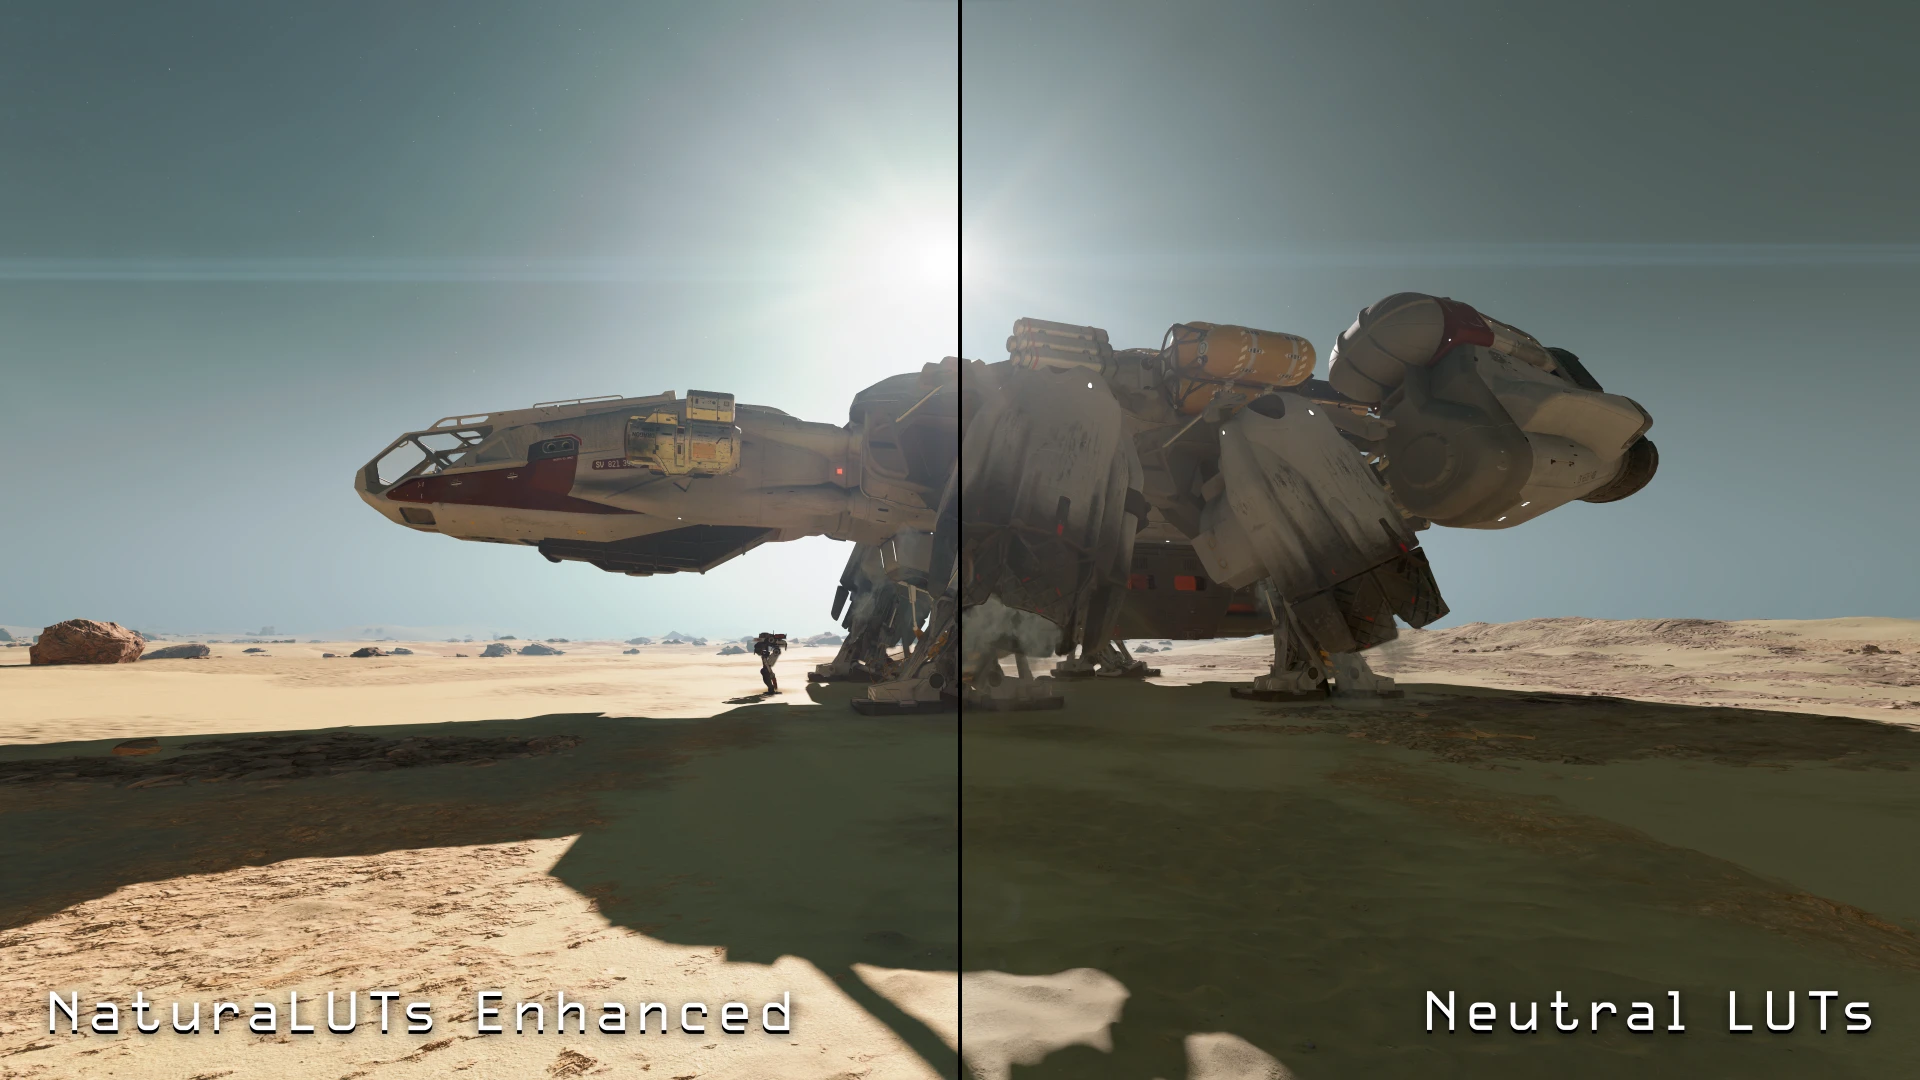
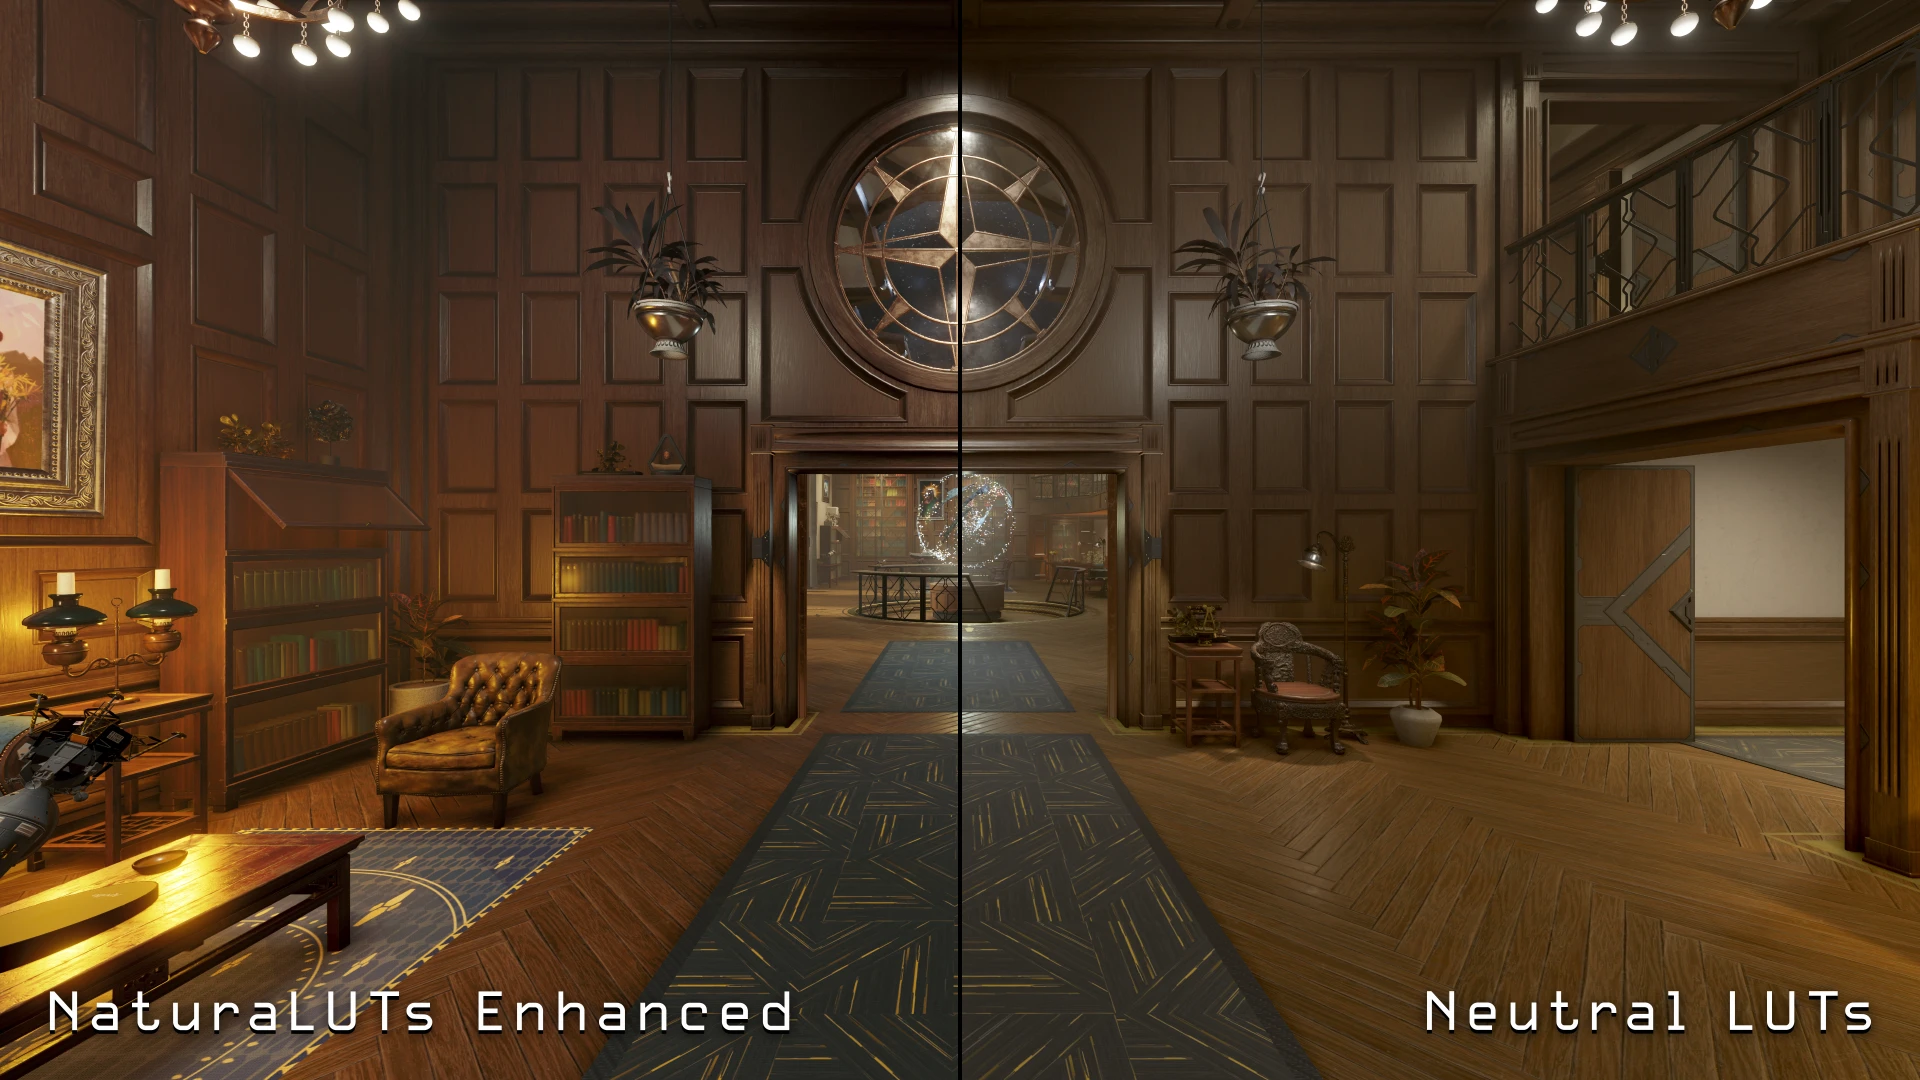
☼ How is this different from Neutral LUTs? ☼
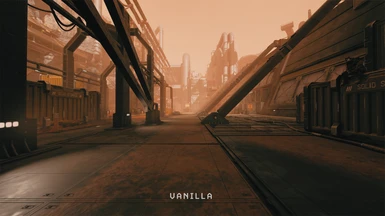
Neutral LUTs (currently) uses the same totally neutral LUT for all locations in the game. NaturaLUTs allows the original color grading for each unique location to remain in tact, meaning places that should have a particular color (Mars should be reddish, for example) will remain in tact. Additionally, NaturaLUTs Enhanced brings a brighter, more vibrant image overall. Here are some comparison screenshots:
☼ Why do some shadows still look like they have crushed black levels? ☼
I believe this has to do with the game's auto exposure system. No LUT is able to cause the underlying exposure system to change, as they only affect how the game processes the base image. Until we have a way to adjust the base contrast and auto-exposure, unfortunately this can't be adjusted by any LUT. However, this will at least ensure that the deepest black levels the game produces actually reach pure black, so the lifted filtered black levels of the original LUTs are gone.