


0 of 0
About this mod
The detailed guide to install and configure my IMNotACollection mods collection(s) using Vortex, Nemesis, Reshade, Community Shaders and DynDOLOD, for newcomers.
- Permissions and credits
Summary
About this guide
About the collection
Requirement
I. Install
II. Configuration
III. Final steps
Conclusion
About this guide
I make this guide for newcomers, but also for me if I stop to play a while and I come back, I will need to remember how to install and configure the collection.
This guide will target my last Vortex mods collection: IMNotACollection 2023 and IMNotACollection 2023 - Horror
About the collection
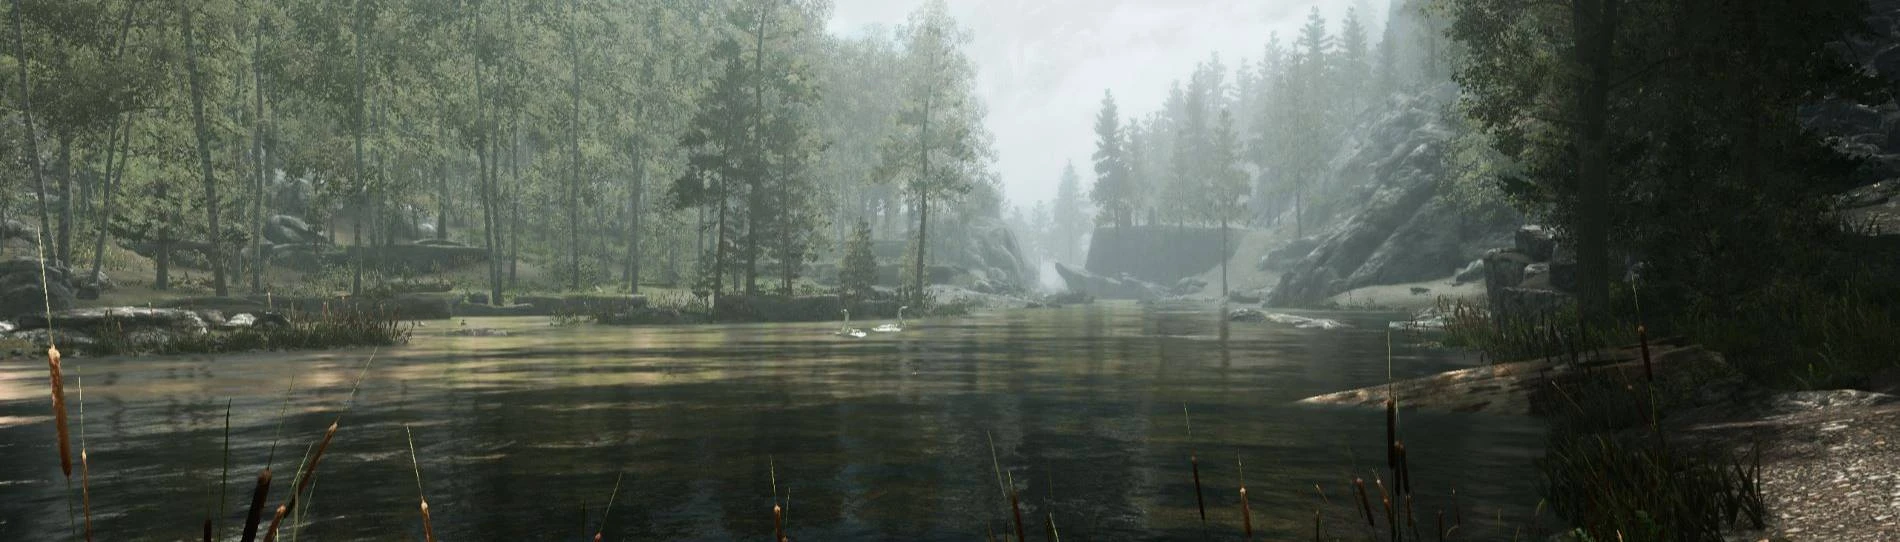
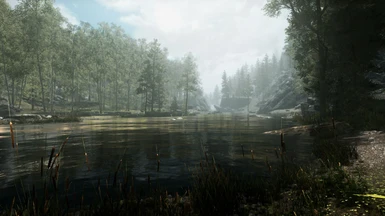
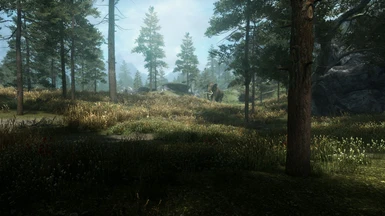
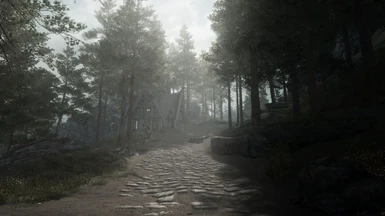
IMNotACollection 2023 is my mods collection for low to mid computers (optimized), that already include more than 700 mods that improve gameplay, graphics, animations, combats, audio, realism and fixes. It is vanilla Skyrim friendly, so no nude, no porn, no chicks. The collection is also more for a first person gameplay (I don't play third person view, so there is no fancy darksoulish combats and UI mods, and no Japanese cosplay stuff). It will require at least 3GB of vram memory (check your GPU and your graphic card). It is my personal collection, so there's maybe some mods you will not like, like the Talos statue I guess, though you can disable, remove, add or replace any mods afterwards. Also it may have some bugs, I don't says I've covered and tested everything, but it works fine so far. See the About page of the collection for more details about it.
Requirement
- At least 3GB of vram (check you gpu or your graphic card)
- 16GB ram recommended (8GB will be too short, especially if you got low vram; if you don't have enough memory the game will crash to desktop (CTD))
- Vortex, the new Nexus mod manager (install it from this Nexus official website)
- Skyrim v1.6.640 (any other version will not match some mods and so will crash; you can upgrade or downgrade to this version with some tools and some Steam command)
- A good internet connection (more than 700 mods to download, and some are big, like HD textures)
- At least 150GB free space on an internal disk drive (as Skyrim use data streaming and as Vortex do a lot of mods deployments, it will be better to install everything on a fast internal drive instead of an external drive. It will be better for DynDOLOD as well)
I. Install
I.A Install Skyrim v1.6.640
The version should really be 1.6.640, legendary edition, no less, no more, or there will be crash to desktop (CTD) at start.
I recommend to install it on the internal disk drive, it will be more faster than any external drive, and as Skyrim use data streaming this will have better performances.
If you have steam and another Skyrim.exe version, you can upgrade/downgrade to this version with the following command to download the corresponding Skyrim.exe version:
steam://nav/console
download_depot 489830 489833 5291801952219815735
But, if you have installed the v1.6.1130 or newer, you will have to reinstall lot of data files too, using those depots:
steam://nav/console
download_depot 489830 489831 3660787314279169352
download_depot 489830 489832 2756691988703496654
download_depot 489830 489833 5291801952219815735
Then be sure to use SKSE v2.02.03 from https://skse.silverlock.org/download/archive/ and compatible mods (in particularly if using USSEP (Unofficial Skyrim Special Edition Patch) it must be the USSEP 4.2.9a).
I.B Install Vortex
I use Vortex as mods manager, it's the official Nexus mod managers, you can download it from this Nexus website. Some people use another mod managers, like MO2 though. In this guide we use Vortex only. I recommend to install Vortex on the same drive than Skyrim, which should be an internal drive for better performances, as there will be a lot of mods deployments using Vortex that will take time, and it will be better anyway for the Vortex management.
I.B Install SKSE v2.2.3
You will need to download the SKSE zip from skse.silverlock.org, the exact 2.2.3 version for Skyrim 1.6.640. If it is no more on this page, check on its archives link. Then extract its content to your Steam\steamapps\common\Skyrim Special Edition folder, as its content should be in the same folder than the Skyrim.exe file. SKSE is require for tons of mods.
I.C Install some Microsoft libraries
Some Microsoft dlls are require for some mods, also for DynDOLOD:
Install the last Visual C++ redistribuables (x86, x64): https://learn.microsoft.com/en-us/cpp/windows/latest-supported-vc-redist?view=msvc-170
Install the .Net framework too (x86, x64): https://dotnet.microsoft.com/en-us/download/dotnet/6.0
I.D Install Reshade
Reshade is a DirectX post-processor, like EnbSeries, that include tons of shaders (effects), like film grain, ambiance occlusion and so on, to enhance games visuals, and it has very good performances. Reshade will be require for Community Shaders mod and its dependencies. It also works with a tons of games. So download it from its official website: reshade.me
Select the full add-on support version, as it is a single player game, so you will have more options.
During the install, select the SkyrimSE.exe program from your steamapps path. Then select the DirectX 10/11/12 option. Then select all the shaders to install. And that's it. During the game there will be first a shaders compilation, this will occurs only once, so just wait the end of the compilation. Then you can press Home key to open the Reshade menu and either start to use some shader or use a preset like my Reshade True Light preset for Community Shaders. Don't forget to activate the optimization mode once you have edited some configuration (the little checkbox at bottom right).
I.E Install Loot and BethINI
Loot and BethINI are optional but highly recommended, as Loot will check our mods list and will warn about missing patch and unsafe mods, and BethINI will help us to configure Skyrim settings. You can download Loot (manual download and install) from loot.github.io and BethINI from its mod page (BethINI).
I.F Install Nemesis
Nemesis, the successor of FNIS, will be used by some mods to have some fancy animations. It is a standalone application that must be install into your Skyrim Data folder.
To use it, select Update Engine, then select the mods you use that use Nemesis (we will check that later), and press Launch Nemesis Behavior Engine.
Nemesis can be download from its mod page (Nemesis). You can also add it in the Vortex Dashboard page afterwards, for a quick launch, under the Tools section (at the bottom page).
I.G Install DynDOLOD 3
DynDOLOD (Dynamic Distant Object LOD (Level Of Details)) is an application and a mod, from Sheson, that will rebuild LODs of your new objects and landscape that you have put into Skyrim with some mods. Basically, object that are far will just be rendered with a 2D low res image, for better performance, whereas near objects will be rendered as full 3D and a max details. This is very important for dense forests, by example, to keep good performances.
In fact you will need three applications: xLodGen, to generate landscape LODs, TexGen, to generate textures (included in the DynDOLOD zip), and DynDOLOD to generate the final LODs and plugins. We will explain how to use them later, for now just install them. Also we will use DynDOLOD 3, not DynDOLOD 2, so beware to not install DynDOLOD 2. Also you can disabled the strange DynDOLOD "got your firstborn" loadscreens in the ini file (see DynDOLOD Loadscreens - HowTo Remove). Always use the latest versions:
- xLodGEN can be downloaded from its thread page: https://stepmodifications.org/forum/forum/223-dyndolod-xlodgen
- DynDOLOD (with TexGEN included) from its mod page: https://www.nexusmods.com/skyrimspecialedition/mods/68518
Unzip them into a C:\Modding folder for example. After unzip, you can add them under Vortex Dashboard tools: be sure to select the x64 versions (xLODGenx64.exe, DynDOLODx64.exe and TexGenx64.exe) and to use the "-sse" option. There will be some configuration to do for Community Shaders, as explain further.
Also check the requirements: https://dyndolod.info/Downloads#Additional-Requirements
I.H Install the collection
Now it's time to install the collection under Vortex. Install the collection IMNotACollection 2023 from its page, button Add to Vortex, then follow the install under Vortex. You should have mods installed and enabled, same as their plugins. Be sure to use a clean profile, to not have conflicts with others collections or mods.
I.I Install some fixes
Some important mods require a manual install, to place some dll into the Skyrim Special Edition\Data folder. That's the case of the dll of SSE Engine Fixes part 2 and the d3dcompiler_47.dll of SSE Parallax Shader Fix for Community Shaders.
II. Configuration
- With BethINI, that will be easier, set max particules to 3000 or 6000, that's an Embers XD mod recommendation.
- Still with BethINI, set grass density to 30, that's the setting we use with the Veydosebrom Regions mod.
- For Soaking Wet, to be sure to have rain wet effect on NPC and your character, check that in the Data\SKSE\Plugins\SoakingWet.ini file the [Weather-Rain] block has Enabled=true.
- Check that the Faster HDT-SMP mod is configured for your GPU/CPU (do reinstall this mod under Vortex). Mine is configured for No Cuda and AVX processor. You can also change the Faster HDT-SMP settings in its Data\SKSE\Plugins\hdtSkinnedMeshConfigs\configs.xml file.
- For Better Jumping AE, set the Data/SKSE/Plugins/BetterJumpingSE.txt file to your preferences. I use Jump Count to 2 and Jump height multipliers to 1.3 for all jumps.
- For Tree LOD Lighting, as explain on its mod page, in your DOLOD\Edit Scripts\DynDOLOD\DynDOLOD_SSE.ini file, setTreeLODComplexAtlas=1
and in your DynDOLOD\Edit Scripts\DynDOLOD\TexGEN_SSE.INI file setTreeNormalMaps=1
Then be sure to run TexGen and DynDOLOD apps with the -sse option (as explain further). - For Ultimate Potion Animated NG, I use the v1.6, not the v2.1, as the v1.6 can be use with several potions before the animation. In your Data/SKSE/Plugins/UAPNG.ini file, set bEnablePotionQueue=1. Also the animation is nice, but in the other hand you will not see how many health/magic you will gain during the pause. If you feel it is annoying, you can disable this mod and rerun Nemesis without it.
- Be sure to clear your Data\ShaderCache folder before a new Community Shaders install and your DynDOLOD\Edit Scripts\DynDOLOD\Cache before a new DynDOLOD install.
III. Final steps
III.1 Run Nemesis
It is time to launch the Nemesis app, to enable some animations required by some mods. In the Nemesis app, click on Update Engine, then select Precision and EVG Animated Transversal. Then click on Launch Nemesis Behavior Engine. Wait the end of the process, then close Nemesis. It is important to run Nemesis each time you install or remove a mod that require it, or else you will have some animation issues.
III.2 DynDOLOD 3
I recommend to try to do the DynDOLOD, as it will help you whenever you will add more terrain, trees and objects mods. It's not that complicated, just be careful of each steps. My settings are based on those of this tuto: https://steamcommunity.com/sharedfiles/filedetails/?id=2789657603 but lowered for low to mid computers. Always use the most recent xLODGen and DynDOLOD versions. You can also see this famous tuto: https://stepmodifications.org/wiki/SkyrimSE:2.0.0#DynDOLOD.
Also check this info page about billboards: https://dyndolod.info/Help/Ultra-Tree-LOD#Internal-Billboards-and-External-Billboards.
III.2.1 Run xLODGen
XLODGen will be used to generate Terrain (and only Terrain) LODs. Be sure to create an xLODGen_Output folder in your xLODGen folder first. Then under Vortex, add a shortcut to your xLODGen (under Dashboard panel, Tools (at the bottom)), with the following settings (replace C:\Modding\xLODGen-99 by your folder):
- Name: xLODGen Terrain
- Target: C:\Modding\xLODGen-99\xLODGenx64.exe
- Command Line: -sse -o:"C:\Modding\xLODGen-99\xLODGen_Output"
Then install and enable the SSE Terrain Tamriel Full Extend mod. You will find it here: https://www.nexusmods.com/skyrimspecialedition/mods/54680. It is to use with xLODGen only, so after using it with xLodGen you will have so disable it (and that's why this mod is not in the collection). Now run xLODGen.
About LOD quality here, the higher value will have more perfs but lesser quality, and quality 0 is best quality but lesser perfs. LOD4 is for the closer distant objects, LOD8 for those more distant, LOD16 even more distant, LOD32 is for world map, so generally quality is set to 0 to have a detailed map, though it's fine with a quality 16 as well and this will gain much more perfs. Also you must know textures comes with two files at least: a diffuse texture (the color image) and a normal map (the depth of the relief). Generally the normal map should be same size, but it can be lower with low detailed textures to gain some VRAM.
So here my settings for low to mid computers with not much VRAM (let says around 3GB of VRAM):
- select All the worldspaces (Tamriel, MarkarthWorld, Blackreach and so on...).
- select only Terrain LOD (not Objects LOD, not Trees LOD, not Occlusion, as those will be build by DynDOLOD instead).
- LOD4: select all the checkbox, Quality 4, Diffuse size 256, Normal size 128, Bake diffuse size 256, Bake normal size 128, BC7 Quick.
- LOD8: Quality 8, Diffuse size 128, Normal size 64, Bake diffuse size 128, Bake normal size 64, no MipMaps, BC7 Quick.
- LOD16: Quality 12, Diffuse size 128, Normal size 64, Bake diffuse 128, Bake normal 64, no MipMaps, BC7 Quick. (can even be lower texture size I guess)
- LOD32: Quality 16, Diffuse size 128, Normal size 64, Bake diffuse 128, Bake normal 64, no MipMaps, BC7 Quick. (can even be lower texture sizes too)
- don't select Specific chunk and select Seasons only if you are using seasonal Skyrim mods (then check Default and all the 4 seasons).
- click on Generate. Wait until the end (it take around 12 minutes on a laptop, 54 minutes if seasons).
- once you see the "LOD generation complete" line, and nothing is moving, then close xLODGen.
- Zip the xLODGen_Output folder. Drag'n drop the xLODGen_Output.zip into the Vortex Mods panel, in the Drop File(s) region.
- if there's some conflicts with some mods that has some LODs, resolve the conflict by putting the xLODGen_Output.zip after those (overwrite).
- disable the SSE Terrain Tamriel Full Extend mod. You can also delete the xLODGen_Output folder content now, to get some disk space.
TexGen will create textures to use by DynDOLOD, especially those tiny textures to use for long distant objects instead of full detailed objects, and so to gain a lot of performance. Under Vortex, you can add a shortcut to your TexGen (under Dashboard panel, Tools (at the bottom)), with the following settings (replace C:\Modding\DynDOLOD3.00-140a by your folder):
- Name: TexGen 3
- Target: C:\Modding\DynDOLOD3.00-140a\TexGenx64.exe
- Command Line: -sse
Be sure to have follow the configuration steps for Tree Lod Lightning (see II.Configuration). You should use 3D Tree lods and enable HD Tree too, because that will be a game changer, you will see nice tree on the back, instead of some flat crossed images, so better to use 3D Tree lods when available, even on low computers.
So here my TexGen settings for low VRAM computers, using a grass cache mod (like Grass Precache for Veydosebrom Regions) and some 3D LOD trees for DynDOLOD 3 that we get with Happy Little Trees or Fabled Forest:
- Stiched size: 128 (720p)
- Rendered size: 128 (720p)
- Select Grass, Tree, HD Tree, Rendered and BC7 Quick on all formats.
- Tree: Unit 17.0 (720p), Texture size min 32, max 1024
- Click on Start and wait until the end, just be patient, but it should go much more faster than with xLODGen. On the final popup, click on "Zip and Exit".
- Drag'n drop the TexGen_Output.zip (from your DynDOLOD\TexGen_Output folder) to the Drop File(s) region of Vortex Mods panel. On conflicts, TexGen_Output.zip must be after all (overwrite).
III.2.3 Run DynDOLOD
Final step, DynDOLOD will create final LODs and plugins as well to activate DynDOLOD during the game. Under Vortex, you can add a shortcut to your DynDOLOD (under Dashboard panel, Tools (at the bottom)), with the following settings (replace C:\Modding\DynDOLOD3.00-140a by your folder):
- Name: DynDOLOD 3
- Target: C:\Modding\DynDOLOD3.00-140a\DynDOLODx64.exe
- Command Line: -sse
Be sure to have follow the configuration steps for Tree Lod Lightning (see II.Configuration).
Now run DynDOLOD 3. In the windows popup, click to Advanced ">>>", then select all the worldspaces.
Then for computers with low VRAM and using some 3D Tree LOD like Happy Little Trees or Fable Forest:
- select Candles and FXGlow then click on "Low" button.
- Go at the bottom of the scroll list, and click on the tree row:
For LOD Level 4, 8, 16 and 32, select respectively Level0 (that's for 3D lods), Billboard4, Billboard4, Billboad1. Select VWD TREE and FarLOD too. - Still at the bottom of the scroll list, now click on the root \ row:
For LOD Level 4, 8, 16 and 32, select respectively Level 0, Level 1, Level 2, Level 3. Select VWD (but not TREE) and FarLOD. - In the Options: select Object LOD, Ultra (as using 3D tree lods), Dynamic LOD, Glow windows, High, size LOD 512, size full 256, billboard brightness -5, billboard max size 512, NearGrid 11, FarGrid 21, Uncheck Upgrade NearGrid (if you are short on perfs), Occlusion data, Terrain underside, Grass LOD, deselect Seasons (if not using Seasons mods).
On the last row: select Quality 3 (this will gain some perfs), Plugin, Quality 12, Height 500, density 30 (same as your grass settings), Mode 1. - Then click OK and wait... it will take a lot of time, around 1 hour on my computer. If you still have some good perfs the next time you can select the option Upgrade NearGrid large references to FarGrid, this will be nicer visually. If DynDOLOD is pending around some Fake lights processing, try to unchecked them and add LockTexconv=1 to the DynDOLOD_SSE.ini file and restart.
- Once finished, click on zip and exit, then like others zip, drag'n drop it in the Vortex Mods Drop File(s) zone. Make sure to enable its three plugins (DynDOLOD.esm, DynDOLOD.esp and Occlusion.esp). On conflicts put DynDOLOD_Output.zip after all (overwrite).
Conclusion
Check my collection page to see some recommandations, tips and some others mods that I don't have put there but are still nice to use. Just one more thing. At first start, Community Shaders will compile all its shader, so you will have a black screen (like during 20 seconds) and some very slow starting screen (like during two minutes), until the end of compilation. This compilation is required just one time, so don't panic.
Also during game you can take a look to the Reshade menu, using the Home key, and to the Community Shaders menu, using the End key (beware Light Limit Fix will use around 5 fps, so on low computers I recommend to disable Light Limit Fix in the Community Shaders menu). Also be sure to launch the SKSE launcher, not the official Skyrim Launcher (you should not see the little start popup), or else close the popup and restart.