Documentation
Readme
View as plain text
ADVANCED WALK THROUGH
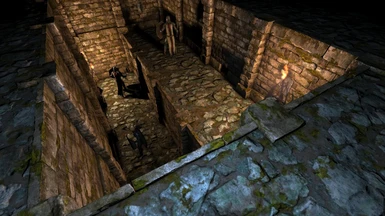
first of all, here's the dungeon:
LeveL 1 [Crusadors] 1st dungeon level from Surface (Launch beach)
LeveL 2 [Surface] Launch Beach, game starts here
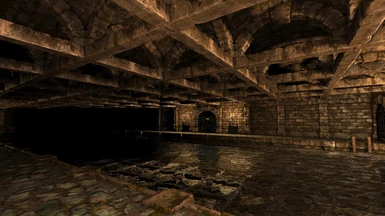
LeveL 3 [Deep Dungeons] second stage dungeons, lovely puzzles
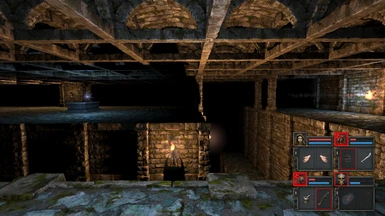
LeveL 4 [The Nexus Vaults] third stage dungeons and real fighting starts now
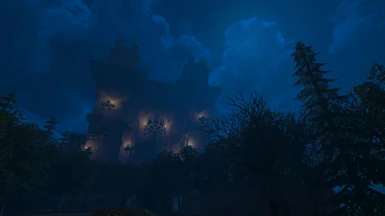
LeveL 5 [Castle Grounds] easy outside areas, looks gorgeous
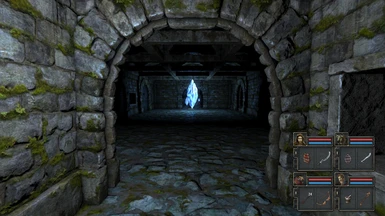
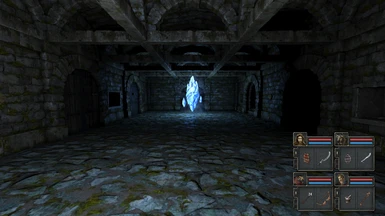
LeveL 6 [Blue Stones I] Healing Crystals and Your Home Base, dump your excess stuff here
LeveL 7 [Old Railings Level] Tricky getting those 2 levers pulled (Tomb Level here too)
LeveL 8 [Survival Beach] looks pretty similar to Surface Beach but more fighting
LeveL 9 [River of Archers] underwater levers need finding here, quite difficult
LeveL 10 [The Old Mine] Loot and hidden areas galore
LeveL 11 [Planteganet Army] Toorum's remains and quite a lot of his blessed artefacts, grab 'em!
LeveL 12 [Lagoons] underwater secret buttons and loot, patience is a virtue, take it slow
LeveL 13 [Prison Fortress] Blue Stones II is here somewhere, can you find it?
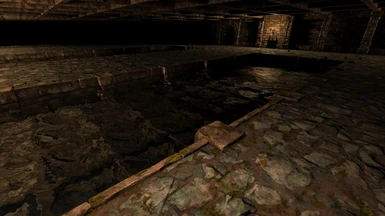
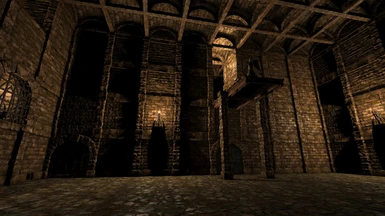
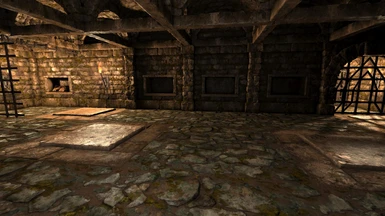
LeveL 14 [Old Dungeons] squalid fetid stinking old ramshackle passages and long forgotten rooms
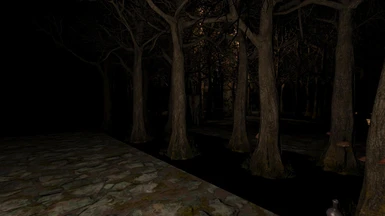
LeveL 15 [Swamp Lands] curiously difficult to move around because of the trees
LeveL 16 [Castlevania] also known as Lindworm Warehouse - find the "Master Key"
Level 17 [Skeleton Base] Highly dangerous terrain and Villains, but "with a plan" ....
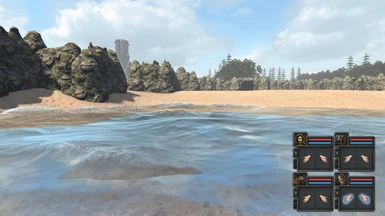
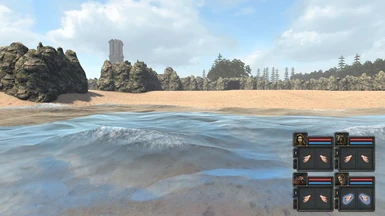
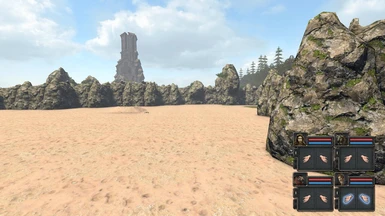
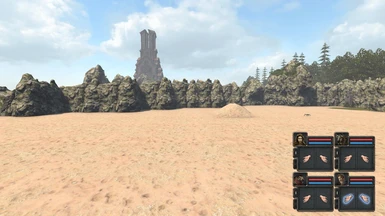
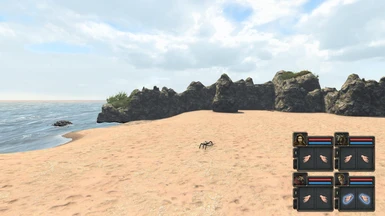
You start on Level 2, Surface Beach. You have been washed ashore with 3 mates from a shipwreck.
STEP A move sideways to the rocks in the water NORTH, the rocks are hollow, find the treasure chest!
STEP B move to the Southern Beach, operate the LEVER that opens the main dungeon gates down
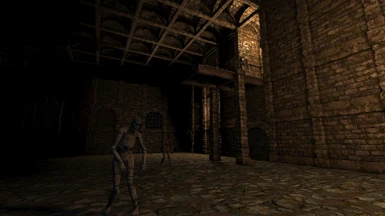
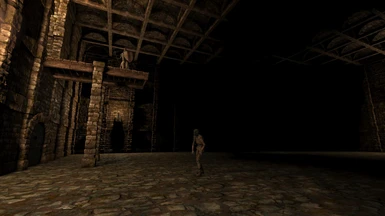
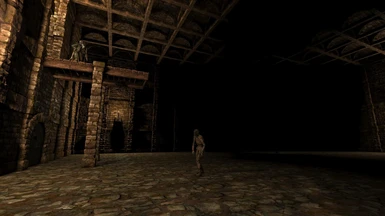
STEP C you are now on Level 1, Crusadors, easy learning curve here, just spot the rocks on the ground.
STEP D rocks on the ground mean "Secret Button" near! Press the secret button, descend 2 levels
STEP E More rocks on the ground 2 levels down, press the secret button, explore the room, press Another secret button
STEP F move on, you come to a bracket on the wall that looks like it should have a torch on it
STEP G backtrack and search for a torch, place it in the bracket, a secret door opens
STEP H as soon as the secret door opens LOOK FOR A SECRET BUTTON very nearby, press it
STEP I this closes the very secret door that you just opened, so PRESS IT AGAIN! now go back to where you found the torch
STEP J after fighting the Mummy from the secret room, place all the items BACK onto the alcoves! NOW go back to where you found the torch
STEP K find the Orb of Vilson just inside the portcullis to the Bumblebee Room. if you can collect 3 of the Vilson Orbs you can get in to the TOMB later
STEP L continue on and look for a rock on the ground, then very nearby press a secret button
STEP M move down a level and straight across to another secret button, press it. have a look around, the WEST WALL has a blue/ grey metal door, this is opened with a BRASS KEY. See two alcoves that look too high to access. You can drop down onto these later from above!
STEP N descend the PIT to the next level down
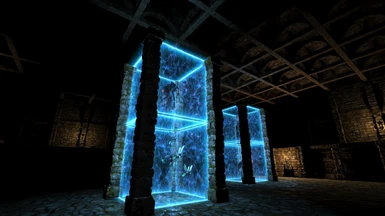
STEP O you are now on Level 3 "DEEP DUNGEONS" : change direction so you are facing SOUTH, move ahead and kill the Mummy
STEP P jump down a level, find the PRISON KEY in an alcove, jump down a level, find a torch on a wall, remove it. the wall opposite opens to reveal a staircase. have a look around, the WEST WALL has a blue/ grey metal door, this is opened with an IRON KEY. If you have an Iron Key certainly explore past here but without a Gold Key this will not be much use. (SAVE THE GAME) [NOTE, recommended, do STEPS Q - T before descending pit (to Blue Stones) because this gives the team many items/ skills before Blue Stones "Missions"]
STEP Q ascend the staircase where you just removed the torch, at the top find a secret button, access a bomb stash, move along the balconey, half way along find secret button, another stash, get to end of balconey Final secret button, this triggers a portcullis back in the middle of the portcullis, that leads to a passageway (that contains the MINE KEY and the Gold Key) from which you can jump down to those two alcoves that you saw before that looked too high, grab the loot from those alcoves, includes two really good weapons!
STEP R return to the balconey, jump off it but you do not want to stay on the ledge below, move immediately to get off it and progress away from the area to fight the herders, more loot to be had
STEP S in the herder's base a secret area that contains a small secret button 2 rooms in, DANGER: LARGE HERDERS to fight if you press it but of course, more loot as well
STEP T in Crusadors now jump down and fight a Crusador, teleport to the Castle Area and use an Iron Key to progress further into the Dungeons [NOTE] use an IRON KEY to explore a Library Dungeon, climb the ladder to see the RED GEM and GREEN GEM, now you know where they are, get them later!]
STEP U return to the Balconey where you found the passageway that dropped down to the high alcoves. this time drop onto the ledge below and fight all the Mummmies DANGER : 3 SPIDERS, CAUTION use your bombs to see these off, loot is worth the fighting!
STEP V ok ** now ** find your way to the 'Blue Stones' with at least 1 Gold Key and 1 Iron Key, pick any missions from there, your Team should now have sufficient items and skills [NOTE, pick doors at each END of the Blue Stones room to unlock first, then the doors in the middle of the room with a Gold Lock between them, you see in both cases stairs leading up, OPEN THESE DOORS next! ]
TIP: every time you enter Blue Stones, this is the one place you know you are coming back to, so every time, DUMP OFF STUFF IN HERE that you really don't need, e.g. food, scrolls, old weapons, clothing, get rid of excess items in Blue Stones (that way IF you need it, you know where it is)
STEP W ok go up the stairs from the Blue Stones that lead to the Water Lanes, you are back in the "DEEP DUNGEONS" level here and your overall aim is to move SOUTH, but be careful. there is a locked metal door on the Southern Wall, you must first UNLOCK IT
STEP X unlock the Metal Door on the Southern Wall by finding the rocks on the West side of the Lagoon Lanes, these mark where you should jump in to the water and press a secret underwater button which UNLOCKS the Metal Door on the Southern Wall
STEP Y swim to the Southern Wall and go through the now unlocked Metal Door, enter NEXUS VAULTS: DANGER [SAVE THE GAME]
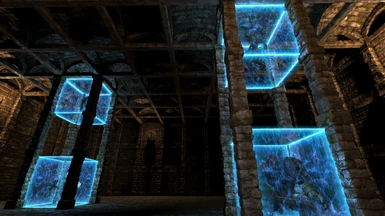
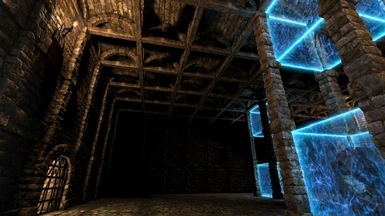
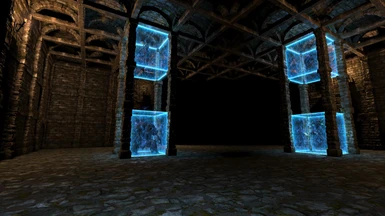
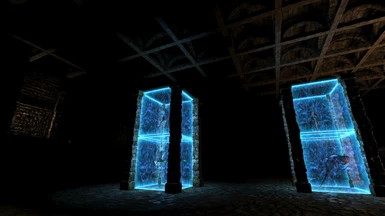
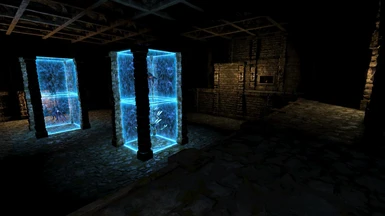
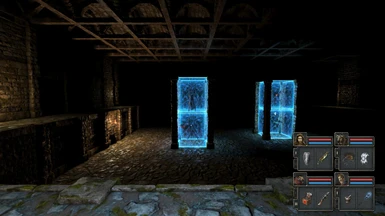
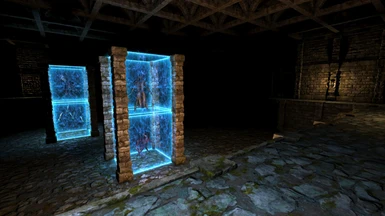
STEP Z note the Pressure Plates as you see the top platform of Nexus Vaults, these trigger a cage that traps a very dangerous enemy, only use it as a last resort!! [TIP, cage the Xeleroid in this]
at the foot of the Nexus Vaults you see the Sewers which is the final level down, you don't need to go down there unless your team is in a bad way! [SEWERS] this final lowest gully is a bad place but has 2 wall buttons that teleport you back up to the top of Zone if that helps! There's nothing else there !
STEP 1 use the first HUB KEY now prepare bombs for the next dog
STEP 2 use the second HUB KEY and kill the dog with your bombs
STEP 3 now to find the SKULL KEY on this ground level, keep walking around the floor as far as you can go without falling into the sewer, see the secret button, press it and collect the SKULL KEY (use it in Blue Stones)
STEP 4 now find the Rope! Find the small secret button just where you found the Skull Key, rope is there! * DO NOT ENTER THE SEWERS UNLESS YOUR PARTY IS REALLY BADLY HURT *
STEP 5 use the next HUB KEY and explore the rest of the Area until all your Hub Keys are gone
TIP, when you come to the large courtyard enclosed on all sides, find TWO more Hub Keys, on the South Wall is a secret button, inside the secret room is a harpoon, so practice using it in a small water practice area next to it.
STEP 6 move on, use the next HUB KEY to open two doors at once, one a blue metal door, the other a portcullis that leads up to the "Herder Base" but enter the other door way the Blue Metal One
TIP, if you find there are not enough Hub Keys then use the SEWERS to teleport back up to the Top of the Zone, then slowly come down exploring every ledge because you didn't pick up all the Hub Keys!
TIP each time you enter water [SAVE THE GAME] because you could get blocked by a Water Turtle!
STEP 7 find the ladder up and check out the 2 Crusadors, when you look down on them you see that if you jump, you would not land of either of their platforms, you are not in the right position (yet) so enter the water, find the ladder in the underwater section that brings you to surface pavement
TIP once on the surface pavement - move along the West side wall until you see a wooden door. Keep looking at the West Side wall, press the small secret button, this reveals a monster Trap. Enter the trap yourself and lure a monster to follow you, trap the monster!
STEP 8. jump into the water right next to the trap, find items, (prison key, tomb key, hub key) return to surface pavement TIP each time you enter water [SAVE THE GAME] because you could get blocked by a Water Turtle!
STEP 9 Move to the wooden door mentioned - you now see a Torch on the Eastern wall, remove it. Enter the new passageway, explore!
STEP 10, find the open section, when you look down, you see that now you are in the right position to drop down on one Crusador platform, jump down and fight the Crusador, use the wall button to exit
STEP 11 if you do not have the Gear Key, jump down 1 ledge, the Gear Key is there
STEP 12 use the Gear Key to enter a small pond room, chuck any item onto the pond island to open the locked door and move on
STEP 13 the next passages contain a spare rope so get it as a back up rope
STEP 14 Use any Vilson Orbs you have to open up 3 Vilson gates leading To The Tomb
STEP 15 head back to the Bumble Room where you found a Vilson Orb, use the Hub Key to enter the room, descend the pit using the rope, note the locked wooden door as you go past it
STEP 16 use another Hub Key, this opens two doors, the one right in front of you AND that wooden door you went past, go back to the Wooden Door, it's now open
STEP 17 move straight ahead through the bushes, find the Tomb Key - return to the dungeons
STEP 18 find the Bumblebee Room where you grabbed a Vilson Orb
STEP 19 choose the stairs to Plantagenet
CHOOSE A MODE: SLOW and methodical, or FAST and racy
SLOW, turn right as you see the base and hug the right hand wall as you go round, this opens "trap cells" into which you can lure and trap any enemy that looks a handfull
FAST, turn left and hug the left hand wall - press a secret button half way along, this opens a herder base but more importantly auto fireballs, lightning - that, while you are in the herder base, will wipe out all enemies on the central Plantagenet base, CAUTION the auto fireballs will still be going when you board the base, so LOOK OUT!
if you choose the Slow way then borading the base is extremely dangerous, many of the highly lethal monsters will still be there and maybe you should just confine your ambition to grabbing stuff from just 2 of the 4 altars, you may get the Rapier Sword from one of those 2 anyway and then do a return attack after your Team is restored
BOARDING THE BASE : on the WEST wall is a secret button to open the adjacent Herder Base, look across from the secret button to the base, you will see the tips of a ladder sticking up, this is the boarding ladder
if you chose Fast then your team are equally likely to be wiped out by the auto fireballs and lightning, turn them OFF by simply grabbing stuff from any altar on the Plantagent Army base but remember it takes several seconds after that for the fireballs to actually cease and several enemies like the Ugguardians will still be after you
STEP 20 once you have plundered all the four altars on the Plantagenet base and have all the items from them (or AT LEAST the Rapier Sword) then return to Blue Stones, do this by 1 of 3 exits from the Plantagenet Base, 1 > the way you came 2 > the exit on the Northern wall, see the portcullis exit, throw an item onto the Plantagenent base exactly opposite the gate it will open 3 > through the herder base on the Southern Wall
STEP 21 in Blue Stones make sure that you have the Rapier Sword, you can now enter "the Old Railings Level" 1 of 2 ways .... 1 > open the door on the EAST wall, you will see a trapdoor, this leads to "the Old Railings Level" DIRECT, 2 > open the door on the WEST WALL - you see a long passageway leading to a SKULL LOCK, this leads to "the Old Railings Level" if you have a skull key but it is more tricky, you would need to activate a magic bridge from the alcoves
STEP 22, if method 1 - find a Prison Key close to the start of the level, (SOUTHERN EDGE) THEN drop down to pull the levers, carefully look down before you jump and make sure you're only dropping down 1 level, not 2 or you'll miss the levers
STEP 23, if method 2 you'll miss out on finding the prison key, never mind, pull the levers and drop down to ground - NOW find the brass key - it's on the ground level pavement
STEP 24 using a pit on the ground level drop down onto Survival Beach, if you don't have a Rapier Sword you're now locked in, so load a previous SAVE
STEP 25 if you have a Rapier Sword use it to unlock doors via the Statues
STEP 26 find the 3rd Vilson Orb by the seaside statue
STEP 27 fight the Rat Soldiers, drop down using the pit to the River of Archers
STEP 28 on landing on River of Archers, slowly look around you, facing trees look on the shore for a few loose stones, these indicate a secret nearby! jump in the water aiming for the stones and keep thinking of where the stones are, move forward towards the stones, pull the lever, return to where you started. now a magic bridge allows you off the island
STEP 29 find the Acolyte's resting place, 1 Mudwort can be looted from the "companion's shed" so take that but inside is a Treasure Chest, we'll get that later
STEP 30 find the TRAPDOOR up on the bank
STEP 31 find the stone head whose eyes light up, the eyes unlock the trapdoor so descend now to THE MINE
STEP 32 find the Prison Key and the Gold Key then move to the South Eastern, corner, place any item into the Alcove, a secret door opens, explore: DANGER, Stone Summoners
STEP 33 either fight the Stone Summoners or walk past them but if you have THE MINE KEY, now is the time to use it! Explore the nearby areas to find a Mine Lock, this opens the door to a great stash including the (blue) Orb of Radiance! this holds a special magical power (LIGHT)
STEP 34 move to the Northern edge of the mine, ENTER Lagoons Level, turn left, go along the Western Edge of the Lagooons, you come to a wall bracket that looks like it should have a torch, place a Torch in it, nothing happens! WELL in fact a magic bridge has just energised in the middle of the Lagoon, you'll see it later ;)
STEP 34A IS YOUR TEAM INJURED/ ILL / DEAD ? Do you need Blue Stones? OK Route to Blue Stones II is close to here, if you need their healing crystals - move to the Eastern Edge of the Lagoons, you can do this via water or land, either will work but you should be 2 water levels down on the Eastern Edge, take the underwater exit to PRISON FORTRESS
In Prison Fortress you need three keys to get restored by Blue Stones, 2 prison keys and a Gold key, BEGIN : 1 prison key, insert it in the first lock, pick up 1 HUB Key, move through the gate, pick up a 2nd Hub Key now listen as you put the 2nd Hub Key BACK! You hear Blue Stones II entry door sliding open, in fact if you look up, you'll see it opening
In the inner hallway insert 1 Gold key - at the ladder cage, insert a 2nd Prison Key, this gives you access to the Blue Stones ladder, now find a GEAR KEY up the ladder, walk towards the Blue Stones, keep walking, touch them and RESTORE THE TEAM
STEP 35 return to Lagoons Level from Blue Stones II, remember where they are!
STEP 36 head to the Eastern Wall on the ground, see two rocks, these indicate a secret, jump in the water, find the secret button, move North until you drop down a levl, then move WEST, see a tall pillar sticking up, find the secret button, you have now started 2 more magic bridges, exit the water
STEP 37 you should now be on the Western pavement, jump in to the water so that you are only 1 water level deep, search for a tiny island and on it's base press a secret button, this activates a critical magic bridge, exit the water
STEP 38 head to the Southern Wall and take the wall torches from there unless you already have 3 wall torches in your posession, you will need them very soon
STEP 39 press two wall buttons on the Southern Wall now, these turn on the last 2 magic bridges
STEP 40 walk onto the magic bridge, if any sections of the magic bridge are missing then first - is there a wall bracket to put a torch into? If so, insert a torch, if not repeat from STEP 36
STEP 41 the magic bridge, if complete will take you to the other side of the Lagoons where a single Lindworm Rider has been frozen in fogslime, OPTION! Route to Swamplands when you see this Lindworm, simply walk off the magic bridge straight towards the Lindworm, you will fall in the water but keep walking, you then eventually find an underwater exit to Swamplands but this is just an OPTION,
STEP 42 come off the magic bridge at the Northern Landing stage, move up the stairs and see the Green Gem, to your left remove the weapon and turn right, place it in the empty alcove, NOW take the Green Gem, now go back to STEP T to find and get the RED GEM! the blue one is in Prison Fortress, see STEP 34A, explore this further to get the Blue Gem
STEP 43 using the 3rd Vilson Orb get to the TOMB level, (see STEP 14) find a secret button, now see a prison key and a Mine Key
STEP 44, choose the Teleporter or Descend the Trapdoor : Trapdoor mission, descend to Survival Beach, find the Gear Key and when arriving at Crusadors, the "Too high Alcoves" are now reinstated, you can now loot the remaining items as per STEP Q - you get ORNATE KEY and Frost Arrows!
Video A - first hour of the game at: http://youtu.be/-QGV_G7YLmo
Video B - second hour of the game at: http://youtu.be/_sYMsBOa4t8
Video C - third hour of the game at: http://youtu.be/Neui_eNmWio
Video D third hour of the game at: http://youtu.be/t7zW-t45mFs
Video E fourth hour of the game at: http://youtu.be/8TksAy-BzhQ
Video F at: http://youtu.be/L6D9gMu82m8
Video G at: http://youtu.be/RxupWlRwTf8
Video H Your video will be live at: http://youtu.be/DviUz7uNtNU
Video One - the first half hour at: http://youtu.be/CZ3qVKVbQUQ shows the game start
Video Two - the second half hour at: http://youtu.be/iqlppQW1QC4 shows the daytime Castle Grounds and the route to the Healing Crystals
Video Three - the second hour at: http://youtu.be/p5IlQWzloCI shows the night time Castle Grounds and the route to the Healing Crystals and Dawn on the beach!
video four at: http://youtu.be/YulDbujQ2eU the tempo picks up in this half hour clip as the Team descend the dizzy heights of the Nexus Vaults
video five at: http://youtu.be/h-WRExsSIjc culmination of the Nexus Vaults, the last few Hub Keys, underwater puzzles, traps and adventure (!! trapping the Xeleroid !!)
video six at: http://youtu.be/6D1hKonI_9Y shows the route to the Plantagenet Army, the nightmare of the base and side trap rooms
video seven at: http://youtu.be/FXdlK09FR7A see the Secret Route Approach to Plantagenet Army and the location of the Hand Cannon
video eight at: http://youtu.be/yvH-mM-8ehw The Old Railings Mission and then Survival Beach
Video nine at: http://youtu.be/WKdTzrfkjP4 Survival Beach, arriving with the Rapier and the pit down to "The River of Archers"
Video ten at: http://youtu.be/oPUvlB4Japc the Skeleton Commander on "The old Railings" Level
video eleven video will be live at: http://youtu.be/PjtMcJHTC_A LAGOONS LEVEL : triggering the magic bridges
Your team of four adventurers have been shipwrecked on an island but luckily are able to swim to the safety of a calm and deserted beach.
The tranquility found in the first few minutes, soon gives way to the discovery of a lever on a nearby wall, as you pull the lever you hear
a door opening nearby. This door leads to a dark dungeon way below the beach and soon a letter you find, that talks of three beautiful gems!
These gems are undoubtedly priceless and are found on your journey through the dungeon. Make it back to the beach with the three gems and you have completed the game!
TIP: for the first hour of the game only, a rock found on the ground inside the dungeon means that there is a secret button nearby.
(After the first hour of the game, secret buttons are no longer marked by a rock.) TIP: a torch holder on the wall will very often provide light to aid your exploration.
If you find a torch holder without a torch, try placing a torch into the bracket! It may open a nearby secret door.
TIP: look out for a "mortar and pestle" that one of your team could use to make up health potions with. The simple bowl can be found on triggering a secret room early in the game,
but there is a secret button inside the secret room that reveals one further secret room in which the precious bowl is found. Once you have it there are many opportunites to use the bowl on your adventures.
LeveL 1 [Crusadors] 1st dungeon level from Surface (Launch beach)
LeveL 2 [Surface] Launch Beach, game starts here
LeveL 3 [Deep Dungeons] second stage dungeons, lovely puzzles
LeveL 4 [The Nexus Vaults] third stage dungeons and real fighting starts now
LeveL 5 [Castle Grounds] easy outside areas, looks gorgeous
LeveL 6 [Blue Stones I] Healing Crystals and Your Home Base, dump your excess stuff here
LeveL 7 [Old Railings Level] Tricky getting those 2 levers pulled (Tomb Level here too)
LeveL 8 [Survival Beach] looks pretty similar to Surface Beach but more fighting
LeveL 9 [River of Archers] underwater levers need finding here, quite difficult
LeveL 10 [The Old Mine] Loot and hidden areas galore
LeveL 11 [Planteganet Army] Toorum's remains and quite a lot of his blessed artefacts, grab 'em!
LeveL 12 [Lagoons] underwater secret buttons and loot, patience is a virtue, take it slow
LeveL 13 [Prison Fortress] Blue Stones II is here somewhere, can you find it?
LeveL 14 [Old Dungeons] squalid fetid stinking old ramshackle passages and long forgotten rooms
LeveL 15 [Swamp Lands] curiously difficult to move around because of the trees
LeveL 16 [Castlevania] also known as Lindworm Warehouse
KEY -- -- Found on Level -- -- for use on Lev
iron Launch beach Crusadors
iron Crusadors
iron Crusadors -5
gold Crusadors -5
mine Crusadors -5
brass Railings Crusadors
LOCK -- -- Found on Level -- -- enables what?
brass Crusadors -3
STEP BY STEP SURVIVAL BEACH
1. Find the nearby lever on the beach that opens the doors in the rock wall
2. Descend the stairs to the Two Crusadors Dungeon. Note in the centre, are two Crusadors!
3. At the foot of the stairs you just came down, find a nearby small rock, this indicates a secret button on the wall right there
4. Press the secret button
5. Jump down one level
6. Jump down one level, find a nearby small rock, this indicates a secret button on the wall right there
7. Press the secret button
8. enter the small room, grab the sling and Press the secret button inside the room, this reveals a second secret room
9. Grab the Mortar and the Iron Key - move on and find two torches to grab from the walls
10. After grabbing the second wall torch look on the ground, find a nearby small rock, this indicates a secret button on the wall right there
11. Press the secret button
12. Jump down one level, move straight ahead in a straight line to the other side of the grand hall, find a secret button on the wall right there
13. Press the secret button, take the handaxe, REST THE TEAM (another secret button inside the secret room can merely closes the door while your team rests)
13A take a look at the metal door, try unlocking it if you have a key (it needs a BRASS KEY!)
14. Jump down the pit. click on TAB to see which direction you are facing. Change to SOUTH facing, move forward, this opens only ONE internal gate so you're just fighting one Mummy
15. To retrieve all critical weapons from this location now - you can activate the remaining gates and fight the other 3 Mummies if you wish, gain Bow and Flintlock and Daggers, OR come back and do that later, up to you!
16. Jump down one level
17. Jump down one level
18. your corridor now goes around in one great square at the foot of some kind of tower. Find a wall torch, grab the wall torch, a secret door opens revealing a staircase, do not ascend it yet!
19. Imagine the location that is diagionally opposite this wall torch bracket, go there to find a secret button.
20. Press the secret button, retrieve the Whitewood Wand for your Wizard, now move along to the other end of the corridor, note a locked door, do you have an Iron Key? if so you may go on a little sightseeing tour of the castle grounds but without a Gold Key AS WELL you cannot descend the Pit in the Castle Grounds down to the Blue Stones. Without a Gold Key you cannot exit Blue Stones, so you are better off going to this place WITH a Gold Key really.
21 return to the stairs and Ascend up the stairs, move along the ledge and fight two Mummies waiting around the corner
22 Where there were waiting is a secret button, it opens TWO nearby secret doors, enter the one it a little further back, retrieve various bombs SAVE THE GAME HERE
MORE SECRETS TO BE HAD: find the corridor half way that was closed by a portcullis, this has a secret door half way along it containing 3 more keys, gold, mine and iron keys!
23 from that Bomb Stash room jump down to the Mummy Guards below at the nearest point, what you are aiming to do is get down from there as soon as possible to the next level down
24 Jump down one level, hurry to the next wall, turn right, hurry to the ladder up, go up it REST THE TEAM, SAVE THE GAME HERE
25 Go back down the ladder, defeat all the Herders, use the Poison Bombs to kill them all.
26 You arrive back at the Two Crusadors Dungeon that you first arrived in Look at the Two Crusadors. Look closely, there are two LEVERS
27 Jump down - ENSURE you land immediately next to a lever. Find weapons and THEN return to Step 23, remember the Mummy Guards? You will need all your newly aquired fighting skills here, USE ALL THE BOMBS YOU FOUND to defeat these Mummies! NOTE: 3 spiders are very dangerous, save your Freeze Bombs for these
28 Find the pit down in STEP 14, now from here find the Locked Dooor mentioned in Step 20, this leads to Bluestones pit, go there and from here choose 4 different missions
29 The brass key can be found by choosing THE RAILINGS MISSION but each mission needs a Gold Key so make sure you choose wisely
30 if you choose the Railings Mission the critical part is finding the 2 master Levers, these are sited on the Northern Edge 2 levels down, so move North, drop down 2 levels North, pull 1 or 2 levers to unlock doors further down, this leads to Survival Beach WARNING you need a Rapier Sword to exit Survival Beach - so do not do the Old Railings Level until you have a Rapier (which is found on Plantagenet Army level, which is accessed after Nexus Vaults)
31 assuming you found the Rapier - head to Survival Beach from the Old Railings Level. You need to go via the Old Railings level for this which is off Blue Stones! Don't forget to find the brass key in Old Railings Level before you jump down any pit, it is on the bottom floor! On arriving in Survival Beach find the Vilson Orb next to the Sea Column Statue, then place the Rapier on the correct statue and find the PIT DOWN to River of Archers
32 In River of Archers you start on Island 1, there are two ladders near your position. Find a hidden lever at the bottom of the river in between these 2 ladders, it's quite difficult to spot so look at the walls closely, it is there, pull the lever and return to the island, you can now move to the grass walk.
33 You soon come to the Philosopher Head, standing in front of it opens a nearby trapdoor and this leads to THE OLD MINE! dark down there, so take some light :)
34 at the end of the Mine Area is the Lagoons Level which needs a lot of planning and patience. 1st you need some spare TORCHES. Carry 2 torches spare with you, these will be needed to activate pathways and if you see a torchbracket on the side with no torch, that needs fixing (to start up a pathway). SO, 2 buttons on the wall as soon as you enter bring on magic pathways. First of all get used to what these 2 wall buttons do, then move on further towards a few stones on the path to the right. Jump in here, you find a SECRET BUTTON that activates the next leg of the pathway needeed
35 Pretty soon you succeed in getting 3 pathways to take you near to a Lagoon Island but there is about 2 meters gap! What do you do. Jump in by the island, there is a secret button that activates the last little bit .... and so it goes on
36 Do you have 3 prison keys? If so jump in by the stones and instead of pushing the secret button move past it to deeper water, here you find an underwater exit to a PRISON AREA, 3 prison keys are needed
37 the first mission from Blue Stones is more likely to be the Nexus Vaults, you choose the opposite wall to insert a gold key - this you notice opens two exit doors at the same time, the first goes to Nexus Vaults, you first see underwater tanks, don't jump in yet!
38 NEXUS VAULTS MISSION (Gear Key) move towards the far wall where you find a few rocks strewn on the ground. Jump into the water right here where the rocks are. Now turn to face the rocks, there is a secret buton that releases an iron door on the SOUTHERN end of the level. without pressing this secret button you can't progress to the Nexus Vaults.
39 now move to the Southern end of the level and find the Gear Lock. You don't have the Gear Key yet but make a note of where the Gear Lock is
40 now enter through the Iron Door to Nexus Vaults
41 SAVE THE GAME. There are Wyverns and Xerleroids here which are pretty dangerous. You need your wits about you! Find as many Hub Keys as you can. The Gear Key is here too.
42 Progress through the level carefully and evade the Xerleroid which is pretty lethal, you can hear the thing pining or crying - this is a danger sign. Capture it at the start of the level (high up) if you can. There is a metal cage right at the start, don't waste it on any less ferocious creatures
43 On the ground level there is a secret to be had. Hub Key 1 opens the tower. Hub Keys 2 opens the inner courtyard, this is where the secret is. Move along the courtyard and take out a viscous dog. At the far end of the courtyard is a secret button! Make sure you explore it
44 Move through the level to a final tower where 2 Crusadors keep guard over loot! Can you get the loot? (it's possible but not easy)
45 to get back to the start of the level (to use the Gear Key) do 1 of 2 things: 1. from the 2 crusadors guarding the loot, use their teleporter OR jump down into the Nexus Sewers, the very bottom of the level, find a secret button right in the back of the sewers, this transports you back to the start
46 Back at the Gear Lock, use the Gear Key here to enter the next section
47 solve the easy puzzle by just throwing a piece of food or clothing onto the middle island, this releases the exit door to the side passages :SECRET: find the rope in the side passages
48 the three Vilson Orb locks are here in the side passages, remember this for when you get the 3rd Vilson Orb, move on towards the end of this area
49 Head to the Bumblebee Room where you found 1 Vilson Orb in the entrance gate
50 You now have a Hub Key to enter this room, ascend the stairs to the Plantagenet Army, note on the RIGHT HAND SIDE is a corridor with "SAFE ROOMS" all along that wall, as you move on, a secret door opens, if you enter an automatic trap allows you to "capture" unwanted enemies
51 SECRET: The middle trap contains a secret back exit. In the middle trap press the exit button an extra time as if to close it on yourself, this opens an extra exit door at the back! LOOT !!
52 One ladder in the Plantagenet Sewers allows you to enter the base, beware there are a couple of broken ladders that don't do much.
53 Slowly wear down the Army and their legion of creatures. An exit door on the far side is triggered by simply going to the opposite ground on the base that faces that door, or throw an item on to that ground, it will open the exit door
54 to your left as you enter the level, this corridor has a secret button that allows you to roam a "HERDER BASE" kill them and some food and extra items are accessed.
55 More important, in the centre are four stone ALTARS. Each one holds precious objects, one the Rapier, which allows you to move into critical areas on "Survival Beach" - get all four Altar Items, or just the Rapier, up to you, but the more Altars you conquer, the more "magic bridges" are triggered to allow you easy exit from the Base.
56 With the Rapier - return to THE BLUE STONES I to do the "Old Railings" Mission
Q+A
Q How do I get the Rapier Sword?
A Go to Plantaganet Army
Q How do I get to Plantagenat Army?
A Remember the first bumble bee in the room? Go to that room but do not descend the pit! Use the stairs
Q Why do I need the Rapier?
A To place in the statue that has his hands outstretched, this unlocks a nearby exit/ entrance
Q How do I get the Rapier?
A Your team need to defeat the Plantaganet Army and find the Rapier in the middle of their base
Q How do I do that?
A There is one ladder that leads up to the base sited fom the sewers below but be careful, the Plantaganet Army are many!
Q How do I exit the level?
A You can retreat the same way you came
Q But there is a second exit
A Yes to unlock it - you need to throw an item onto the corresponding tile opposite it on the base, or just go there, you will see the exit door unlock
Q How do I get off the base?
A When you start picking up the most highly valuable treasures in the base e.g. The Rapier, magic bridges trigger across the sewers to allow you off the base
Q what is the point of these herbs?
A you must brew them using a mortar
Q what is a mortar?
A a bowl that you find early in the game, look out for stones on the dungeon floor, these indicate secrets
Q I didn't find the mortar
A from Crusadors entrance jump down 1 level, find the revolver, jump down 1 more level, push secret button, enter secret room, push next secret button, find mortar
Q then?
A examples: Blooddrop Cap + Crystal flower = Potion of Strength
Etherweed + Crystal flower = Potion of Willpower
Mudwort + Crystal flower = Potion of Vitality
Falconsyre + Crystal flower = Potion of Dexterity
Q any more
A Advanced recipes : requires alchemy 5:
-willpower (Permanent +1 increase to willpower): Crystal Flower + Etherweed
-strength (perm. +1 strength): Crystal Flower + Blooddrop Cap
-vitality (perm. +1 vitality): Crystal Flower + Mudwort
-dexterity (perm. +1 dexterity): crystal flower + Falconskrye
-antivenom (cures poison/ or poison resist?): blooddrop cap + mudwort (level 2)
-antidote (cures disease) etherweed + mudwort (level 2)
-potion of bear form (yes, it turns you into a bear! - very good if you find your front line down and you need some heavy melee): mudwort +falconskrye (level 4?)
-shield (like the mage spell; boosts your armor rating by quite a lot): mudwort + etherweed (level 2)
-rage (like the mino ability, but at will!): booddrop cap + falconskrye (requires alchemy 4)
Q where are the three Skull Keys?
A when you enter the tomb, you see twin Gold Mask Heads. Above them you see a passageway illuminated. In that passageway is a trapdoor that leads down to Survival Beach, 1 skull key is there
Q where's the next Skull Key?
A see STEP 3 (nexus Vaults)
Q how do I get the Master Key?
A The Master Key is on Castlevania level and in a room with 4 altars, You need 2 ornate keys, a skull key, a Gold Key AND an Iron Key all at once, together to enter the room!!
Q where do the cube keys fit?
A you need SIX. Proceed from Blue Stones I. Head to "Deep Dungeons" Castle Area from Blue Stones Stairs, head to where the three Crusadors stood guard on the holy scrolls!
Q where are the three Vilson Orbs?
A There are actually four in the game but you just need three
1. on the launch beach on the beach where you pull the lever, diagonally opposite to the lever
2. on Survival Beach by the tower statue in the sea
3. when teleported from the Lindworm Warehouse in Castlevania to a Ruin in the forest from which there is no path out
4. inside BumbleBee room near start of game
Q how do you get to the RED GEM?
A if you have opened gates in Blue Stones I, then 1 of these gates leads up to Crusadors, right next to where the RED GEM is!
Q what if that gate has not opened?
A in Crusadors level (first dungeon from first beach) drop down and fight one Crusador, teleport to Castle Area, insert Iron Key to access Library and from there secret door to ladder that reaches RED GEM
Q how do you get to the Green Gem?
A Although the Green Gem is sited next to the RED GEM this doesn't mean you can get it anywhere near the start of the game
A To get the green Gem just complete the LAGOONS LEVEL. This level is accessed from THE MINE (end of Mine area)
A At the end of the LAGOONS LEVEL you enter a castle area, you see the Green Gem ahead - place an unwanted item into the alcove to your right, this triggers a bridge for you PLUS you hear a portcullis rising, this is the locked door in front of the RED GEM unlocking, just get both gems now!
Q how do you get to the Blue Gem?
A this is on the Prison Level, do you have 3 prison keys? Then just go to Lagoons Level (Reached from end of MINE area) jump in the water by a pile of stones, find the watery exit from the level (underwater) Blue Gem is here BUT YOU MUST HAVE 3 prison keys!
Q how do you get to the Blue Gem?
A as you put the Gear Key in you must RACE to grab the blue gem before your team are erased from history by the Prison Defences. Unlock with the Gear Key then swiftly grab the blue gem
Q How do you get back to put the 3 Vilson Otbs in?
A From Blue Stones 1, ascend stairs to first dungeon water area, this is where you found the first secret button underwater and used the first Gear Key. Return to the Gear Lock there and follow the passages from there!
Q Where are tomb keys?
A Carefully look on base of Plantagenet Army, there are 2 on stone altars in the base
Q I fought the Band of Ratlings after placing the Rapier, but when I drop down onto a River Island I can't get anywhere
A Look from the island at the river bank, look for 2 small rocks, these mark where a secret lever is at the bottom of the river (2 levels down)
Q is there a ROPE in the game?
A yes there are two ropes in the game
ROPE 1 is at the bottom of the Nexus Vaults. After fighting (the first) several dogs at the bottom of the level you find the Nexus Locks opened by HUB KEYS, the first couple of unlocks leads you to a level ground with 1 dog, go as far back as you can, find a secret button (or 2)
ROPE 2 is just after you use the first GEAR KEY. You come to a room with a water tank, you have to chuck a medium weighted object onto the island to open the door. The viewing panel at the far end allows you to see into an unexplored area, this is where the 2nd rope is! in that unexplored area (use TAB to see the map)
Q skyway on Nexus Vaults?
A get there from Lindworm Warehouse. 4 ^ 6 < 6 > 4 < 9 >
Q Where is a spare bow?
A Spare bow in Blue Stones I
Q How do I get the Lightning Bow?
A Find all 3 Vilson Orbs, use them after inserting the first GEAR KEY, then head down to the Tomb, in the Tomb a secret button by a Trapdoor releases a TELEPORTER GATE, teleport to find the Lightning Bow! (there's a hidden tomb key nearby to there too!)
Q where is the second gear key?
A in the second Blue Stones
Q Where is the second Blue Stones?
A in the Prison Fortress, before you ascend the primary ladders (from Lagoons) you find a hub key, simply put it back! you hear a door opening, this opens to Blue Stones II
Q where is the third Gear Key?
A go down the trap door in the Tomb Level, you find it there
Q how do you get off River of Archers Islands?
A the middle island where you find a baked maggot, here you have to swim South to an underwater lever, then swim back again, a bridge has activated
Q what about the tiny island?
A here, face the ruined cottage and jump in, swim along the edge until you see a tall ladder, go up the ladder, you're on the middle island again
CASTLEVANIA, the Lindworm Warehouse: 2 ways in, FULL ENTRY from using all the 6 Cube Keys on "DEEP DUNGEONS" (from Blue Stones I)
LIMITED ENTRY from dropping down the Swamplands Chasm
LIMITED ENTRY gets you two teleporters C & D
FULL ENTRY gets you all four A - D
Where do they go? teleporter A Back to Plantagenet SPECIAL MISSION (Teleporter Off? All four altars must be pillaged on the original Plantagenet mission, otherwise this Teleporter does not light up)
Back at Plantagent there are seven treasure rooms, four were accessable on the original mission: Toorum's remains and his beloved gloves etc but NOW find and loot his most revered armour in a Locked wooden box, his Elements Shield and finally his Life Giving Force, on this mission you must return to Plantagenet and wrench the last 3 Toorum artefacts from the holy resting places! What a mission!
teleporter B side mission to Blue Stones I, precints - find the Sabre, the holy Sabre left behind by Toorum - if your Team get torn apart by the evil creatures infesting the Precincts, Blue Stones I is not far away!
teleporter C skyway on Nexus Vaults and you had better have a head for heights - plenty of secrets and loot here - see more info above! ENJOY!
teleporter D head to Swamplands and find a Vilson Orb but is there more?
Q where are the second set of Gems?
A Towards the end of the game the secret comes out! There's a second set of 3 gems, the 2nd Green is on the River Of Archers in the Acolyte's ruin, she guards it most preciously and if she finds you near it, there'll be trouble!
Q where are the final 2 gems?
A in the Lindworm Warehouse, get to it after using the six Cube keys! Cube Locks look like Gear Locks but they have an eerie (Cursed) focal light eminating from them WARNING ethereal guards wander the Warehouse Reception!
Q where in the Lindworm Warehouse are the final 2 gems?
A when you see the first 2 Lindworms, just jump down to see portcullis gates on either side, 1 gem is sited behind each gate, just GET 'EM!
Q where do the Teleporters on Tomb Level go?
A first teleporter goes to a secret area in the Castle Grounds where a treasure chest and Super Weapons can be looted
Q TO DO >> The second Teleporter goes to XX The Old Dungeons
Q where are the six cube keys?
A Four are in the Prison Fortress just after you get the (1st) Blue Gem
Q where are the other two Cube Keys?
LeveL 1 [Crusadors] 1st dungeon level from Surface (Launch beach)
LeveL 2 [Surface] Launch Beach, game starts here
LeveL 3 [Deep Dungeons] second stage dungeons, lovely puzzles
LeveL 4 [The Nexus Vaults] third stage dungeons and real fighting starts now
LeveL 5 [Castle Grounds] easy outside areas, looks gorgeous
LeveL 6 [Blue Stones I] Healing Crystals and Your Home Base, dump your excess stuff here
LeveL 7 [Old Railings Level] Tricky getting those 2 levers pulled (Tomb Level here too)
LeveL 8 [Survival Beach] looks pretty similar to Surface Beach but more fighting
LeveL 9 [River of Archers] underwater levers need finding here, quite difficult
LeveL 10 [The Old Mine] Loot and hidden areas galore
LeveL 11 [Planteganet Army] Toorum's remains and quite a lot of his blessed artefacts, grab 'em!
LeveL 12 [Lagoons] underwater secret buttons and loot, patience is a virtue, take it slow
LeveL 13 [Prison Fortress] Blue Stones II is here somewhere, can you find it?
LeveL 14 [Old Dungeons] in developement
LeveL 15 [Swamp Lands] curiously difficult to move around because of the trees
Level 16 [Castlevania] also known as Lindworm Warehouse


