


0 of 0


About this mod
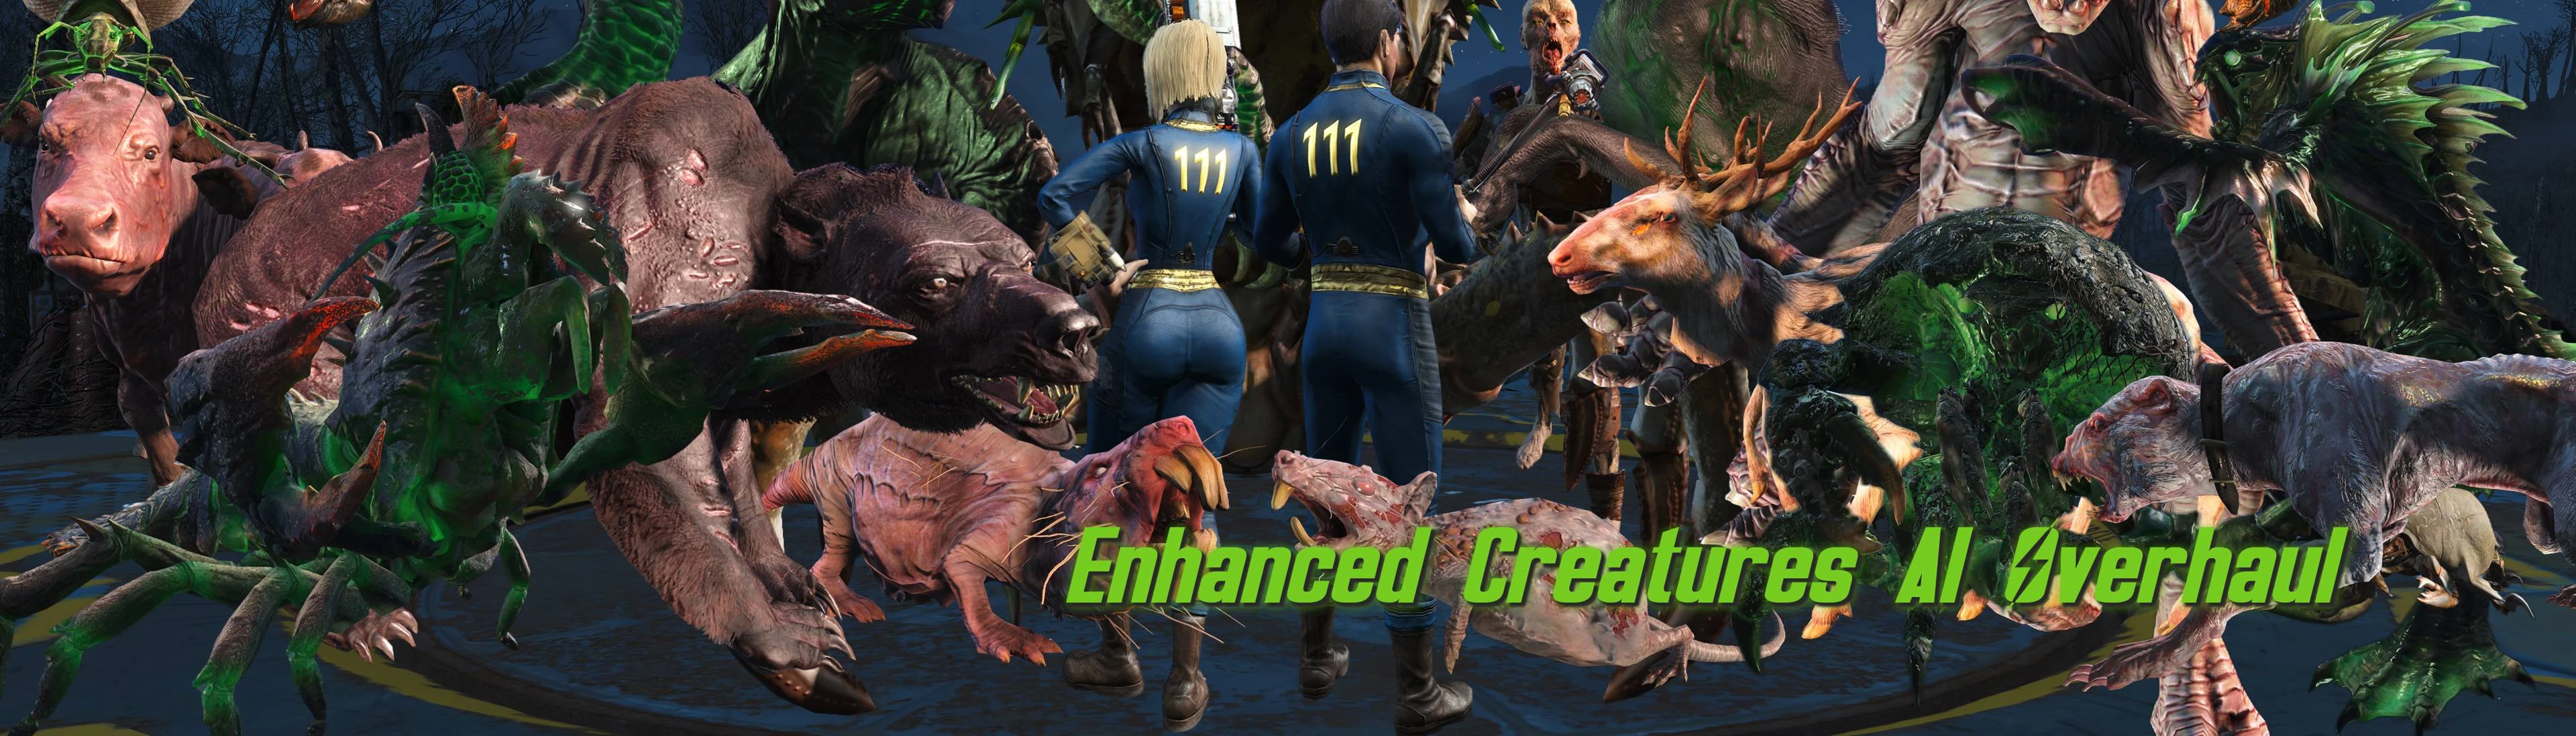
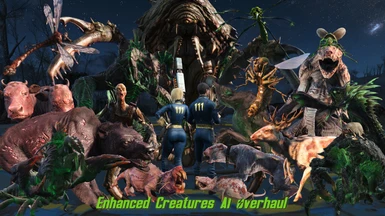
This mod modifies the AI of Commonwealth creatures by adding new combat behaviors. The changes include solo and pack behaviors. This mod aims to make creatures stronger in combat without modifying their base statistics to avoid turning them into bullet sponges or enemies that kill you with a single hit.
- Requirements
- Permissions and credits
-
Translations
- Russian
- French
- Changelogs
Introduction
This mod modifies the AI of Commonwealth creatures by adding new combat behaviors. The changes include solo and pack behaviors. This mod aims to make creatures stronger in combat without modifying their base statistics to avoid turning them into bullet sponges or enemies that kill you with a single hit.
The behavior changes are implemented through scripts, and I'm trying to make them as non-invasive as possible to avoid compatibility issues with other mods. It's still a work in progress, but ideally, I'd like to release updates every 1 or 2 weeks to address bugs or alter the way scripts are integrated in case they impact performance.
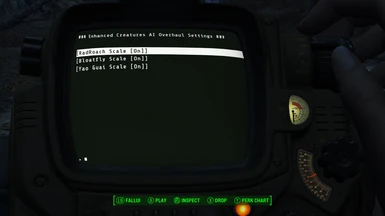
Mod Configuration Menu (MCM) and Options Holotape
The AIs of each creature can be independently enabled or disabled using MCM or the Configuration Holotape (added upon installing the mod or can be crafted at chemistry stations). If you experience any bugs or crashes during a mission or anywhere else, you can deactivate the AI from the settings. AIs are only loaded upon initiating combat.
Summary of changes to each creature
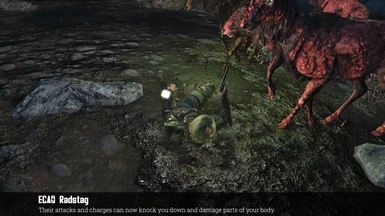
1 - Radstag
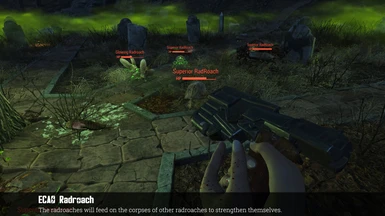
2 - RadRoach
3 - Ghoul
4 - Bloatfly
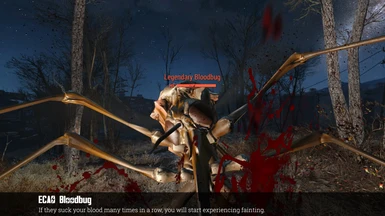
5 - Bloodbug
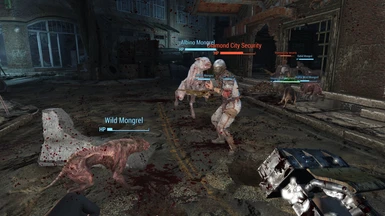
6 - Dog / Far Harbor Wolf
7 - Molerat / Rad-Rat
8 - Chameleon Deathclaw
9 - Yao Guai
10 - Stingwing
11 - Glowing Deathclaw
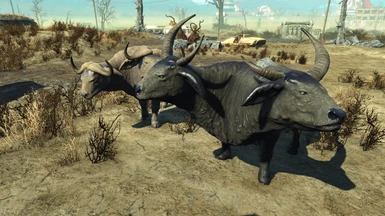
12 - Brahmin / Brahmiluff
13 - Albino Deathclaw / Albino Gatorclaw
14 - Mirelurk Crab / Nukalurk Crab / Bloodrage Mirelurk
15 - Mirelurk Hunter / Nukalurk Hunter
16 - Mirelurk Spawn/ Nukalurk Spawn
17 - Mirelurk Queen/ Nukalurk Queen
18 - Mirelurk King/ Nukalurk King
Demo.
Other Mods
Wasteland Combat Arena - Quest and Framework
VATS Freeze Fix - Next Gen Update
Enhanced Creatures AI Overhaul
VATS Third Person Only
Mysteries of the Commonwealth - Chapter One Luxi
Cannibal Overhaul - Kuru Disease
This mod modifies the AI of Commonwealth creatures by adding new combat behaviors. The changes include solo and pack behaviors. This mod aims to make creatures stronger in combat without modifying their base statistics to avoid turning them into bullet sponges or enemies that kill you with a single hit.
The behavior changes are implemented through scripts, and I'm trying to make them as non-invasive as possible to avoid compatibility issues with other mods. It's still a work in progress, but ideally, I'd like to release updates every 1 or 2 weeks to address bugs or alter the way scripts are integrated in case they impact performance.
Mod Configuration Menu (MCM) and Options Holotape
The AIs of each creature can be independently enabled or disabled using MCM or the Configuration Holotape (added upon installing the mod or can be crafted at chemistry stations). If you experience any bugs or crashes during a mission or anywhere else, you can deactivate the AI from the settings. AIs are only loaded upon initiating combat.
Summary of changes to each creature
1 - Radstag
Spoiler:
Show
- Now they are more aggressive when they have numerical advantage.
- The attacks have a chance to knock you down and severely damage your body parts.
- When only half of the pack or less remains, their level of aggressiveness decreases, and they will keep their distance.
- If there is a legendary Radstag in the pack, they will be less likely to flee, even if less than half of the pack remains.
- If you kill the legendary Radstag, it will scare the entire pack, and they will immediately reduce their aggressiveness level, keeping their distance from the player.
- While the legendary Radstag or Legendary Radstags are alive, they will constantly motivate the pack, increasing their health regeneration rate.
- When the Radstags enter the phase of keeping their distance from the player, they will start charging randomly. Each charge has a high chance of knocking you down. The more damaged body parts you have, the higher the probability of being knocked down.
- Legendary Radstags have a higher chance of knocking you down both with regular attacks and charges.
2 - RadRoach
Spoiler:
Show
- Radroaches are never alone; when you initiate combat, more of them will always emerge from the ground.
- If there are legendary Radroaches, the number of Radroaches emerging from the ground will be higher.
- When a Radroach dies, it will be devoured by its companions.
- Devouring Radroaches will strengthen them. By gaining strength, they absorb a large amount of radiation that makes them considerably more resistant to damage, but at the same time, they become slower.
- A Radroach can evolve up to 5 times, with each level making it more resistant, larger, and slower.
- Given that the small body of a Radroach is not adapted to withstand much internal radiation, it will start releasing large doses of radiation explosively, damaging the player and also causing them significant internal harm, possibly leading to death.
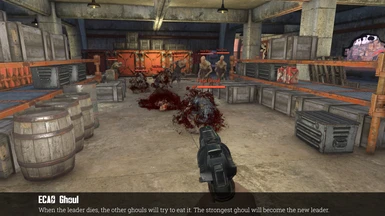
3 - Ghoul
Spoiler:
Show
- When you initiate combat against a horde of ghouls, there will always be a ghoul that instinctively recognizes the danger. This ghoul will become the leader of the horde.
- The leader of the horde will keep their distance from the player and let the other ghouls hunt the player. The leader will also emit a large amount of radiation constantly, which will heal nearby ghouls and burn the player if they are close.
- The leader will release large doses of radiation at regular intervals that will completely heal nearby ghouls and significantly damage the player.
- If the leader is a glowing ghoul, it will emit a higher amount of radiation, healing nearby ghouls much faster. The explosive radiation doses will revive nearby ghouls that don't have their heads destroyed.
- The ghouls will constantly pursue you, but if they are damaged, they will run near the leader to heal. Once fully healed, they will resume chasing you.
- When the leader dies, the other ghouls will try to eat its flesh. By consuming the leader's flesh, the ghoul that eats the most will rise as the new leader of the horde.
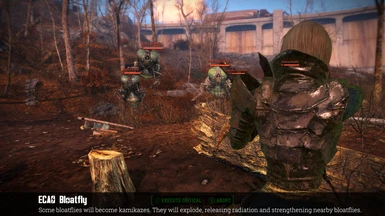
4 - Bloatfly
Spoiler:
Show
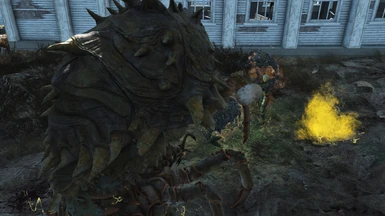
- Some bloatflies will become kamikazes, launching themselves at high speed towards you and exploding, creating a radiation area.
- Damaged bloatflies will automatically become kamikazes.
- The radiation area will last for about 10 seconds. All bloatflies within the area will heal rapidly and become highly resistant to damage until the area dissipates or they move out of it.
- The radiation burst from a kamikaze bloatfly is potent enough to trigger the evolution of all maggots attached to the player.
- If the kamikaze is a glowing bloatfly, it will trigger the evolution of all maggots within, potentially spawning up to 5 new glowing bloatflies.
- The radiation area generated by a glowing bloatfly will last twice as long and significantly burn the player while inside the area.
5 - Bloodbug
Spoiler:
Show
- These blood-sucking bugs will now be considerably more aggressive and will constantly use the only weapon they have, their proboscis.
- When they suck your blood, they will heal a significant amount of health.
- When they suck your blood, they will either spit it directly at you or keep it in their blood sac.
- If their health is at maximum, they will always siphon your blood.
- If their health is not at maximum, the lower their health, the more likely they are to keep the blood inside their blood sac. Keeping the blood inside their blood sac significantly accelerates their regeneration. They will also move away from the player while recovering their health.
- When their blood sac is full, they are highly vulnerable. If you destroy their blood sac under these conditions, they will die instantly.
- Given that blood is crucial, if they suck too much blood, you will start to faint.
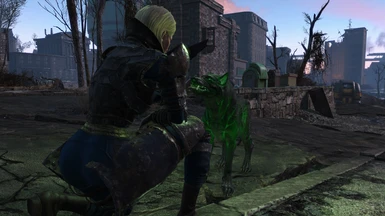
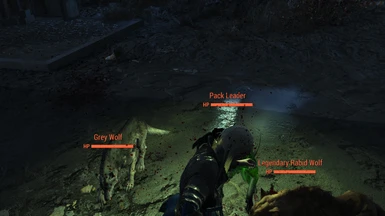
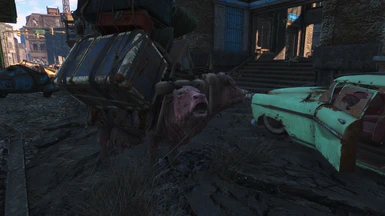
6 - Dog / Far Harbor Wolf
Spoiler:
Show
- The dogs will be more aggressive and more likely to use their jaws to grab you.
- Each pack will have a pack leader, typically the strongest dog.
- If you kill the pack leader, the other dogs will consider you their new leader and join your pack.
- The dogs in your pack will follow you everywhere, even indoors and when fast traveling.
- The dogs won't initiate combat with anyone unless the player is engaged in combat. If you attack a neutral target, the dogs will assist you. If you holster your weapon to exit combat, the dogs will obey. If you retaliate against an attacking enemy, the dogs will become hostile toward that enemy as well.
- Injured dogs will walk close to you, expecting your help with stimpacks.
- You can give orders to the dogs.
- You can give a mine or an activated grenade to a dog and send it against an enemy to trigger an explosion.
- You can remove the mine or grenade from a dog, or you can exchange it for a different one.
- If you send a little dog to die with a grenade, you won't be any better than the psychopaths in the Commonwealth D:
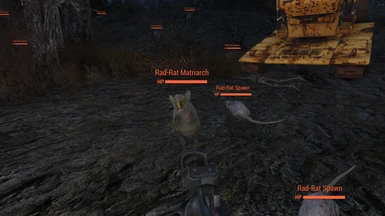
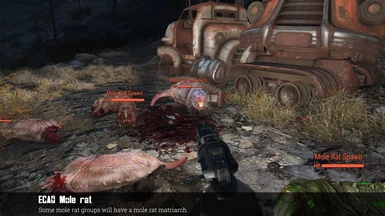
7 - Molerat / Rad-Rat
Spoiler:
Show
- The mole rats will be more aggressive and will have a mole rat matriarch within their colony.
- While the matriarch is alive, she will continuously summon all her spawns to the battle.
- When the matriarch dies, all her spawns will gather around her corpse.
- The spawns around the matriarch's corpse will no longer attack.
8 - Chameleon Deathclaw
Spoiler:
Show
- The Chameleon Deathclaw will no longer attack the player continuously.
- The Chameleon Deathclaw will spend most of its time camouflaged, only revealing itself when it grabs you to inject venom with its claws.
- After injecting the venom, it will camouflage itself again and move away from you, allowing the venom to take effect.
- When the poison finishes taking effect, the Chameleon Deathclaw will return to inject you with more poison.
- The venom causes potent and progressive damage to your health. It is advisable to use mitigations against poison damage, or you could die quickly.
- The poison will cause auditory hallucinations, making you hear footsteps, Deathclaw noises around you, and voices inside your head.
- The venom will cause visual hallucinations, making you see copies of the Chameleon Deathclaw everywhere. Coming into contact with these hallucinations will make them dissipate in a greenish cloud.
- The venom will rapidly deteriorate parts of your body.
- The Chameleon Deathclaw will never stop hunting you, even if you manage to get far enough away to escape combat. Its sense of smell will allow it to track you everywhere until it kills you.
9 - Yao Guai
Spoiler:
Show
- Now the Yao Guai will always be with their cubs.
- The Yao Guai will no longer be aggressive upon seeing you. Now, they will have a more protective stance towards their cub.
- If you get too close to their cubs, the Yao Guai parent will consider you a threat and start attacking. If you decide to run, the Yao Guai will only chase you as long as its cub is nearby.
- If you attack the Yao Guai parent or its cub from a distance, the Yao Guai parent will start chasing you faster and for a longer duration than if you had approached its cub.
- If you kill the cub, the Yao Guai parent will enter a state of fury and start attacking you. During the fury, it will be very fast.
- The Yao Guai parent will be much more resilient while fighting to protect its cub. If you find yourself cornered in combat, you can try shouting to temporarily scare it away (The longer the combat lasts, the less effective the intimidation attempt will be).
- The likelihood of intimidation will depend on your strength and decrease the longer the combat lasts.
- When you kill the Yao Guai parent, you can kill or adopt its cub. To tame the cub, you must feed it food (steaks or raw meat). With 5 pieces of meat, it will undergo its first evolution (at this stage, it will only follow you). With 10 pieces of meat, it will undergo its second evolution; from this stage, you can command it, and it will assist you in combat.
- You can administer chems to your Yao Guai to make it stronger in combat.
- You can equip your Yao Guai with one or multiple explosives.
- You can only have one Yao Guai as a pet. If you try to adopt another cub, your existing Yao Guai will kill the new cub.
- Your Yao Guai pet will not feel threatened by the dogs accompanying you, so you can have a pack of dogs and 1 bear.
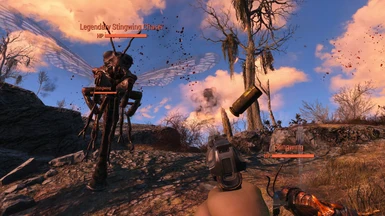
10 - Stingwing
Spoiler:
Show
- The sting of a Stingwing's stinger will cause hallucinations. Multiple Stingwings will appear around you and attack.
- The hallucinations don't cause any kind of damage, nor do they provide experience or can be looted.
- If you destroy a Stingwing's stinger, it won't be able to poison you anymore.
- If multiple Stingwings poison you, the effect will accumulate.
- You'll notice when you destroy the real Stingwing, causing the hallucinations to disappear.
11 - Glowing Deathclaw
Spoiler:
Show
- The claws and horns of the Glowing Deathclaw are nearly useless due to severe radiation damage, so its physical damage shouldn't be a concern.
- Due to the high amount of radiation within, the Glowing Deathclaw is practically immune to damage.
- As long as the limbs of the Glowing Deathclaw are not crippled, all the radiation will remain sealed within it.
- As long as the Glowing Deathclaw doesn't have radiation leaks, it will have a radioactive aura causing 35 points of damage per second.
- When you cripple a limb of the Glowing Deathclaw, it will cause a radiation leak, making it vulnerable to damage and increasing the emitted radiation to 45 points of damage per second.
- When a body part is crippled, it will start regenerating rapidly. While it's recovering, the Glowing Deathclaw will be vulnerable to damage.
- Every 25% of lost health, the Glowing Deathclaw will temporarily become invulnerable, releasing a large amount of radiation. It will also leave an area with a high level of radiation that will last for 20 seconds. The closer you are to the center of the radiation zone, the greater the damage you will receive.
- Destroying the tail of the Glowing Deathclaw won't cause a radiation leak, but since the tail is an extension of its spine, it will begin to experience instability and occasionally fall to the ground.
12 - Brahmin / Brahmiluff
Spoiler:
Show
- You can use wild and harvested plants to feed wild Brahmin and Brahmiluffs. When you feed them, they will become your companions, and you can use them to store your belongings.
- You can also buy Brahmin from the caravaneers. You can choose between Brahmin without luggage and Brahmin with luggage; the latter is more expensive but has a greater carrying capacity.
- You can only have 2 Brahmin at the same time.
- You can abandon your Brahmin at any time to buy or tame new ones.
- You can give orders to your Brahmin and leave them waiting so that they don't bother in combat.
- You can use wild and harvested plants to feed and enhance the characteristics of your Brahmin. You can increase their carrying capacity, damage resistance, and total health.
- Each level of each characteristic will require more plants than the previous one. Attempting to domesticate a high-level Brahmin that was previously abandoned will require a large quantity of plants.
- The Brahmin will follow you everywhere except indoors and will always be marked with a quest marker to make them easy to find in case you lose one. If one of your Brahmin dies, the quest marker won't disappear until you loot it or until the game removes them.
13 - Albino Deathclaw / Albino Gatorclaw
Spoiler:
Show
- The behavior of the Albino Deathclaw now depends on whether you fight it during the day or night. It also depends on whether you are in an indoor or outdoor area.
- During the day, the Albino Deathclaw will be an easy enemy to defeat. Due to direct exposure to daylight and the sun, its behavior will be clumsy, it will fall constantly, attack randomly due to unclear vision, its skin will be less resistant to impacts, and it won't have its regeneration ability.
- The light generated by the flames will blind the Albino Deathclaw. While engulfed in flames, it will perform random attacks and be slowed down. The flamethrower and Molotov cocktails are useful for slowing it down.
- Like other Deathclaws, if you destroy its tail, it will cause it to lose balance.
- At night or in indoor areas, not being exposed to daylight or sunlight will make it much more resistant. Its resistance level will depend on the layers of its skin. The more layers it has intact, the higher its resistance will be. At night, it won't suffer any of the penalties from the day.
- Your PipBoy will have a high-power flashlight (30 secs CD) that you can use to blind and burn the layers of skin of the Albino Deathclaw. Each time you use the flashlight, you will destroy one layer of the Albino Deathclaw's skin, reducing its resistance, slowing it down, and causing it considerable pain.
- At every 25% of health lost, the skin of the Albino Deathclaw will react by significantly increasing health regeneration. While the regeneration is active, the only way to stop it is by burning its skin with the PipBoy's high-power flashlight.
- The attacks of the Albino Deathclaw won't be very powerful, but they will cause significant bleeding damage due to its sharp claws. The bleeding lasts for 60 seconds and can accumulate, so if you receive many hits in a short period, it will be very difficult to stop the bleeding with stimpacks or other healing items.
14 - Mirelurk Crab / Nukalurk Crab / Bloodrage Mirelurk
Spoiler:
Show
- The Mirelurk crab shells absorb most of the impacts, making Mirelurk crabs almost invulnerable while they have their shells.
- When the shell is destroyed, Mirelurk crabs become faster.
- When the shell is destroyed, Mirelurk crabs take double damage.
- Slow weapons are a poor choice for destroying shells.
- Automatic weapons, explosives, grenades, and flamethrowers are good for quickly destroying shells.
- Perks that increase melee damage, one-handed and two-handed weapons, explosives, and heavy weapons help to destroy shells more quickly.
- [Group Combat] If fighting alongside a Hunter Mirelurk, the Mirelruk crab will form in front of it to absorb projectiles.
- [Group Combat] When the Hunter Mirelurk blinds its prey, the Mirelurk crab will run to engage in melee combat with the prey.
- [Group Combat] When the blindness begins to dissipate, the Mirelurk crab will return to protect the hunter.
15 - Mirelurk Hunter / Nukalurk Hunter
Spoiler:
Show
- Hunter Mirelurks spit a mixture of poison, blood, and mud to blind their targets.
- When the prey is blinded, the Hunter Mirelurk will switch to a melee attack mode.
- Melee attacks are weaker than usual, but in return, they will damage the limbs of their prey.
- When the blindness effect wears off, the Hunter Mirelurk will quickly retreat to create distance and resume ranged attacks.
- The shell of the Hunter Mirelurk will reduce projectile damage. The farther the distance, the less damage projectiles will inflict.
- [Group Combat] When fighting alongside Mirelurk crabs, Mirelurk crabs will position themselves in front of the hunter to block projectiles.
- [Group Combat] When the Hunter Mirelurk blinds the prey, it will maintain its position and continue ranged attacks; meanwhile, it will send the Mirelurk crabs to engage in melee combat.
- [Group Combat] When the blindness effect is wearing off, the Mirelurk crabs will run towards the Hunter Mirelurk to reform the barrier.
16 - Mirelurk Spawn/ Nukalurk Spawn
Spoiler:
Show
- The Mirelurk spawns now explode upon death, leaving a pool of acidic blood that progressively damages you. The closer you are to the pool, the greater the damage.
- When they feel threatened, they will run towards you and explode upon contact.
- [Mirelurk Queen]: The pool of acidic blood will be absorbed by the Mirelurk queen, causing her to regenerate health.
17 - Mirelurk Queen/ Nukalurk Queen
Spoiler:
Show
- Due to its large size, the Mirelurk queen will now be slower, making her rely primarily on her ranged attack.
- Her ranged attack will have a similar effect to the Mirelurk hunter. If you are hit by the acid, it will cause temporary blindness. Most of the acid is distributed to her spawns, so the damage from the acid spit is reduced.
- Now the queen will launch her eggs at you. When the eggs hatch, the spawns will begin to follow you, and when they die from damage or come into contact with you, they will explode and leave a pool of acidic blood.
- When the queen walks over or near the acidic pools, she will begin to regenerate her health.
- The queen's shell helps reduce long-range damage. The farther the source of the damage, the greater the reduction.
- Every 25% of lost HP, the queen will roar to alert her guards. After roaring, the queen will start absorbing her lost acidic blood to regenerate.
- After hearing the roar, her spawns will run towards her to be consumed by the queen. When the queen consumes them, she rapidly regenerates her lost health.
- When the guards hear the roar, they will rush towards you to protect their queen while she regenerates.
- While the queen consumes the spawns, she will be highly vulnerable to close-range damage.
18 - Mirelurk King/ Nukalurk King
Spoiler:
Show
- Now the sonic attack will disorient you and cause increased damage to your head.
- When his health falls below 75%, he will adapt his body to take on a chameleon-like form.
- When he adopts his chameleon form, he will start screaming constantly to disorientate everyone nearby.
- In its chameleon form, its body will be extremely agile, allowing it to evade (90%) any type of physical damage.
- In his chameleon form, he is vulnerable to damage from explosives and area-of-effect weapons.
- You can use fire to temporarily nullify his camouflage.
- You can alternate your attacks with weapons that burn the Mirelurk King to temporarily weaken it.
- In compensation for its new mechanics, its physical damage has been reduced by 30%.
Demo.
Other Mods
Wasteland Combat Arena - Quest and Framework
VATS Freeze Fix - Next Gen Update
Enhanced Creatures AI Overhaul
VATS Third Person Only
Mysteries of the Commonwealth - Chapter One Luxi
Cannibal Overhaul - Kuru Disease