


0 of 0


About this mod
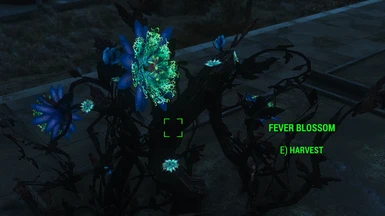
Adds previously unplantable ingredients to the Resources > Food menu that function exactly like vanilla workshop plants.
- Requirements
- Permissions and credits
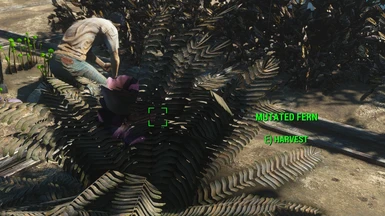
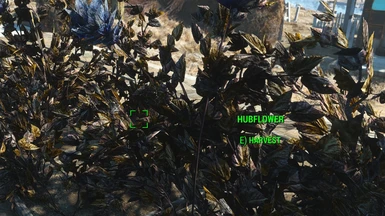
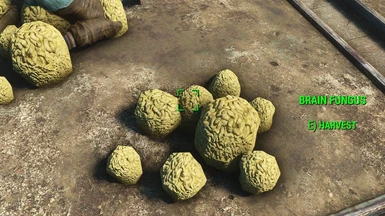
This is a simple mod that adds previously unplantable ingredients to the Workshop menu. These act functionally the same as vanilla plants and come with a few variants each to aid your décor. All added plants are located in Resources > Food. They each give 0.5 food rating.
Cover art created by me.
This mod uses new forms in order to avoid any compatibility issues with vanilla flora. This means however that you can't go to a vanilla unplantable (like a Bloodleaf) that is in your settlement and attempt to move it/store it. The ones added by this mod are new objects.
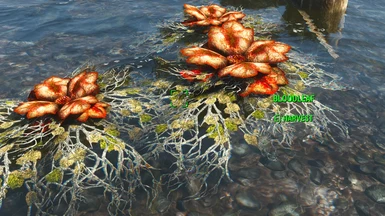
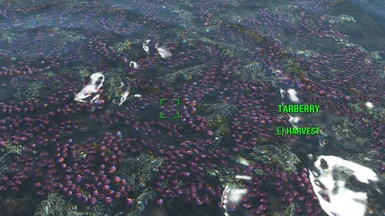
Bloodleaf and Tarberry are only plantable in water and so can be a little bit tricky to place so they're sitting on the waters surface; they prefer to glue themselves to the bottom. You can still harvest them perfectly fine if they're underwater but when settlers enter their crouched farming animation they may dunk their heads under the water. If you would like to place them a bit more precisely then I recommend a placement mod like Place Everywhere, but it works perfectly well without it.
This mod also edits the script attached to the WorkshopParent quest, which allows food items to be harvested by settlers and transferred to the workbench container. It will conflict with anything that also edits this quest. A patch is available for Northland Diggers.
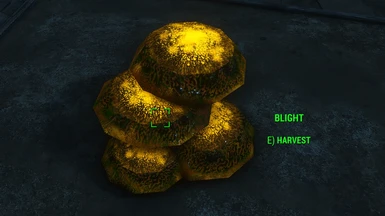
Blight can be awkward to place in planters without Place Everywhere.
This is a tutorial on how I created this mod for those who want to learn how to do it themselves. If you’re also well aware of how the mods in your load order function, this information may help to diagnose any conflicts you’re experiencing.
Cover art created by me.
Plants Added
Bloodleaf
Tarberry
Brain Fungus
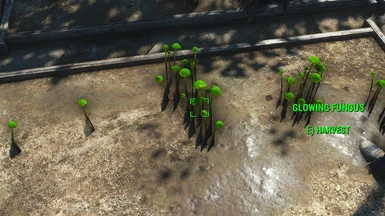
Glowing Fungus
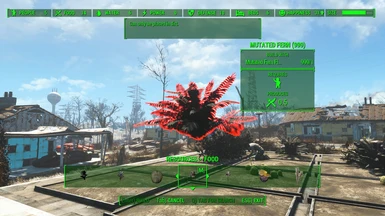
Mutated Fern
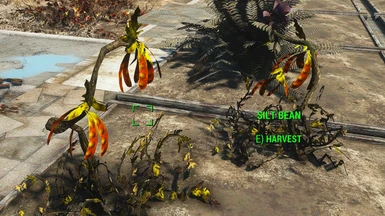
Silt Bean
Hubflower
Ash Blossom
Wild Melon Blossom
Wild Gourd Blossom
Wild Carrot Flower
Irradiated Thistle
Wild Tato Blossom
DLC Plants
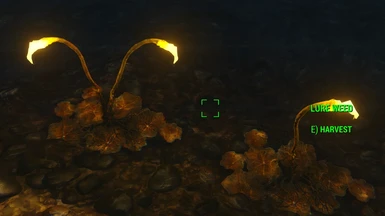
Lure Weed
Blight
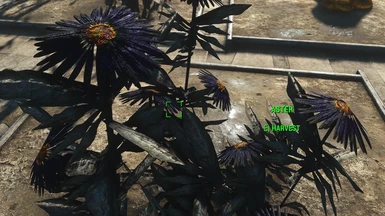
Aster
Fever Blossom
Black Bloodleaf
Things of Note:Bloodleaf
Tarberry
Brain Fungus
Glowing Fungus
Mutated Fern
Silt Bean
Hubflower
Ash Blossom
Wild Melon Blossom
Wild Gourd Blossom
Wild Carrot Flower
Irradiated Thistle
Wild Tato Blossom
DLC Plants
Lure Weed
Blight
Aster
Fever Blossom
Black Bloodleaf
This mod uses new forms in order to avoid any compatibility issues with vanilla flora. This means however that you can't go to a vanilla unplantable (like a Bloodleaf) that is in your settlement and attempt to move it/store it. The ones added by this mod are new objects.
Bloodleaf and Tarberry are only plantable in water and so can be a little bit tricky to place so they're sitting on the waters surface; they prefer to glue themselves to the bottom. You can still harvest them perfectly fine if they're underwater but when settlers enter their crouched farming animation they may dunk their heads under the water. If you would like to place them a bit more precisely then I recommend a placement mod like Place Everywhere, but it works perfectly well without it.
This mod also edits the script attached to the WorkshopParent quest, which allows food items to be harvested by settlers and transferred to the workbench container. It will conflict with anything that also edits this quest. A patch is available for Northland Diggers.
Blight can be awkward to place in planters without Place Everywhere.
How This Mod Was Made (Tutorial)
This is a tutorial on how I created this mod for those who want to learn how to do it themselves. If you’re also well aware of how the mods in your load order function, this information may help to diagnose any conflicts you’re experiencing.
Spoiler:
Show
This mod was created in the Creation Kit and I’m going to assume you know the basics of navigation.
I first started by loading up Fallout4.esm and duplicating these Razorgrain items; using an already existing crop as a template.
(Flora) FloraRazorgrain01
(Constructible Object) workshop_co_FoodRazorgrain
(Art Object) WorkshopFoodRazorgrainIcon
(Levelled Item) WorkshopProduceFoodRazorgrain
(Actor Value) WorkshopRatingFoodTypeRazorgrain
(Form List) workshopRecipe_RazorGrain
I then changed the ID of these objects appropriately and added my prefix, VJ, in order to be able to find them easily later on.
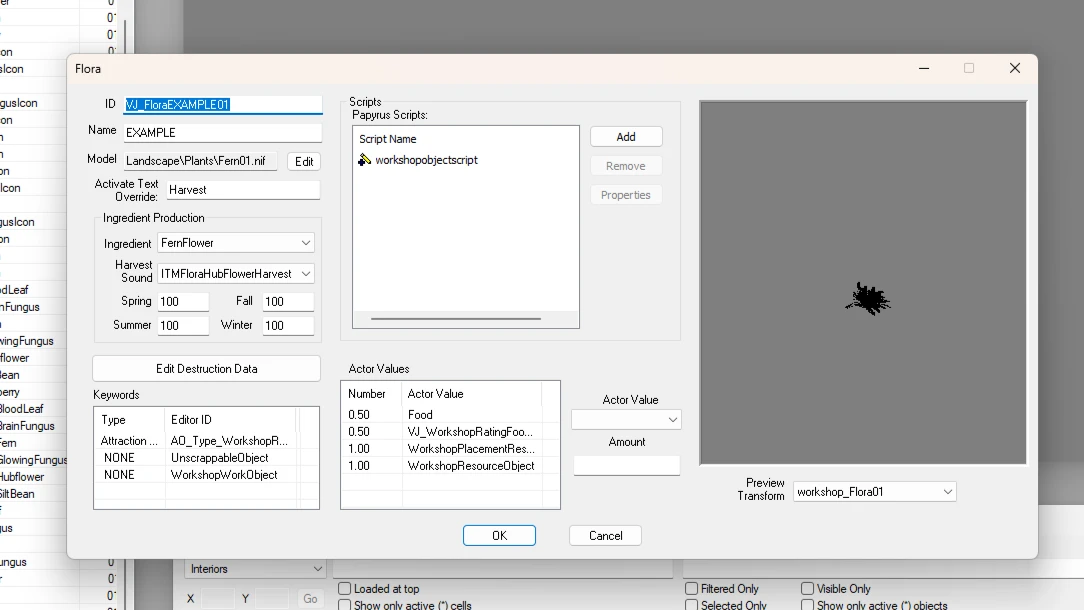
(Flora) VJ_FloraEXAMPLE01
(Constructible Object) VJ_workshop_co_FoodEXAMPLE
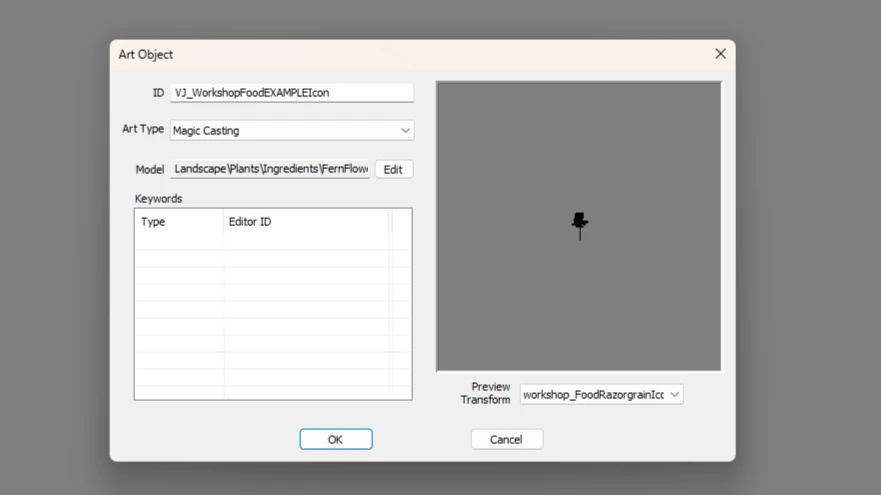
(Art Object) VJ_WorkshopFoodEXAMPLEIcon
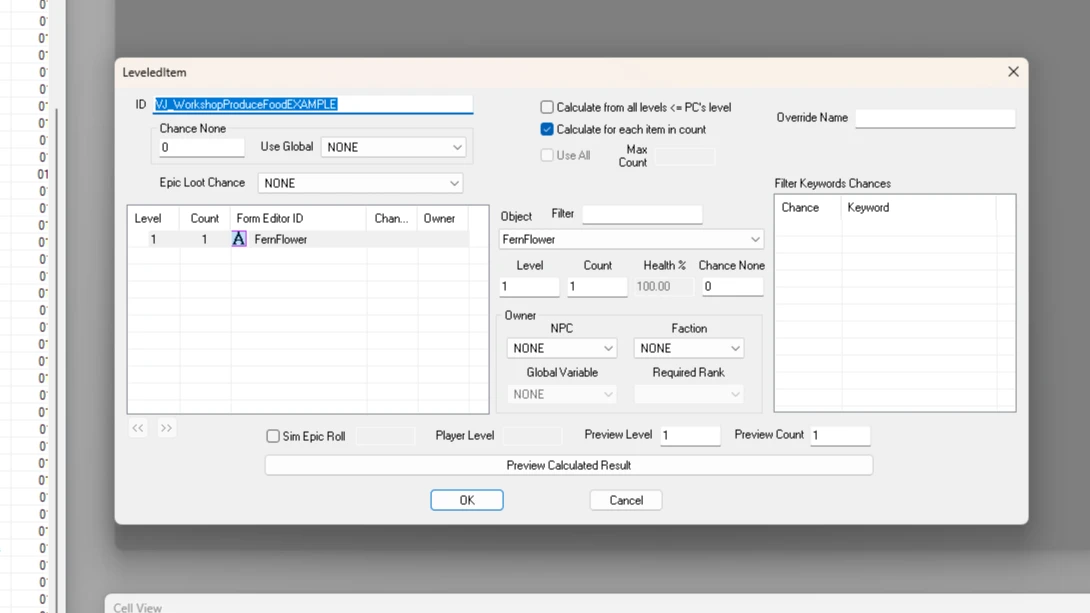
(Levelled Item) VJ_WorkshopProduceFoodEXAMPLE
(Actor Value) VJ_WorkshopRatingFoodTypeEXAMPLE
(Form List) VJ_workshopRecipe_EXAMPLE
Open VJ_FloraEXAMPLE01 (this is your flora object) and change the name of the item. Assume from here on out that when I write ‘EXAMPLE’ you should replace that with the name of your chosen crop. I’ll use the Mutated Fern as my model just to show you how to change that.
Open the dropdown for ‘Ingredient’ and change this to the item you want to receive when you pick the plant. Just start typing to search.
Activate Text Override allows you to change the activate word for any interactable. So, if you wanted it to say ‘Pick’ instead of ‘Harvest’ you could change that here.
You could also look at the drop down for ‘Harvest Sound’ and change the sound to something you like.
In the Actor Value tab we need to change a couple things. Firstly, if you want your crop to only be plantable in water then you can change WorkshopPlacementRestrictToDirtAV by clicking it and then navigating to the drop down on the very right, then selecting the actor value called WorkshopPlacementRestrictToWaterAV. Values are changed in the box below titled ‘Amount’, but for this actor value it should always be at 1.0.
Click on WorkshopRatingFoodTypeRazorgrain and instead change it to VJ_WorkshopRatingFoodTypeEXAMPLE. Just start typing your prefix to search for it. For the value, this is the food rating of that crop. Most crops have a rating of 0.5 but mutfruit has a rating of 1.0. Set this to the value you’d prefer.
Lastly for Flora we can change the model by going to Model, Edit, and you can either select Edit again to choose a .nif from your PC if you're making a custom crop, but for this I’m going to just type in the vanilla filepath for the model. If you’ve used B.A.E to unpack the files then you can just type in the name of the .nif file you want after finding it in the unpacked BSA. If you don’t have the files unpacked then you can search for the object in the creation kit and copy the file path for the Landscape model (not the ingredient model!). Or you can just start typing and hope you guess the right name, which is chaotic but acceptable.
Press OK and save. Open up VJ_WorkshopFoodEXAMPLEIcon (this is your art object). This is the model you’ll see in the settlement menu when you go to place the item. Here it’s the same process as changing the flora model, but this time we want to use the ingredient .nif.
Press OK and save. Next, open up VJ_WorkshopProduceFoodEXAMPLE (this is your levelled item) and click on the ingredient and use the drop down to change it to the ingredient you want to receive in the workshop when settlers are assigned to this crop. You can also change the amount using the ‘Count’ box.
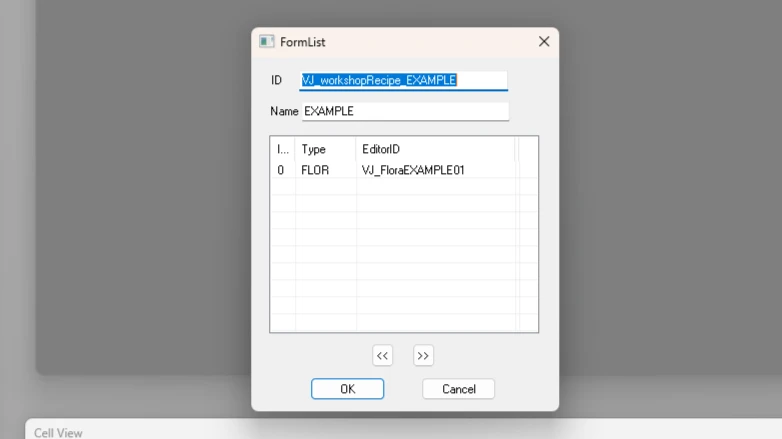
Press OK and save. Open up VJ_workshopRecipe_EXAMPLE (this is your formlist) and delete the items in the list by selecting them and pressing the delete key on your keyboard. Then click and drag VJ_FloraExample01 (this is your flora object) into the box. If you’d like to have two variants of the same crop that produce the same thing and share the same recipe, then create a flora object for your variant and just change the model to your variant, then drag that in here too. Change the recipe name to something appropriate.
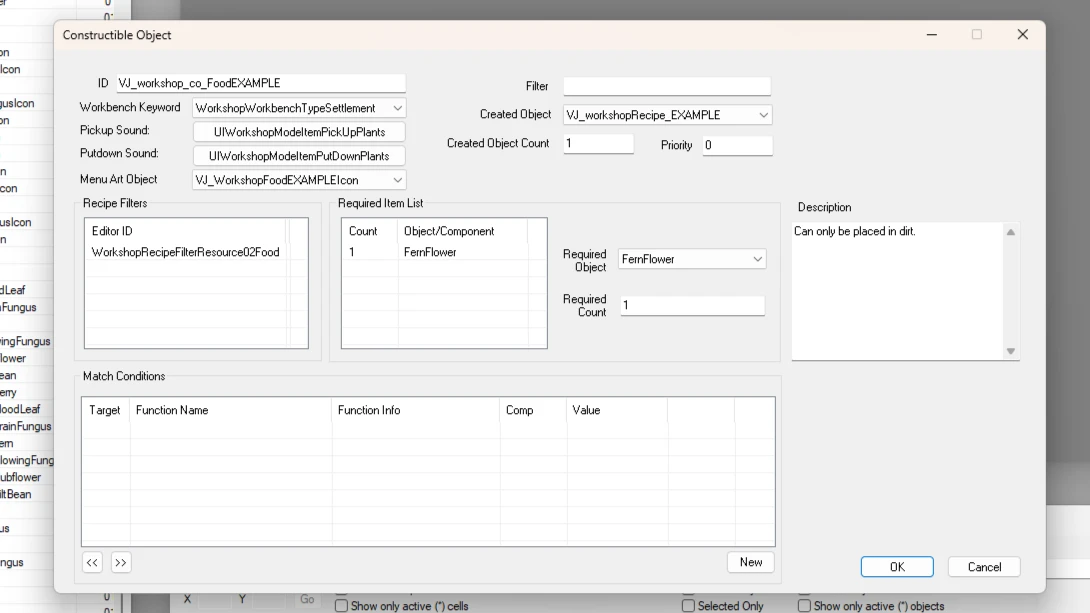
Press OK and save. Next step is to open up VJ_workshop_co_FoodEXAMPLE (this is your constructible object). In the required item list, change razorgrain into the item you want to have as a requirement for planting this crop.
Change the Menu Art Object to VJ_WorkshopFoodEXAMPLEIcon (this is your art object).
Change the Created Object to VJ_WorkshopRecipe_EXAMPLE (this is your formlist).
You can change the description to whatever you like, but it’s best to keep it simple. I mean, I don’t read them. Do you?
Press OK and save.
This one’s the bit that seems to trip people up as we have to edit a few properties in a script, but it’s very easy to do. Open the Quest tab in your object window and search for WorkshopParent. This is what allows settlers to produce food and send it to the workbench.
Go to the Scripts tab all the way to the right and double click on workshopparentscript. Scroll down until you see the header LeveledItems and click on the property called WorkshopFoodTypes. Click the Add button. Under the header Struct Variables you’ll see the properties resourceValue and foodObject. We’re going to fill these in. Click resourceValue, then the Edit Value button and search for your prefix in the drop down. Pick VJ_WorkshopRatingFoodTypeEXAMPLE (this is your actor value).
Click foodObject, the Edit Value button and search for your prefix in the drop down. Pick VJ_WorkshopProduceFoodEXAMPLE (this is your levelled item). Click OK and save.

And you’re done! That’s how I created this mod.
I first started by loading up Fallout4.esm and duplicating these Razorgrain items; using an already existing crop as a template.
(Flora) FloraRazorgrain01
(Constructible Object) workshop_co_FoodRazorgrain
(Art Object) WorkshopFoodRazorgrainIcon
(Levelled Item) WorkshopProduceFoodRazorgrain
(Actor Value) WorkshopRatingFoodTypeRazorgrain
(Form List) workshopRecipe_RazorGrain
I then changed the ID of these objects appropriately and added my prefix, VJ, in order to be able to find them easily later on.
(Flora) VJ_FloraEXAMPLE01
(Constructible Object) VJ_workshop_co_FoodEXAMPLE
(Art Object) VJ_WorkshopFoodEXAMPLEIcon
(Levelled Item) VJ_WorkshopProduceFoodEXAMPLE
(Actor Value) VJ_WorkshopRatingFoodTypeEXAMPLE
(Form List) VJ_workshopRecipe_EXAMPLE
Open VJ_FloraEXAMPLE01 (this is your flora object) and change the name of the item. Assume from here on out that when I write ‘EXAMPLE’ you should replace that with the name of your chosen crop. I’ll use the Mutated Fern as my model just to show you how to change that.
Open the dropdown for ‘Ingredient’ and change this to the item you want to receive when you pick the plant. Just start typing to search.
Activate Text Override allows you to change the activate word for any interactable. So, if you wanted it to say ‘Pick’ instead of ‘Harvest’ you could change that here.
You could also look at the drop down for ‘Harvest Sound’ and change the sound to something you like.
In the Actor Value tab we need to change a couple things. Firstly, if you want your crop to only be plantable in water then you can change WorkshopPlacementRestrictToDirtAV by clicking it and then navigating to the drop down on the very right, then selecting the actor value called WorkshopPlacementRestrictToWaterAV. Values are changed in the box below titled ‘Amount’, but for this actor value it should always be at 1.0.
Click on WorkshopRatingFoodTypeRazorgrain and instead change it to VJ_WorkshopRatingFoodTypeEXAMPLE. Just start typing your prefix to search for it. For the value, this is the food rating of that crop. Most crops have a rating of 0.5 but mutfruit has a rating of 1.0. Set this to the value you’d prefer.
Lastly for Flora we can change the model by going to Model, Edit, and you can either select Edit again to choose a .nif from your PC if you're making a custom crop, but for this I’m going to just type in the vanilla filepath for the model. If you’ve used B.A.E to unpack the files then you can just type in the name of the .nif file you want after finding it in the unpacked BSA. If you don’t have the files unpacked then you can search for the object in the creation kit and copy the file path for the Landscape model (not the ingredient model!). Or you can just start typing and hope you guess the right name, which is chaotic but acceptable.
Press OK and save. Open up VJ_WorkshopFoodEXAMPLEIcon (this is your art object). This is the model you’ll see in the settlement menu when you go to place the item. Here it’s the same process as changing the flora model, but this time we want to use the ingredient .nif.
Press OK and save. Next, open up VJ_WorkshopProduceFoodEXAMPLE (this is your levelled item) and click on the ingredient and use the drop down to change it to the ingredient you want to receive in the workshop when settlers are assigned to this crop. You can also change the amount using the ‘Count’ box.
Press OK and save. Open up VJ_workshopRecipe_EXAMPLE (this is your formlist) and delete the items in the list by selecting them and pressing the delete key on your keyboard. Then click and drag VJ_FloraExample01 (this is your flora object) into the box. If you’d like to have two variants of the same crop that produce the same thing and share the same recipe, then create a flora object for your variant and just change the model to your variant, then drag that in here too. Change the recipe name to something appropriate.
Press OK and save. Next step is to open up VJ_workshop_co_FoodEXAMPLE (this is your constructible object). In the required item list, change razorgrain into the item you want to have as a requirement for planting this crop.
Change the Menu Art Object to VJ_WorkshopFoodEXAMPLEIcon (this is your art object).
Change the Created Object to VJ_WorkshopRecipe_EXAMPLE (this is your formlist).
You can change the description to whatever you like, but it’s best to keep it simple. I mean, I don’t read them. Do you?
Press OK and save.
This one’s the bit that seems to trip people up as we have to edit a few properties in a script, but it’s very easy to do. Open the Quest tab in your object window and search for WorkshopParent. This is what allows settlers to produce food and send it to the workbench.
Go to the Scripts tab all the way to the right and double click on workshopparentscript. Scroll down until you see the header LeveledItems and click on the property called WorkshopFoodTypes. Click the Add button. Under the header Struct Variables you’ll see the properties resourceValue and foodObject. We’re going to fill these in. Click resourceValue, then the Edit Value button and search for your prefix in the drop down. Pick VJ_WorkshopRatingFoodTypeEXAMPLE (this is your actor value).
Click foodObject, the Edit Value button and search for your prefix in the drop down. Pick VJ_WorkshopProduceFoodEXAMPLE (this is your levelled item). Click OK and save.
And you’re done! That’s how I created this mod.