


0 of 0


About this mod
Enhance the world of Faerûn with the first ever reshade for Baldur's Gate 3!
• Smoother textures
• Enhanced details
• Richer tones
• Vibrant colors
• Improved lighting
- Requirements
- Permissions and credits

____________________________________________________________________________________________
• BACKGROUND •
____________________________________________________________________________________________What does Candlekeep Reshade do?
Candlekeep Reshade is a simple reshade that makes several small tweaks to improve the overall appearance of the game. This isn't a complete overhaul of the original visuals of Baldur's Gate III, but rather an enhancement on what is already a great looking game. I wasn't aiming to make any drastic changes to the appearance of the game with this reshade, so this is much more on the subtle side.
The main things that this reshade accomplishes:
- Builds upon the sense of "realism" in the game.
- Smooths out textures, while simultaneously sharpening and enhancing details.
- Enriches tones to create a deeper sense of contrast between highlights and shadows.
- Adjusts hue + saturation to make colors more vibrant and accurate.
- Improves light sources to create more discernible and realistic lighting effects.
• INSTALLATION •
____________________________________________________________________________________________Installation Instructions
IMPORTANT: Before attempting to install ReShade or my shader configuration, make a copy of your BG3 "bin" folder. The directory for your "bin" folder should be similar to the following:
If downloaded from Steam: C:\Program Files (x86)\Steam\steamapps\common\Baldurs Gate 3\bin
Seriously. Do it. It's highly unlikely that anything will go wrong, but it's better to be safe than sorry and avoid having to do a fresh install of the game.
NOTE: If you have any other reshades installed for BG3 already, I would recommend uninstalling them to ensure that there are no conflicts.
Step 1: Download ReShade 6+
Follow this link and download the most recent version of the ReShade software:
Click here to install ReShade
Step 2: Install ReShade 6+
After downloading ReShade, you'll want to run the "ReShade_Setup_6.x.exe" file.
When the setup launches, search the auto-populate list for "Baldur's Gate 3." If BG3 doesn't automatically populate, click the box that says, "Click here to select a game and manage its ReShade installation" and then navigate to your "bin" folder where the "bg3.exe" file is located and direct ReShade to that file and then click "Open." As noted above, the default directory for the game is:
If downloaded from Steam: C:\Program Files (x86)\Steam\steamapps\common\Baldurs Gate 3\bin
NOTE: If your bg3.exe file isn't in the default location, but you do know where it is located, direct ReShade accordingly. However, if your bg3.exe file isn't in the default location, and you don't know/can't find where it's located, follow the troubleshooting guide at the end of this description.
SECOND NOTE: If you're running the DirectX version of the game, direct reshade to the "bg3_dx11.exe" file instead.
THIRD NOTE: If you'd like, you can go ahead and create a shortcut to this folder for quick access, as we'll be coming back to it several more times throughout this setup.
Next, when it asks you, "Which rendering API does Baldur's Gate 3 use?," you'll want to select either "Vulkan" (which is the default), or "Direct3D 10/11/12" if you've chosen to run the game using DirectX instead.
Lastly, when it asks you "Select effects packages to install," you'll simply want to click the button that says "Skip." And after that, you'll be all done setting up ReShade for BG3!
Step 3: Install "Candlekeep Reshade"
Next up is actually installing my reshade! I provide everything you'll need, so you won't have to go download anything else in addition to this. To download my reshade, navigate over to the "Files" tab above. You'll want to click the button that says "Manual Download," which will then open a pop-out menu. Assuming you've already followed the directions in steps 1 & 2 and have successfully installed ReShade, you'll just need to click the "Download" button.
You'll then be redirected to a page where you will select your download type. If you happen to be a "Premium" member of Nexus Mods already, you can select the "Fast Download" option. Otherwise, just select the "Slow Download" option (don't worry though; the file isn't that big so the download really isn't that slow).
Once you've downloaded it, you'll need to unzip the file to access its contents. You can unzip it to your desktop and then move the contents of the folder, or you can just unzip it directly into your BG3 "bin" folder (the same location of the "bg3.exe" file you directed ReShade to in the previous step):
If downloaded from Steam: C:\Program Files (x86)\Steam\steamapps\common\Baldurs Gate 3\bin
The folder and files in the "Candlekeep Reshade.zip" folder will go directly into the "bin" folder. Do not remove anything from the "reshade-shaders" folder; simply place it in the "bin" folder as-is along with the .ini configuration files.
Step 4: Configure ReShade In-Game
Alright, now that you've successfully installed my reshade, you're just about ready to load it up in-game and give it a whirl! But first, there is a quick, final setup to do in order to get everything working properly. So first, you'll want to go ahead and launch BG3. You should see a little banner pop up when you open the game. Whenever you open the ReShade interface for the first time, it will ask if you want to run through the tutorial. If you want to, knock yourself out. But it won't be necessary to get this reshade working, so you can just click "Skip." Now if you haven't already, you'll want to press the "Home" key on your keyboard to pull up the ReShade interface.
Next, you'll want to make your way to the menu bar up top and select "Settings." What we're going to do now is direct ReShade to the proper folder to load the effects and textures you'll need to run my reshade. So go ahead and click Alt+Tab on your keyboard to minimize the game. Go into your file explorer and make your way back to your BG3 "bin" folder and open the "reshade-shaders" folder, and then the "Shaders" folder. Once you're in the "Shaders" folder, you'll want to go up to your navigation bar, right click "Shaders" to pull up the options menu, and click "Copy address as text."
Reopen BG3 (the game) and press the "Home" key on your keyboard to pull up the ReShade interface again, if it's not already opened. In the "Settings" menu under the "General" section, you'll see an entry for "Effects search path." Click the "+" button and that will open up a sub-menu. In the search path box at the top, you will want to press Ctrl+V to paste the file path we just copied. Now go ahead and click "Ok" and your effects search path should be all set!
The last thing you'll need to do is repeat this process for the "Texture search path" entry below the "Effects search path" entry; only this time, you'll be directing it to the "Textures" folder instead of the "Shaders" folder. So for one last time, make your way back to your BG3 "bin" folder and then open the "reshade-shaders" folder, and then the "Textures" folder. Once you're in the "Textures" folder, you'll want to go up to your navigation bar, right click "Textures" to pull up the options menu, and once again click "Copy address as text." Then follow the same steps you did for the "Effects search path" process.
Now all that's left is to load the Candlekeep Reshade preset and be on your way. To select or change the preset, press the "Home" key on your keyboard to pull up the ReShade interface. Make sure you're in the "Home" menu and you'll see a box at the top that currently says "Default Preset." Click on that and it will open a drop-down menu with all of your available presets. Simply click on "Candlekeep Reshade" and you're all set!
Step 5: Enjoy!
Now that you've successfully completed the installation and setup process, you can sit back and enjoy. If you like the reshade, please consider endorsing to help others find it and enjoy it for themselves :)
____________________________________________________________________________________________
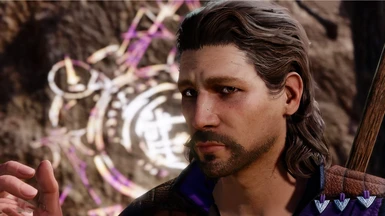
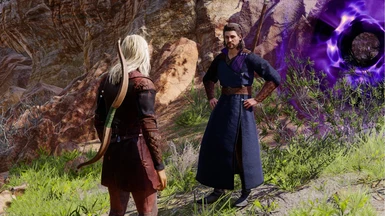
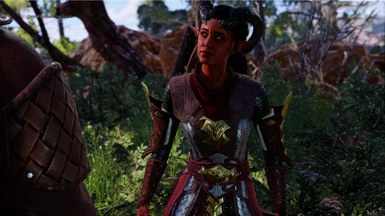
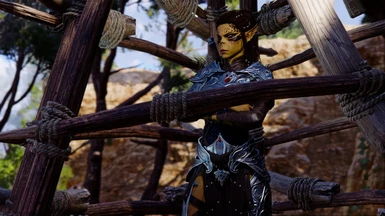
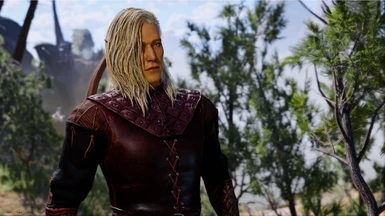
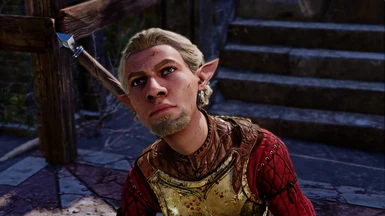
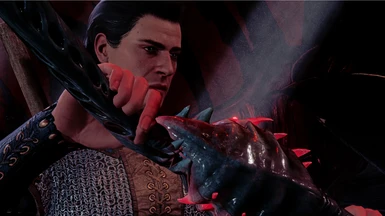
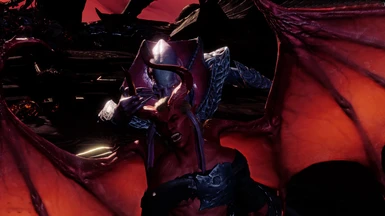
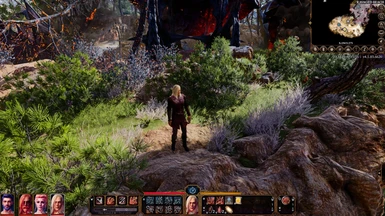
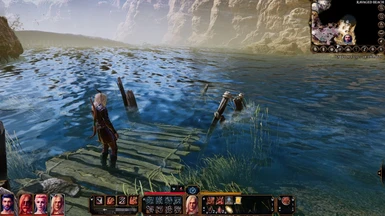
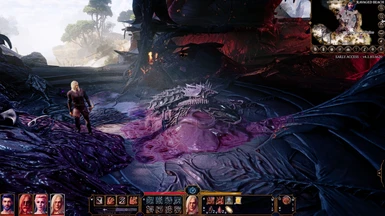
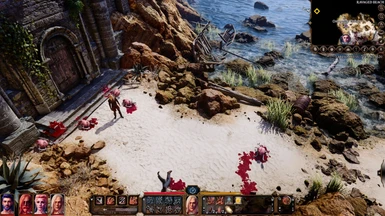
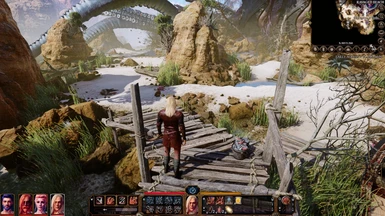
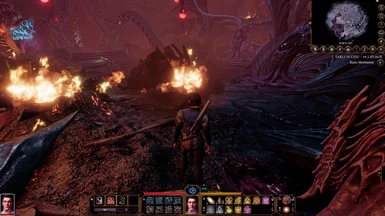
• BEFORE & AFTER •
____________________________________________________________________________________________


____________________________________________________________________________________________
• RESHADE BREAKDOWN •
____________________________________________________________________________________________Shader Effects
- Ambient Light: This effect increases the amount and intensity of ambient light in the game, creating more pronounced and realistic lighting.
- Chromatic Aberration: This effect adds a very subtle distortion to smooth/feather rough edges on textures and give the game a slightly more "three-dimensional" look.
- Filmic Tonemap: This effect implements a tonemap that creates a deeper sense of contrast and enriches tones, making the game look much less "flat."
- Fake HDR: This effect slightly increases the contrast between highlights and shadows, making white tones more "white" and black tones more "black."
- Color Gamut: This effect changes the color gamut (or range of colors reproduced on your screen) to Apple's "Apple RGB" color gamut. This is a subtle effect most notable in red and green hues.
- Lightroom: This effect covers a wide range of settings, similar to the editing tools in Adobe Lightroom. The main focus of this effect is making broad changes to colors and tone curves.
- Selective Color: This effect focuses on more surgical color correction, building upon the color changes made in the "Lightroom" effect.
- Colorfulness: This effect adds a splash of saturation to all colors, making them appear more, well... colorful, as the name would imply.
- Vibrance: This effect increases the intensity of more muted colors by intelligently detecting which colors are already well-saturated, and excluding those colors from its process.
- Color Temperature: This effect adds a "cooling" filter to balance out the overall color temperature, keeping it from looking too orange and warm.
- Clarity: This effect increases the contrast levels in mid-tones specifically, reducing haziness and making textures appear clearer and more detailed.
- Sharpen: This effect adds a deeper level of texture by increasing the contrast of individual pixels along detected edges.
- Gaussian Blur: This effect adds a subtle blur that softens "cartoon-y" textures and and makes the game look smoother.
____________________________________________________________________________________________
• TECHNICAL SUPPORT •
____________________________________________________________________________________________Troubleshooting
1. "I can't find my bt3.exe file."
If you're having a hard time locating your "bin" folder or "bg3.exe" file (and it isn't in the default directory listed in the installation instructions above), there is an easy way to find it! All you need to do is launch the game and then open your task manager by pressing Ctrl+Alt+Delete on your keyboard. Once you do that, find the "ESO" process and right-click on it. A list will appear and you will want to click on the "Open File Location" option.
Once you do that, your file explorer should open up to the location of the "bg3.exe" file. Make note of the location in the navigation bar and commit it to memory so you can properly direct ReShade to the correct file.
2. "My game is crashing at launch."
It turns out it's actually a problem with the ReShade installer and not my reshade specifically. The fix for this is actually pretty easy. What you'll want to do is navigate to your "bin" folder where the "bg3.exe" file is located (and if you don't know where that is, refer to the troubleshooting guide above) and look for a file named "dxgi.dll."
Once you've found that file, you'll want to right-click on it and select "Rename" and change the name of the file to "d3d11.dll." Once you do that, everything should be working as normal. If not, then unfortunately I don't have a fix for you and I hope you made a copy of your "bin" folder like I told you to do at the beginning of this post for this very reason!
3. "I tweaked your reshade too much and now it looks bad."
If you decided to take matters into your own hands and adjust my reshade settings, but made a horrible mistake and now the game looks really bad, worry not! This is another easy fix. Just go into your "bin" folder and delete the configuration file and then re-download the file and replace it. This will set everything back to my default settings and you'll be all set. And if you want to tweak the shaders in the future, be sure to make a copy and edit the copy just in case things go wrong (trust me, I've learned this the hard way one too many times).
4. "It turns out I don't like your reshade; how do I get rid of it?"
If you install my reshade and decide you don't like it (no hard feelings), or it's unfortunately too resource intensive for your PC to handle, then getting rid of it is even easier than installing it! What you'll want to do is run the "ReShade_Setup_4.x.exe" again and direct it to the "bg3.exe" file again. Whenever you do this, you will be offered two choices: "Update" or "Uninstall."
Go ahead and click "Uninstall" and you'll be all set. And even if you didn't like it, I appreciate you giving my reshade a chance! And if there's something in particular you didn't like about it, or areas where you think I could improve the reshade, I'm 100% open to any and all constructive feedback.
For additional assistance, join the Discord Server.
____________________________________________________________________________________________• DISCLAIMER/THINGS TO NOTE •
____________________________________________________________________________________________Differences in Monitor Calibration
One thing to keep in mind is that during the process of configuring this reshade, everything was tweaked to look best on my monitor and PC setup; from color correction to tone enhancements to brightness adjustments. This means that everything may not translate perfectly to your setup. It should be pretty close, but colors may look slightly different, and things may possibly look darker or brighter on your monitor than mine.
Something I recommend doing is adjusting your "Screen Gamma" setting in your video settings in-game after you've installed my reshade. If you keep the same gamma settings as you had when you were running the game with the vanilla appearance, things may seem too bright or too dark. Don't use the "Calibrate" option though, as the game won't take the reshade into consideration. Use the slider to adjust it and use your eyes to decide what level of brightness looks best.
And along the same note, you may find you need to tweak some settings of the reshade itself to get it looking right on your setup. Which leads me to my next point.
Tweaking the Reshade Yourself
A lot of people are going to choose to adjust the reshade settings to their liking. I can't stop anyone from doing this; and even if I could, I wouldn't. On the contrary, I fully support tweaking the settings yourself! I feel it gives people a better understanding of what's happening "under-the-hood," and tweaking the settings of other reshades is actually what inspired me to configure this reshade from the ground up.
The only thing I would advise is making a copy of any configuration files before you decide to tweak them, just in case you change things to a point where you no longer like it. However, if you've made changes without making a backup and want to revert to my default settings, follow the instructions in the "Troubleshooting" section above.
Please Don't Redistribute My Reshade
If you find that you really enjoy my reshade and want to share it with others, that truly means a lot and I'm humbled! All I ask is that you direct people here to my Nexus Mods page. Please don't upload it elsewhere. Since ReShade is freeware and I don't own any of the assets I used to create this reshade, I don't technically have any legal ownership of this reshade
But always remember that modders like myself put a lot of time and effort into creating things for the community for no other reason than wanting to make our favorite games more enjoyable for others. So whether it's me or another modder, always try to support us by sending people directly to our pages.
And if you decide to tweak the settings yourself, please don't try to upload your changes somewhere and pass it off as your own work. If you wind up creating a configuration that is substantially different from my own, that's a different matter. But if you only change a couple of small things and it still more or less looks the same, just keep those changes for yourself.