


0 of 0
About this mod
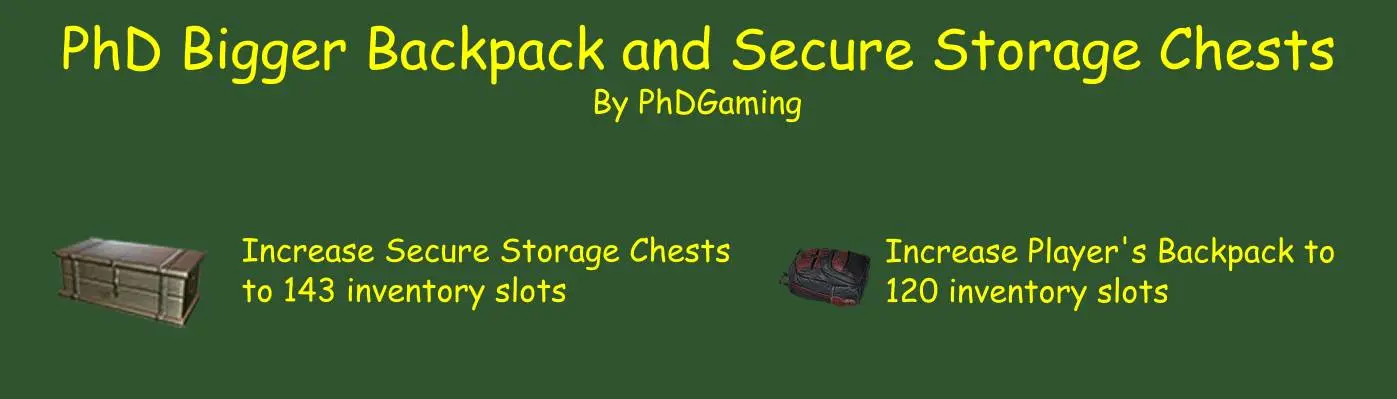
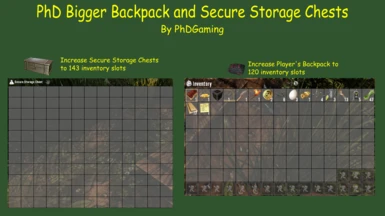
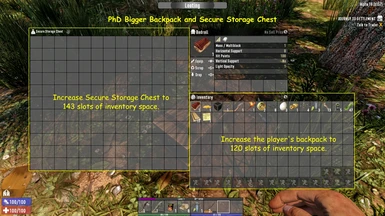
Increases the size of the player's backpack and Secure Storage Chests built after install
- Requirements
- Permissions and credits
- Changelogs
- Donations
UPDATE 2.0: Mod is also compatible with A21.
UPDATE 1.5: Added additional Player-built storage container. Mod is also compatible with A20.
UPDATE 1.3: Minor positional changes to match B178.
UPDATE 1.2: Revealed the Combo-box logic that locks a portion of inventory and excludes it from the new sort and movement options. This feature is available in both containers and your backpack. This logic was in the game but comment out. I've simply exposed it. My guess is TFPs don't feel this feature is ready for the game yet so have commented it out of the game. Please be aware of this. I make no promises that this feature works. I've used it before in and so far it seems to work fine but be aware it may not be ready for prime time. I hope you enjoy it as much as I do though.
Also fixed a bug that might cause you to lose portions of your inventory when you die and go to pick up your dropped backpack. Your dropped backpack inventory size was not the same as your original backpack so you could possibly lose inventory depending on how full it was at the time you died. This has now been fixed. Sorry for any inconvenience.
UPDATE 1.1: Fixed errors caused by the B177 release. This release implemented a sort option and two movement options to both loot containers and the backpack. Because of this, these options are now built into this mod by default. This makes this mod incompatible with any mod that adds this functionality to the game. I have also added Wooden Storage and Writable Storage Boxes to the mod. So both these containers will be just as big as the Secure Storage Chest. This will apply only to Storage Boxes built after you install this mod.
PhD Bigger Backpack and Secure Storage Chest
Other mods in this series:
PhD Bigger Crafting Queue (my original mod)
PhD Bigger Forge Input
• Increases forge input from 2 spaces to 3 spaces.
PhD Bigger Vehicle Storage
• Increases all vehicle's storage to 90 slots
• Requires a 16:9 or better resolution
• You will not see the increased vehicle storage size until picking it up and placing it back down again.
WARNING!!! If you MUST remove all Secure Storage Chests created while this mod has been installed BEFORE uninstalling this mod. If you fail to do so, opening the chest after uninstalling the mod will result in errors and game crashes. Also, any inventory will be lost when downsizing your backpack which results from uninstalling this mod.
This mod is NOT compatible with SMX - By Sirillion.
Let me know what you think. I'm always open to suggestions and comments. Please don't forget to hit the endorse button if you like the mod. It's a big help! Thanks!
I'd also welcome any donations (Patreon)! Thanks!
My Other Mods:
PhD Bigger Crafting Queue (A21)
PhD Bigger Forge Input (A21)
PhD Bigger Vehicle Storage (A21)
PhD Bigger Output Queue (A21)
PhD Disassemble IT (A21)
PhD Just Better (A21)
PhD Nailgun (A21)
PhD Better 30K Stacks (A21)
INSTALLATION:
ALWAYS backup your game! THIS SHOULD ALWAYS BE DONE BEFORE INSTALLING ANY NEW MOD - EVEN WITH A MOD MANAGER!
The best way to install mods is to use a mod manager. I use Vortex. But there are others available such as Mod Organizer 2 and Nexus Mod Manager. There should be a button to learn more about Vortex on the Nexus webpage. The other two can be downloaded from Nexus; just search for them. There are videos available on YouTube on how to install and set up these programs. They might also help you decide which of the three you'd like to use. Installing a mod is then just as simple as pressing the button on the download page. Your installed mod manager will do the rest.
To install a mod manually:
1. Back up your game files!
2. Create a folder called "Mods" in your 7 Days to Day installation folder - "\steamapps\common\7 Days To Die"
3. Extract the folder in the Mod's zip file into the Mods directory. Each mod you install should have its own directory.
4. Start the Game
5. Done
UPDATE 1.5: Added additional Player-built storage container. Mod is also compatible with A20.
UPDATE 1.3: Minor positional changes to match B178.
UPDATE 1.2: Revealed the Combo-box logic that locks a portion of inventory and excludes it from the new sort and movement options. This feature is available in both containers and your backpack. This logic was in the game but comment out. I've simply exposed it. My guess is TFPs don't feel this feature is ready for the game yet so have commented it out of the game. Please be aware of this. I make no promises that this feature works. I've used it before in and so far it seems to work fine but be aware it may not be ready for prime time. I hope you enjoy it as much as I do though.
Also fixed a bug that might cause you to lose portions of your inventory when you die and go to pick up your dropped backpack. Your dropped backpack inventory size was not the same as your original backpack so you could possibly lose inventory depending on how full it was at the time you died. This has now been fixed. Sorry for any inconvenience.
UPDATE 1.1: Fixed errors caused by the B177 release. This release implemented a sort option and two movement options to both loot containers and the backpack. Because of this, these options are now built into this mod by default. This makes this mod incompatible with any mod that adds this functionality to the game. I have also added Wooden Storage and Writable Storage Boxes to the mod. So both these containers will be just as big as the Secure Storage Chest. This will apply only to Storage Boxes built after you install this mod.
PhD Bigger Backpack and Secure Storage Chest
- Increases backpack size to 120 slots
- Increases Secure Storage Chest to 143 slots
- Requires a 16:9 resolution or better
- Applies to Secure Storage Chests built after installing the mod only
Other mods in this series:
PhD Bigger Crafting Queue (my original mod)
- Increases crafting queue from 4 spaces to either 10 or 20 spaces.
- 20 Space version requires the install of PhD Bigger Backpack and Secure Storage Chest
PhD Bigger Forge Input
• Increases forge input from 2 spaces to 3 spaces.
PhD Bigger Vehicle Storage
• Increases all vehicle's storage to 90 slots
• Requires a 16:9 or better resolution
• You will not see the increased vehicle storage size until picking it up and placing it back down again.
WARNING!!! If you MUST remove all Secure Storage Chests created while this mod has been installed BEFORE uninstalling this mod. If you fail to do so, opening the chest after uninstalling the mod will result in errors and game crashes. Also, any inventory will be lost when downsizing your backpack which results from uninstalling this mod.
This mod is NOT compatible with SMX - By Sirillion.
Let me know what you think. I'm always open to suggestions and comments. Please don't forget to hit the endorse button if you like the mod. It's a big help! Thanks!
I'd also welcome any donations (Patreon)! Thanks!
My Other Mods:
PhD Bigger Crafting Queue (A21)
PhD Bigger Forge Input (A21)
PhD Bigger Vehicle Storage (A21)
PhD Bigger Output Queue (A21)
PhD Disassemble IT (A21)
PhD Just Better (A21)
PhD Nailgun (A21)
PhD Better 30K Stacks (A21)
INSTALLATION:
ALWAYS backup your game! THIS SHOULD ALWAYS BE DONE BEFORE INSTALLING ANY NEW MOD - EVEN WITH A MOD MANAGER!
The best way to install mods is to use a mod manager. I use Vortex. But there are others available such as Mod Organizer 2 and Nexus Mod Manager. There should be a button to learn more about Vortex on the Nexus webpage. The other two can be downloaded from Nexus; just search for them. There are videos available on YouTube on how to install and set up these programs. They might also help you decide which of the three you'd like to use. Installing a mod is then just as simple as pressing the button on the download page. Your installed mod manager will do the rest.
To install a mod manually:
1. Back up your game files!
2. Create a folder called "Mods" in your 7 Days to Day installation folder - "\steamapps\common\7 Days To Die"
3. Extract the folder in the Mod's zip file into the Mods directory. Each mod you install should have its own directory.
4. Start the Game
5. Done