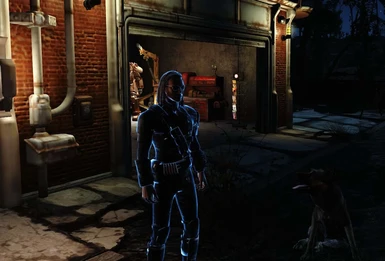
About this mod
A two part quest based mod to acquire a player and companion shielding system, with Auto Inject Stimpack & RadAway options for when the shield is down.
- Requirements
- Permissions and credits
- Donations
__________________________________________________________________________________________
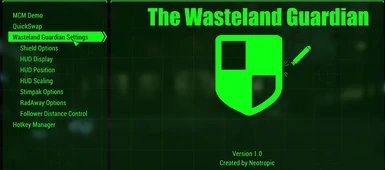
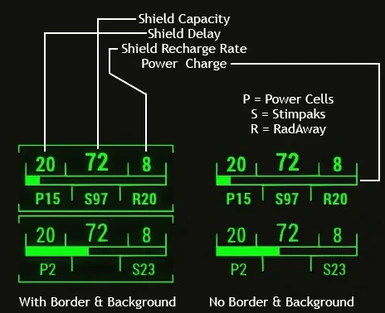
(The second two screenshots are a bit different now. To lazy to make ones. MCM Menu is different. HUD counts are "P:000 | S:000" adding colons)
............................:::::::::::::/----\:::::::::::::...........................
Rebel Science & Technologies Presents
The Wasteland Guardian
Project
____________________________________________________________
Requires
HUD Framework & AutoMatron DLC
(Because of Companion Robots)
Optional
Mod Configuration Menu + Latest F4SE
If using MCM, just use MCM.
If not using MCM, then use the Holotape.
If you change something in MCM, say like Shield Sounds, the holotape will not acknowledge the change until it needs to use the sound.
Initially created to just use MCM, so things are a bit wonky in that area. Holotape will take priority in setting settings however. It will reset MCM menu to show changes. Not not fully the other way around.
I have tested the mod with and without MCM and F4SE.
Certain options in the holotape will not appear until Quests are completed.
Unlike MCM.
Val Item Sorting & Remove Interior Fog Compatible if using them
__________________________________________________________________________________________
The Wasteland Guardian is a replacement of my previous mod The Wastelander Guardian, combining aspects of it with two of my other mods Wasteland Energy Shields & The Medical Injection System (Fallout New Vegas).
Shields run exactly the same as Wasteland Energy Shields, but only the Player and Companions use them.
No modding involved for upgrades or NPC's wearing shields.
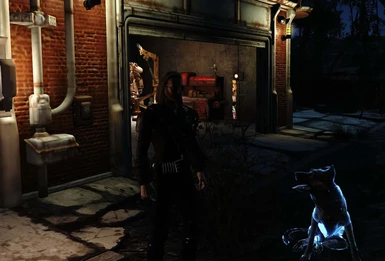
Only active companions that are roaming with you will have the shield running.
Otherwise, it turns off until they are with you.
Shields are always up. Only way they turn off is removing PipBoy Batteries so you have none.
Or go get shot up. No on or off for it. Has to be running for specials/bonus abilities as they are related to the shield.
__________________________________________________________________________________________
Even though the object of this mod is to give the Player and Companion a Shielding system among other things, there are a series of quests involved. So with that being said, I decided to place this under Quests. It also falls under the following categories:
- Game Play Effects and Changes -
- Miscellaneous Item -
__________________________________________________________________________________________
Main Quest
In order to start using this system, you must first do a small quest and must be at least level 10 to start it. As you will be up against a few Legendary enemies. And a Boss like Legendary. It is easy and simple to follow. Will not go in the story, on what there is. Not much of one really. Locations to objectives are easily accessible through fast traveling and can get it done in a matter of minutes. Not fast traveling, may take a good 30+ minutes. All locations are generally before the big broken up freeway bridge towards Diamond City.
You get them from the RSAT Terminal.
The Prototype Generator - For Followers (Optional)
The Prototype Generator is an optional tool that will create smaller prototype models for redistribution. It does however require the Core user, the one wearing a PipBoy with the system installed, to be within a certain distance of the Prototypes. Otherwise they will fail to function as the Prototypes communicate with the Core users PipBoy.
"Sadly, we were unable to retrieve all the required pieces in order to build such a device. The base of the machine has already been installed. It just needs the rest of the pieces."
Required Pieces:
- Prototype Unit
- Prototype Engine
- Prototype Capacitor
- Prototype Adapter
- Prototype Sensor
- 4x Steel & Glass
Our scientists have devised a way to scan items with special abilities and generate code to mimic the effect. However, we were unable to locate the required pieces on our own. The base of the machine has already been installed. It just needs the rest of the pieces.
Required Pieces:
- Replicator Motherboard
- Replicator Adapter
- Replicator Capacitor
Once installed, you will be able to take specific items already cataloged by name in our database and scan them. Once scanned, the system will create a holotape that you will have to play on your Pipboy in order for the code to be transferred.
Get the Quests below from the Terminal
Only one can be done at a time. Complete one to get the next quest.
Get Quest. Find Item. Place Item in Replicator. Read Disk. Put disk back in replicator.
Your shield becomes electrically charged. Melee attackers have a chance to be knocked back and dealt shocked damage.
The shield energizes your attacks. Chance on hit to Shock and Paralyze targets.
Become a Ghost. The shield will be able to reflect light and cloak you making you invisible to the naked eye.
- There are two ways to activate the stealth Field.
__ With MCM you can set a personal Hotkey.
__ With or Without MCM, you can craft a free Stealth Activator at a chemistry station. Should only have to once. Can only be made after completing the Chameleon Quest.
- The stealth will activate for the player and companion using the Mobile Prototype.
- The field has a maximum duration of 30 seconds.
- There is a cool down before it can be used again. The cool down is based on how long you used the stealth field.
- The cool down is determined by taking the duration used and multiplying it by 2, rounded. 30 sec for a 60 sec CD.
- While the shield is active, it will consume 4 energy per second.
- While this is active, you will be completely undetected. You can loose enemies, they will say "Where did you go?". No need to sneak.
Best to toggle it on and off when needed to fast recharges. Can be a bit OP. Use it for what best suits you. You can control it, or not even use it.
All three end with the following to avoid repetition:
We have located a Bounty Hunter in your general location that has the required piece we need to install the shields Shock Field. The location has been added to your PipBoy.
Find this Bounty Hunter, retrieve their implant and bring it back to be scanned.
ALL BONUS OPTIONS & TARGETING LENSES STOP THE MOMENT THE SHIELD IS DEPLETED
Everything shuts down. Once it has at least a capacity of 1, they all start back up or can be used.
These shields handle damage a bit differently than my other mod (even though I am trying to balance them out). These are not to meant to really always be up and make you invincible. Was never my goal. This is why I added the auto inject system to help accompany the downtime of the shield. I do not know about you, but myself... I like taking cover and shooting behind things. This is not to make you Rambo and go all out, untouched.
It may still need a few tweaks. Trying to find that right balance in damage received and the shields capacity.
- Suicide Nukers will deplete your shield down to 0.
- A couple missles will take your shield down.
- Will go down fast under heavy fire and attacks.
- Various guns will, obviously, do more damage. Avoid shotguns to the face :)
(I was level 34 and it dropped 3+ times while doing the final AutoMatron fight and a few stimpak auto injects. In my mind, how it should be)
General System Options
- Shielding System
- Auto Inject Stimpaks
- Auto Inject RadAway
Shielding System
Basically the shields prevent any damage to the player and absorbed through the shields health. Once hit, looses health or is depleted, it goes through a recharge process. The initial timer is a delay, before it actually starts recharging. Every time you are hit, this will be reset. Even after it has completed. Once that time counts down, it then starts another, shorter timer, and recharges the shields capacity. Once the shield is depleted, you will take normal damage, until it has at least a charge of 1.
The shield also has a chance to Ricochet bullets, but not kill. Just do damage.
Auto Injects
Like my older mod, when your health reaches a certain point that you specify in the settings, it will auto inject a stimpak.
With RadAway, once you reach a certain limit of radiation, it will use a RadAway. Companions do not use RadAway.
All have their own settings to enable or disable. Set percentages at when to Auto Inject.
It will also check if they are an AutoMatron Robot and then instead looks for Repair Kits. Why that is required.
When companions are knocked out (unconscious), the shield should wake them up.
Thought about doing like a shock charge to jolt them awake. Kinda like Shock Paddles. Yes, I giggled at the thought.
Targeting Lenses
Completely optional, do not want it... do not equip the lenses. I went back and forth on this one. Decided to go with a sort of lenses that you can consider contact lenses, or lenses that vanish while equipped. In either case, in the world when dropped, these will look like Black Rimmed Glasses (may look into like a small box to hold lenses?). But when worn, nothing is shown. With these on, while the shield is running, you will gain a targeting HUD. Green for Allies, Red for enemies, Faint purple/violet for dead bodies. All living or dead NPC's will only glow when your weapon is drawn. On top of that, you get a Recon Scope effect. Add's a little arrow above their heads. These will have to be crafted at a Chemistry Workbench after completing the main quest.
You can enable or disable all of the options for the lenses minus Hostile targets.
That will always be enabled for the lenses.
The idea behind the lenses is they are special "Contact Lenses" of sorts, that run specifically for the shield when it is up. Works off of a reflective system that is transmitted to the lenses. Best as I can describe it right now.
I also made an attachable mod, in case you want to use your own Eye wear. You will need a mod that allows attaching and or detaching of legendary mods, like Legendary Modification - DLC and Additional Fixes, is what I use. As they add the needed keywords to items. Up to you what to attach them to, they will attach to any Armour piece. Really, for the sake of all things, use eye wear.
New Power Source
Included is a new 'Battery' called the PipBoy Battery. You will be able to find 5 of them early on in the quest (inside trailer-you will see them). After that, you can craft them at a chemistry station under WASTELAND GUARDIAN. Can create packs of Ten, Five or just one. These are required in order for the System to run. I initially was using Fusion Cells. But decided to go this route as it would make more sense to use smaller batteries that the PipBoy would use. In theory.
Power Usage
- 0.01 Every second while shield is running.
- 0.5 For AutoInjects (Not when Auto Injects are disabled)
- 0.02 For Shield Idles (Not when Shield Idle Disabled)
- 0.25 On Shield Hit
- 1 For each Shield Recharge of it's Capacity
- 2 per second while Stealth Field is active
- 5 when Shock Field shocks an enemy.
Upgrade System
After the main quest is complete, you can start upgrading your shields. Both Player and Companion shields will always have the same stats. To do upgrades, you use the terminal used in the Quest. As well as create Prototypes.
There are upgrades available all the way up to level 100. Every 3,2,3 levels. So levels 12, 15, 17, 20 ect... After level 50, they become less frequent. One at level 57, then 60. Then every 20 levels until 100.
Shield Capacity: Starts at 26 Capacity
Every 10 levels starting at level 20, gain +8 Shield Capacity. At level 60, it is every 20 levels.
Shield Delay: Starts at 24 seconds
Every 10 levels starting at level 17, get -2 to Shield Delay. Up to level 57
Shield Recharge Rate: Starts at 12 seconds
Every 10 levels starting at level 15, get -2 to Shield Recharge Rate. Up to level 45
Shield Recharge Capacity: Starts at 2 Capacity per recharge.
Every 10 levels starting at level 12, get +2 to Shield Recharge Capacity. Up to level 42
Final Stats at level 100 end up being: 82, 14, 4, 10
Enhanced Shields Mode
I have added an enhanced shields mode. If you feel the shields do not have enough capacity, or you are using damage increasing mods, enable this. Does come at a cost however. You can swap modes at anytime. It will recalculate everything putting the shield maxed to your current level.
- Shield Capacity base value increased by 20 Points, taking it to 46.
- Both Recharge Delay and Recharge Rate have 4 seconds added to initial base value.
- Recharge Capacity has 2 points added to base value.
46 Capacity, 28 Delay, 16 Recharge Rate, 6 Recharge Capacity
Gain 12 capacity instead of 8 on upgrades.
Gain 4 Recharge Capacity per level instead of 2
Final Stats at level 100 end up being: 130, 18, 8, 12
HUD
These HUD's are a bit different than my other mod. More compact. They will show, if enabled... Stimpak and RadAway count. For the shield, it will show how many Batteries you have. Then above those is a little health bar for power usage. Above that is Shields Delay, Capacity and Recharge Rate.
SIDENOTE:
I did have the idea of replacing both Health and AP bars (hiding them) and implementing them into this HUD, different design obviously. But then you have Power Armor... It also was giving me a hard time trying to pass the actors Action Point percentage. Kept returning 0, unlike Health which does return an actual value.
Three HUD options for each individual HUD.
- Always Show
- Auto Hide (Show in combat and recharge only)
- Never Show
- Enable or Disable the HUD Border & Background (Both HUD's)
There is a significant delay in the companions HUD. When you FT somewhere, or simply go in or out of an interior and you see the HUD vanish and reappear 5+ seconds later, that's them somehow loosing everything and it resets. To avoid HUD confusion when swapping companions (before dismissing your current), I have to add a delay for the HUD to be ready to be changed. Say in case the companion being dismissed shield is recharging. In which just stops, and should start up again once hired.
HUD Positioning
You can use MCM to move and scale the HUD's.
Moving the HUD:
HUDFramework does not respond well to fast commands and has delays in the movement, which cause setting the HUD to move while keys held down to keep moving after the key has been released, which would trigger the move to stop. It attempts to catch up (still sending the move commands) and often can move right off of the screen if not careful. So the method below is an alternative to moving the HUD.
Movement is done when you release the key. You can hold the key down to multiply the time held down by what you selected as Move increment per click (1,5,10,50,100). If no key action is detected in within 30 seconds of a set timer after each key release, HUD movement will be disabled.
1. Select the HUD you would like to move by turning it ON.
2. Close MCM and go back into game.
3. Use your arrow keys to move the HUD.
4. Hit Enter/Return when done.
Using Console for HUD Positioning
Player HUD = wastelandguardianhud
Follower HUD = wastelandGuardianfollowershud
Both HUD's = wastelandGuardianfollowershud modposboth, setposboth, setscaleboth
Adjust Current Position
Move the HUD X or Y, plus or minus from its current location.
cqf wastelandguardianhud modpos <x or y> <value>
cqf wastelandguardianhud modpos <x value> <y value>
Example: move the HUD's X position +10 of it's current position.
cqf wastelandguardianhud modpos x 10
Example: move the HUD's X & Y position +10 of it's current position.
cqf wastelandguardianhud modpos 10 10
Set Position
Set its position with entered values.
cqf wastelandguardianhud setpos <x value> <y value>
Example: Set the HUD's X & Y to 100
cqf wastelandguardianhud setpos 100 100
Set Scale
Increase or decrease. Default is 1. Smaller is 0.9, 0.91 ect... Larger 1.1, 1.2 ect...
cqf wastelandguardianhud setscale <scale value>
MCM Scaling
Movement is done when you press the key. If no key action is detected in within 30 seconds of a set timer after each key release, HUD movement will be disabled.
There is an oddity when scaling down, Left Arrow. It causes the HUD to move it's X (Left/Right) position matching it's width backwards (Right). No idea why it does this. Using your Scaling Up, Right Arrow, puts it back.
1. Select the HUD you would like to scale by turning it ON.
2. Close MCM and go back into game.
3. Use your LEFT & RIGHT arrow keys to move the HUD.
- LEFT ARROW - Decreases Size.
- RIGHT ARROW - Increases Size
4. Hit Enter/Return when done.
Follower Distance Check
This is a distance check tool to keep your Current Active Follower using the shield system to not get lost. You set the maximum distance a Follower can be before they are teleported to you. Setting the options to 0 disables it. Best to use distance greater than 4-5k.
For the time being, this does not work well if they are told to wait and you take off. You must either disable it, or dismiss them.
Still looking around to see if it can be detected.
Install
Download Base Install. FOMOD Install.
Select install Packed or Loose.
VIS Compatible file included.
Download MCM Settings File.
This a should only be downloaded once. This mod was originally created using that settings file to get values for ease of use. But since adding holotape options and avoiding installing this in the main install to only be removed next update, I made it a separate download.
Uninstall
Use the MCM to disable the mod.
WARNING: Toggling it off and on will reset everything. You may have to start all over to get it back.
Make save.
Remove mod.
Uninstall MCM Settings
If you want to modify the shields
If you want to increase or decrease any of the shields stats, capacity ect... Open the mod up in CK. Edit the script code for "WastelandGuardianMain" then look for "Function PlayerLevelUp()" (Line 138). In there you will see the update modes for Enhanced and normal shields. There is descriptions ect.. in the code. Change the values, save script and file. Then once in game, toggle Enhanced shields to get the stats you changed to.
Possible Conflicts/Bugs
Only if a mod you are using modifies the current cell my items are in.
- NPCS in the main quests are outside and should be easy to find.
- Followers quest items are as well easily obtainable. All but one is in outside locations.
- Replicator items are placed inside some general quests locations. All easily obtainable.
- The last 3 quests have Courser NPC's placed in relatively empty, unused buildings.
I ran through the quest multiple times, it can take anywhere from an hour+ to complete it all.
No dialog or NPC's you interact with, all notes, terminal reading and crafting things to produce specific items. Ultimately, mostly fetch & build quests.
- Followers:
Sometimes, not to often, the shield likes to deplete itself down to 0. Part of me thinks the follower is loosing the spell/effect added to them and is getting re-added. It will recharge it self back up. Or you can just remove the item and put it back in their inventory to reset it.
- Targeting HUD.
Sometimes dead targets do not glow. I noticed it can be a combo of the Energized bullets effect hitting them and over riding it. Not sure, as when I have show friendlies, I see my companions shield, then it goes back to green. To fix this, just stow then draw your weapon.
- HUD Got stuck
Rarely, super rarely, often maybe a game glitch or who knows what. if your HUD is tuck. Just either restart shield or make a save and reload that save.


