


0 of 0
File information
Created by
wghost81 aka Wasteland GhostUploaded by
wghost81Virus scan
Safe to use
Documentation
Readme
View as plain text
Friendly Stash Mod for the Next Gen Edition v.0.9NGE
====================================================
by wghost81 aka Wasteland Ghost
===============================
This mod is for v4.0 of the game also known as the "Next Gen Edition" (NGE).
Description:
============
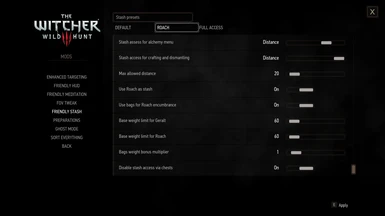
The mod makes stash management a little less painful: you can configure stash access the way you want and enable using of ingredients in stash for alchemy and crafting. You can also use Roach as a stash.
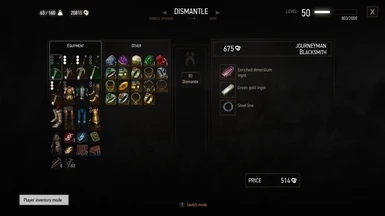
By default you can assess stash menu in view-only mode by pressing U or through Hub menu. Stash items are also used for alchemy, crafting, can be dismantled and repaired while at alchemist or blacksmith/armorer.
Configuration options are separate for menu assess, shop, alchemy and crafting/dismantling access: you can disable stash access altogether, allow full access or make it so it will only be accessible when in settlements or when you're close enough to stash (max distance is also configurable).
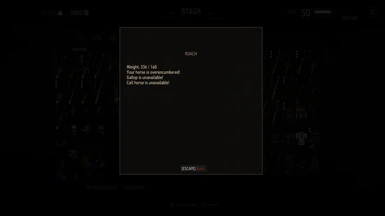
Roach can be turned into a mobile stash with the mod: with separate carry weight limit depending on horse bags equipped and distance-based access. Configure the distance and press U to transfer items or access stashed items directly from shop, alchemy or crafting/dismantling menus when Roach is close enough.
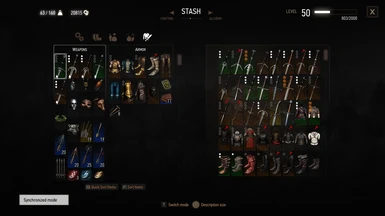
New synchronized mode is introduced for the stash: when enabled, it only displays stash items which belong to the currently opened player inventory tab; when disabled, it displays all items as vanilla.
Base carry weight limit is configurable by the mod for both the player and the horse. Bags weight bonus can also be adjusted.
Default key bindings:
=====================
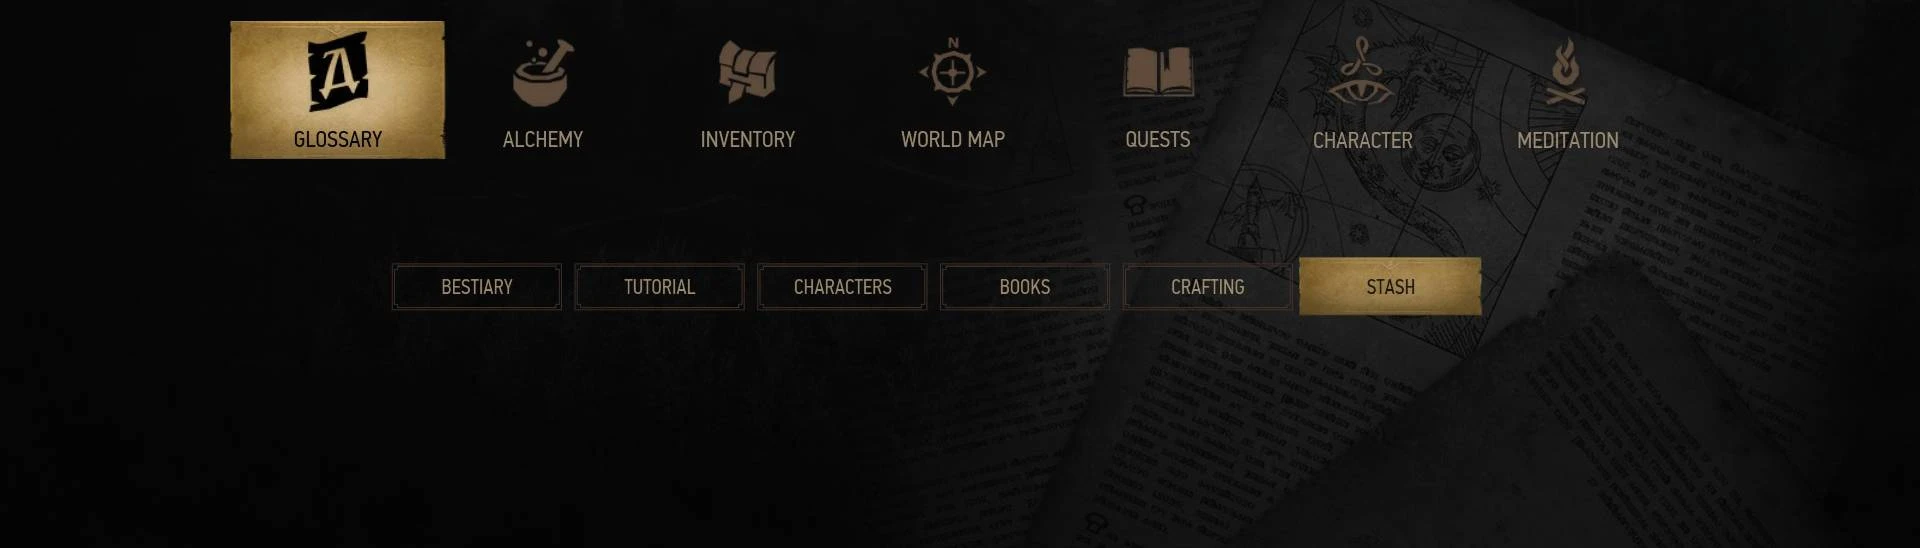
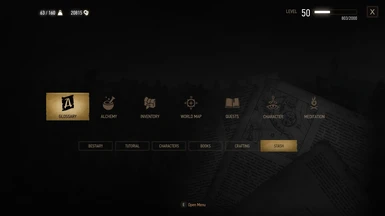
"U" (Hub -> Glossary -> Stash) - open stash menu.
"T" (controller R2) - switch shop/dismantling/repair/enchanting inventory (player/stash).
"T" (controller R2) - switch stash synchronization on/off when in stash menu.
"H" (controller X) - show horse encumbrance info when in stash menu.
Configuration:
==============
All mod options are configurable directly from in-game menu - look for "Mods" and "Friendly Stash" entries.
Use Roach as stash option is meant to be used in conjunction with distance-based stash access restriction, so if you're near your horse, you get full access to her inventory.
Use bags for Roach encumbrance option introduces weight limit for stash the same way as it works for Geralt: horse bags carry weight bonus is moved from Geralt to Roach and if Roach is overencumbered it won't be able to gallop, nor you will be able to call her from the distance. When Geralt is overencumbered and uses the horse, it won't be able to gallop either.
Installation:
=============
Since v.4.0 (Next Gen Edition) TW3 handles menus differently and has two separate config files for dx11 and dx12 versions of the game. If menus are not shown in game for you or options are not set - check the manual install section below (steps 3 and 4 in particular).
It's recommended to use The Witcher 3 Mod Manager (TW3MM) available on Nexus for installing the mod.
Note that Vortex (former Nexus Mod Manager) might have troubles installing some of the parts like additional hotkeys. If you're using Vortex and something is not working, check manual install first before reporting a bug.
Resolving conflicts with other mods
===================================
If you have other mods installed, use Script Merger to find and resolve conflicts. Note that some of the mods on Nexus might not support the latest patch and thus are incompatible nor with this mod not with the current game version in general. Also note that you need to re-merge all your merges after updating any of the mods to a newer version.
Manual installation:
====================
1. Creating backups (optional)
If you have vanilla version of the game, backup your "[Path To The Witcher 3]\bin\config" folder as some of the mods (including this one) make changes to configuration files and it won't hurt to have vanilla version in case you will need to quickly clean up all your mods.
2. Installing core mod files
Install core package by unpacking the mod and copying an entire "modFriendlyStash" folder to "[Path To The Witcher 3]\Mods" folder. If "Mods" folder doesn't exist, create it first. You can use NMM for this step, but make sure you also perform all the steps below.
3. Installing in-game menu and new hotkeys
For in-game menu to work you need modFriendlyStashConfig.xml to be in your "[Path To The Witcher 3]\bin\config\r4game\user_config_matrix\pc" folder. As well as the entry modFriendlyStashConfig.xml; to be in dx11filelist.txt and dx12filelist.txt files.
For new hotkeys to work, they have to be added to your "[Path To The Witcher 3]\bin\config\r4game\user_config_matrix\pc\input.xml" file.
3.1. Quick install
If you don't have any other mods which add new hotkeys installed, simply copy "[Path To The Witcher 3]\Mods\modFriendlyStash\bin" folder into your "[Path To The Witcher 3]" folder. A window will pop up, asking if you want to replace existing input.xml file, if you're doing everything right. Choose "overwrite" to replace vanilla input.xml with the modded one.
3.2. Step by step install
If you have other mod(s) installed which add new hotkeys, you most probably don't want to replace your existing input.xml. To install new hotkeys in this case open your existing "[Path To The Witcher 3]\bin\config\r4game\user_config_matrix\pc\input.xml" file and modded "[Path To The Witcher 3]\Mods\modFriendlyStash\bin\config\r4game\user_config_matrix\pc\input.xml" file and manually copy modFriendlyStash changes (they are marked with "modFriendlyStash begin" and "modFriendlyStash end" comments) into the same part of your existing input.xml file.
Also copy "[Path To The Witcher 3]\Mods\modFriendlyStash\bin\config\r4game\user_config_matrix\pc\modFriendlyStashConfig.xml" file into "[Path To The Witcher 3]\bin\config\r4game\user_config_matrix\pc" folder to install in-game menu.
Open your existing "[Path To The Witcher 3]\bin\config\r4game\user_config_matrix\pc\dx11filelist.txt" file and add modFriendlyStash.xml; to the end of it (see the example in "[Path To The Witcher 3]\Mods\modFriendlyStash\bin\config\r4game\user_config_matrix\pc\dx11filelist.txt"). Do the same for the other file named dx12filelist.txt.
4. Initializing mod default settings and hotkeys
For DX11 version mod settings are stored in "C:\Users\[Your Username]\Documents\The Witcher 3\user.settings".
For DX12 version mod settings are stored in "C:\Users\[Your Username]\Documents\The Witcher 3\dx12user.settings".
Key bindings are stored in "C:\Users\[Your Username]\Documents\The Witcher 3\input.settings".
To initialize default settings open both "C:\Users\[Your Username]\Documents\The Witcher 3\user.settings" and "[Path To The Witcher 3]\Mods\modFriendlyStash\user.settings.part.txt" file from the mod, select everything inside "user.settings.part.txt" and copy and paste it at the beginning of "user.settings" file. Do the same for dx12user.settings. Note that if you miss this step, most of the mod's options will be off and the mod will appear to be not functioning properly.
To initialize key bindings open both "C:\Users\[Your Username]\Documents\The Witcher 3\input.settings" and "[Path To The Witcher 3]\Mods\modFriendlyStash\input.settings.part.txt" file from the mod, select everything inside "input.settings.part.txt" and copy and paste it at the beginning of "input.settings" file. Note that if you miss this step, you will see hotkeys in game menu, but you will be unable to assign them properly.
5. Resolving conflicts with other mods
If you have other mods installed, use Script Merger to find and resolve conflicts. Note that some of the mods on Nexus might not support the latest patch and thus are incompatible nor with this mod not with the current game version in general. Also note that you need to re-merge all your merges after updating any of the mods to a newer version.
Updating:
=========
It is always safer, both when updating manually and with TW3MM/NMM, to remove previous mod version (and make sure "[Path To The Witcher 3]\Mods\modFriendlyStash" folder was indeed deleted) and install it anew. No other steps but installing core mod files are needed, if changelog for the new version has no new menu options and no new bindings mentioned.
If there were changes to hotkeys in a new version, safest way to upgrade is to delete your "C:\Users\[Your Username]\Documents\The Witcher 3\input.settings", run the game once to create a default one and then repeat steps 3 and 4 of the install process, described above.
If there were changes to menu options in a new version, safest way to upgrade is to delete your "C:\Users\[Your Username]\Documents\The Witcher 3\user.settings" (dx12user.settings), run the game once to create a default one and then repeat steps 3 and 4 of the install process, described above.
Warning! Deleting input.settings and user.settings (dx12user.settings) files will reset your input and game settings to defaults, so you'll need to restore your preferred setting after doing so!
If you have other mods installed, un-merge your existing merges in ScriptMerger and re-merge everything again.
Uninstallation:
===============
If you've installed the mod using TW3MM, open it up and choose the uninstall option.
If you're still having mod menus in the list or having empty lines in place of the mod menus, check your dx11filelist.txt and dx12filelist.txt (see Install instructions above, step 3.2).
Do not forget to run Script Merger to fix your merged files.
Manual uninstallation:
======================
1. Uninstalling core mod files
You can either uninstall the mod with NMM or manually delete "[Path To The Witcher 3]\Mods\modFriendlyStash" folder.
2. Uninstalling menu and hotkeys
To remove in-game menu you need to delete modFriendlyStashConfig.xml from your "[Path To The Witcher 3]\bin\config\r4game\user_config_matrix\pc" folder. Then remove the modFriendlyStashConfig.xml; line from dx11filelist.txt and dx12filelist.txt.
To remove new hotkeys, you have to delete them from your "[Path To The Witcher 3]\bin\config\r4game\user_config_matrix\pc\input.xml" file.
2.1. Quick uninstall using backup
If you have backup of your vanilla "[Path To The Witcher 3]\bin\config" folder and have no other mods installed which change configuration files, simply delete your "[Path To The Witcher 3]\bin\config" folder and copy backup "config" folder in its place.
2.2. Step by step uninstall
To remove key bindings you need to open "[Path To The Witcher 3]\bin\config\r4game\user_config_matrix\pc\input.xml" file and delete everything in between "modFriendlyStash begin" and "modFriendlyStash end" comments.
To remove menu options simply delete "[Path To The Witcher 3]\bin\config\r4game\user_config_matrix\pc\modFriendlyStashConfig.xml" file. Then remove the modFriendlyStashConfig.xml; line from dx11filelist.txt and dx12filelist.txt.
3. Conflicts with other mods
If you have this mod merged with the others, you will need to re-merge remaining mods after uninstalling this one.