Documentation
Readme
View as plain text
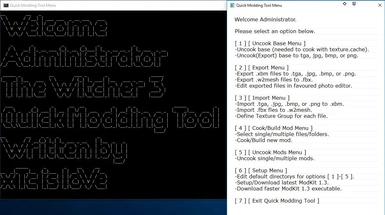
Turorial:
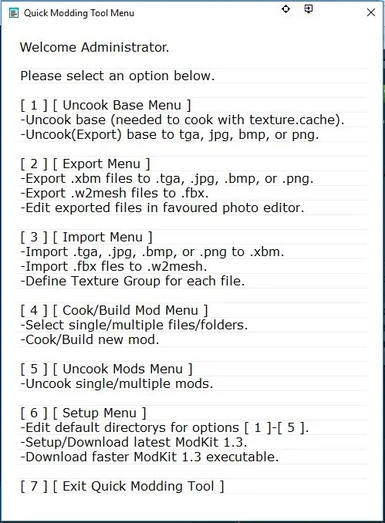
[ 1 ] [ Uncook Base Menu ]
-Uncook base (needed to cook with texture.cache).
-Uncook(Export) base to tga, jpg, bmp, or png.
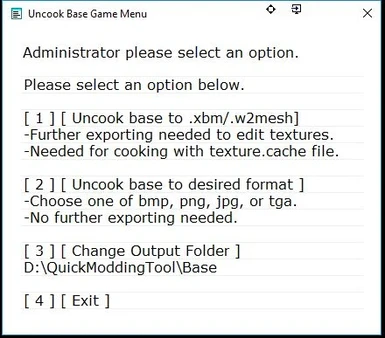
[ 1 ] [ Uncook base to .xbm/.w2mesh]
-Normal base uncooking to every given format.
-But .xbm files and .w2 mesh files are the important files for modding.
- this folder will be around 80 gb if u have the GOTY version.
-u need this folder i u like to cook your mods with texture.cache file.
-if u like to edit textures u need to export .xbm files and .w2mesh files lates for editing them with gimp or something else.
[ 2 ] [ Uncook base to desired format ]
-Choose one of bmp, png, jpg, or tga.
-U can edit for example any of these .tga files and import them back to .xbm or .w2mesh which is the format the game can read.
-No further exporting needed.
-around 40 gb in size if u have the GOTY version.
[ 3 ] [ Change Output Folder ]
-Change the Output Folder for base uncooking.
-Can be another drive but its not suggested.
[ 2 ] [ Export Menu ]
-Export .xbm files to .tga, .jpg, .bmp, or .png.
-Export .w2mesh files to .fbx.
-Edit exported files in favoured photo editor.
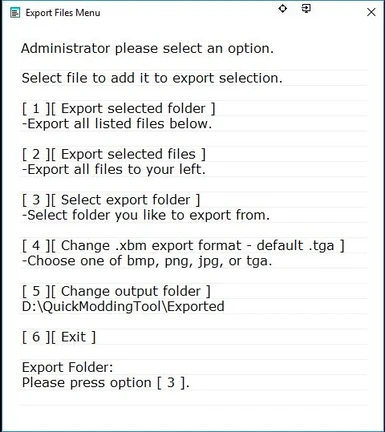
[ 1 ][ Export selected folder ]
-Export all listed files below.
-Select export folder [3] first to see the list ;).
[ 2 ][ Export selected files ]
-Export all files to your left.
-You will see every file in the console you have selected and it will dissappear from the list below.
[ 3 ][ Select export folder ]
-Select folder you like to export from.
-Better not select the whole base folder select single folders.
-Do it like me in the video search for the folder where you like to edit textures from.
[ 4 ][ Change .xbm export format - default .tga ]
-Choose one of bmp, png, jpg, or tga.
-You can select the format which you like to work with they dont differ really.
[ 5 ][ Change output folder ]
-Change the Output Folder for exporting.
-Can be another drive but its not suggested.
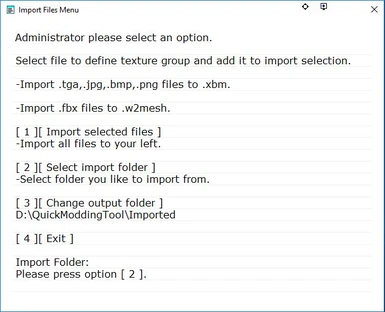
[ 3 ] [ Import Menu ]
-Import .tga, .jpg, .bmp, or .png to .xbm.
-Import .fbx fles to .w2mesh.
-Define Texture Group for each file.
-You have to select a folder first, probably the folder where you exported to and where you saved your edited .tga file.
-You have to select a texture group and i cant help you here, if anyone has a reference where i can see the texture group for every file this would be great.
[ 1 ][ Import selected files ]
-Import all files to your left.
-You will see every file in the console you have selected and it will dissappear from the list below.
[ 2 ][ Select import folder ]
-Select folder you like to import from.
-Probably the folder where you exported to and where you saved your edited .tga file.
[ 3 ][ Change output folder ]
-Change the Output Folder for importing.
-Can be another drive but its not suggested.
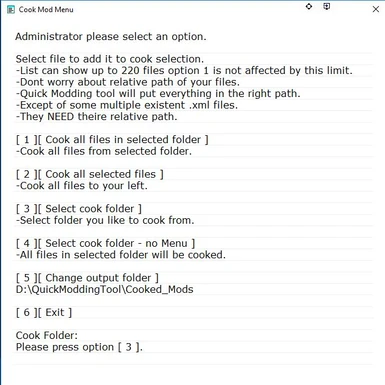
[ 4 ] [ Cook/Build Mod Menu ]
-Select single/multiple files/folders.
-Cook/Build new mod.
-List can show up to 220 files option 1 is not affected by this limit.
-Dont worry about relative path of your files.
-Quick Modding tool will put everything in the right path.
-Except of some multiple existent .xml files.
-They NEED theire relative path.
[ 1 ][ Cook all files in selected folder ]
-Cook all files from selected folder.
-Select a folder with files you like to cook first [ 3 ].
[ 2 ][ Cook all selected files ]
-Cook all files to your left.
-You will see every file in the console you have selected and it will dissappear from the list below.
[ 3 ][ Select cook folder ]
-Select folder you like to cook from.
-Choose this option if you dont like to cook EVERY file in a folder and if u like to choose single/multiple files.
-If u like to cook every file in a folder option [4] is your option here.
[ 4 ][ Select cook folder - no Menu ]
-All files in selected folder will be cooked.
-Attention no select Menu here all files in selected folder will be cooked.
[ 5 ][ Change output folder ]
-Change the Output Folder for your mod.
-Can be another drive but its not suggested.
[ 5 ] [ Uncook Mods Menu ]
-Uncook single/multiple mods.
-Uncook mods from anywhere of your computer.
-Useful for editing mods you already like.
[ 1 ] [Start Uncooking]
-Cook all files to your left.
-You will see every file in the console you have selected and it will dissappear from the list below.
[ 2 ] [Browse computer for cooked mod]
-Browse computer for single mod.
[ 3 ] [Change cooked mods list folder]
-Select the folder for list below.
-Normally this is your mods folder.
-But it can be everywhere on your computer.
[ 4 ] [ Change output folder ]
-Change the Output Folder for your mod.
-Can be another drive but its not suggested.
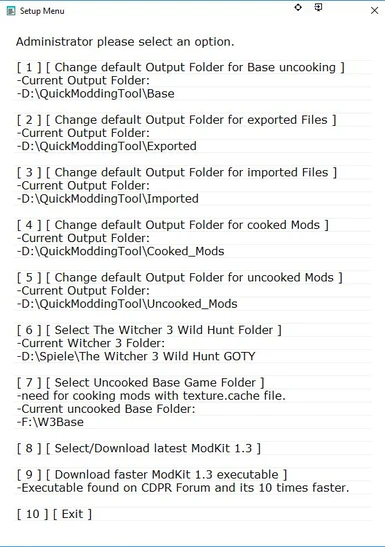
[ 6 ] [ Setup Menu ]
-Edit default directorys for options [ 1 ]-[ 5 ].
-Setup/Download latest ModKit 1.3.
-Download faster ModKit 1.3 executable.


