


0 of 0
About this mod
A basic step by step tutorial for installing the recommended programs and getting your first mod working.
- Permissions and credits
- Changelogs
Please note that NONE OF THE REQUIRED PROGRAMS ARE INCLUDED IN THIS DOWNLOAD. THIS IS ONLY TUTORIAL INSTRUCTIONS.
So you want to learn how to mod Subnautica? This tutorial will get you started whether you're a complete beginner or veteran
Modder that is just looking to start on a new game. If you're new, modding does require some programming skills. This is
not a programming tutorial so I'd recommend getting a grasp of the basics. Subnautica modding is done using C#. Against
everything that this world has taught us with things similar alphabetically, C# is very different from C and C++ so make
sure that you're learning the right one! Also this tutorial is for modding on a Windows computer.
There are a few tools you'll want to download before proceeding.
First, get Visual Studio from
https://visualstudio.microsoft.com/downloads/. The Community Edition is free for personal use and will be sufficient for
modding. When installing, make sure to select the ".Net desktop development" option from the workloads list.
If you are going to be making new mod items from scratch you'll need Unity.
You can download it from https://unity3d.com/get-unity/download/archive.
Subnautica is currently on version 2019.2.17 and BelowZero is currently on 2019.4.9;
Third for looking into the games code you will want to grab dnSpy from github. https://github.com/0xd4d/dnSpy/release.
Place it in a folder somewhere convenient you will be using it A LOT!.
You'll also need to install QModManager from Nexus. Here's the nexus pages
QModManager: Wiki
Subnautica - https://www.nexusmods.com/subnautica/mods/201/
Below Zero - https://www.nexusmods.com/subnauticabelowzero/mods/1/
Run the executable file to install it. This will, among other things, create a QMods folder in your subnautica directory.
SMLHelper is a modding Library to make adding mod items and changing existing items easier as well as many other utilities to make modding easier.
SMLHelper: Wiki
Subnautica - https://www.nexusmods.com/subnautica/mods/113
BelowZero - https://www.nexusmods.com/subnauticabelowzero/mods/34
This mod gets extracted into the QMods folder in the game directory.
-----------------------
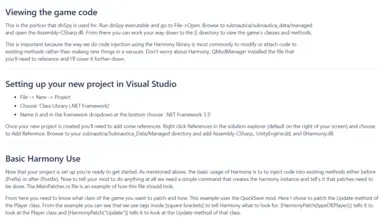
Viewing the games code
-----------------------
This is the portion that dnSpy is used for. Run dnSpy executable and go to File->Open. Browse to Subnautica/Subnautica_Data/Managed
or SubnauticaZero/SubnauticaZero_Data/Managed and open the Assembly-CSharp.dll. From there you can work your way down to the {} directory to view the game's classes and methods.
This is important because the way we do code injection using the Harmony library is most commonly to modify or attach code to
existing methods rather than making new things in a vacuum. Don't worry about Harmony, QModManager installed the file that
you'll need to reference and I'll cover it further down.
----------------------------------------------
Setting up your new project in Visual Studio
----------------------------------------------
* File -> New -> Project
* Choose 'Class Library (.NET Framework)'
* Name it and in the framework dropdown at the bottom choose '.NET Framework 4.7.2'
Once your new project is created you'll need to add some references. Right click References in the solution explorer (default on the right of your screen) and choose to Add Reference.
Browse to your Subnautica/Subnautica_Data/Managed or SubnauticaZero/SubnauticaZero_Data/Managed directory and add the following files:
Assembly-CSharp.dll
UnityEngine.dll
UnityEngine.CoreModule.dll
Now add 0Harmony.dll from the BepInEx/core directory and QModInstaller.dll from the BepInEx\plugins\QModManager directory.
These 5 files are the most basic references needed to make any mod that alters the games code in any way.
If you are going to be adding or altering existing objects in the game or even want an easy in-game mod config to be added to the menu then you will also want to reference SMLHelper.dll from inside the QMods folder where you installed it earlier.
-------------------
Basic Harmony Use
-------------------
Now that your project is set up you're ready to get started. As mentioned above, the basic usage of Harmony is to to inject code into existing methods either before (Prefix) or after (Postfix). Now to tell your mod to do anything at all we need a simple command that creates the harmony instance and tell's it that patches need to be done. The MainPatcher.cs file is an example of how this file should look.
From here you need to know what class of the game you want to patch and how. This example uses the QuickSave mod. Here I chose to patch the Update method of the Player class. From the example you can see that we use tags inside [square brackets] to tell Harmony what to look for. [HarmonyPatch(typeOf(Player))] tells it to look at the Player class and [HarmonyPatch("Update")] tells it to look at the Update method of that class.
Next you choose whether to use a prefix or a postfix. This example uses a postfix. Simply put the postfix tag before the method and then any code you want to run inside that method. If you are using a prefix it needs to return a boolean. True will send the code into game's method as normal, False will skip the games method, providing you with a way to overwrite the game's method entirely if you choose. EscapePod_Patcher is provided as an example of a prefix that overwrites the game's existing method. Prefix method needs an EscapePod __instance parameter passed to it to replicate seeing 'this.xyz' in the game's code.
https://harmony.pardeike.net/articles/intro.html can be a great reference to learn more about the uses of Harmony.
We actually use a slight off shoot of Harmony called Harmony and there are a few differences which can be found on the HarmonyX Wiki
-------------------------------------------
Building, Testing, and Uploading Your Mod
-------------------------------------------
When you're ready to build and test your mod right click on it in the solution explorer and select 'build'. This will generate a .dll file for your mod. By default this will be created in bin/debug but this is configurable with your visual studio setup. Now make a mod.json file to tell qModLoader how to install your mod.
You can find more information https://github.com/SubnauticaModding/QModManager/wiki/Creating-your-mod.json-file or you can just take the provided example and change it to match your own mod's requirements.
To test your mod place the .dll that you generated and mod.json into a folder with your mods name (matching the ID in mod.json). Place this folder in the Subnautica/QMods or SubnauticaZero/QMods directory then start up your game.
When you're ready to upload your mod to the nexus simply zip the folder up (that contains your mod's .dll and the mod.json file) and upload that.
-----------
End Stuff
-----------
Feel free to let me know if anything here was unclear or needs updating and join our discord community at
https://discord.gg/UpWuWwq. The discord community also has links to many public code repo's for existing mods that you can use for examples and inspiration.
Thanks to various members of that community for reviewing and suggesting additions to this explanation. I highly recommend you browse through some of the repos that they have made available linked on the discord.
So you want to learn how to mod Subnautica? This tutorial will get you started whether you're a complete beginner or veteran
Modder that is just looking to start on a new game. If you're new, modding does require some programming skills. This is
not a programming tutorial so I'd recommend getting a grasp of the basics. Subnautica modding is done using C#. Against
everything that this world has taught us with things similar alphabetically, C# is very different from C and C++ so make
sure that you're learning the right one! Also this tutorial is for modding on a Windows computer.
There are a few tools you'll want to download before proceeding.
First, get Visual Studio from
https://visualstudio.microsoft.com/downloads/. The Community Edition is free for personal use and will be sufficient for
modding. When installing, make sure to select the ".Net desktop development" option from the workloads list.
If you are going to be making new mod items from scratch you'll need Unity.
You can download it from https://unity3d.com/get-unity/download/archive.
Subnautica is currently on version 2019.2.17 and BelowZero is currently on 2019.4.9;
Third for looking into the games code you will want to grab dnSpy from github. https://github.com/0xd4d/dnSpy/release.
Place it in a folder somewhere convenient you will be using it A LOT!.
You'll also need to install QModManager from Nexus. Here's the nexus pages
QModManager: Wiki
Subnautica - https://www.nexusmods.com/subnautica/mods/201/
Below Zero - https://www.nexusmods.com/subnauticabelowzero/mods/1/
Run the executable file to install it. This will, among other things, create a QMods folder in your subnautica directory.
SMLHelper is a modding Library to make adding mod items and changing existing items easier as well as many other utilities to make modding easier.
SMLHelper: Wiki
Subnautica - https://www.nexusmods.com/subnautica/mods/113
BelowZero - https://www.nexusmods.com/subnauticabelowzero/mods/34
This mod gets extracted into the QMods folder in the game directory.
-----------------------
Viewing the games code
-----------------------
This is the portion that dnSpy is used for. Run dnSpy executable and go to File->Open. Browse to Subnautica/Subnautica_Data/Managed
or SubnauticaZero/SubnauticaZero_Data/Managed and open the Assembly-CSharp.dll. From there you can work your way down to the {} directory to view the game's classes and methods.
This is important because the way we do code injection using the Harmony library is most commonly to modify or attach code to
existing methods rather than making new things in a vacuum. Don't worry about Harmony, QModManager installed the file that
you'll need to reference and I'll cover it further down.
----------------------------------------------
Setting up your new project in Visual Studio
----------------------------------------------
* File -> New -> Project
* Choose 'Class Library (.NET Framework)'
* Name it and in the framework dropdown at the bottom choose '.NET Framework 4.7.2'
Once your new project is created you'll need to add some references. Right click References in the solution explorer (default on the right of your screen) and choose to Add Reference.
Browse to your Subnautica/Subnautica_Data/Managed or SubnauticaZero/SubnauticaZero_Data/Managed directory and add the following files:
Assembly-CSharp.dll
UnityEngine.dll
UnityEngine.CoreModule.dll
Now add 0Harmony.dll from the BepInEx/core directory and QModInstaller.dll from the BepInEx\plugins\QModManager directory.
These 5 files are the most basic references needed to make any mod that alters the games code in any way.
If you are going to be adding or altering existing objects in the game or even want an easy in-game mod config to be added to the menu then you will also want to reference SMLHelper.dll from inside the QMods folder where you installed it earlier.
-------------------
Basic Harmony Use
-------------------
Now that your project is set up you're ready to get started. As mentioned above, the basic usage of Harmony is to to inject code into existing methods either before (Prefix) or after (Postfix). Now to tell your mod to do anything at all we need a simple command that creates the harmony instance and tell's it that patches need to be done. The MainPatcher.cs file is an example of how this file should look.
From here you need to know what class of the game you want to patch and how. This example uses the QuickSave mod. Here I chose to patch the Update method of the Player class. From the example you can see that we use tags inside [square brackets] to tell Harmony what to look for. [HarmonyPatch(typeOf(Player))] tells it to look at the Player class and [HarmonyPatch("Update")] tells it to look at the Update method of that class.
Next you choose whether to use a prefix or a postfix. This example uses a postfix. Simply put the postfix tag before the method and then any code you want to run inside that method. If you are using a prefix it needs to return a boolean. True will send the code into game's method as normal, False will skip the games method, providing you with a way to overwrite the game's method entirely if you choose. EscapePod_Patcher is provided as an example of a prefix that overwrites the game's existing method. Prefix method needs an EscapePod __instance parameter passed to it to replicate seeing 'this.xyz' in the game's code.
https://harmony.pardeike.net/articles/intro.html can be a great reference to learn more about the uses of Harmony.
We actually use a slight off shoot of Harmony called Harmony and there are a few differences which can be found on the HarmonyX Wiki
-------------------------------------------
Building, Testing, and Uploading Your Mod
-------------------------------------------
When you're ready to build and test your mod right click on it in the solution explorer and select 'build'. This will generate a .dll file for your mod. By default this will be created in bin/debug but this is configurable with your visual studio setup. Now make a mod.json file to tell qModLoader how to install your mod.
You can find more information https://github.com/SubnauticaModding/QModManager/wiki/Creating-your-mod.json-file or you can just take the provided example and change it to match your own mod's requirements.
To test your mod place the .dll that you generated and mod.json into a folder with your mods name (matching the ID in mod.json). Place this folder in the Subnautica/QMods or SubnauticaZero/QMods directory then start up your game.
When you're ready to upload your mod to the nexus simply zip the folder up (that contains your mod's .dll and the mod.json file) and upload that.
-----------
End Stuff
-----------
Feel free to let me know if anything here was unclear or needs updating and join our discord community at
https://discord.gg/UpWuWwq. The discord community also has links to many public code repo's for existing mods that you can use for examples and inspiration.
Thanks to various members of that community for reviewing and suggesting additions to this explanation. I highly recommend you browse through some of the repos that they have made available linked on the discord.