


0 of 0
About this mod
Loads custom Posters to decorate with.
- Requirements
- Permissions and credits
- Donations
# Custom Posters
Loads custom Posters to decorate with.
Works kind of like Custom Hull plates but for Posters instead.
## How to:
After extracting the mod into your BepInEx folder you should see a new folder in the plugins folder named CustomPosters.
It should contain two things:
That means there is a folder named Brolly that contains three files:
Replace the icon.png with another icon.png image file of your choice.
Additional info provided by Mishka on Discord about the composition of the posters after some testing.
For landscape, the ratio of the Canvas must be is 2:1
For example 1024•512, however, the width of the image itself must be reduced by 11%
So the formula would be start with your 2:1 canvas 1024•512, multiply 1024 by 89% 1024(89%) for 911.36, round down to the nearest pixel, 911•512
Fit the image, then change the canvas width back to 1024, leaving the sides transparent.
It's similar for portrait.
To avoid warping, the canvas must be 1:2, example 𝐰1000 • 𝐡2000
To avoid cropping, the picture itself must be within 67% of the height(𝐡) of the canvas, 2000(67%) | 𝐰1000 • 𝐡1340 and it must be centered, leaving roughly 16.5% height(𝐡) blank above and below the picture.
Now included in the Optional section of the Files tab are the .psd guide files created by Mishka to make posters easier.
Open the info.json file with a text editor i.e. Notepad++ or Notepad or whatever you choose.
Do not touch anything on the left side i.e InternalName,DisplayName ...
Have fun!
Loads custom Posters to decorate with.
Works kind of like Custom Hull plates but for Posters instead.
## How to:
After extracting the mod into your BepInEx folder you should see a new folder in the plugins folder named CustomPosters.
It should contain two things:
- Posters(folder)
- CustomPosters.dll (don't touch this).
That means there is a folder named Brolly that contains three files:
- icon.png <-- this will be the icon inside of the fabricator.
- info.json <-- this contains very important configuration stuff that we will have to change.
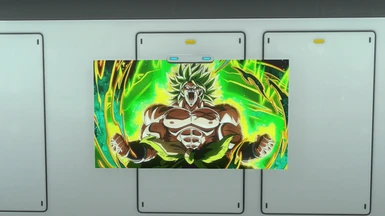
- texture.png <--- this will be the poster
Replace the icon.png with another icon.png image file of your choice.
- The image should be rectangular
- 128x128px should be large enough for such a small icon
- The name must be icon.png
- The file type should stay png
- The name must be texture.png
- The file type should stay png
Additional info provided by Mishka on Discord about the composition of the posters after some testing.
For landscape, the ratio of the Canvas must be is 2:1
For example 1024•512, however, the width of the image itself must be reduced by 11%
So the formula would be start with your 2:1 canvas 1024•512, multiply 1024 by 89% 1024(89%) for 911.36, round down to the nearest pixel, 911•512
Fit the image, then change the canvas width back to 1024, leaving the sides transparent.
It's similar for portrait.
To avoid warping, the canvas must be 1:2, example 𝐰1000 • 𝐡2000
To avoid cropping, the picture itself must be within 67% of the height(𝐡) of the canvas, 2000(67%) | 𝐰1000 • 𝐡1340 and it must be centered, leaving roughly 16.5% height(𝐡) blank above and below the picture.
Now included in the Optional section of the Files tab are the .psd guide files created by Mishka to make posters easier.
Open the info.json file with a text editor i.e. Notepad++ or Notepad or whatever you choose.
Do not touch anything on the left side i.e InternalName,DisplayName ...
- Change BrollyPoster to MyPoster. This name has to be unique for the whole game... so you might want to add some random letters MyPosterXYZ.
- Change DisplayName to whatever you like i.e. My awesome Poster.
- Change Description to whatever you like i.e. A very awesome Poser.
- Change Orientation to either Portrait or Landscape depending on your image.
Have fun!