


0 of 0


About this mod
using some reshader effects to improve the game using the IMMERSE package to improve shadows
- Permissions and credits
If you liked it, endorse us, it cheers us up a lot!
Step-by-Step Guide to Using the FilesStep One: Download Necessary Files
- Download Reshader:
- Download the correct version of Reshader.
- https://reshade.me/
- Download the Nexus File for Red Dead Redemption:
- Find and download the necessary file on Nexus Mods.
- Find and download the necessary file on Nexus Mods.
- Place the File in the Game's Root Directory:
- Place the
Red Dead Redemption.ini and also the reshade-shader where there is the lut.fx texture with the name Red Dead RedemptionV0.3.pngfile in the game's root directory where the.exefile is located.
- Place the
- Open the Reshader Program:
- Open Reshader and find the game.
- Select the DX11 or DX12 version.
- Locate and select the
Red Dead Redemption.inifile using Reshader. This should automatically download all necessary configurations.
- Start the Game:
- Start your game and go to the open-world section.
- Start your game and go to the open-world section.
- Home Key:
- Press the
Homekey to open the Reshader menu.
- Press the
- Settings:
- Go to
Settings. - In
OVERLAY KEY, set the key toDel(you can choose any key you prefer). This will allow you to toggle the overlay on and off. - In
EFFECT TOGGLE KEY, set the key toPage Down(you can choose any key you prefer). This will toggle the effects on and off.
- Go to
- In the Home Tab, Enable the Following Options for Version v0.3:
- ✔️
IMMERSE: Launchpad (enable and move to the top!) [MartysMods_LAUNCHPAD.fx] - ✔️
IMMERSE: Sharpen [MartysMods_SHARPEN.fx] - ✔️
IMMERSE: Anti Aliasing [MartysMods_SMAA.fx] - ✔️
IMMERSE: MXAO [MartysMods_MXAO.fx] - ✔️
Clarity [Clarity.fx] - ✔️
prod88_01A RT_Correct_Contrast [PD88_01A_RT_Correct_Contrast.fx] - ✔️
DPX [DPX.fx] - ✔️
Vibrance [Vibrance.fx] - ✔️
Vignette [Vignette.fx] - ✔️
LUT [LUT.fx]
lut.fxand make it more realistic. If you don't like it, just disable it, and if there is an orange tint to your game, simply editlut.fxuntil it suits your taste. - ✔️
- Settings:
- In
Edit global preprocessor definitions, set the configurations as follows:- v0.1 or v0.3:
RESHADE_DEPTH_LINEARIZATION_FAR_PLANE = 1000.0RESHADE_DEPTH_INPUT_IS_UPSIDE_DOWN = 0RESHADE_DEPTH_INPUT_IS_REVERSED = 0(Test this option with 0 or 1 and see how it goes)RESHADE_DEPTH_INPUT_IS_LOGARITHMIC = 0
- v0.1 or v0.3:
- In
How to Customize Effects to Your Liking
- IMMERSE: Launchpad (MartysMods_LAUNCHPAD.fx):Enable and move to the top: Enable this effect and move it to the top of the list for best results. Improve the quality of normals and motion vectors.
- IMMERSE: Sharpen (MartysMods_SHARPEN.fx):Enable: Check the box to enable this effect. It enhances image sharpness.
- IMMERSE: Anti Aliasing (MartysMods_SMAA.fx):Enable: Check the box to enable this effect. It smoothens the edges of objects, reducing jagged lines.
- IMMERSE: MXAO (MartysMods_MXAO.fx):Enable: This effect enhances shadows around objects, providing greater visual depth. This robust ambient
- occlusion shader is based on GTAO and Irradiance Bitfields.
- Clarity (Clarity.fx):Enhances overall image clarity and detail.
- prod88_01A RT_Correct_Contrast (PD88_01A_RT_Correct_Contrast.fx):Adjusts the contrast levels to correct color and lighting.
- DPX (DPX.fx):Enhances color grading and tonal response.
- Vibrance (Vibrance.fx):Increases the intensity of colors without oversaturating them.
- Vignette (Vignette.fx):Adds a subtle darkening effect around the edges of the screen for a more focused image.
- LUT (LUT.fx):Applies a Lookup Table to transform the colors and overall look of the image.
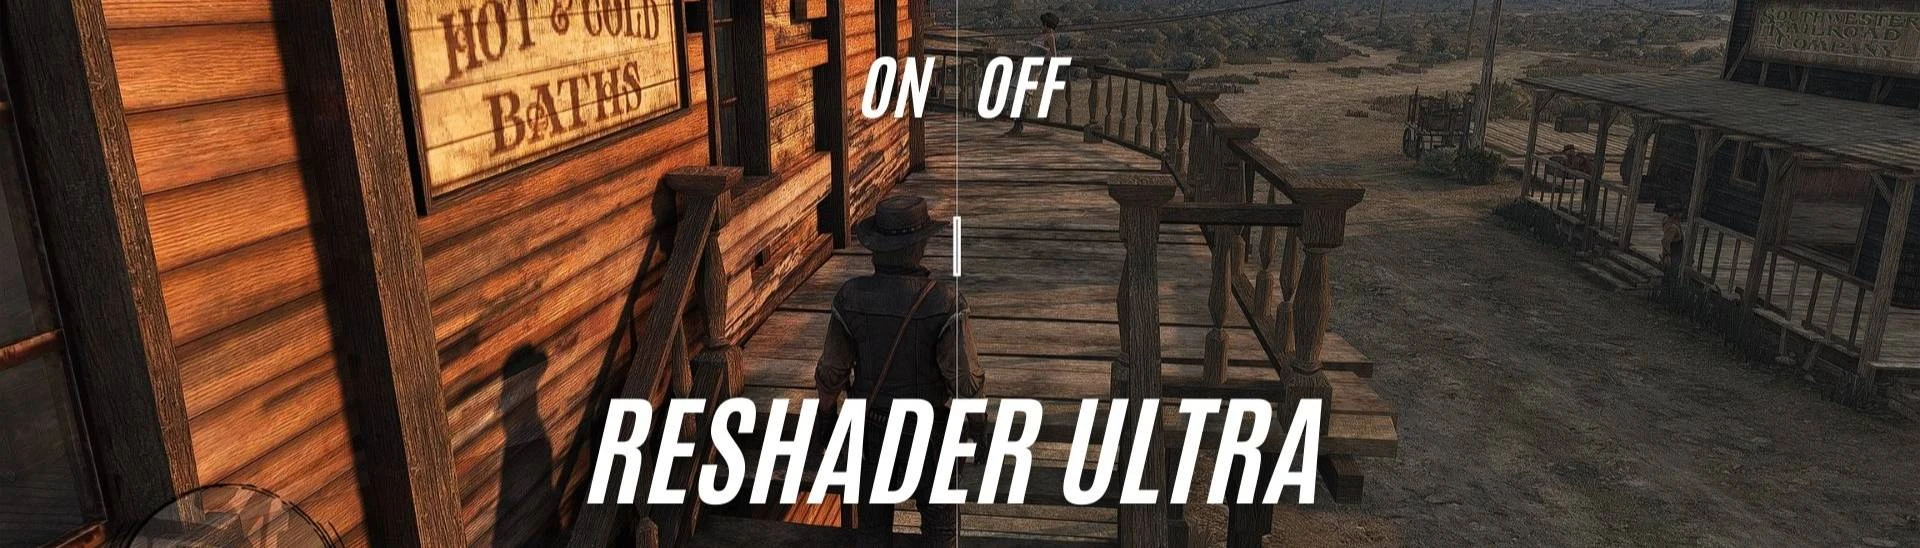
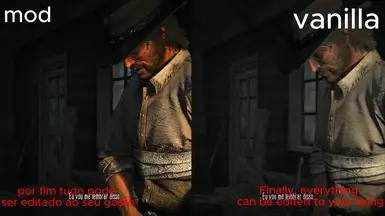
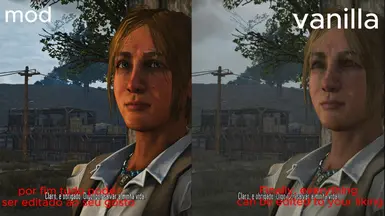
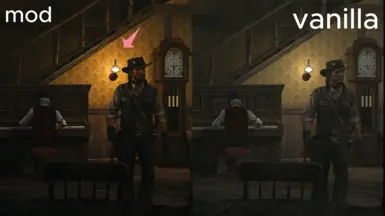
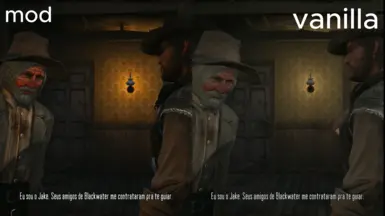
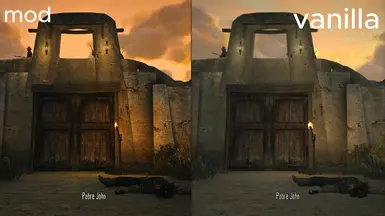
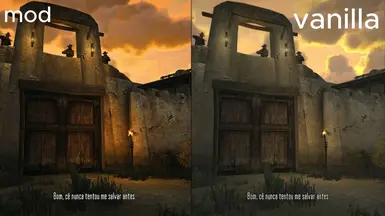
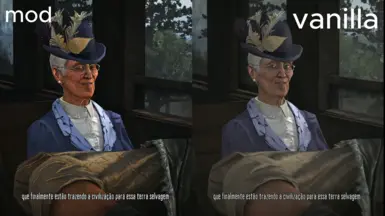
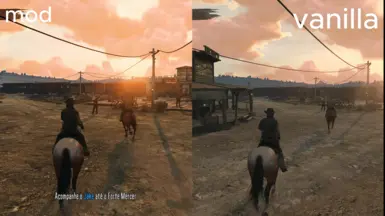
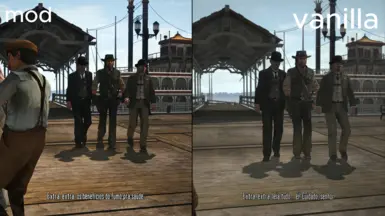
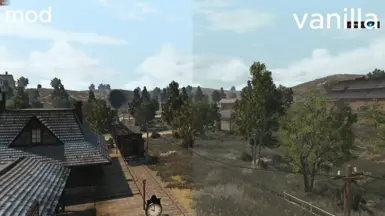
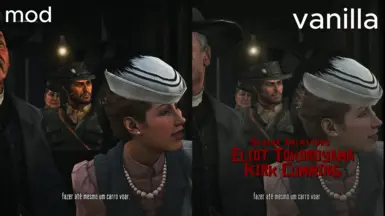
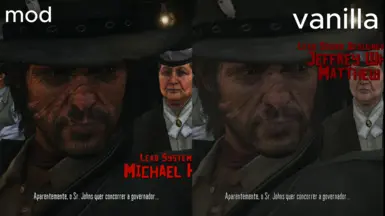
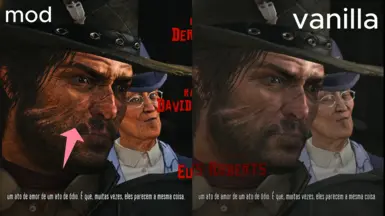
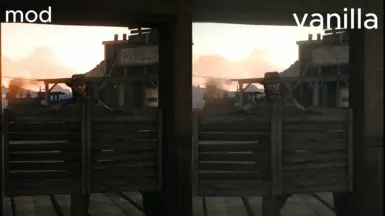
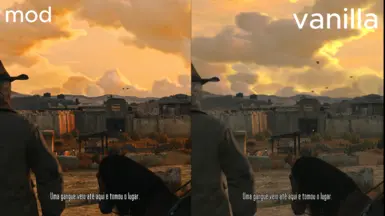
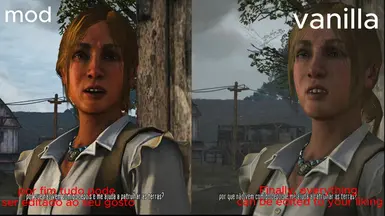
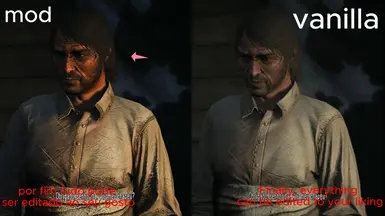
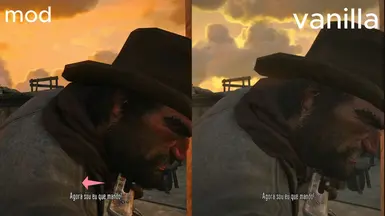
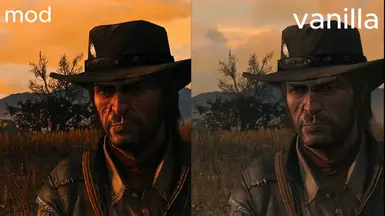
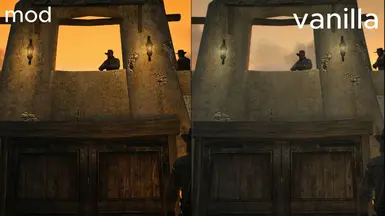
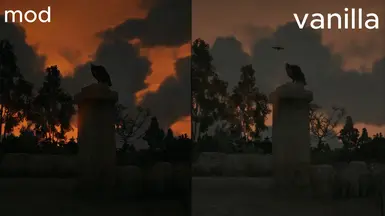
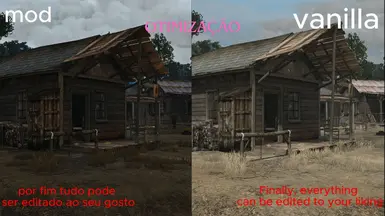
- Some Before and After Comparisons
edit lut.fx to your liking using this option.
> LUT chroma amount
>LUT luma amount
>LUT luma amount
- The IMMERSE options may cause a drop in FPS if not configured correctly. If your PC is very weak, I recommend using only IMMERSE: MXAO.
Note:
Best Mods for the Game:
- Reality Redemption - Overhaul Project: Reality Redemption Overhaul Project
- Note: With the RTGI option activated, the game is very heavy. I recommend using MXAO only or making an edition to customize your game.
- Note: With the RTGI option activated, the game is very heavy. I recommend using MXAO only or making an edition to customize your game.
- Red Dead Redemption enabling FG for all GPUs: Enable FG for all GPUs
4lex4nder for the biggest reshade mode ever 'REST addon'
Pascal Gilcher for free (GTAO + Bitmask)MXAO
papadanku for the autoexposure for hdr rest buffers wasnt needed in the end but he has alot of other cool effects.
- And other effect and filter creators using this mod.