


0 of 0
")
")
")
")
")
")
")
")
")
")
")
")
")
")
")
")
")
")
")
")
")
")
About this mod
This is a collection of my own personal Oblivion Reloaded settings that I find contribute to the game's visual fidelity.
- Requirements
- Permissions and credits
- Changelogs
~~EPILEPSY WARNING~~
Under certain rare, uncommon conditions, the eye-adaptation and contrast
enhancing effects can occasionally be driven to change rapidly in response to
unusually severe lighting events.
Under no normal circumstances should Seriously HDR produce visual discomfort.
If you have found a setup that is causing a serious problem I am 100% interested
in solving it and I encourage you to contact me.
Seriously HDR has been tuned with compatibility and long-term usage in mind and
will play well with most content, but I can't guarantee there isn't a mod out there
with bright lights being used in a weird way that interacts with the eye adaptation
negatively.
The only notable place I've found in the GOTY edition that makes a lot of screen
flicker is standing very near the Shivering Isles portal with the Medium Roast.
Everywhere else is very good. Sometimes very bright, flickering lights in close
proximity will cause major brightness changes. Lightning from thunderstorms can
also cause a very severe flash at night with certain Roasts. The HDR algorithm is
rather susceptible to particle effects blowing at the screen, so certain areas with
magical mist or other luminous sprite effects can cause significant and rapid
dimming of the screen. Sadly there is very little control over the eye adaptation
parameters that could permit a safer setup.
There was a glitch in foggy weather that caused the screen to *strobe* when
looking at the horizon, and for some reason the "DefaultWeather" weather has
broken/different HDR behavior than the other weathers and selecting it via the OBR
menu would result in the screen pulsing and strobing before I found a solution.
Classic Roast and Espresso Roast are probably the "most safe" as they have a
much lower emphasis on using the eye adaptation to increase contrast and should
therefor minimize the amount of "flaring" and full screen dimming.
This mod is packaged with:
OR Additional Effects Volumetric Fog and Bokeh DOF Addons
Give your thanks by visiting their page and leaving a kudos!
~~Nearly Free FPS~~
Oblivion Decompressed Records
Oblivion BSA Decompressor
What is Seriously HDR?
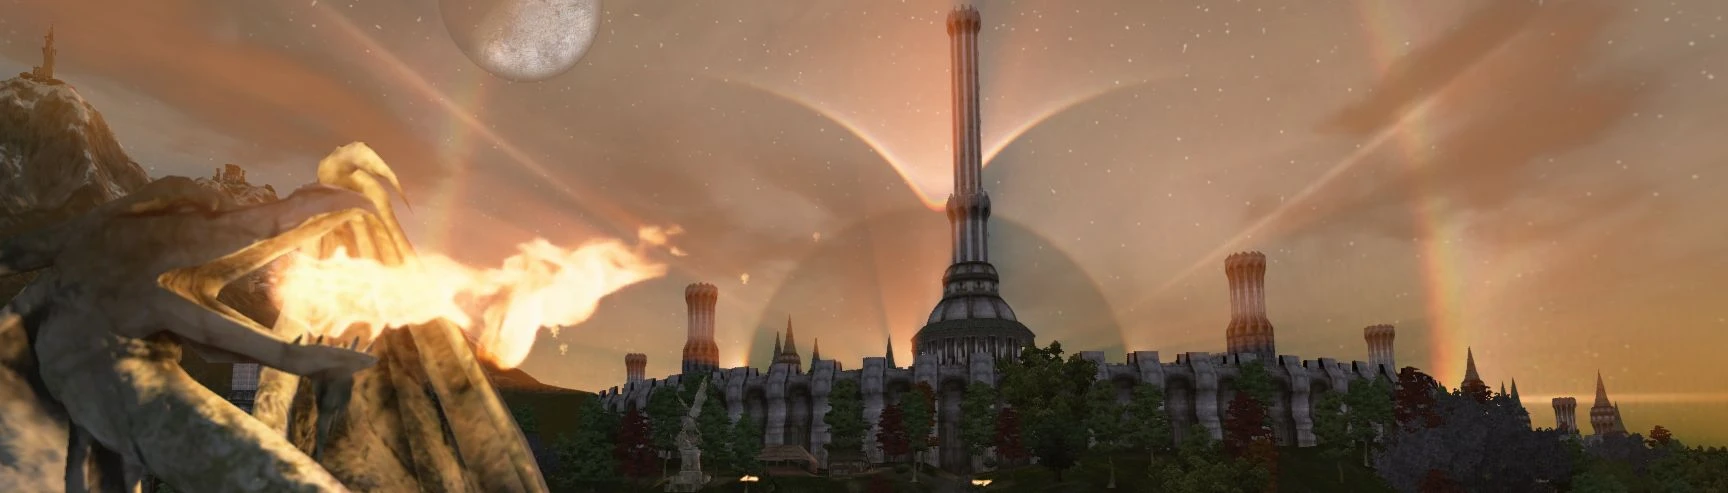
Seriously HDR takes advantage Oblivion Reloaded's powerful shaders to overhaul
the HDR balance of the game, for those seeking a performance-friendly bold and
eye catching appearance. These configs have intentionally been pushed to the
absolute limits, freely using extreme values and toeing the edge of distortion and
visual artifacts. They create an indubitably dramatic image but lack the personality
found in many other configs, so they may not be suitable for all adventures.
Installation
Please check the INI Settings section below for Oblivion.ini settings that will
improve performance and contribute to a higher-quality final appearance.
OBRv9.1.1 users: Simply drop a config file into your OBSE->Plugins directory
OBRv8.4.0 and E3 users: Check the readme included in the download for instructions
ORL/ORC users: Make sure to install the included HDR fix.
ORC users need to change the file directories to /Data/Shaders/ORC/
I will no longer be maintaining packs for ORL/ORC for the forseeable future
ALL USERS: Please make sure to back up the following files if you have any custom settings you
want to preserve:
/ini/AllNatural.ini
/OBSE/Plugins/OblivionReloaded.ini
/OBSE/Plugins/OblivionReloaded.dll.config
/OBSE/Plugins/OblivionReloaded.Weathers.ini
/Shaders/.../anything special here/
Recommended Mods:
Weather - All Natural
-Extensive weather overhaul with many features.
At this moment I recommend disabling all additional weathers until I have time
to make a more comprehensive config. All Natural contributes Real Lights and
interior weathers which vastly improve the atmosphere of the game and allow
sHDR to thrive in more environments.
INI Settings
These recommended settings will improve performance while contributing to a higher quality final appearance.
Also of note: using the `cal` console command in-game will reset the game's HDR. If you suspect you are
experiencing an HDR-related glitch try running this command. If the scene's brightness suddenly changes
then HDR is a substantial factor in the image and it may be a clue as to what is causing the issue.
-To enable a more accurate lighting algorithm in Oblivion's engine, In the Oblivion.ini
under [bLightAttenuation] set
bUseQuadratic=0
bUseLinear=1
-Under [BlurShaderHDR] set:
iNumBlurPasses=16
fBlurRadius=8.0000
These settings will reduce the "shimmering" effect seen in certain
brightly lit areas, and soften the HDR effect for a more well-rounded
look.
-These settings change lighting and shadows to have an acceptable level of detail and
fade-in to balance performance with appearance, especially improving actor's faces.
Under [Display] set:
fShadowLOD2=512.0000
fShadowLOD1=256.0000
iShadowMapResolution=1024
iShadowFilter=2
fLightLOD2=3196.0000
fLightLOD1=768.0000
-To boost overall image clarity and reduce stuttering, under [General] set:
bTintMipMaps=1
and under [Display] add:
iTexMipMapMinimum=8 or 16
This enables mip-mapping in the game, which may slightly boost
performance, but mainly reduces graininess on distant objects leading to
a smoother overall appearance. Then gamma correction is applied to these
long-distance textures, restoring appropriate luminosity and
saturation leading to a more clear overall appearance. Level 16 is the max,
some users have reported better performance with level 8 due to reduced
memory usage.
iTexMipMapSkip=0
This setting reduces texture detail and improves performance. It is probably
only useful for people that would like to use a certain texture pack that does
not have a low-detail version, or for people that have low VRAM.
bUseOptimizedTextureLoading=1
This may reduce stuttering, especially if you have generated mipmaps using
a program such as Ordenador. Ordanador is considered safe for Oblivion but
make sure to disable everything except mipmap generation, especially
compression. Then remove mipmaps first, then reburn forced. This may
improve performance depending on your hardware's balance between GPU
performance and cache latency. Alternatively, just removing mipmaps may also
increase peformance if you have GPU power to spare. Please back up your
entire "Textures" folder before running Ordenador, for safety and comparison.
-To play the game at higher display refresh rates, under [HAVOK] set:
fMaxTime=0.0333 is for 30fps, may help performance on slow computers at the expense of physics accuracy
fMaxTime=0.0166 is for 60fps
fMaxTime=0.0133 is for 75fps
fMaxTime=0.0111 is for 90fps
fMaxTime=0.0083 is for 120fps
fMaxTime=0.0069 is for 144fps
fMaxTime=0.0042 is for 240fps
It is recommended to only set this value to the highest FPS you can
keep stable, since physics is tied to FPS having this value much above
your average FPS will just result in your physics running slo-mo. I
prefer a value of 0.014 for 60fps machines, this makes the physics feel a
bit less spastic and you can more easily see neat ragdoll deaths because
they're running like 5% slo-mo.
This tweak is somewhat depreciated by the Oblivion Display Tweaks mod,
though may still be useful on some setups.
-Under [Water] these settings may improve FPS throughout the world but
especially near water. Also one user says that these settings fix the
"flickering sky" glitch while swimming in 1st person:
uSurfaceTextureSize=1
uNearWaterRadius=0
uSurfaceFrameCount=0
uSurfaceFPS=0
bUseWaterReflectionsMisc=0
bUseWaterReflectionsStatics=0
bUseWaterReflectionsTrees=1
bUseWaterReflectionsActors=0
bUseWaterReflectionsLOD=0
bUseWaterReflections=1
bUseWaterHiRes=0
bUseWaterDisplacements=1
bUseWaterShader=1
bUseWaterDepth=0
bUseWater=0
fSurfaceTileSize=512.0000
bUseWaterLOD=1
-Under [LOD] setting:
bLODPopTrees=0
bLODPopActors=0
bLODPopItems=0
bLODPopObjects=0
fLODFadeOutMultActors=7.5000
fLODFadeOutMultItems=2.0000
fLODFadeOutMultObjects=4.5000
fLODMultTrees=0.5
iFadeNodeMinNearDistance=1024
fLODFadeOutPercent=0.9000
fLODBoundRadiusMult=10.0000
My setup aims to change the balance between high-detail and low-detail models,
balancing the fade-in to potentially increase performance with low visual impact.
Since most models do not have a reduced VWD mesh/texture, Gamebryo came up
with the idea of a "weighted pop-in" effect where larger objects pop in farther, and
smaller objects pop in nearer to more accurately reflect an object's presence in
the viewport.
iFadeNodeMinNearDistance ensures full-detail models will be rendered at this distance
from the camera, which can allow the draw distances to be reduced overall increasing
performance. However it also eliminates detail fade-in within this range.
fLODBoundRadiusMult changes how objects fade through their LOD stages.
Objects and Items: size (usually accurately) weighs into pop-in distance.
The advent of the new lighting engine has revealed a variety of meshes
with shadows that do not reflect their physical geometry, perhaps they are
related.
Actors: actors step through several levels of increasing animation.
L0: The actor is loaded and begins following it's AI, but is not rendered.
L1: The actor's body pops in, but no segments are animated.
L2: The actor's hips/legs begin posturing but not animating
L3: The actor's arms begin posturing but not animating
L4: The actor's knees and elbows begin simple animation
L5: The actor's feet, hands, and head begin simple animation
L6: The actor has full detail, fingers are animated, animations are smoothed
Levels 3-6 happen relatively quickly, whereas actors can be in L0 for a long time.
Trees: Trees are not affected by this setting, instead they automatically step through
their LOD levels relative to fLODMultTrees, unless bForceFullLOD under [SpeedTree]
is enabled. The trunk pops in first, then increasing numbers of branches, then leaf detail.
All 4 base render distances are multiplied by this value and must be compensated for.
However, it will have a larger effect on LOD - a value of 5 can be interpreted as
larger objects popping in 5 times farther than smaller ones, or actors stepping through
their LOD levels 5 times faster. This allows pop-in to be tweaked relative to how much
visual influence an object has - large easily visible rock will pop in at long distance, but
smaller stones and things like fence pieces will wait until the player is closer.
By keeping object quantity low and loading well within the uGrids cell distance, stutter
may be minimized and performance highest as cell loads will be easier, yet the visible
field will be more sparsely populated.
These settings seem to have a beneficial effect on OBR's shadow engine, by having
fewer objects to process it seems to have an easier time mixing and overlaying different
layers and shading every object. I notice less shadow flicker and glitching outdoors.
Weather Parameter Descriptions
I personally haven't found any documentation online as to what any of the variables do,
this is my understanding of them. Maybe they will be useful for someone.
First, I must explain some details about how this particular HDR shader works. Remember,
I am just a layman with way too much time on his hands so some of my takes may be
somewhat off from the facts.
Displays can only produce a given range of colors and brightnesses, whatever your
bit depth white is still the brightest color. If the in-game world were limited to a mere
256 lightness steps (24-bit color) the game would look like it did in 2004 when your
graphics card didn't support the right shaders and you had no lighting. By allowing
lights to have a "brightness level" independent of their in-game color, more interesting
appearances are possible. For example lets say the Sun at noon is lighting the ground
to 180 lumens (well within the 256 limit of our display) if you activate a light source of
(arbitrary numbers incoming because I don't have hard numbers) 255 "lumens", there
will now be an area of ground with 180+255 lumens which is too much. Back in the day
the extra light would just bleed out and that information would be lost and not usable
for making a more realistic bright appearance. So how do we handle this? One way is
to change the gamma such that the oversaturated area comes into gamut, but this
necessarily lowers background brightness.
Hence the introduction of Bloom and HDR - methods of using and controlling the
brightness information present in the game to better fit everything we see into our
screens. In the case of Bloom, the oversaturated area's brightness is turned into a
"glow" that symbolically represents the oversaturation from bright light sources. It's
a simple effect that only has enough controls to control how bright things need to be
to produce light, how big of a "blotch" is created, the alpha of each blob, and their
saturation. Bloom produces it's glow effect by causing pixels above X brightness to
produce a Y sized Gaussian glow of their color around them. The usually additive
nature of the effect creates a signature appearance that tends to brighten the image.
Bloom in Oblivion may or may not use any brightness information I'm not sure. It could
just be based purely on pixel color, it's a simple effect.
The HDR shader in Oblivion is literally just Bloom on steroids, but using an abstracted
"brightness" value instead of working with just the color of a pixel. Believe it or not it
functions in a very similar manner to Bloom, by depositing Gaussian blur patches over
pixels based on brightness. It's simply the accumulation of enough "passes" of this
Bloom-ey map and some additional wizardry related to color and brightness processing
that eventually add up to the more familiar soft, halo-like HDR appearance.
The vanilla HDR setup in Oblivion functions in an additive manner, adding additional brightness
and saturation to lit areas. It has a "signature" look but I wouldn't say a particularly good one,
often being compared to a good coat of Vaseline on your screen.
Not saying my appearance is objectively good either. I've just tried something different by using
the HDR effect subtractively, where bright light sources *darken* the area around them. The funny
thing is... in the v6.4.0 days the appearance of sHDR could have been mostly replicated in the
vanilla game all the way back when it came out with a suitable mod. As far as I'm aware the HDR
shader we control in OBR is the stock vanilla Oblivion shader. If I manually edited all the right stuff
a good chunk of this appearance could have been replicated on day 1, all the bits are right there.
Just to make things even more confusing, OBR added a new shader called Bloom that... doesn't
add any lighting bloom to the screen. All it does is adjust highlight tones so I suspect it's meant to
help adjust Oblivion's base Bloom shader.
Weather HDR Parameters
BlurPasses: quantity of HDR shader passes applied to the image. A single pass produces a distinct
"shimmering" appearance as I believe Oblivion actually processes luma information at half your
display resolution. Evidence in favor of this assertion comes from setting iBlendType=1 in the
INI file under [BlurShaderHDR] which disables the blur-based HDR and enables a per-pixel HDR,
which lacks blending but is quite obviously at a lower resolution than the rest of the render.
If performing this test with sHDR installed you will need to disable the HDR shader temporarily.
I think maybe potentially Oblivion might be "dithering" the blur passes by randomly sampling one
of the "base pixels" within a given "luma pixel" so potentially something like 4, 9, or 16 passes
would be needed for a full sample. It also takes about 16 samples to produce an appearance
just smooth enough to not notice the shimmering. I believe additional passes are mixed not
added, not like HDR costs modern hardware anything and I barely notice a change in FPS with
1-200 samples. Too many samples tends to smear high-frequency chroma information.
BlurRadius: Gaussian blur applied to the HDR map. Smooths out shimmering at the expense of
reducing high frequency luma information.
BrightClamp: lower bound for luminosity required to activate the shader. It's a floating point number
so it's all relative but the value affects both the minimum pixel brightness it responds to and also
is a scale factor. It's possible to make shadows glow but also dampen down more extreme values
from other settings with this one.
BrightScale: scale factor controlling how much blur is applied per luminosity
EmissiveMult: In theory controls brightness of point lights but I haven't tested much or noticed if it works
EyeAdaptSpeed: floating point scale factor for determining eye adapt speed. Cinematic values in vanilla
were between 0.8 and 0.975 which translated to "a second or two" as 1.0 was age of the universe and by
0.5 was essentially instant. Set to 0 in sHDR due to an HDR bug that caused severe brightness changes
in certain weathers, which may or may not still be present. May revisit setting in the future.
GrassDimmer: Moderates brightness of grass relative to rest of scene. Think it's just for RNG grass
LUMRampMax: doesn't seem to work with sHDR
LUMRampMin: doesn't seem to work with sHDR
LUMRampNoTex: moderates brightness of certain effects such as water
SunlightDimmer: moderates brightness of sun vs ambient lighting
TargetLUM: Only affects base image brightness. The displays gamma(?) will be adjusted until this particular
luminosity is within gamut. Anything brighter than this level is considered white. For example you could set
this so that the sun at midday just barely washes out to white, or you could lower the target luminosity which
will dim the sun and expose more of it's texture. The sun is now the reference point for what you consider
should be bright. If something as bright as the sun were to appear on your screen, the gamma would be lowered
until the sun-like object looked the same brightness as the sun, darkening the scene by the amount needed to
make the brightest object visible.
OF NOTE WHEN ADJUSTING THIS SETTING: Oblivion really, really was not designed with HDR in mind.
In general the typical environmental brightnesses found in normal play can mostly easily be shown on your
display, however once in a while something is brighter than a stadium light. A good place to start seems to
be in the range of 0.1 to 0.4, you'll notice the most difference there.
TreeDimmer: Moderates brightness of trees relative to scene
UpperLUMClamp: Upper bound for luminosity the game will consider "too bright" and always shade out.
Moderates how much shading is applied to bright areas. Part of the whole HDR tonemapping thing is handling
high-contrast scenes - what kind of appearance do you want when one small bright light is visible? What kind of
appearance do you want when there's lots of ambient lighting and suddenly somebody takes out a torch? Do
you want the torch to bloom out, or do you want to dim the background? How bright do you want bright things
to be? TargetLum and UpperLUMClamp, and BrightClamp have the strongest influence over the balance between
base lighting and the shading effect.
"Luminosity" seems to be based on the pixel values of the final image, so the combined appearance of base +
shader is used to calculate the perceived brightness of the scene. The game's eye adaptation effect is most
strongly affected by TargetLUM and you should really start by setting BrightClamp to 1 which usually completely
disables shading, this way you can tune the base image response to brightness under different conditions to get
a close estimate. Then you need to start applying the effects provided by the other parameters glhf a face full of
the SI portal gate is the brightest thing I've found if you're looking for stress testing
HDR Shader parameters:
I actually don't know what any of these do and just kept trying stuff till it worked.
My hands know what my eyes want and I try not to get in the way.
Gameplay/Known Issues
I have configured these settings to my satisfaction, however Oblivion Reloaded still has a few graphical
bugs and Oblivion's engine has a great many fatal limitations. There are several scenarios where Ambient
Occlusion, Volumetric Fog, and DOF fail to blend or mix properly with the background and foreground,
leading to them having noticeably wrong shading. These shaders also have mixing issues when it comes
to anything transparent such as flames, hair, and dungeon cobwebs. These are flaws in the game engine
and there is nothing we can really do except personally take some time to learn how to fix this game to
make it better for everybody, in much the same way as what brought us to this point.
Personally I rather enjoy how AO and Fog blend together at night and in the dungeons, as an aesthetic
effect, creating almost a 3D relief effect. I just wish it didn't happen always, everywhere and in places where
it shouldn't. You will occasionally see dark halos or slight color aberration around small, bright light sources.
I enjoy the effect, it is caused by the HDR tone mapping operator saturating the area with the opposite color
in order to enhance contrast. Light sources that are bright enough will "burn" the area around them which
increases contrast and psychologically primes us to understand that light is very bright, since we can't see
the area immediately around it. Think about car headlights - they are so bright the car behind them appears
totally black, and yet the rest of our vision away from the light source is fine.
Compatibility
sHDR is not compatible with any mod that changes HDR or the default weathers. Generally OBR has priority
over any .esp based graphics mods.