


STEP 1. go to the Castle Teleporter Room. there is a bridge walk way over to the Blue Stones, this divides the teleporters into two halves. head to the Southern half of the teleporter room and find the teleporter adjacent to the wall mushrooms, is this teleporter on? YES > the mission is a go, no and the mission cannot proceed!
STEP 2. if you go on that teleporter now, then the mission is theorectically still possible, head South back to the Barracks, you will find the Stone gate is now open BUT the mission is now tremendously hard! delay this and go to Step 3 first, this will lessen the odds against you
STEP 3 . find the Castle Teleporter Room and stay in the Northern half. see some wall candles and Ivy growing up the wall, is the teleporter next to the IVY ON? YES the mission is a go, no and the mission cannot proceed! if yes enter the teleporter, immediately do a 180 turn from the Zhandul Orb and move in the opposite direction from the Z Orb and keep going!
STEP 4 . spend some time battling the Pyramid Legions, see if you can eliminate most of them but you're in no hurry, take your time! these same Legions are the exact troops that guard that Master Key in fact, so it is better to engage with them out here than it is in the Triple Chambers that house the Key itself.
STEP 5. keep returning to the Pyramid to smash the Evil Legions, once they are hugely reduced THEN go back to the Castle Teleporter Room. find the teleporter adjacent to the wall mushrooms, is this teleporter on? YES the mission is a go, no and the mission cannot proceed! ok, if its on NOW go into it and find the Stone Gate in the Southern barracks
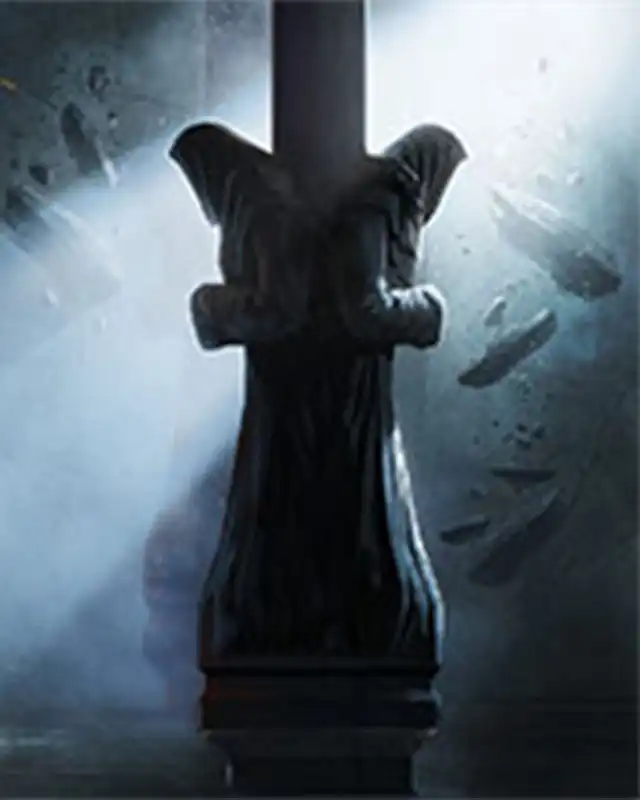
STEP 6. see the fire etheral in the corner? this creature must be slain, see the video https://www.youtube.com/watch?v=gb1MmS-4a30
STEP 7. the Stone Gate admits you to the outer Master Key chamber, you see a metal ladder and a wall lever. use the wall lever to keep the stone gate open because on the other side of it there is no means to open it. stairs down take your crew to the Sewers and beautiful Crystal Armour , there is a pit down here to CITY (gold lock!)
STEP 8. try and keep the Stone Gate open if you can. it is tempting to use the wall lever to close the gate. if you do that, remember that if you depart this chamber, use the wall lever to unlock the stone gate.
STEP 9 you will see that as you defeat the fire etheral , a platform unlocks next to the metal ladder, this gives your crew access to the Master Triple Chambers
STEP 10. right at the end of the Triple chambers is the Master Key, see the video for more details ....
Intro preamble > crew from a shipwreck discover they are now in a bizarre world. the beach they have arrived on features a massive Castle Tower, apparently deserted on first glance. but as the crew descend a concrete pit further up the beach, a dungeon of mutant creatures shocks the crew to their core, can they survive this unearthly place?*suggested strategy* - remember there are many other ways to plan a successful foray into the mutant world, this is just 1 suggestion
STEP 1 descend the nearest pit down (NORTH pit). can grab a couple of weapons first, an easy one to find is under the wooden bridge at the cave end. the other is a little more difficult to find but locate a circle of stones in the beach surf, then using them as a waypoint. move directly from there to the cave, a superb Battle Axe is found, NOW descend the nearest pit down
STEP 2 having the weapon(s) is a big advantage , having descended the nearest pit the crew arrive in the terrifying Tomb. on initial descent the place is a nightmare but there are ladders along the side that allow the crew respite if they can just survive that long
STEP 3 ascend a ladder to the Tomb Balconies and head to the WESTERN passage which affords 3 distinct bonus areas 1. embalmer office, 2. Rogue stop off and 3. castle stairs, each of these would be an early boost to the crew, in the way of bonus items
STEP 4 after attempting these 3 places resume to the Eastern side of the Tomb Balcony where a tomb Barracks is discovered, check out the Eastern Passage but the resume back to the Western passage, either exit to the castle Tower from there OR drop off the SOUTH platformCITY SCAPEso as stated in Step 4, you could drop off the Southern Platform, have a look around on the Southern Platform, do you find a trapdoor? is it open? are your crew in good shape? OK! descend the trapdoor to CITY! (bonus mission) STEP 5 if dropping off the South Platform (Recommended) the below passage leads to the Castle Library, but back tracking along the passageway there leads to a useful store room STEP 6 you could defeat the Librarians and collect everything from the Library , but if possible try IMPRISONING the Librarians and dont drop down from the Castle Library yet though. once you have taken everything NOW backtrack to the useful store room, a lurker station is now found (great bonus items)STEP 7 on the way back from the useful store room the crew could quite easily find some new stairs to a beautiful forest. in the forest ... the crew see the tomb from the outside, what a sight! (dont worry if you miss the forest just now, the crew find it again from the Pushblocks later)STEP 8 there are 3 pits down on the Launch Beach, North, West and Cave. the recommended order to descend them, is North, West and Cave. the crew could now descend the West pit so exit the castle Library and back to the Launch beachSTEP 9 descending the West pit brings the crew to a single passageway, one ending takes the crew to the uper tomb (Tomb key?) and the other out to the 2nd beach (Tomb LOCK?), the crew need to do BOTH (get the tomb key and use it in the Tomb lock), note in the Tomb key section a mess on the floor and a tiny spider!STEP 10 once in the Pyramid (from 2nd beach) the crew may be able to do some strategic fighting and gain 2 more tomb keys which unlock the tomb BARRACKSSTEP 11 once the tomb Barracks is unlocked - a lot of monsters pile out - so best reteat and go back to the Forest (see step 7) where access to the upper tomb now provides the crew with Level 3 access (MORTAR!) (ledges 3, 2 and 1 !) TIP! fully explore the entire Ledge 3 STEP 12 the crew could now return to the Launch beach and the West pit. descend the West pit AGAIN, this time return to the mess on the floor and a tiny spider! an access to the first push blocks is now unlocked. descend to the first push blocks (Skull key needed!)STEP 13PUSHBLOCKS 1 - there are cages which contain two pressure plates - this first pushblocks needs a Skull key to energise. after that place an item through the cage onto pressure plate 1. when the cage finally opens that allows you to access pressure plate 2 just go and stand on it, then complete the pushblocks puzzle.to get to Pushblocks 1 descend the West pit on the Launch beach and find the place where the tiny spider and view of the first Tomb key was. descend to Pushblocks 1 from here.Once solved, the crew descend to well lit tomb Arena, skirt around to the left where a Crowern Leader is found, defeat himn and move past his position down to a potions platform. Move down from the platform into a Sarco Shrine, from there descend directly to Pushblocks 2PUSHBLOCKS 2 - get there from the Sarco Shrine. Pushblocks 2 has cages which contain 2 floor pads. Floor pad 1 : just pass an item through the cage onto the pad! see accompanying video https://www.youtube.com/watch?v=kXsk6D2DddA&t=56s Once Pushblocks 2 is solved the crew descend to the Sewers and find a pretty nifty set of Leathers, very nice too! (:Light armour) So if this is your first time in the Sewers then BE CAREFUL. the water here is deep and can be disorientating. once submerged ensure none of your crew are travelling injured because that means slow and slow means drowning! STEP 14MORTAR - the crew need the mortar by this stage, if not soonerHow to get the mortar - first, one tomb key must have been inserted - see step 9. now get to the Forest, see Step 7 OR the Forest can be found from Sewers. From the forest the crew see the outside of the Tomb, enter via main stairs, if 1 Tomb Key already inserted, mortar is now obtained.STEP 15 as you take the mortar, the crew notice a wall lever. pull the wall lever, this unlocks Bridge 1STEP 16 stay on Ledge 3 and go all the way around to find stairs up to new foraging, this foraging exits back to the Pyramid OR The TombSTEP 17 if your crew haven't descended the centre trapdoor in the Tomb yet, then go there now. if the centre trapdoor in the Tomb is still closed, then remove all items from the side alcoves there, trapdoor opens! TIP! CAUTION : fire etheral!PUSHBLOCKS 3 - get there from the Tomb centre pit. To energise the floor, find the wall button behind the barrels! TIP! several of the standing pushblocks are FAKE. if you look closely you can tell the Fake ones apart. when solved, the crw again descend to the Sewers but this time an additional section of the Sewers is seen from a pullchained wooden door. Go through the door to find a ROPE and a mortar ! TIP! if you see a swimming Turtle near the Rope, take it down for a special bonus! STEP 18 PUSHBLOCKS 4 - is accessed from a deep water stream of the Sewers , find the part in the Sewers where the crew sink 10' lower down and then follow the long section as it narrows to Pushblocks 4, *beware* some of your crew may drown in the effort to find this destination! see the video https://www.youtube.com/watch?v=fv1BEL66OwYSTEP 19 once PUSHBLOCKS 4 is solved the crew move on to an advanced basins missions which leads down to THE MIRROR ARMOUR : Caution :Etherals Army guard the Mirror Armour, be ready to fight the Etherals!STEP 20 on exit from a successful Pushblocks 4 go around the edge of the advanced Basins mission dealing with mosquitos or any other flying menace, TIP! jump down on an Ogre or Big herder, this will unlock the centre trapdoor
STEP 21 descend the centre trapdoor of the advanced Basin to an Etherals Battalion, so make sure you can fight the Etherals! help yourself to an entire suit of magnificent Mirror Armour TIP! dont let the Etherals surround you, TIP! after grabbing the Mirror Armour see the strange half powered wall lights? the southern lamp marks a secret stairway but take all the armour first!STEP 22 after defeating the Etherals descend the centre trapdoor to Pushblocks 5PUSHBLOCKS 5 see the video https://www.youtube.com/watch?v=fv1BEL66OwY STEP 23 this is from the Air Etherals battle and includes Fire Etherals so keep your Etheral weapons ready. a wall button unlocks the awaiting fire etherals, defeat one to energise the Pushblocks 5STEP 24 these pushblocks cannot all be moved, there are three which are up against a "SOLID WALL" so how do you move them? (see Special Solutions further down this page!) so do energise the pushblocks but move on from here for now PUSHBLOCKS 6STEP 25 head back to the Forest and enter the Tomb from the outside, descend from the mortar ledge three ledges down - (you are now on Ledge 1) you may find that a portcullis in the Northern ledge has now unlocked revealing a Responder Station, defeat the bizarre creatures there or skirt them to a stairs down to Pushblocks 6STEP 26 these pushblocks dont seem to energise! how to energise these? descend the side stairs to the Castle where an empty chamber is found, the crew see a PRESSURE PLATE! what could activate it? the activation of this pressure plate energises the PUSH BLOCKS above! TIP! if you solve the pushblocks descend the trapdoor to the SEWERS below, youir crew find themselves in a sacred Catacombs and resist the temptation to take ANYTHING! locate the portcullis, ok its locked, now locate the mess on the floor, now locate the bones on the floor, now the nearest altar, place an item ONTO it, the portcullis can be heard unlocking! SHAMAN STAFFSTEP 27 see STEP 6, did you imprison a couple of those Librarians? as advised in Step 6, if you did then the Shaman Staff can be yours! get one of the Librarians to activate the pressure plate specified in Step 26, then slay him and find a further pressure plate nearby that unlocks the holy SHAMAN STAFF! if you only have one Librarian captured then at least that will energise your push blocks as mentioned in Step 26 but try to maneuvre two librarians if you can!STEP 28 check the Dungeon balconey, to do this descend from the Beach inside the cave there is a pit staright down to the Dungeon basin, ascend a ladder to the Dungeon balconey and carefully explore the balconey.SPECIAL SOLUTIONS: TIPS>> difficult pushblocks with blocks up against a wall, can't be solved?<< go to Starter Beach, find cave with pit down, descend. now ascend ladders to balconey, find newly open portcullis, enter new mission there, follow this path, down next pit and next etc TIP! ensure that you explore the entire balconey around the arena! the gates are there! >> Passages mission (Junior) can be done via a single teleporter in the Castle Tower (mentioned in Intro Preamble at top) - the Teleporter activates a couple of minutes after the game starts, so check for it a couple of minutes into gameplay. there is another way to access passages, try the balconey on Tomb level, there is a stairs on the N balconey that route to a frozen forest, near to that stairs are another stairs close by. if you can find it ... that could also lead to passages. (sometimes its closed off)<< The mission starts in a quiet Swamplands but dont be fooled, this quest is not for the faint hearted>> Passages mission (advanced) << see difficult pushblocks with blocks up against a wall ABOVE, the action needed follows on from that , once you have solved the difficult pushblocks with blocks up against a wall, keep an eye on that location! check all walls and if nothing unusual just check back in 20 minutes time and keep checking, the Entrance to the advanced mission will OPEN hereGEMSred : from SW teleporter to Sewersgreen : from SE teleporter to Frozen forestblue : wizard battle, first defeat all teleporter mutantsrope? mortar? go to tomb basin arena, descend centre pit to pushblocks, find wall button, activate pushblocks, solve puzzle move onto Sewers where rope/ mortar foundRoutes to Teleporter RoomTIP! once the Teleporter Room (Castle) has been visited once THEN try these routes to return there again.TOMB > from the Tomb Level take the western passage to the castle.PYRAMID (BARRACKS) > ascend the ladders in the Barrcacks to the top of the Pyramid, past the 3 tomb locks and keep turning right to the Castle.FOREST > from the Forest enter the Pyramid and then left through the sister Medusa chamber. Teleporters by nameRed Cloth banner - Passages mission (only available early on).1st setIvy - top of Pyramid (only available if crew have unlocked Pyramid gates).candles - green gem.mess on ground - red gem .pit down - Stormseed Orb.2nd setwall torch - plate armour missionmushrooms - Crystal Armour and pit down to Chitin Armour and Potionsmess on floor - assassin dagger & Maulno marker by stairs - Foraging mission , collect a few herbs3 tomb locksthe crew finally find a third Tomb key and find Toorum's leather set, plus are stunned to find his remains in the Tomb Ruins Crew from a wrecked Schooner just offshore survive to stumble ashore. In the morning they awake bleary eyed to see a monumental tower looming over them. Upon entering the tower they find nothing and return to the Beach.the Beach also appears empty apart from a wooden bridge built from a cave into trees and going further into another Beach.What are the crew to do? There are two obvious shafts that the crew could descend into and even a third in the strange cave. This place is a mystery, can they crack it?
Notifications
0 comments