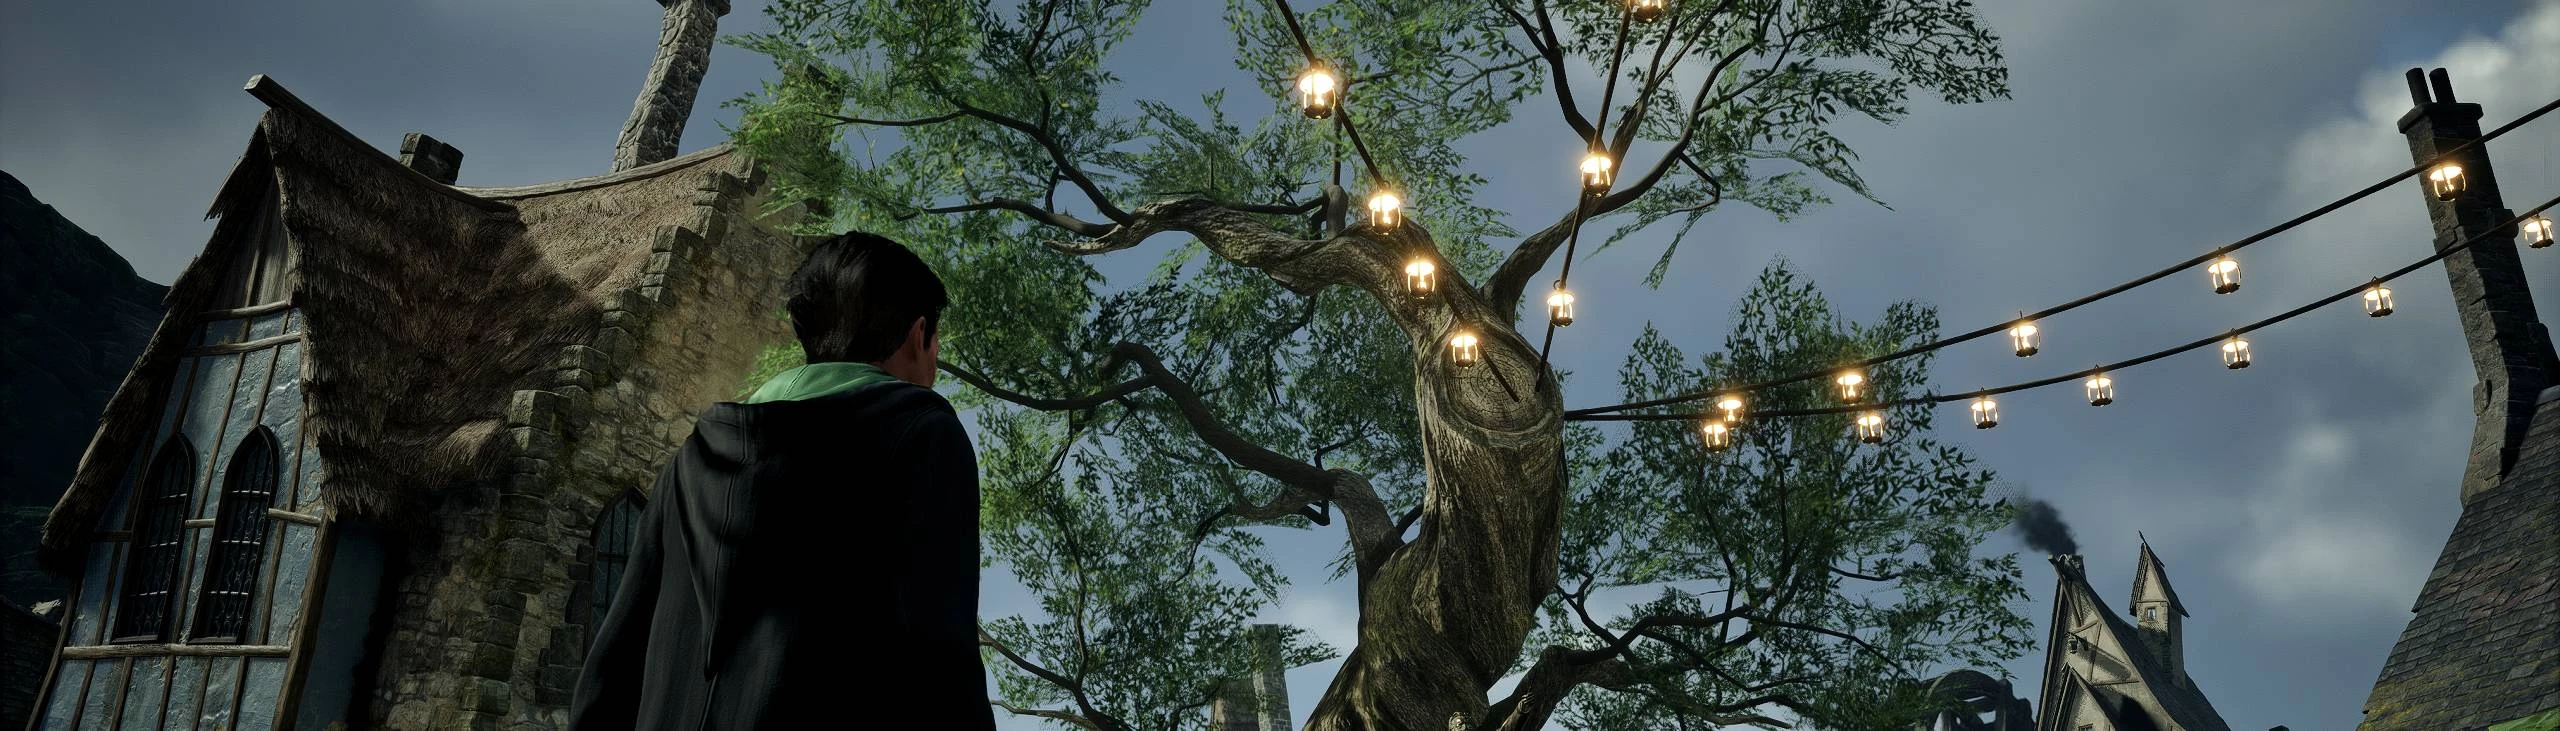
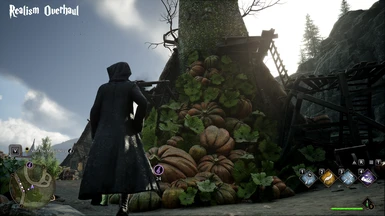
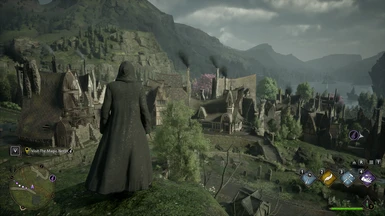
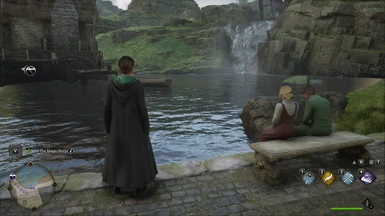
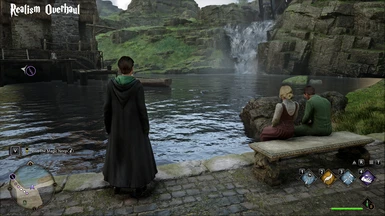
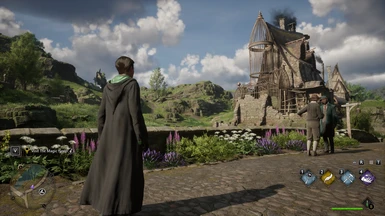
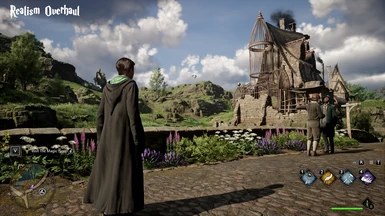
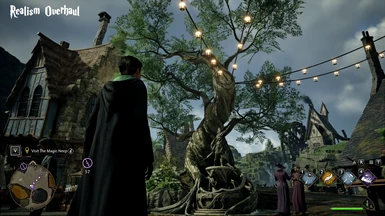
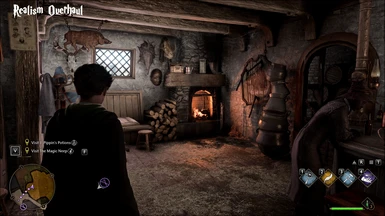
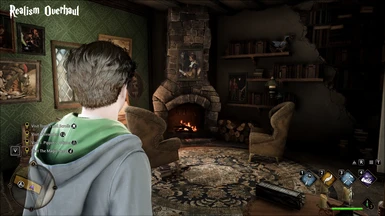
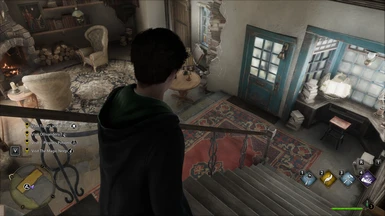
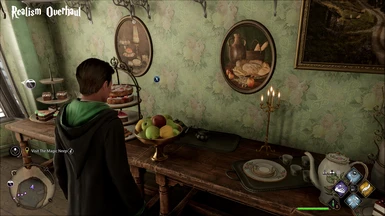
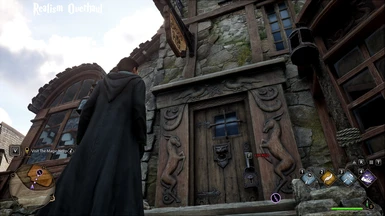
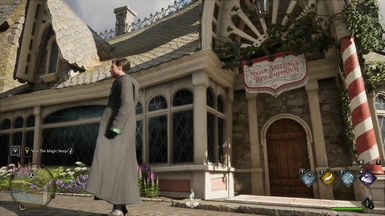
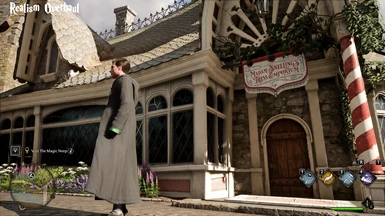
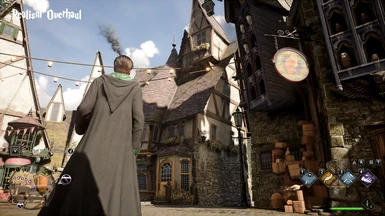
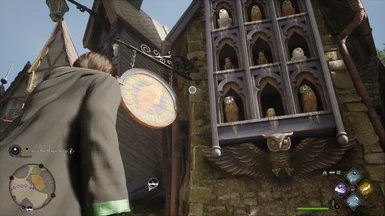
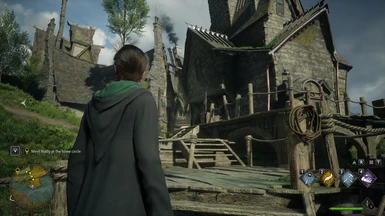
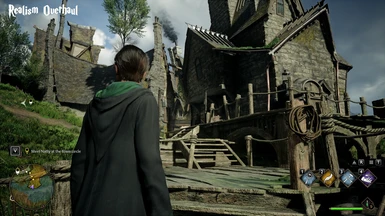
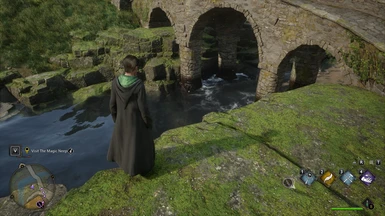
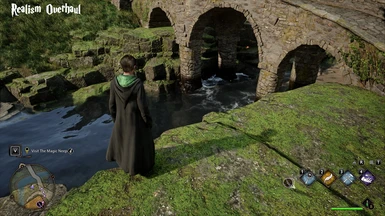
I've now added my personal Reshade which is called 'Realism Overhaul 2023' I wasn't originally going to, but because of how many kind comment's I've received I thought it would be nice to add it as another optional choice.
Here's to you all, I hope you like as much as I do. <3
Please, please ENDORSE if you like what you see :)
IMPORTANT: If you're using the latest reshade, it may/may not have 'clarity' in the options.
I HAVE now added the file to my 'files' section.
In addition to this, some people are experiencing crashes with their game, maybe try deleting Ambient Light from the 'shaders' folder.
Also if you can't get the reshade to work as a text, then do the following:
You can use a text editor such as Notepad. Once you've added the text you want to save, select File > Save and use the . ini extension in the file name example ( realismOverhaul.ini )
EVERYTHING YOU NEED WILL BE IN THE COMMENT SECTION SO PLEASE READ THROUGH IT IF YOU'RE UNSURE, OR LOOKING FOR FIXES AS TO WHY THIS ISN'T WORKING STRAIGHT AWAY.
Thank you to everyone that's left positive comments, you're all appreciated immensely. I will be taking time to make reshades for other games.
It's the 'Home' key haha. Depends if it's on your keyboard. If your keyboard doesn't have the button, you may need to go into the 'RESHADE' config files and change the hotkey.
Thanks for this, gonna try it out soon. But do you really mean for us to install ALL of the add-ons? Many of them seem extremely superfluous but I don't know what you actually use in your preset.
when i turn on [Technicolor2.fx] it seems (hogwars legacy relaism overhaul 2023 reshade) it seems it gets more "white filtery" i tried to tune brighness or gamma but it still makes it strange when i activate it. here 2 pics one with Technicolor2 filmicpass and fakehdr off and one with all on. do i need to keep technicolor checked or what does it add besides making everyting more white'isch ? maybe i just untick all 3 options? on:
It's completely optional.. people like to tweak their reshades to get their own personal preference. Though I'd check your settings etc in-game, as they may affect it. I can't say I'm having the same issue myself.
For me the AMD Adaptive Sharpening causes tiny pixelated image, to be precise it's oversharpening for me. Also with Real HDR on turning FakeHDR off looks better.
But I love this. Came back to this today after originally using it when it came out and it still looks great. Awesome job.
Thanks a lot! Yeah it's different for all, but I'm very glad you like it. Seeing how much people like this makes me feel so joyful. Thank you for the support! :)
You extract the file to a destination on your computer, preferably the same drive your game is installed on, and then search for it in the reshade menu. :)
I took a big fps hit the crazy thing is it isn't that much he added to the reshade to make the game look that much better. if you installed mods before this is easy as cake to install i tried downloading the newer version of your updated one it does not come with a file I can extract to my win64.i will be uninstalling this overhaul.. Thank you for sharing your reshade build. I would give it a 5/10
thats because the reshade basically slaps a sharpening filter on top of the game. if youd really want more detail, play at higher resolutions or use the dlss upscale sharpening wich works well.
Hello, Could someone add a tutorial for reshade and installing presets? I downloaded it and I use winrar, when i extract the folder it is Txt file instead of config file. I am not sure what to do. Thank you!
Thanks for posting this. However as a long time mod user (who's used mods for TES/Fallout/The Sims etc since Morrowind/F03/TS2 came out, here are some feedback:
The video's basic framework/foundation process for setting up the shader file is similar for the game. However,
1. Please consider adding a detailed, updated version on how to install this mod for this game (and not using another franchise). This video creates even more confusion for ppl looking to install the re-shader. More explicitly for those folks who've never installed a mod for a complex PC game like The Sims franchise. NVM the fact it's for TS4 (vs. the more straightforward TS3). And especially because it's NOT explicitly designed towards Hogwarts Legacy---which has DIFFERENT folder structure from TS4.
2. Please add the file path where updated files like the !!!Hogwarts Legacy Realism Overhaul 2023 Reshade.txt need to be installed. Based on all the feedback and videos I've seen on installing the reshader to date, this seems to be the Steam vanilla game path executable
C:\Steam\Steamapps\common\Hogwarts Legacy
and NOT the Phoenix Win 64 folder (the UE4SS-RE/RE-UE4SS xinput) where this shader mod framework's files are stored in the binaries:
3. Please also clarify which of these file directories the re-shader is updating/modifying the game's .exe in. The game has TWO .exe located in the directory file paths. And so is very confusing for Steam players if the reshade exe doesn't automatically identify which .exe to modify on installation. Unlike the old 4.9.1 version, the latest 5.7.0 version doesn't appear to automatically select which of these exe to update. And the executable doesn't appear to remove/delete the pre-existing older reshade versions. So TWO versions of the re-shader will exist in the game folder
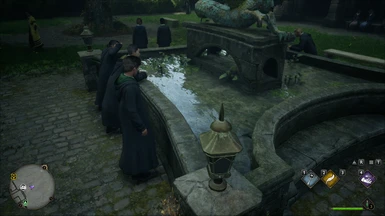
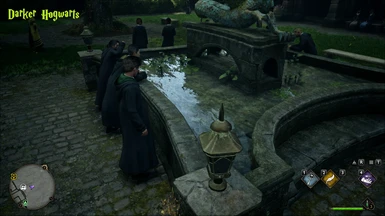
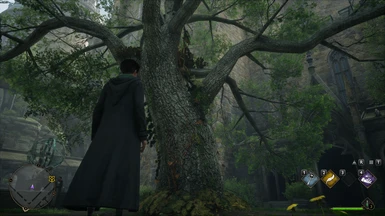
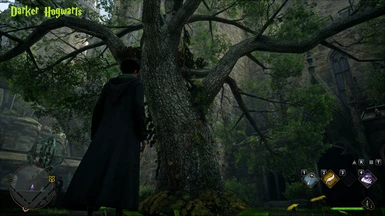
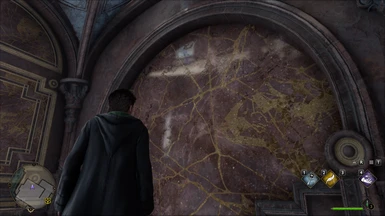
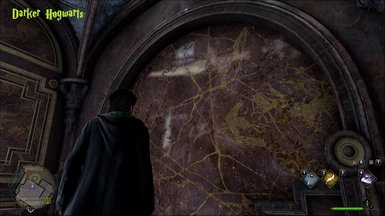
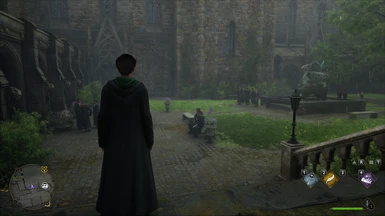
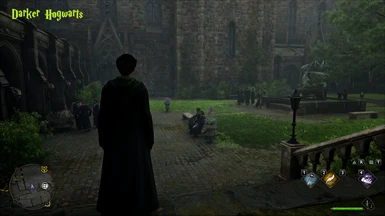
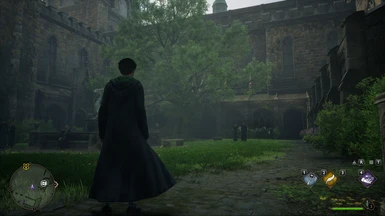
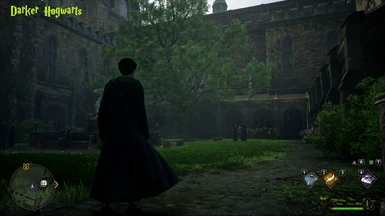
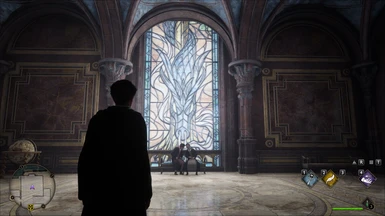
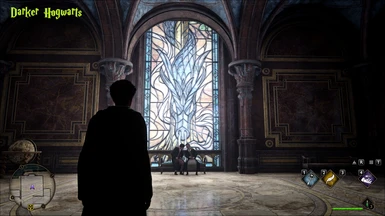
4. Please consider tagging/identifying the images with their associated reshader version in the images section. The Realism Overhaul is the only verison which can be identified (with before/after screenshots) because it's been tagged/labeld as such. But the other before/after images can't be identified. So you can't really tell the visual difference between Real Life v. Darker Hogwarts in the image gallery because these aren't tagged/id as such.


413 comments
Thank you all <3
I've now added my personal Reshade which is called 'Realism Overhaul 2023' I wasn't originally going to, but because of how many kind comment's I've received I thought it would be nice to add it as another optional choice.
Here's to you all, I hope you like as much as I do. <3
Please, please ENDORSE if you like what you see :)
I HAVE now added the file to my 'files' section.
In addition to this, some people are experiencing crashes with their game, maybe try deleting Ambient Light from the 'shaders' folder.
Also if you can't get the reshade to work as a text, then do the following:
You can use a text editor such as Notepad. Once you've added the text you want to save, select File > Save and use the . ini extension in the file name example ( realismOverhaul.ini )
Thank you for the words of encouragement, without you guys I wouldn't be doing what I do!
This is not appreciated or welcome!
EVERYTHING YOU NEED WILL BE IN THE COMMENT SECTION SO PLEASE READ THROUGH IT IF YOU'RE UNSURE, OR LOOKING FOR FIXES AS TO WHY THIS ISN'T WORKING STRAIGHT AWAY.
Thank you to everyone that's left positive comments, you're all appreciated immensely. I will be taking time to make reshades for other games.
Thanks again for being amazing.
Scottyus1
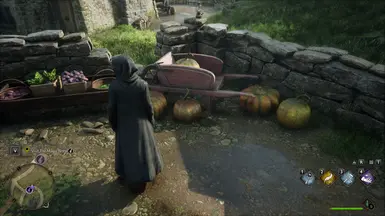
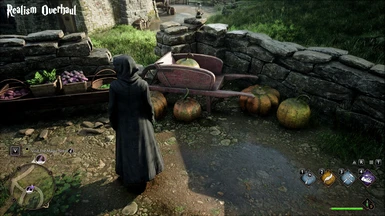
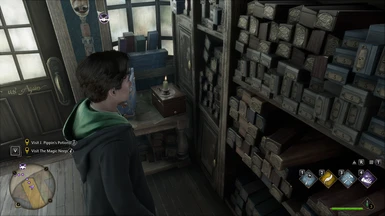
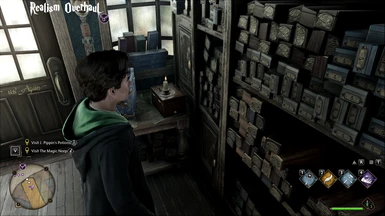
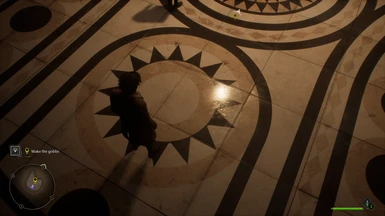
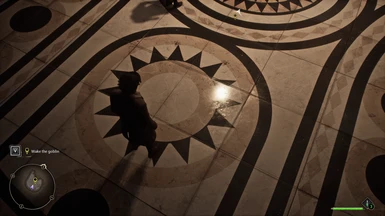
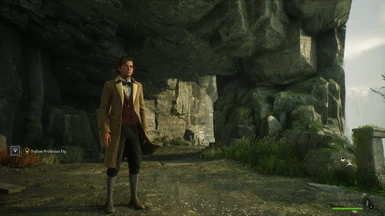
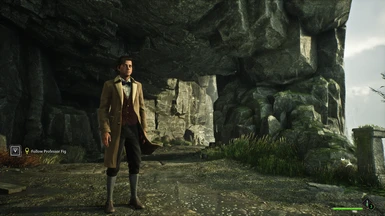
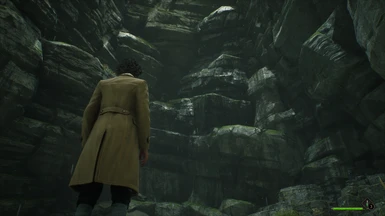
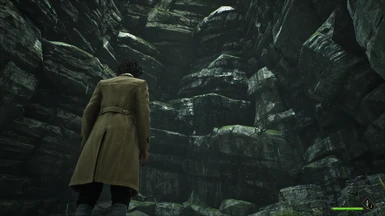
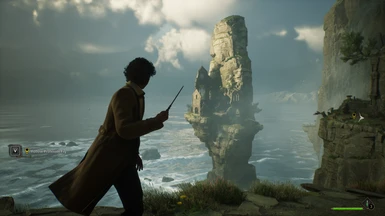
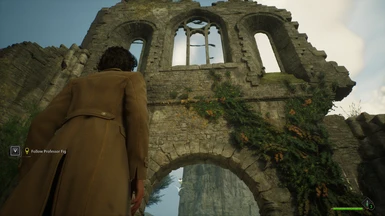
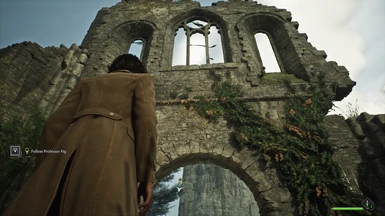
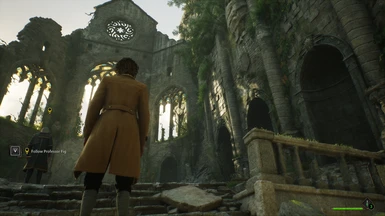
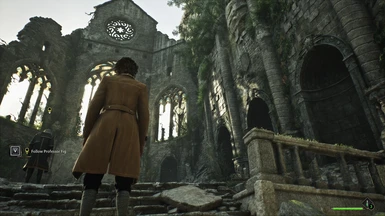
on:
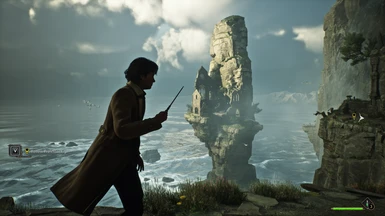
Off:
But I love this. Came back to this today after originally using it when it came out and it still looks great. Awesome job.
my pc spec
3070ti
64GB of RAM 3600
ryzen 7 5800x
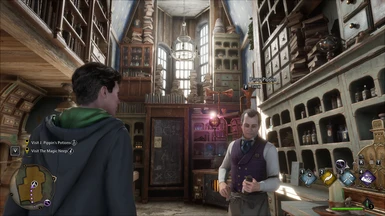
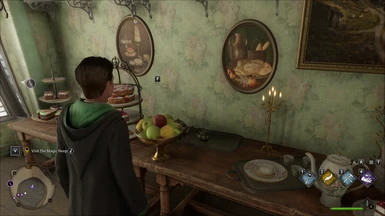
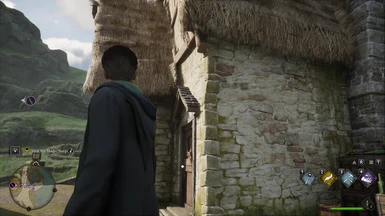
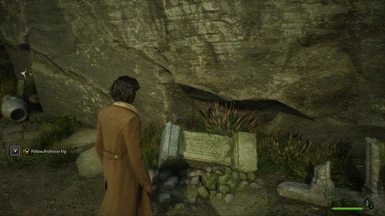
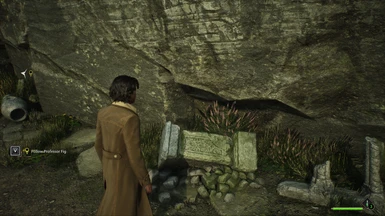
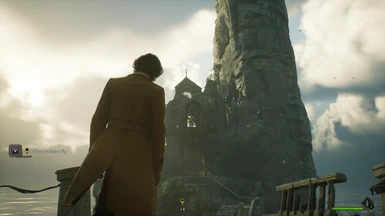
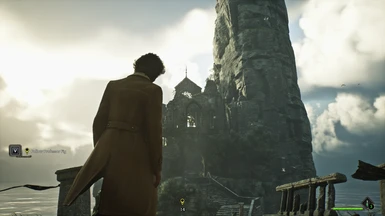
When looking at your before and after pictures, it felt like I was putting on glasses and getting a clearer picture 😅
Hope this helps :)
The video's basic framework/foundation process for setting up the shader file is similar for the game. However,
1. Please consider adding a detailed, updated version on how to install this mod for this game (and not using another franchise). This video creates even more confusion for ppl looking to install the re-shader. More explicitly for those folks who've never installed a mod for a complex PC game like The Sims franchise. NVM the fact it's for TS4 (vs. the more straightforward TS3). And especially because it's NOT explicitly designed towards Hogwarts Legacy---which has DIFFERENT folder structure from TS4.
2. Please add the file path where updated files like the !!!Hogwarts Legacy Realism Overhaul 2023 Reshade.txt need to be installed. Based on all the feedback and videos I've seen on installing the reshader to date, this seems to be the Steam vanilla game path executable
C:\Steam\Steamapps\common\Hogwarts Legacy
and NOT the Phoenix Win 64 folder (the UE4SS-RE/RE-UE4SS xinput) where this shader mod framework's files are stored in the binaries:
C:\Steam\Steamapps\common\Hogwarts Legacy\Phoenix\Binaries\Win64
3. Please also clarify which of these file directories the re-shader is updating/modifying the game's .exe in. The game has TWO .exe located in the directory file paths. And so is very confusing for Steam players if the reshade exe doesn't automatically identify which .exe to modify on installation. Unlike the old 4.9.1 version, the latest 5.7.0 version doesn't appear to automatically select which of these exe to update. And the executable doesn't appear to remove/delete the pre-existing older reshade versions. So TWO versions of the re-shader will exist in the game folder
4. Please consider tagging/identifying the images with their associated reshader version in the images section. The Realism Overhaul is the only verison which can be identified (with before/after screenshots) because it's been tagged/labeld as such. But the other before/after images can't be identified. So you can't really tell the visual difference between Real Life v. Darker Hogwarts in the image gallery because these aren't tagged/id as such.