


0 of 0


File information
Created by
SgtPorkchop91 and TenabraeUploaded by
SgtPorkchop91Virus scan
Safe to use
UPDATE: Introduced randomized gear camo/color to various Sentinel NPC archetypes
This is a remastered version of my previous Sentinel Cosmetic Mod.
SHOUTOUTS to the following:
Tenabrae - for his Weapon Accessory Emporium Mod and NPC Weapons Mod
AntoineFlemming - for his advice and spearheading the NPC camo edits
FlawlyBoy and MakimotoJin for outfit suggestions and critiques
This mod uses buildtables (instructions at the bottom of the Description Page)
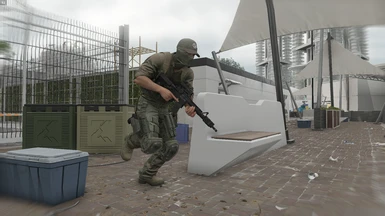
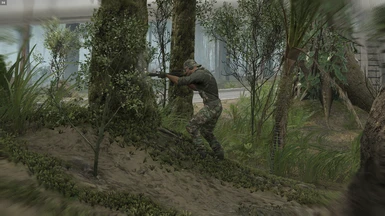
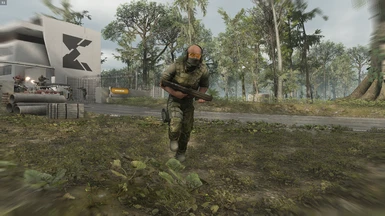
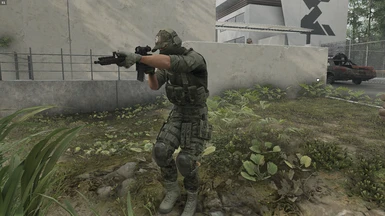
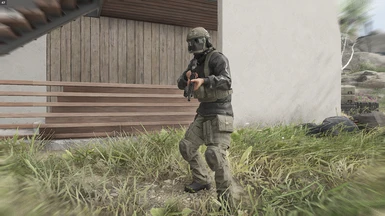
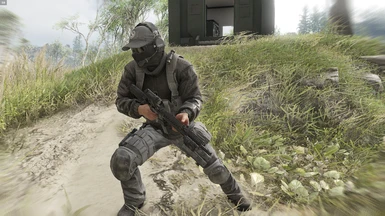
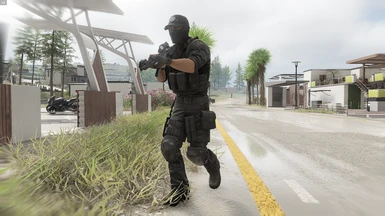
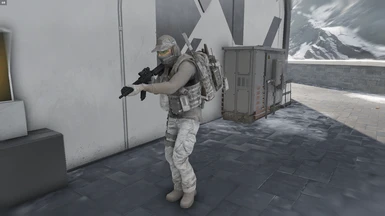
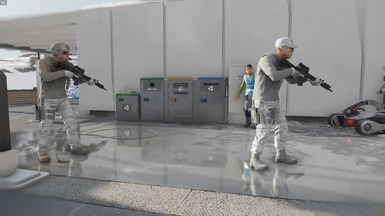
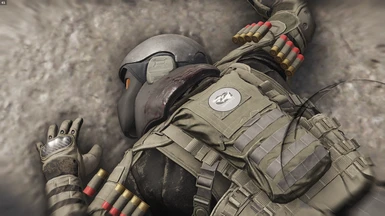
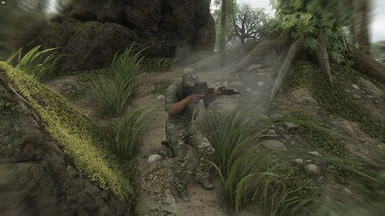
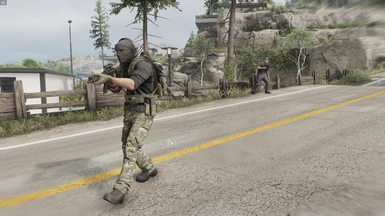
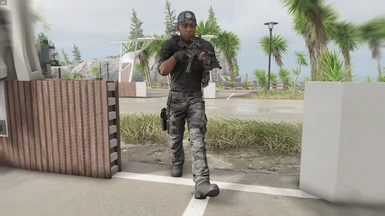
Many of Vanilla Sentinel Outfits have been changed, including Shirts, Pants, Gear, Hats, Balaclavas, and Shoes
Installation Tutorial - Teammate (For Cosmetics)
Installation:
Installation Tutorial - Resources Patch 01 (For Patch & Camos)
Installation:
PS: No more Pink or Missing Textures from my old mod
Installation Tutorial - DBContainerEntry (For the loadout aspect)
Installation:
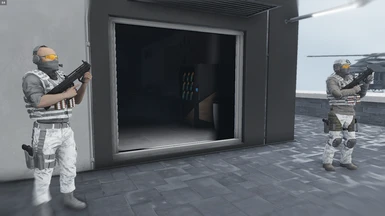
- Included multiple variants of Multicam as uploaded by CommanderVeers in their mod (specifically, MC Auroa, MC Transitional, MC UCP, MC NATO Woodland and MC Alpine)
- Changed the Urban ERDL Camo to a fictionalized US4CES Snow Camo variant
- Sentinel NPCs will now wear 8 camos for Urban and Jungle terrain and 4 camos for Snow terrain
This is a remastered version of my previous Sentinel Cosmetic Mod.
SHOUTOUTS to the following:
Tenabrae - for his Weapon Accessory Emporium Mod and NPC Weapons Mod
AntoineFlemming - for his advice and spearheading the NPC camo edits
FlawlyBoy and MakimotoJin for outfit suggestions and critiques
This mod uses buildtables (instructions at the bottom of the Description Page)
Many of Vanilla Sentinel Outfits have been changed, including Shirts, Pants, Gear, Hats, Balaclavas, and Shoes
- Muscle shirts to Rolled Up Tshirts
- PMC Pants to Cargo pants with Kneepads
- Jeans to Cargo Pants
- Ranger Boots to Combat Boots
- Mk3 Vests to Armored Vests and Chest Rigs
- Added Helmets to some PMC NPCs
- Changed the color of gear from Khaki to Olive Drab
- Changed some or all of Sentinel's Glasses or Goggles
- Changed the loadouts of some NPC types to look more appropriate for their roles
Riflemen, and Officers now get the M16A4 rifle
They get the AR18 rifle, but files are included to change the look and sound of the AR18 to the M16A4 with the choice of M4a1 gunshots or ACR gunshots
Callers and Drone Carriers get the R4C rifle
Snipers get the MSR rifle - Added Camos to some Archetypes
- and other cosmetic changes/additions to make them closer to their concept art
Installation Tutorial - Teammate (For Cosmetics)
Installation:
- Install AnvilToolkit and Net5 (in AT's Description).
- Find Ghost Recon Breakpoint's Directory and link it to AT.
- Go into settings and disable Compression (Dont ask me why, I also dont know)
- Double Click The "DataPC_patch_01.forge" and wait for it to unpack.
- In the search bar (Top right corner) search for "Teammate" and double click and wait for it to unpack.
- This will create a folder called "_-_TEAMMATE_Template.data"
- Download my mod, open each folder, copy all buildtables and paste them inside the Teammate folder (DO NOT COPY & PASTE THE FOLDERS, COPY & PASTE THE BUILDTABLES WITHIN EACH "PMC..." folder
- Repack this folder in Anvil and then repack the "DataPC_patch_01.forge
Installation Tutorial - Resources Patch 01 (For Patch & Camos)
Installation:
- Download and install AnvilToolkit.
- Set up Anvil Toolkit, disable the use of compression in Settings->Files and set compression ratio to 0.
- Unpack DataPC_Resources_patch_01.forge
- Open Extracted folder in your GRB directory and open the DataPC_Resources_patch_01.forge folder.
- Copy the .data folders into the DataPC_Resources_patch_01.forge/Extracted subfolder. If the Extracted subfolder doesn’t exist, create it. Your file path should look like Extracted/DataPC_Resources_patch_01.forge/Extracted/(your mod folders here)
- Select the added folders in AnvilToolkit, right-click, and select "Repack" - you should see the message
Finished repacking data files | Successful: NN | Failed: 0 - Head back up to the top-level Extracted folder in AnvilToolkit and click on DataPC_Resources_patch_01.forge
- Right-click the folder, and select "Repack" - you should see the message
Successfully written forge file! - After it's done repacking, you can delete the Extracted folder if you so desire. I don't recommend it, though, since there'll be more mods like this to come, and you'll probably want to install them!
PS: No more Pink or Missing Textures from my old mod
Installation Tutorial - DBContainerEntry (For the loadout aspect)
Installation:
- Download and install AnvilToolkit.
- Set up Anvil Toolkit, disable the use of compression in Settings->Files and set compression ratio to 0.
- Unpack DataPC_patch_01.forge
- Open Extracted folder in your GRB directory and open the DataPC_patch_01.forge folder.
- Unpack 1_-_DBContainerEntry_0X....... (should be near the top). This may take a few minutes, its a big file
- Copy the loose files from the mod download into the new unpacked DBContainerEntry folder. If you want a backup, look for the identically named files that are already in there (the numbers in front are a good way to search) and save them elsewhere.
- Select the DBContainer folder in AnvilToolkit, right-click, and select "Repack" - you should see the message (This may take a few minutes. Be patient)
Finished repacking data file | Successful: 01 | Failed: 0 - Head back up to the top-level Extracted folder in AnvilToolkit and click on DataPC_patch_01.forge
- Right-click the folder, and select "Repack" - you should see the message
Successfully written forge file! - After it's done repacking, launcher the game
- Profit