


This tutorial assumes you have a cell or worldspace set up already, and want to turn it into a VR Framework simulation. This covers the very basics.
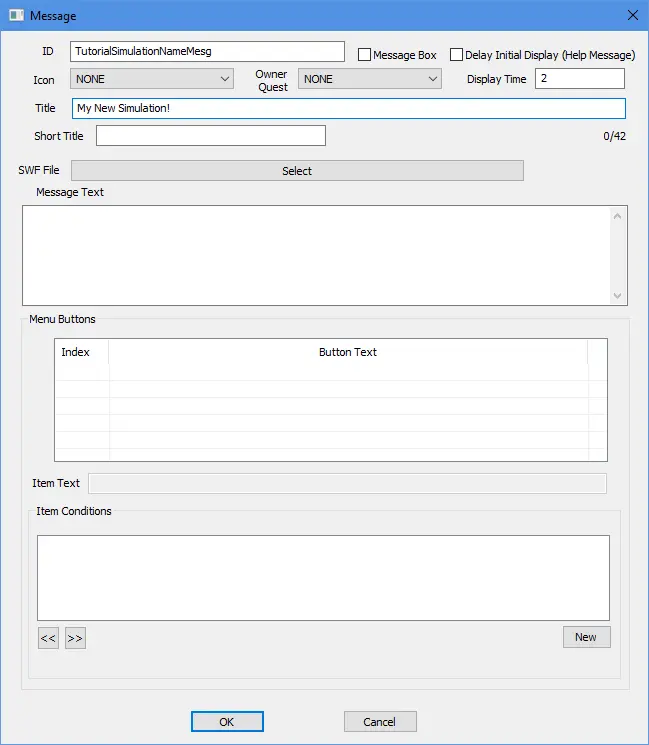
If you want to create a VR Workshop, also see this.PreparationFirst thing you need to do, is creating a new Message, to hold your simulation's name. You only need to fill out the Title field:
Next, prepare your cell. You need two things:
- An Entrance Marker. This is what the player will be moved to, when they enter the simulation.
- A door to exit the simulation.
For the entrance marker, it doesn't really matter which form it is. It just shouldn't cause issues when the player appears there. I recommend using the Static "XMarkerHeading".
For the exit door, you can use the Activator "praVRF_SimExitDoor".
To make your own exit door, create an Activator with the script "praVRF:ExitSimActivator" attached to it. Don't forget to fill out the "ManagerQuest" property!
Creating the Tape Item
Under MiscItem, search for "praVRF_VRTape_Template", and make a copy.
Why MiscItem? Shouldn't this be a holotape?
To be perfectly honest, originally, I wanted simulations to be proper holotapes, which you could load through connected terminals. However, this would have made the setup process rather convoluted. You would have to configure a Terminal record, in addition to the item itself.
Plus, Holotapes have some limitations:
- Holotapes cannot have keywords assigned. This makes it harder to make an inventory which only recieves items with a specific keyword.
- Holotapes cannot be traded. Want to have a vendor sell your simulation tape? You must set up a scripted misc item which removes itself and
gives the player the proper tape.- Holotapes cannot have Material Swaps. To make a differently-looking holotape, you must make a copy of the .nif file, and edit it in NifSkope
to point to a different material.
Now, in the copy you just made, open the properties of the script "praVRF:SimulationData". The two important settings are "EntranceMarker" and "SimulationName".
For the EntranceMarker, click "Pick Reference in Render Window", and pick the XMarkerHeading you placed within your cell before.
For "SimulationName", select the message you created before.
The properties should now look like this:

For an explanation of the other fields, see this article: https://www.nexusmods.com/fallout4/articles/3929
Adding the Recipe
To make this new tape craftable at the VR Workbench, set up a ConstructibleObject like this:
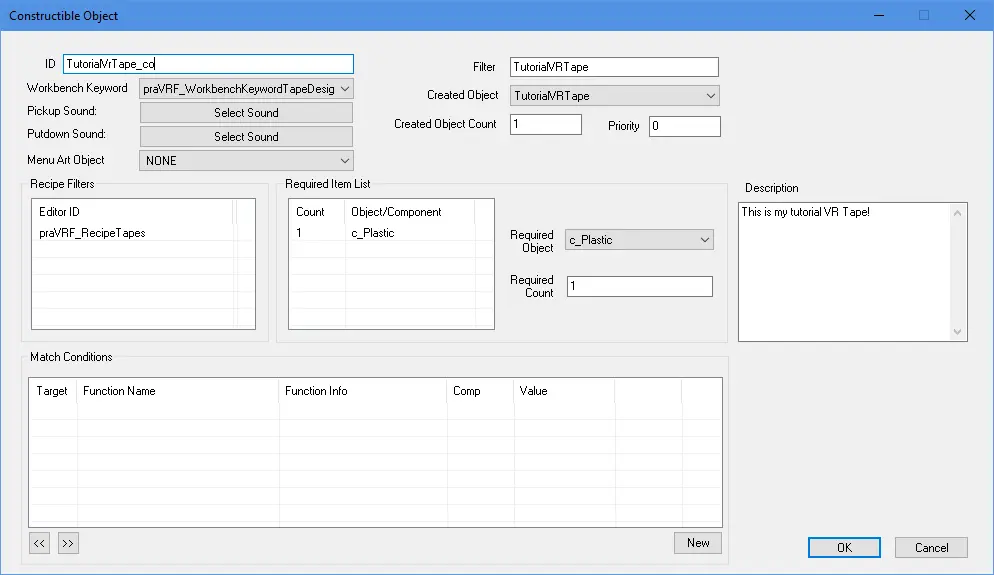
Under "Created Object", select your tape. Tip: type the EditorID or parts of it into the "Filter" field.
Under, "Workbench Keyword", select "praVRF_WorkbenchKeywordTapeDesign".
Under "Recipe Filters", add "praVRF_RecipeTapes".
For the "Required item List" or the "Description", you can put whatever you want.
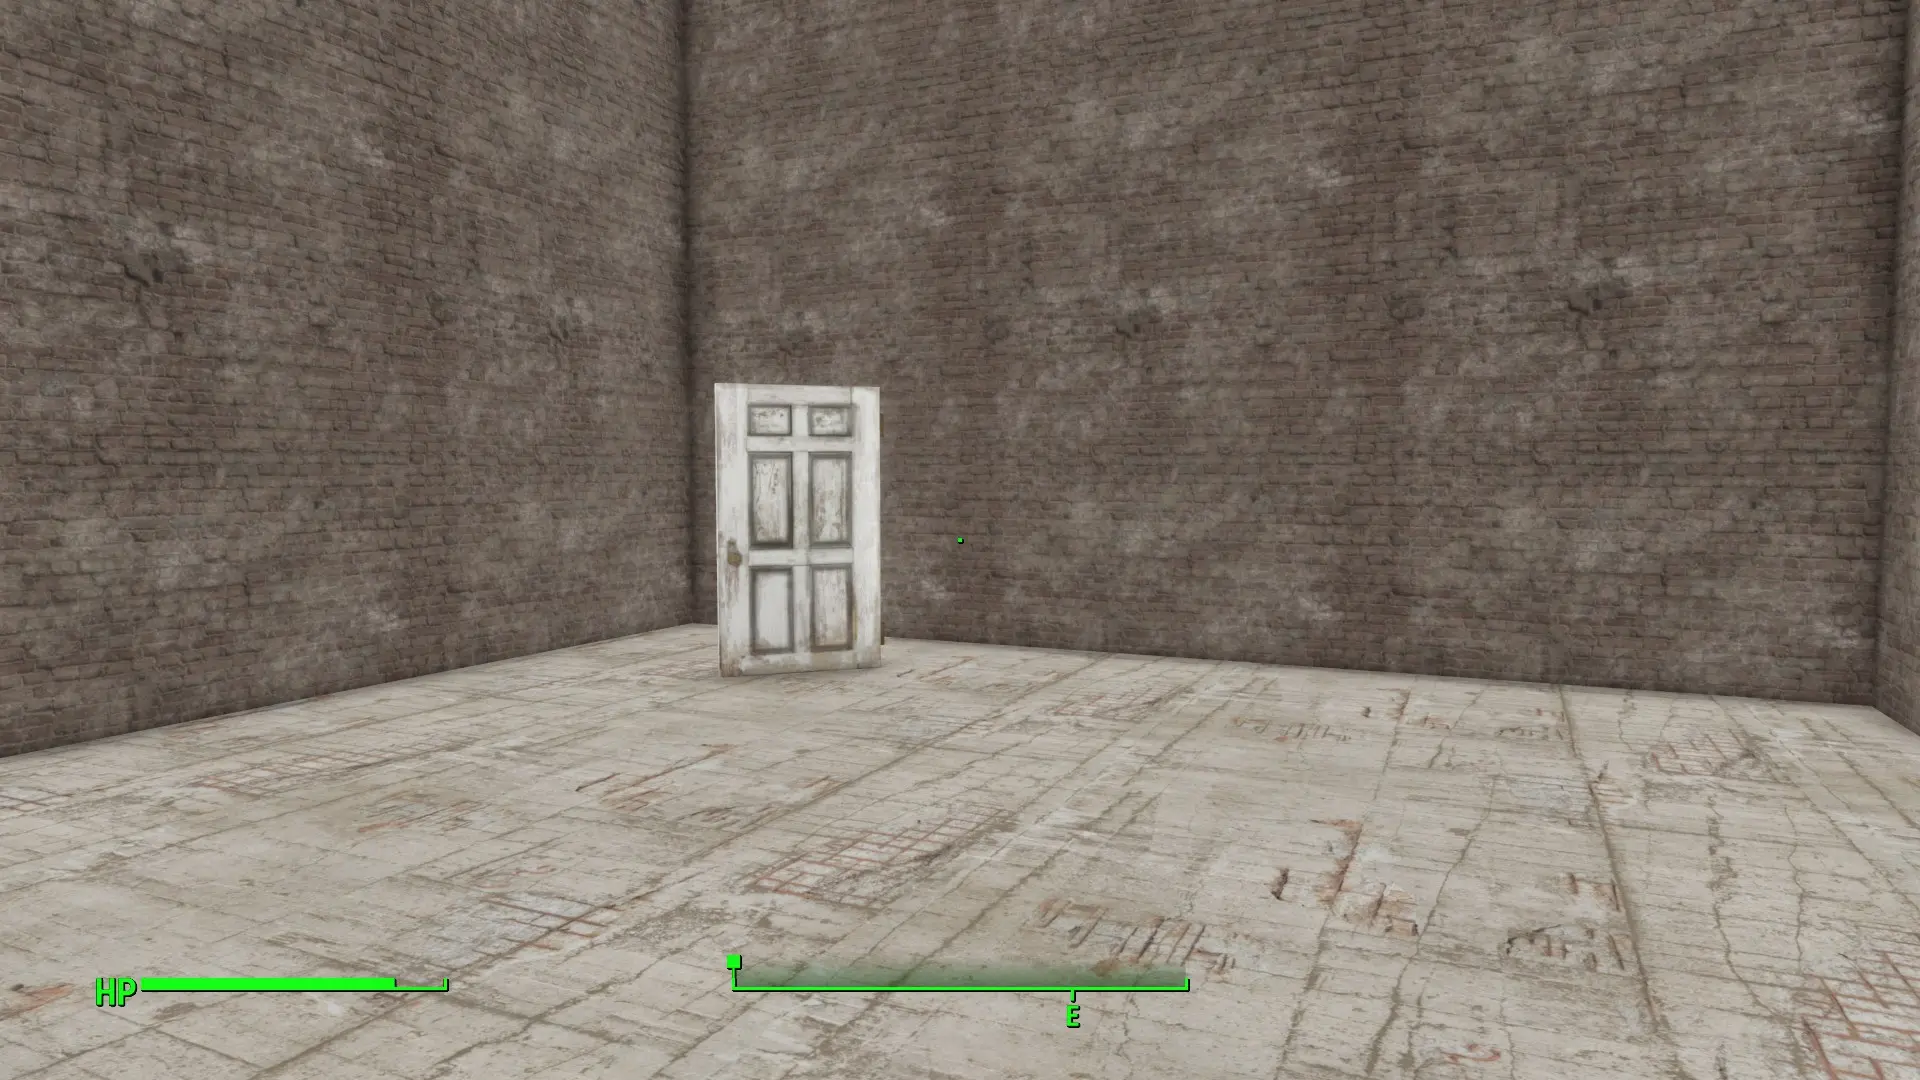
Testing In-Game
You're done! Time to start the game. If you did everything right, it should look something like this:


0 comments