


How to Make Translation Mod (Advance)
-
Endorsements
-
Unique DLs--
-
Total DLs--
-
Total views--
-
Version1.1.0
- Original File
- Download:
- Manual
0 of 0

File information
Created by
AlexGoDUploaded by
darthalex2014Virus scan
Some manually verified files
About this mod
Do you have a favorite mod but there's no translation for it?
Do you have a favorite mod whose translation hasn't been updated for a long time?
This guide is for you!
- Requirements
- Permissions and credits
-
Translations
- Russian

Step 0. Preparing the programs
Baldur's Gate 3 Modder's Multitool (throw the files from the archive into the Translate\Tools\BG3_Modders_Multitool folder)
lslib (throw the files from the archive into the Translate\Tools\ExportTool folder)
BG3-Tools (throw the files from the archive into the Translate\Tools\BG3-Tools-Translator folder)
Optional:
Translator++ (Archive password: Dreamsavior) (throw the files from the archive into the Translate\Tools\Translator++ folder)
Also, you will need to go into the settings of Translator++ and select the language you will be translating from and the language you will be translating into.
Notepad++ v8.6.4 (throw the files from the archive into the Translate\Tools\npp_portable folder)
WinMerge (throw the files from the archive into the Translate\Tools\WinMerge folder)
Special thanks to the authors at the end

Step 1. Unpacking the Original Mod
- Run 1_Unpacking_pak.bat
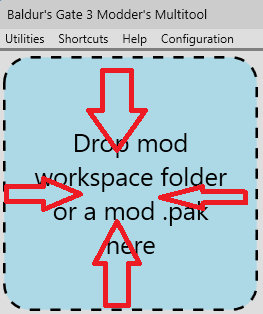
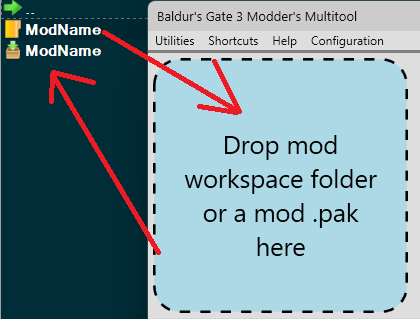
- Drag and drop the .pak file (Original mod) into Modder's Multitool (into the blue window Drop mod)
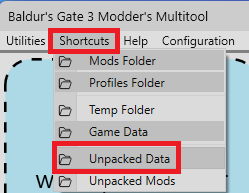
- Modder's Multitool will unpack everything into Tools\UnpackedMods\Mod_Name (you can quickly navigate there from the Modder's Multitool program - top menu - Shortcuts - Unpacked Mods)
- We only need the folders Localization and Mods. Delete all the others.
- If you have a ScriptExtender folder inside the Mods folder, delete it.
Step 2. Rename the folders
- The folder structure should look like this:
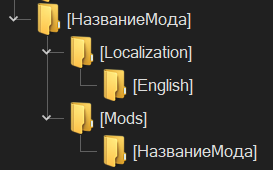
- Change both instances of the folder name "Mod_Name".
Make it different from the original mod. (for instance, I use Mod_Name_YourLanguage) - If it has the same name as the original mod, it will create a .pak file with the same name, which will cause a conflict. Step 3. What to do with the "Localization" folder
- Enter the Localization folder and create a folder named "YourLanguage".
- Go to the English (or the language from which you are doing the translation) folder and copy the file Mod_Name.xml or Mod_Name.loca from there to our "YourLanguage" folder.
- Translate the file Mod_Name.xml. (more details will be provided at the bottom "Translation of Mods")
(Proceed with the next step only after the mod has been fully translated!) - Convert the translated .xml file into a .loca file using one of the two methods below:
Method 1) Use the Export Tool (4_xml-to-loca_and_Create_pak.bat) to convert Mod_Name.xml to Mod_Name.loca.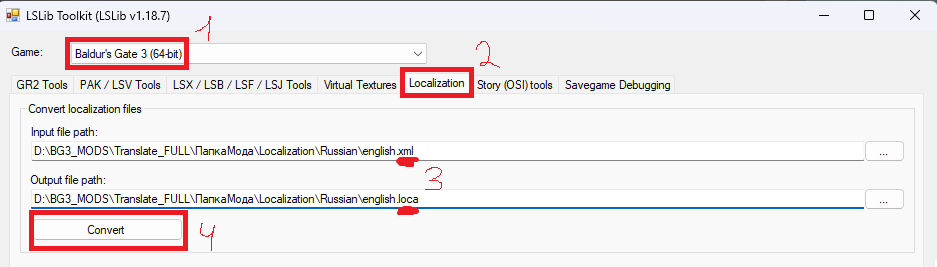
Method 2) If it's ModName.loca.xml, which has .loca before the extension, then it will be automatically converted using Modder's Multitool. (Not tested)
Step 4. What to do with the "Mods" folder
We only need the meta.lsx. (For the manual method) Delete everything else.If you are creating the meta.lsx file through AlexGoD B3 Meta Create, then go ahead and delete it.
Step 5. Editing meta.lsx
Method 1 (Manual):
You need to change the following values (via Notepad or Notepad++):
id="Folder" - The name of the folder where the meta.lsx file is located.
id="Name" - The name in the Mod Manager, it should be different from the original mod.
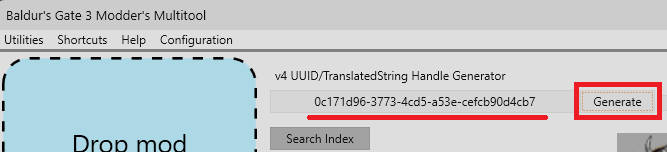
id="UUID" - It must be different from the original mod. You can create a UUID in Modder's Multitool.
I also recommend changing the following values:
id="Author" - Your name. (In English!!!)
id="Description" - A description of your mod. (In English!!!)
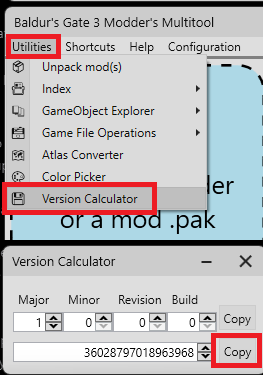
id="Version" - The version of the mod translation, you can create numbers using Modder's Multitool.
Method 2 (AlexGoD B3 Meta Create):
- Run 3_Create_Meta.exe
- Fill in the fields according to the image below.
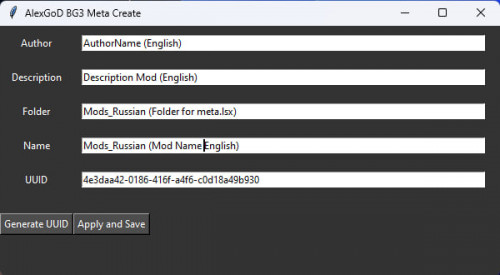
- Click Apply and Save and rename meta.xml to meta.lsx (I forgot to do it automatically)
- Move the meta.lsx file to your Mods\ModName_YourLanguage folder.
Step 6. Packaging and Testing
Drag and drop the folder into Modder's Multitool (1_Unpacking_pak_and_Create_pak.bat), after which you will receive a .zip file.
Install the zip file using the Mod Manager or Vortex and make sure that everything works well.
Step 7. Uploading the translation to Nexus
- 0) It would be better to talk with the author of the original mod beforehand and get their consent.
- Click Upload - UPLOAD A MOD
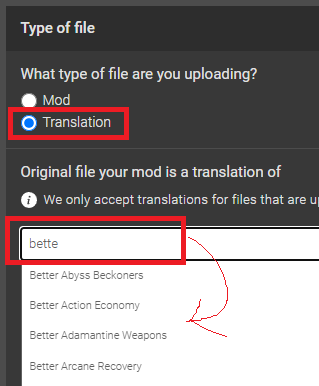
- Choose the file type - Translation
- Enter the mod name and find it in the list.
- Then fill in the rest and publish. Translation of Mods
Let's consider two types of translations: Manual and Google
Type 1: Manual Translation.
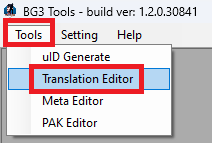
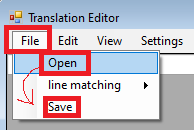
- Open the BG3-Tools-Translator program (2_Translator.bat)
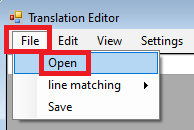
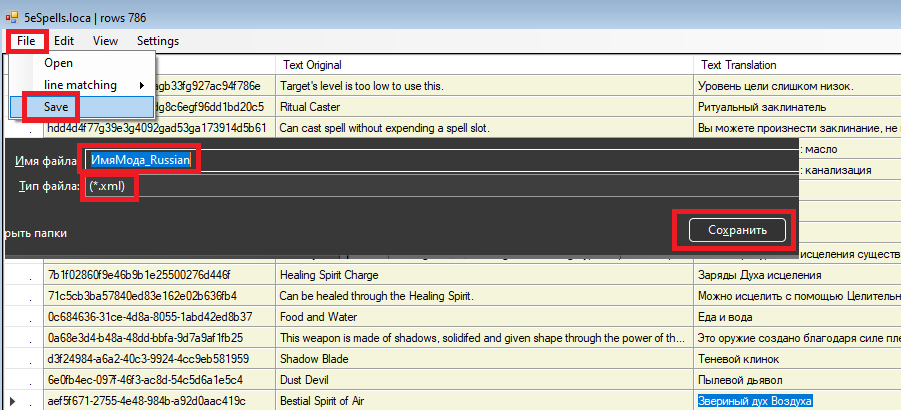
- Open the original loca or xml file (which we will be translating)
- Translate the right column, Text Translation.
Translated lines are highlighted in yellow, while untranslated lines are highlighted in white. - Save the completed translation DEFINITELY IN .xml (loca broken)
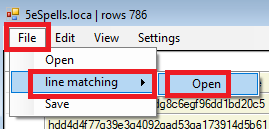
If a new version of the mod is released or you want to take translation lines from another author (which I do not condone),
you can open the original xml or loca file and then use line matching to add the ready-made lines to the right column!
Steps 5-9 - more details above!
5) Convert our xml file into loca using 4_xml-to-loca_and_Create_pak.bat
6) Then throw our ready-made loca translation into NameMode_YourLanguage\Localization\YourLanguage
7) Create meta.lsx through 3_Create_Meta.bat in the folder NameMode_YourLanguage\Mods\NameMode_YourLanguage
8) Pack our mod using 1_Unpacking_pak_and_Create_pak.bat or 4_xml-to-loca_and_Create_pak.bat
9) Upload our mod to Nexus.
Type 2: Google
- We need to extract the strings for translation from the original file.
- If the file is an Xml then move to step 3; if it's a loca, convert it to xml using 4_xml-to-loca_and_Create_pak.bat or by opening the loca through 2_Translator.bat and saving it as xml.
- Run xml-txt-gui.exe
- Specify the path to our xml file and get a txt file with lines in the same folder.
The file should contain all lines from the original: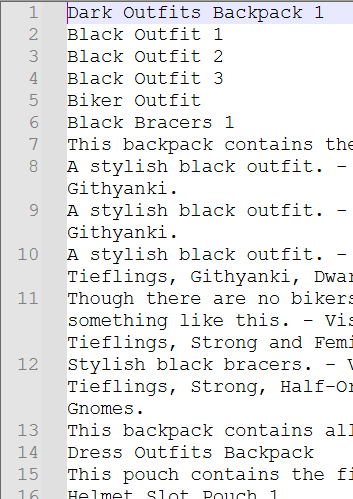
- Open 9_Translator++.bat
- Start a new project - Empty Project - Project Name 1 - Create a New Trans File
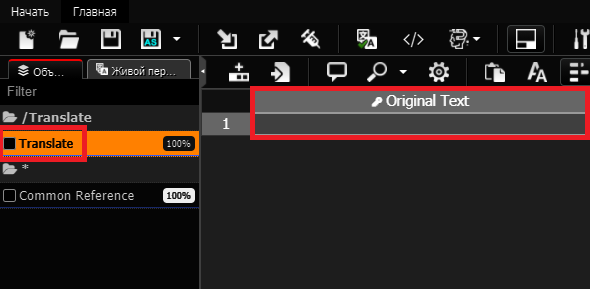
- After completion, you should get this.
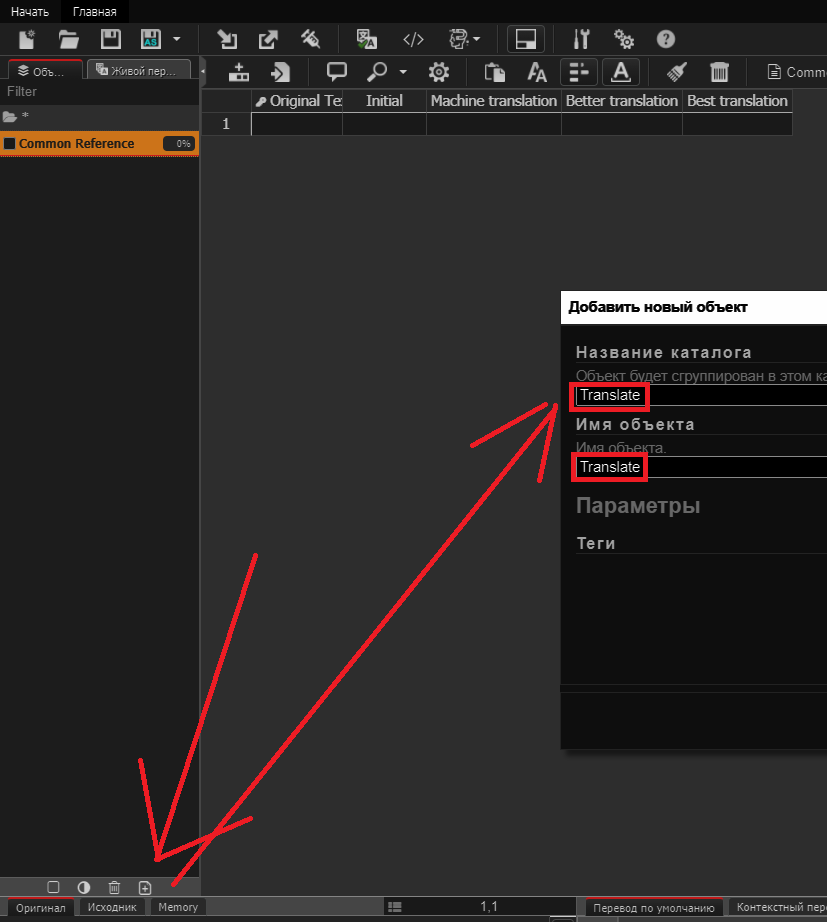
- Create a new object. (You can name it Translate or whatever you like)
- Select our object on the left and choose the first line in the Original Text column.
- Here we paste all the text from our file with lines (Open the file we got using xml-txt-gui.exe through Notepad or Noteapad++, press Ctrl+A to select all text, Ctrl+C to copy, Ctrl+V to paste.)
It should look like this in the end: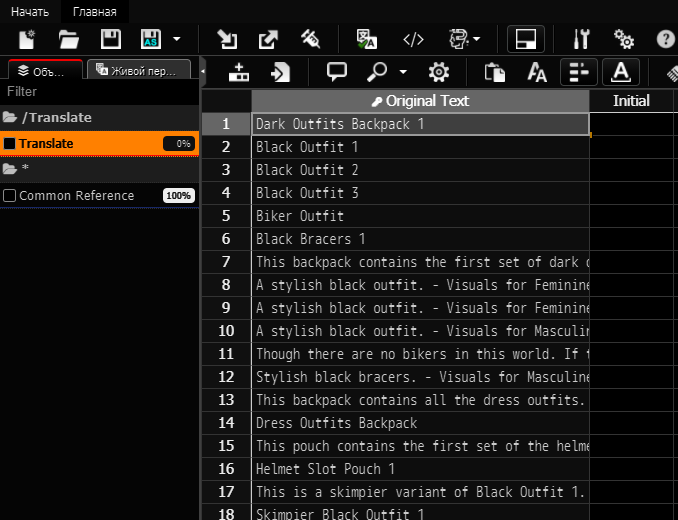
- Click the batch translation button.
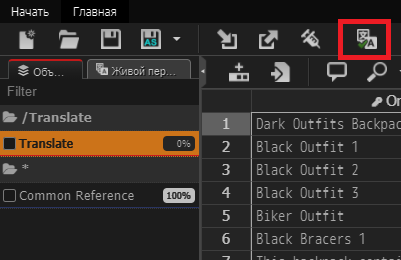
- Select Google (for Other translator need Patreon Support)
Then click Translate Now.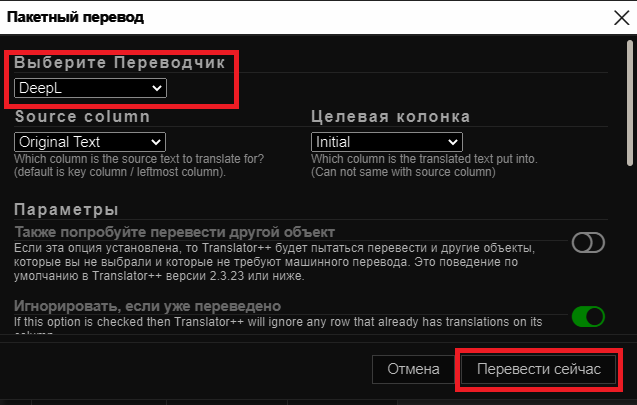
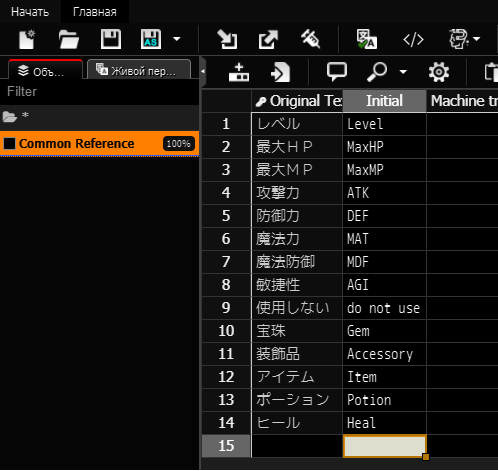
- Wait for the translation to finish. You get the translation in the 2nd column (Inital).
It's recommended to check and edit it, especially places with tags. - Click on the Inital column (This will select all the text in the column). Copy it using Ctrl+C and paste it into our text document to replace the original text, which we received through xml-txt-gui.exe
- Run txt-xml-gui.exe. Specify the path to our original xml file that we are going to translate and indicate our text document with translated lines. We get a Translated xml.
- But xml-txt-gui.exe slightly bugs the xml when saving, so we absolutely open our xml through 2_Translator.bat and resave it again as xml (also checking that the lines are indeed translated)
Steps 17-21 - more details above! - Convert our xml file into loca using 4_xml-to-loca_and_Create_pak.bat
- Then throw our ready-made loca translation into NameMode_YourLanguage\Localization\YourLanguage
- Create meta.lsx through 3_Create_Meta.bat in the folder NameMode_YourLanguage\Mods\NameMode_YourLanguage
- Pack our mod using 1_Unpacking_pak_and_Create_pak.bat or 4_xml-to-loca_and_Create_pak.bat
- Upload our mod to Nexus.
Useful Tips
- In the folder base_game_loca_xml, there are files english.loca.xml and russian.loca.xml, chinese.loca.xml, chinesetraditional.loca.xml.
These contain all the text from the original game, so if you come across a term you don't know while translating or if you want to align with the existing translation, you can open english.loca.xml and YourLanguage.loca.xml, for example using 9_Notepad++.bat or 9_WinMerge.bat.
Search for the unknown word in english.loca.xml. Find the necessary line and copy its contentuid (these are the numbers in front of the text)
And then search for these numbers in the YourLanguage file YourLanguage.loca.xml using Ctrl+F, Notepad++ will find the required line in the YourLanguage version.
You can extract your language using 1_Unpacking_pak.bat, your file is located in the Baldur's Gate 3\Data\Localization\YourLanguage directory. - To open two separate windows for sample English+YourLanguage text in 9_Notepad++.bat, right-click on the open file and follow the instructions shown in the image.
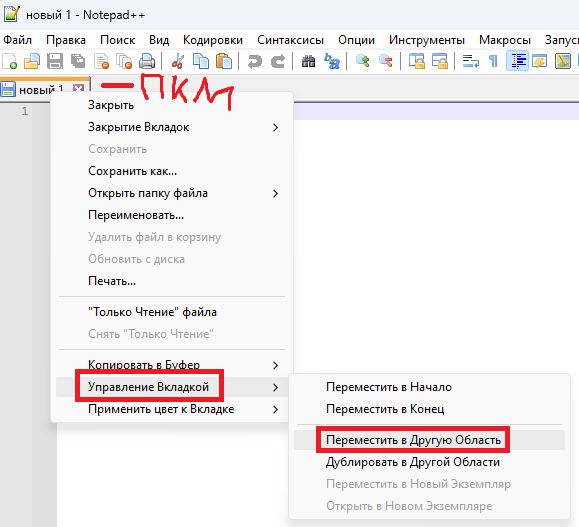
- My 9_Notepad++.bat supports opening multiple instances simultaneously (just run 9_Notepad++.bat as many times as needed), in case it's more convenient for you to have two separate windows.
Acknowledgments
AlexGoD - Author of the guide. (For my patience)
ShinyHobo - for Baldur's Gate 3 Modder's Multitool
Norbyte - for lslib
ulkyome - for the wonderful BG3-Tools