


0 of 0
Documentation
Readme
View as plain text
��H�i� �e�v�e�r�y�o�n�e�!�
�
�A�l�i�e�n� �I�s�o�l�a�t�i�o�n� �h�a�s� �t�h�u�s� �f�a�r� �b�e�e�n� �a� �g�r�e�a�t� �g�a�m�e� �f�o�r� �m�e�,� �d�e�f�i�n�i�t�i�v�e�l�y� �t�h�e� �b�e�s�t� �i�n� �t�h�e� �A�l�i�e�n�/�A�v�P� �f�r�a�n�c�h�i�s�e� �
�I�'�v�e� �p�l�a�y�e�d�.� �H�o�w�e�v�e�r�,� �i�f� �t�h�e�r�e� �i�s� �o�n�e� �c�o�n�s�i�s�t�e�n�c�y� �c�o�m�m�o�n� �t�o� �c�o�m�p�u�t�e�r� �g�a�m�e�s�,� �t�h�e�n� �i�t� �i�s� �t�h�e� �o�l�d� �p�r�o�v�e�r�b� �
�"�t�h�a�t� �t�h�e�r�e� �i�s� �a� �r�o�t�t�e�n� �a�p�p�l�e� �o�n� �e�v�e�r�y� �t�r�e�e�"�.� �O�r� �s�o�m�e�t�h�i�n�g�.�
�
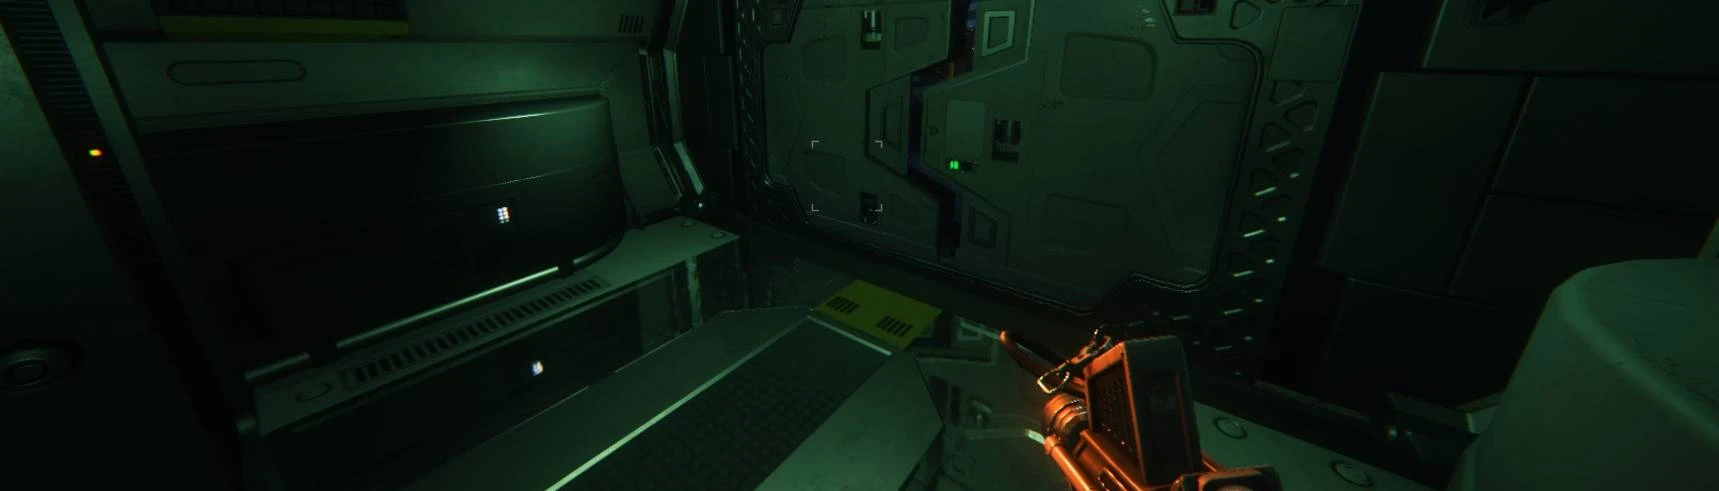
�A�t� �t�h�e� �s�t�a�r�t� �o�f� �M�i�s�s�i�o�n� �1�3� �-� �C�o�n�s�u�l�t�a�t�i�o�n� �(�A�P�O�L�L�O� �C�o�r�e�)�,� �I� �h�a�d� �n�o� �c�h�o�i�c�e� �b�u�t� �t�o� �p�l�a�c�e� �m�y� �h�e�a�v�y� �r�a�n�g�e�d� �
�w�e�a�p�o�n�s� �(�i�.�e�.� �"�f�i�r�e�a�r�m�s�"� �-� �r�e�v�o�l�v�e�r�,� �f�l�a�m�e�t�h�r�o�w�e�r�,� �s�h�o�t�g�u�n�)� �o�n�t�o� �a� �s�e�c�u�r�i�t�y� �c�o�n�v�e�y�o�r� �b�e�l�t� �t�h�a�t� �"�s�e�c�u�r�e�d�"� �
�t�h�e�m� �a�w�a�y� �f�o�r� �g�o�o�d�,� �t�o� �p�r�o�g�r�e�s�s� �t�h�r�o�u�g�h� �t�h�e� �g�a�m�e�.� �I� �r�e�m�e�m�b�e�r� �w�a�t�c�h�i�n�g� �t�h�e� �g�u�n�s� �r�o�l�l� �a�w�a�y� �f�o�r� �g�o�o�d� �-� �
�i�t� �w�a�s� �l�i�t�e�r�a�l�l�y� �t�h�e� �f�u�n�e�r�a�l� �o�f� �m�y� �a�r�s�e�n�a�l�,� �e�s�p�e�c�i�a�l�l�y� �s�i�n�c�e� �(�I�'�l�l� �a�d�m�i�t�)� �I� �h�a�d� �t�w�e�a�k�e�d� �t�h�e� �w�e�a�p�o�n�s� �f�o�r� �
�e�f�f�e�c�t�i�v�e�n�e�s�s� �a�g�a�i�n�s�t� �t�h�e� �A�l�i�e�n�,� �a�n�d�r�o�i�d�s�,� �a�n�d� �e�v�e�r�y�t�h�i�n�g�,� �a�n�d� �h�a�d� �m�o�s�t�l�y� �c�o�m�e� �t�o� �d�e�p�e�n�d� �o�n� �t�h�e�m�.� �A�n�d� �
�n�o�w�,� �t�h�e�r�e� �w�a�s� �a� �m�i�s�s�i�o�n� �p�o�t�e�n�t�i�a�l�l�y� �s�w�a�r�m�i�n�g� �w�i�t�h� �"�J�o�e�s�"� �a�h�e�a�d�,� �a�n�d� �a�n� �u�n�c�e�r�t�a�i�n� �f�u�t�u�r�e� �b�e�y�o�n�d� �t�h�a�t�.� �
�
�I�n� �s�u�c�h� �a� �g�r�e�a�t� �g�a�m�e� �t�o� �t�h�a�t� �p�o�i�n�t�,� �s�o�m�e�t�h�i�n�g� �l�i�k�e� �t�h�i�s� �s�e�e�m�e�d� �a�s� �m�u�c�h� �o�f�f� �a�s� �p�l�a�c�i�n�g� �a� �d�e�a�d� �f�l�y� �(�i�n�s�t�e�a�d� �
�o�f� �a� �s�t�r�a�w�b�e�r�r�y�)� �o�n� �t�o�p� �o�f� �a� �c�a�k�e� �d�e�l�i�c�a�t�e�s�s�e�.�
�
�H�o�w�e�v�e�r�,� �h�a�v�i�n�g� �s�o�m�e� �e�x�p�e�r�i�e�n�c�e� �w�i�t�h� �t�h�e� �C�a�t�h�o�d�e� �S�c�r�i�p�t� �E�d�i�t�o�r� �i�n� �M�a�t�t�F�i�l�e�r�'�s� �O�p�e�n�C�A�G�E� �t�o�o�l�,� �I� �d�e�c�i�d�e�d� �
�t�o� �g�i�v�e� �i�t� �a�t� �t�r�y� �t�o� �f�i�n�d� �a� �s�o�l�u�t�i�o�n� �t�o� �t�h�i�s� �a�n�n�o�y�i�n�g� �s�t�o�r�y� �t�w�i�s�t�,� �a�n�d� �i�t� �h�a�d� �t�u�r�n�e�d� �o�u�t� �a�m�a�z�i�n�g�l�y� �e�a�s�y� �t�o� �
�i�m�p�l�e�m�e�n�t�.� �
�
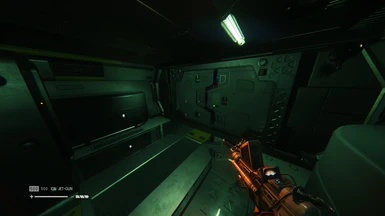
�I�n� �s�h�o�r�t�,� �n�o�w� �a�l�l� �y�o�u� �n�e�e�d� �t�o� �d�o� �t�o� �u�n�l�o�c�k� �t�h�e� �d�o�o�r� �i�s� �w�a�l�k� �t�h�r�o�u�g�h� �o�n�e� �o�f� �t�h�e� �w�e�a�p�o�n�s� �d�e�t�e�c�t�o�r�s� �a�t� �t�h�e� �
�s�e�c�u�r�i�t�y� �s�t�a�t�i�o�n� �(�l�e�f�t� �o�r� �r�i�g�h�t� �-� �w�a�l�k�i�n�g� �o�v�e�r� �t�h�e� �c�e�n�t�e�r� �w�i�t�h� �t�h�e� �y�e�l�l�o�w� �m�a�r�k�i�n�g� �a�n�d� �w�e�a�p�o�n�s� �w�a�r�n�i�n�g� �w�i�l�l� �
�o�n�l�y� �t�r�i�g�g�e�r� �t�h�e� �w�e�a�p�o�n�s� �w�a�r�n�i�n�g� �a�n�d� �R�i�p�l�e�y�'�s� �c�o�m�m�e�n�t� �l�i�n�e�)�.� �T�h�e� �l�i�g�h�t�s� �o�n� �t�h�e� �d�e�t�e�c�t�o�r� �s�h�o�u�l�d� �g�o� �g�r�e�e�n�,� �
�a�n�d� �t�h�e� �d�o�o�r� �w�i�l�l� �o�p�e�n�,� �a�l�l�o�w�i�n�g� �y�o�u� �t�o� �p�r�o�c�e�e�d� �w�h�i�l�e� �s�t�i�l�l� �p�a�c�k�i�n�g� �y�o�u�r� �f�u�l�l� �a�r�r�a�y� �o�f� �f�i�r�e�a�r�m�s�.� �
�
�T�h�e� �w�e�a�p�o�n�s� �d�r�o�p� �o�f�f� �p�o�i�n�t� �o�n� �t�h�e� �c�o�n�v�e�y�o�r� �i�s� �s�t�i�l�l� �t�h�e�r�e�,� �a�n�d� �f�u�n�c�t�i�o�n�a�l� �(�i�t� �w�i�l�l� �t�a�k�e� �a�w�a�y� �y�o�u�r� �w�e�a�p�o�n�s�)�,� �
�s�o� �y�o�u� �d�o� �n�o�t� �h�a�v�e� �t�o� �u�n�i�n�s�t�a�l�l� �t�h�e� �m�o�d� �i�f� �y�o�u� �c�h�o�o�s�e� �t�o� �d�o� �a� �"�c�l�a�s�s�i�c�"� �p�l�a�y�t�h�r�o�u�g�h� �a�t� �s�o�m�e� �t�i�m�e� �i�n� �t�h�e� �
�f�u�t�u�r�e�.�
�
�T�h�i�s� �m�o�d� �w�a�s� �d�e�s�i�g�n�e�d� �o�n� �t�h�e� �1�.�0�.�4� �G�.�O�.�G� �v�e�r�s�i�o�n� �o�f� �A�l�i�e�n� �I�s�o�l�a�t�i�o�n�,� �s�o� �I� �c�a�n�n�o�t� �g�u�a�r�a�n�t�e�e� �i�t� �w�i�l�l� �w�o�r�k� �o�n� �
�o�t�h�e�r� �p�l�a�t�f�o�r�m�s� �s�u�c�h� �a�s� �t�h�e� �S�t�e�a�m�.� �
�
�T�h�e�r�e�f�o�r�e�,� �I� �w�i�l�l� �i�n�c�l�u�d�e� �d�e�t�a�i�l�e�d� �i�n�s�t�r�u�c�t�i�o�n�s�,� �t�a�i�l�o�r�e�d� �t�o�w�a�r�d�s� �a� �n�o�v�i�c�e� �m�o�d�d�e�r� �l�e�v�e�l�,� �o�n� �h�o�w� �t�o� �m�o�d� �i�t� �
�y�o�u�r�s�e�l�f� �b�e�l�o�w�,� �u�s�i�n�g� �M�a�t�t�F�i�l�e�r�'�s� �O�p�e�n�C�A�G�E� �C�a�t�h�o�d�e� �S�c�r�i�p�t� �E�d�i�t�o�r�.�
�
�
�I�n�s�t�a�l�l�a�t�i�o�n�:�
�J�u�s�t� �c�o�p�y� �t�h�e� �D�A�T�A� �f�o�l�d�e�r� �f�r�o�m� �t�h�e� �m�o�d� �f�i�l�e� �o�v�e�r� �t�h�e� �D�A�T�A� �f�o�r�d�e�r� �i�n� �y�o�u�r� �A�l�i�e�n� �-� �I�s�o�l�a�t�i�o�n� �f�o�l�d�e�r�.� �
�I� �s�t�r�o�n�g�l�y� �r�e�c�o�m�m�e�n�d� �m�a�k�i�n�g� �a� �b�a�c�k�u�p� �o�f� �t�h�e� �r�e�l�e�v�a�n�t� �f�i�l�e�s�,� �w�h�i�c�h� �i�n� �t�h�i�s� �c�a�s�e� �w�o�u�l�d� �b�e� �t�h�e� �
�\�A�l�i�e�n� �-� �I�s�o�l�a�t�i�o�n�\�D�A�T�A�\�E�N�V�\�P�R�O�D�U�C�T�I�O�N�\�T�E�C�H�_�M�U�T�H�R�C�O�R�E�\�W�O�R�L�D� �f�o�l�d�e�r�.� �T�h�e� �f�i�l�e�s� �t�h�a�t� �a�r�e� �
�o�v�e�r�w�r�i�t�t�e�n� �a�r�e� �C�O�M�M�A�N�D�S�.�P�A�K�,� �M�O�D�E�L�S�.�M�V�R�,� �A�N�D� �R�E�D�S�.�B�I�N�,� �h�o�w�e�v�e�r� �e�v�e�n� �t�h�e� �e�n�t�i�r�e� �W�O�R�L�D� �f�o�l�d�e�r� � �
�t�a�k�e�s� �u�p� �l�i�t�t�l�e� �s�p�a�c�e�.�
�
�
�I� �h�a�v�e� �t�e�s�t�e�d� �t�h�e� �m�o�d� �b�o�t�h� �o�n� �m�y� �p�r�i�m�a�r�y� �A�I� �g�a�m�e�p�l�a�y� �a�n�d� �m�o�d�d�i�n�g� �f�o�l�d�e�r�,� �a�s� �w�e�l�l� �a�s� �i�n�s�t�a�l�l�e�d� �i�t� �o�n�t�o� �a� �
�c�o�p�y� �o�f� �m�y� �b�a�c�k�u�p� �v�a�n�i�l�l�a� �A�I� �f�o�l�d�e�r� �a�n�d� �h�a�v�e� �e�n�c�o�u�n�t�e�r�e�d� �n�o� �i�s�s�u�e�s�.�
�
�
�I�f� �t�h�e� �m�o�d� �f�i�l�e�s� �i�n�c�l�u�d�e�d� �h�a�p�p�e�n� �n�o�t� �t�o� �w�o�r�k� �f�o�r� �y�o�u�,� �h�e�r�e� �a�r�e� �t�h�e� �i�n�s�t�r�u�c�t�i�o�n�s� �o�n� �h�o�w� �t�o� �m�o�d� �i�t� �y�o�u�r�s�e�l�f�.�
�
�-� �Y�o�u� �w�i�l�l� �n�e�e�d� �t�h�e� �l�a�t�e�s�t� �v�e�r�s�i�o�n� �o�f� �M�a�t�t�F�i�l�e�r�'�s� �O�p�e�n�C�A�G�E� �t�o�o�l� �(�i�t� �w�a�s� �0�.�9�.�3�.�5�)� �i�n� �m�y� �c�a�s�e�.� �
�
�-� �O�n�c�e� �y�o�u� �h�a�v�e� �i�n�s�t�a�l�l�e�d�,� �u�p�d�a�t�e�d� �e�v�e�r�y�t�h�i�n�g�,� �a�n�d� �s�e�t� �u�p� �y�o�u�r� �e�d�i�t�o�r�,� �c�l�i�c�k� �o�n� �"�E�d�i�t� �C�a�t�h�o�d�e� �S�c�r�i�p�t�s�"� �t�o� �
�s�t�a�r�t� �u�p� �t�h�e� �C�a�t�h�o�d�e� �S�c�r�i�p�t� �E�d�i�t�o�r�.� �T�h�e� �e�d�i�t�o�r� �w�i�n�d�o�w�,� �l�a�b�e�l�e�d� �"�O�p�e�n�C�A�G�E� �C�o�m�m�a�n�d�s� �E�d�i�t�o�r�"� �s�h�o�u�l�d� �o�p�e�n�.�
�
�-� �I�n� �t�h�e� �u�p�p�e�r� �l�e�f�t� �c�o�r�n�e�r� �o�f� �t�h�e� �w�i�n�d�o�w�,� �t�o� �t�h�e� �l�e�f�t� �o�f� �t�h�e� �"�L�o�a�d�"� �a�n�d� �"�S�a�v�e�"� �b�u�t�t�o�n�s�,� �o�p�e�n� �t�h�e� �d�r�o�p�-�d�o�w�n� �
�m�e�n�u� �a�n�d� �s�e�l�e�c�t� �"�T�E�C�H�_�M�U�T�H�R�C�O�R�E�"� �(�w�i�t�h�o�u�t� �t�h�e� �q�u�o�t�e�s�)�,� �t�h�e�n� �c�l�i�c�k� �"�L�o�a�d�"� �t�o� �o�p�e�n� �u�p� �t�h�e� �l�e�v�e�l�.� �
�O�b�v�i�o�u�s�l�y�,� �"�M�U�T�H�R� �C�O�R�E�"� �r�e�f�e�r�s� �t�o� �a� �"�M�U�T�H�R� �A�I�"�,� �o�r� �i�n� �t�h�i�s� �c�a�s�e�,� �t�h�e� �A�P�O�L�L�O� �A�I� �c�o�r�e�.�
�
�-� �I� �w�o�u�l�d� �r�e�c�o�m�m�e�n�d�,� �i�n� �p�a�r�t�i�c�u�l�a�r� �f�o�r� �n�o�v�i�c�e� �u�s�e�r�s�,� �a�n�d� �b�a�s�e�d� �o�n� �m�y� �o�w�n� �e�x�p�e�r�i�e�n�c�e�s�,� �t�o� �s�a�v�e� �y�o�u�r� �
�p�r�o�g�r�e�s�s� �e�v�e�r�y� �w�h�i�l�e� �b�y� �c�l�i�c�k�i�n�g� �o�n� �t�h�e� �"�S�a�v�e�"� �b�u�t�t�o�n� �m�e�n�t�i�o�n�e�d� �a�b�o�v�e�,� �a�n�d� �a�l�s�o� �v�e�r�i�f�y� �y�o�u� �a�r�e� �s�t�i�l�l� �o�n� �
�t�r�a�c�k� �b�e�f�o�r�e� �s�a�v�i�n�g�.� �T�h�e�r�e� �i�s� �n�o�t�h�i�n�g� �w�o�r�s�e� �t�h�a�n� �l�o�s�i�n�g� �e�v�e�n� �a� �p�a�r�t� �o�f� �y�o�u�r� �p�r�o�g�r�e�s�s�,� �r�e�g�a�r�d�l�e�s�s� �o�f� �t�h�e� �c�a�u�s�e�.� �
�I�t� �i�s� �f�r�u�s�t�r�a�t�i�n�g�,� �a�n�d� �w�o�r�s�e�,� �i�t� �i�s� �a� �l�o�s�s� �o�f� �a�l�l� �t�h�e� �t�i�m�e� �y�o�u� �h�a�v�e� �i�n�v�e�s�t�e�d� �u�p� �t�o� �t�h�a�t� �p�o�i�n�t�.�
�
�-� �I�n� �t�h�e� �l�e�f�t� �s�i�d�e� �s�t�a�c�k� �m�e�n�u� �b�e�l�o�w� �t�h�a�t�,� �g�o� �t�o� �
�S�C�R�I�P�T�_�S�T�O�R�Y�M�I�S�S�I�O�N� �-�>� �M�2�2�_�A�L�L�_�F�A�T�H�E�R�_�C�O�R�E� �-�>� �M�2�2�_�P�A�R�T�_�0�1� �-�>� �M�2�2�_�P�T�0�1� �
�(�C�l�i�c�k� �o�n� �t�h�e� �"�+�"� �t�o� �e�x�p�a�n�d� �t�h�e� �t�r�e�e�)� �.� �N�o�w� �s�e�l�e�c�t� �a�n�d� �c�l�i�c�k� �o�n� �M�2�2�_�P�T�0�1� �a�n�d� �t�a�k�e� �a� �l�o�o�k� �a�t� �t�h�e� �c�e�n�t�e�r� �m�e�n�u�,� �l�a�b�e�l�e�d� �"�e�n�t�i�t�i�e�s�"�.�
�
�-� �E�n�t�e�r� �"�p�l�a�c�e�d�"� �w�i�t�h�o�u�t� �t�h�e� �q�u�o�t�e�s� �i�n�t�o� �t�h�e� �t�e�x�t� �l�i�n�e� �n�e�x�t� �t�o� �"�S�e�a�r�c�h�"� �a�n�d� �c�l�i�c�k� �o�n� �"�S�e�a�r�c�h�"� �Y�o�u� �s�h�o�u�l�d� �g�e�t� �
�t�h�e� �f�o�l�l�o�w�i�n�g� �4� �r�e�s�u�l�t�s�,� �i�n� �t�h�i�s� �o�r�d�e�r�:�
�
�[�F�1�-�3�7�-�4�6�-�C�9�]� �w�e�a�p�o�n�_�p�l�a�c�e�d�2� �(�P�l�a�y�e�r�T�r�i�g�g�e�r�B�o�x�)�
�[�7�A�-�8�0�-�3�0�-�6�F�]� �w�e�a�p�o�n�_�p�l�a�c�e�d� �(�P�l�a�y�e�r�T�r�i�g�g�e�r�B�o�x�)�
�[�A�B�-�2�A�-�E�3�-�B�0�]� �P�r�e�_�w�e�a�p�o�n�_�p�l�a�c�e�d�2� �(�P�l�a�y�e�r�T�r�i�g�g�e�r�B�o�x�)�
�[�1�1�-�C�8�-�A�D�-�E�C�]� �P�r�e�_�w�e�a�p�o�n�_�p�l�a�c�e�d� �(�P�l�a�y�e�r�T�r�i�g�g�e�r�B�o�x�)�
�
�W�h�e�n� �y�o�u� �c�l�i�c�k� �o�n� �a�n�y� �o�f� �t�h�e�s�e� �e�n�t�i�t�i�e�s� �i�n� �t�h�e� �c�e�n�t�e�r� �w�i�n�d�o�w�,� �t�h�e�i�r� �p�r�o�p�e�r�t�i�e�s� �a�n�d� �p�a�r�a�m�e�t�e�r�s� �w�i�l�l� �a�p�p�e�a�r� �
�i�n� �t�h�e� �v�e�r�t�i�c�a�l� �r�i�g�h�t�-�h�a�n�d� �s�i�d�e� �f�r�a�m�e�,� �l�a�b�e�l�e�d� �"�S�e�l�e�c�t�e�d� �E�n�t�i�t�y� �P�a�r�a�m�e�t�e�r�s�"�.� �T�a�k�e� �s�o�m�e� �t�i�m�e� �t�o� �e�x�a�m�i�n�e� �t�h�e� �e�n�t�i�t�e�s�,� �
�s�p�e�c�i�f�i�c�a�l�l�y� �t�h�e� �o�u�t�b�o�u�n�d� �(�O�U�T�)� �l�i�n�k�s� �i�n� �t�h�e� �l�o�w�e�r� �r�i�g�h�t� �c�o�r�n�e�r� �o�f� �t�h�e� �e�d�i�t�o�r� �w�i�n�d�o�w�.� �
�
�Y�o�u� �w�i�l�l� �n�o�t�i�c�e� �t�h�a�t� �t�h�e� �"�w�e�a�p�o�n�_�p�l�a�c�e�d�2�"� �a�n�d� �"�w�e�a�p�o�n�_�p�l�a�c�e�d�"� �e�n�t�i�t�i�e�s� �b�o�t�h� �l�i�n�k� �o�u�t� �t�o� �
�"�[�9�1�-�7�6�-�E�A�-�D�F�]� �[�P�R�O�X�Y�]� �t�r�i�g�g�e�r�_�s�c�a�n�n�e�r�_�l�g�t�_�n�o�r�m�a�l� �(�E�N�V�I�R�O�N�M�E�N�T�_�M�u�t�h�r�C�o�r�e�_�1� �-�>� �T�o�p�_�S�i�d�e�_�1� �-�>� �t�r�i�g�g�e�r�_�s�c�a�n�n�e�r�_�l�g�t�_�n�o�r�m�a�l�)�"�.� �
�
�T�h�i�s� �i�n� �p�r�a�c�t�i�c�e� �m�e�a�n�s� �t�h�a�t� �o�n�c�e� �t�h�e� �"�w�e�a�p�o�n�s�"� �h�a�v�e� �b�e�e�n� �"�p�l�a�c�e�d�"� �o�n�t�o� �t�h�e� �c�o�n�v�e�y�o�r� �b�e�l�t� �(�T�h�e� �u�n�d�e�r�l�y�i�n�g� �
�e�n�t�i�t�y� �l�i�n�k�s� �a�n�d� �t�r�i�g�g�e�r�s� �a�r�e� �a� �l�o�t� �m�o�r�e� �c�o�m�p�l�e�x�,� �b�u�t� �t�h�i�s� �a�l�l� �w�e� �n�e�e�d�)�,� �t�h�e� �"�n�o�r�m�a�l�"�,� �o�r� �g�r�e�e�n� �l�i�g�h�t� �o�n� �t�h�e� �
�w�e�a�p�o�n� �s�c�a�n�n�e�r� �t�r�i�g�g�e�r�s�"�o�n�_�e�n�t�e�r�e�d�"� �(�i�.�e�.� �o�n�c�e� �t�h�e� �p�l�a�y�e�r� �e�n�t�e�r�s� �t�h�e� �s�c�a�n�n�e�r� �e�v�a�l�u�a�t�i�o�n� �z�o�n�e�)�.� �F�u�r�t�h�e�r� �d�o�w�n� �
�t�h�i�s� �s�e�q�u�e�n�c�e� �a�n�d� �i�n� �a� �s�i�m�i�l�a�r� �m�a�n�n�e�r�,� �t�h�e� �d�o�o�r� �u�n�l�o�c�k� �i�t�s�e�l�f� �i�s� �t�r�i�g�g�e�r�e�d�.�
�
�T�h�e� �"�P�r�e�_�w�e�a�p�o�n�_�p�l�a�c�e�d�2�"� �"�P�r�e�_�w�e�a�p�o�n�_�p�l�a�c�e�d�"� �e�n�t�i�t�i�e�s� �b�o�t�h� �l�i�n�k� �o�u�t� �t�o� �
�"�[�3�7�-�0�C�-�0�8�-�D�F�]� �[�P�R�O�X�Y�]� �t�r�i�g�g�e�r�_�s�c�a�n�n�e�r�_�l�g�t�_�e�r�r�o�r� �(�E�N�V�I�R�O�N�M�E�N�T�_�M�u�t�h�r�C�o�r�e�_�1� �-�>� �T�o�p�_�S�i�d�e�_�1� �-�>� �t�r�i�g�g�e�r�_�s�c�a�n�n�e�r�_�l�g�t�_�e�r�r�o�r�)�"�.� �
�
�O�b�v�i�o�u�s�l�y�,� �"�p�r�e�_�w�e�a�p�o�n�s�_�p�l�a�c�e�d�"� �r�e�f�e�r�s� �t�o� �"�b�e�f�o�r�e� �t�h�e� �p�l�a�y�e�r� �h�a�s� �p�l�a�c�e�d� �t�h�e� �w�e�a�p�o�n�s� �o�n� �t�h�e� �c�o�n�v�e�y�o�r�"�,� �a�n�d� �
�a�s� �y�o�u� �m�a�y� �a�s�s�u�m�e� �,� �"�t�r�i�g�g�e�r�_�s�c�a�n�n�e�r�_�l�g�t�_�e�r�r�o�r�"� �t�r�i�g�g�e�r�s� �t�h�e� �r�e�d� �a�l�a�r�m� �l�i�g�h�t� �a�n�d� �s�o�u�n�d� �w�h�e�n�e�v�e�r� �t�h�e� �p�l�a�y�e�r� �
�e�n�t�e�r�s� �(�"�o�n�_�e�n�t�e�r�e�d�"�)� �t�h�e� �s�c�a�n�n�e�r� �e�v�a�l�u�a�t�i�o�n� �z�o�n�e�.� �
�
�N�o�w�,� �t�h�e� �e�n�t�i�r�e� �m�o�d� �c�o�m�e�s� �d�o�w�n� �t�o� �a�l�t�e�r�i�n�g� �t�h�e�s�e� �e�n�t�r�i�e�s� �t�o� �m�a�t�c�h� �t�h�e� �o�n�e�s� �i�n� �"�w�e�a�p�o�n�_�p�l�a�c�e�d�2�"� �a�n�d� �"�w�e�a�p�o�n�_�p�l�a�c�e�d�"�.� �
�T�h�i�s� �w�a�y�,� �r�e�g�a�r�d�l�e�s�s� �w�h�e�t�h�e�r� �y�o�u� �h�a�v�e� �p�l�a�c�e�d� �t�h�e� �w�e�a�p�o�n�s� �o�n�t�o� �t�h�e� �c�o�n�v�e�y�o�r�,� �o�r� �n�o�t�,� �t�h�e� �"�t�r�i�g�g�e�r�_�s�c�a�n�n�e�r�_�l�g�t�_�n�o�r�m�a�l�"� �
�w�i�l�l� �b�e� �t�r�i�g�g�e�r�e�d�,� �a�c�t�i�v�a�t�i�n�g� �t�h�e� �g�r�e�e�n� �l�i�g�h�t� �o�n� �t�h�e� �s�c�a�n�n�e�r� �a�n�d� �f�u�r�t�h�e�r� �d�o�w�n� �t�h�e� �s�e�q�u�e�n�c�e�,� �u�n�l�o�c�k�i�n�g� �t�h�e� �d�o�o�r�.�
�
�S�o�,� �t�o� �g�e�t� �t�o� �i�t�:�
�
�-� �S�e�l�e�c�t� �o�n�e� �o�f� �t�h�e� �"�[�A�B�-�2�A�-�E�3�-�B�0�]� �P�r�e�_�w�e�a�p�o�n�_�p�l�a�c�e�d�2� �(�P�l�a�y�e�r�T�r�i�g�g�e�r�B�o�x�)�"� �a�n�d� �"�[�1�1�-�C�8�-�A�D�-�E�C�]� �P�r�e�_�w�e�a�p�o�n�_�p�l�a�c�e�d� �(�P�l�a�y�e�r�T�r�i�g�g�e�r�B�o�x�)�"� �
�e�n�t�i�t�e�s� �i�n� �t�h�e� �m�i�d�d�l�e� �r�e�s�u�l�t� �l�i�s�t�.�
�
�-� �I�n� �t�h�e� �l�o�w�e�r� �r�i�g�h�t� �c�o�r�n�e�r�,� �i�n� �t�h�e� �"�o�n�_�e�n�t�e�r�e�d�"� �f�r�a�m�e�,� �c�l�i�c�k� �o�n� �"�E�d�i�t� �L�i�n�k�"�.� �T�h�i�s� �w�i�l�l� �b�r�i�n�g� �u�p� �a� �w�i�n�d�o�w� �l�a�b�e�l�e�d� �
�"�E�d�i�t� �E�n�t�i�t�y� �P�i�n� �L�i�n�k�"�.� �
�T�h�e� �"�[�3�7�-�0�C�-�0�8�-�D�F�]� �[�P�R�O�X�Y�]� �t�r�i�g�g�e�r�_�s�c�a�n�n�e�r�_�l�g�t�_�e�r�r�o�r� �(�E�N�V�I�R�O�N�M�E�N�T�_�M�u�t�h�r�C�o�r�e�_�1� �-�>� �T�o�p�_�S�i�d�e�_�1� �-�>� �t�r�i�g�g�e�r�_�s�c�a�n�n�e�r�_�l�g�t�_�e�r�r�o�r�)�"� �
�e�n�t�i�t�y� �s�h�o�u�l�d� �b�e� �l�i�s�t�e�d� �i�n� �t�h�e� �"�C�o�n�n�e�c�t�s� �i�n� �t�o� �e�n�t�i�t�y�"� �i�n� �t�h�e� �"�P�i�n� �I�n�"� �f�r�a�m�e� �i�n� �t�h�e� �l�o�w�e�r� �p�a�i�r� �o�f� �d�r�o�p�-�d�o�w�n� �m�e�n�u�s�.� �
�
�-� �O�p�e�n� �t�h�e� �"�C�o�n�n�e�c�t�s� �i�n� �t�o� �e�n�t�i�t�y�"� �d�r�o�p�-�d�o�w�n� �m�e�n�u�.� �H�e�r�e� �y�o�u� �h�a�v�e� �a� �l�i�s�t� �o�f� �a�l�l� �t�h�e� �e�n�t�i�t�i�e�s� �a�s�s�o�c�i�a�t�e�d� �w�i�t�h� �t�h�e� �
�M�1�3� �g�a�m�e� �l�e�v�e�l�.� �F�o�r�t�u�n�a�t�e�l�y�,� �t�h�e� �o�n�e� �w�e�'�r�e� �s�e�a�r�c�h�i�n�g� �f�o�r�,� �t�h�e� �
�"�[�9�1�-�7�6�-�E�A�-�D�F�]� �[�P�R�O�X�Y�]� �t�r�i�g�g�e�r�_�s�c�a�n�n�e�r�_�l�g�t�_�n�o�r�m�a�l� �(�E�N�V�I�R�O�N�M�E�N�T�_�M�u�t�h�r�C�o�r�e�_�1� �-�>� �T�o�p�_�S�i�d�e�_�1� �-�>� �t�r�i�g�g�e�r�_�s�c�a�n�n�e�r�_�l�g�t�_�n�o�r�m�a�l�)�"�,� �
�i�s� �j�u�s�t� �b�e�l�o�w� �t�h�e� �d�e�f�a�u�l�t� �
�"�[�3�7�-�0�C�-�0�8�-�D�F�]� �[�P�R�O�X�Y�]� �t�r�i�g�g�e�r�_�s�c�a�n�n�e�r�_�l�g�t�_�e�r�r�o�r� �(�E�N�V�I�R�O�N�M�E�N�T�_�M�u�t�h�r�C�o�r�e�_�1� �-�>� �T�o�p�_�S�i�d�e�_�1� �-�>� �t�r�i�g�g�e�r�_�s�c�a�n�n�e�r�_�l�g�t�_�e�r�r�o�r�)�"�.�
�
�-� �S�o�,� �s�e�l�e�c�t� �t�h�e� �e�n�t�r�y� �w�i�t�h� �t�h�e� �"�t�r�i�g�g�e�r�_�s�c�a�n�n�e�r�_�l�g�t�_�n�o�r�m�a�l�"� �a�n�d� �c�l�i�c�k� �o�n� �i�t� �t�o� �c�l�o�s�e� �t�h�e� �d�r�o�p� �d�o�w�n� �m�e�n�u�.� �I�n� �t�h�e� �
�l�o�w�e�r� �r�i�g�h�t� �c�o�r�n�e�r� �o�f� �t�h�e� �w�i�n�d�o�w�,� �c�l�i�c�k� �o�n� �"�S�a�v�e�"�.� �
�
�-� �R�e�p�e�a�t� �t�h�i�s� �f�o�r� �t�h�e� �o�t�h�e�r� �"�P�r�e�_�w�e�a�p�o�n�_�p�l�a�c�e�d�"� �e�n�t�i�t�y�.� �I�t� �w�o�u�l�d� �b�e� �a�d�v�i�s�a�b�l�e� �t�o� �c�h�e�c�k� �t�h�e� �o�u�t�b�o�u�n�d� �(�O�U�T�)� �l�i�n�k�s� �
�t�o� �v�e�r�i�f�y� �t�h�a�t� �a�l�l� �e�n�t�i�t�e�s� �a�r�e� �l�i�n�k�e�d� �t�o� �t�h�e� �s�a�m�e� �o�u�t�p�u�t�.�
�
�-� �S�A�V�E� �Y�O�U�R� �W�O�R�K�!� �I�n� �t�h�e� �u�p�p�e�r� �l�e�f�t� �c�o�r�n�e�r� �o�f� �t�h�e� �O�p�e�n�C�A�G�E� �C�o�m�m�a�n�d�s� �E�d�i�t�o�r� �w�i�n�d�o�w�,� �c�l�i�c�k� �o�n� �"�S�a�v�e�"� �a�n�d� �
�w�a�i�t� �f�o�r� �t�h�e� �"�S�a�v�e�d� �C�h�a�n�g�e�s�"� �p�o�p�u�p� �t�o� �v�e�r�i�f�y�.� �I�'�v�e� �p�l�a�c�e�d� �t�h�i�s� �w�a�r�n�i�n�g� �h�e�r�e� �j�u�s�t� �i�n� �c�a�s�e� �s�o�m�e�o�n�e� �i�s� �a�b�o�u�t� �t�o� �e�x�i�t� �
�t�h�e� �e�d�i�t�o�r� �a�n�d� �l�o�s�e� �t�h�e�i�r� �w�o�r�k�.�
�
�T�h�a�t� �s�h�o�u�l�d� �b�e� �i�t�!�
�
�C�r�e�d�i�t�s� �a�n�d� �t�h�a�n�k�s� �g�o� �t�o�:� �
�-� �M�a�t�t�F�i�l�e�r� �f�o�r� �h�i�s� �o�u�t�s�t�a�n�d�i�n�g� �O�p�e�n�C�A�G�E� �t�o�o�l� �s�e�t�
�-� �x�1�n�i�x�m�z�e�n�g� �a�n�d� �M�a�t�t�F�i�l�e�r� �f�o�r� �t�h�e� �A�l�i�e�n� �I�s�o�l�a�t�i�o�n� �X�M�L�/�B�M�L� �c�o�n�v�e�r�t�e�r�s� �w�h�i�c�h� �I� �h�a�v�e� �f�o�u�n�d� �t�o� �b�e� �a�n�o�t�h�e�r� �a�n� �
�e�s�s�e�n�t�i�a�l� �m�o�d�d�i�n�g� �t�o�o�l� �p�a�c�k�
�
�D�i�s�c�l�a�i�m�e�r�:�
�-� �Y�o�u�r� �u�s�e� �o�f� �t�h�e� �m�o�d� �f�i�l�e�s� �a�n�d�/�o�r� �t�h�e� �m�o�d�d�i�n�g� �i�n�s�t�r�u�c�t�i�o�n�s� �p�r�o�v�i�d�e�d� �i�s� �s�o�l�e�l�y� �a�t� �y�o�u�r� �o�w�n� �r�i�s�k�.� �I� �w�i�l�l� �n�o�t� �b�e� �
�h�e�l�d� �a�c�c�o�u�n�t�a�b�l�e� �f�o�r� �a�n�y� �d�a�t�a� �l�o�s�s�,� �o�r� �d�a�m�a�g�e� �w�h�a�t�s�o�e�v�e�r� �r�e�s�u�l�t�i�n�g� �f�r�o�m� �t�h�e� �u�s�e� �o�f� �t�h�e� �a�f�o�r�e�m�e�n�t�i�o�n�e�d�.�
�-� �Y�o�u� �a�r�e� �f�r�e�e� �t�o� �m�o�d�i�f�y�,� �d�i�s�t�r�i�b�u�t�e�,� �e�x�p�e�r�i�m�e�n�t� �w�i�t�h� �o�r� �i�n�c�l�u�d�e� �t�h�i�s� �m�o�d� �i�n� �a� �m�o�d� �o�r� �m�o�d�p�a�c�k� �o�f� �y�o�u�r� �o�w�n�.� �
�A�g�a�i�n�,� �I� �w�i�l�l� �n�o�t� �b�e� �h�e�l�d� �a�c�c�o�u�n�t�a�b�l�e� �f�o�r� �a�n�y� �d�a�m�a�g�e� �c�a�u�s�e�d� �t�o� �a�n�y� �p�a�r�t�i�e�s� �r�e�s�u�l�t�i�n�g� �f�r�o�m� �t�h�e� �u�s�e� �o�f� �t�h�i�s� �m�o�d� �
�o�r� �a�n�y� �f�o�r�m� �o�r� �i�t�e�r�a�t�i�o�n� �o�f� �i�t�s� �m�o�d�i�f�i�c�a�t�i�o�n�.�
�
�-� �M�y� �a�p�o�l�o�g�i�e�s� �t�o� �t�h�e� �a�u�t�h�o�r�,� �i�f� �s�o�m�e�o�n�e� �h�a�s� �a�l�r�e�a�d�y� �c�r�e�a�t�e�d� �s�o�m�e�t�h�i�n�g� �l�i�k�e� �t�h�i�s�.� �T�h�o�u�g�h�,� �h�a�v�i�n�g� �s�c�o�u�r�e�d� �t�h�e� �
�I�n�t�e�r�n�e�t� �f�o�r� �a� �s�o�l�u�t�i�o�n� �t�o� �t�h�e� �M�1�3� �p�r�o�b�l�e�m�,� �a�n�d� �h�a�v�i�n�g� �f�o�u�n�d� �n�o�n�e�,� �t�h�a�t� �i�s� �d�o�u�b�t�f�u�l�.� �I�f� �o�t�h�e�r�w�i�s�e�,� �a�l�l� �t�h�e� �r�e�l�e�v�a�n�t� �
�a�u�t�h�o�r� �h�a�s� �t�o� �d�o� �i�s� �s�a�y� �s�o�,� �a�n�d� �I�'�l�l� �r�e�m�o�v�e� �t�h�e� �m�o�d� �f�r�o�m� �t�h�e� �I�n�t�e�r�n�e�t�.�
�
�B�T�W�,� �t�h�e� �e�n�g�l�i�s�h� �n�i�c�k�n�a�m�e� �t�o� �m�y� �f�i�r�s�t� �n�a�m�e� �w�o�u�l�d� �b�e� �"�J�o�e�"� �:�-�)�