Documentation
Readme
View as plain text
~ Installation instructions ~
*You can ignore the Binaries folder altogether if you've already installed Zed's Patch
---------------------
1). If using the retail version of Borderlands, extract Binaries* and Willowgame folders here, as well as fix and win7_fix:
"C:\Program Files\2k Games\Gearbox Software\Borderlands" (merge folders and overwrite files if prompted)
---------------------
2). If using the Steam version of Borderlands, extract Binaries* and Willowgame folders here, as well as fix and win7_fix:
"C:\Program Files (x86)\Steam\steamapps\common\borderlands" (merge folders and overwrite files if prompted)
~ BUT REMOVE nvcpl.dll FROM THE BINARIES FOLDER!!! IT CAUSES A MEMORY LEAK IN THE LATEST STEAM PATCH OF BL ~
---------------------
3). Run either the fix.bat or win7_fix.bat file (whichever corresponds to your operating system). If you have already installed Zed's Patch before, this step is unnecessary.
---------------------
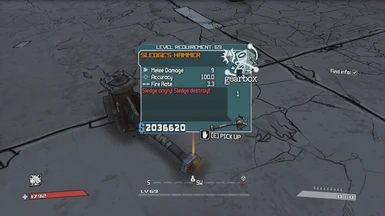
4). Lastly, enter the WillowTree code below into the Weapons tab of your character's save file in WillowTree. This will spawn the weapon in your character's backpack. If you dont know how to this, refer to the step-by-step tutorial at the bottom.
wILLOWTREE CODE:
HammerTime.Custom_Weapons.CustomWeap_Sledge_Hammer
gd_manufacturers.Manufacturers.Gearbox
HammerTime.A_Weapon.WeaponType_Sledge_Hammer
None
None
None
None
None
None
None
HammerTime.acc.acc_hammer
None
None
HammerTime.Title.sledge_hammer
0
5
0
71
---------------------
Willowtree Tutorial:
1. Copy the Willowtree code above.
2. Start WillowTree (the program is free and can be downloaded here: http://sourceforge.net/projects/willowtree/).
3. Open your save file in WillowTree by clicking the WT logo in the upperleft. Your save files should be located in "C:\Users\XXXX\Documents\my games\Borderlands\SaveData". (Make sure you have a back-up of your save files at all times in case anything goes wrong).
4. Click on the "Weapons" tab.
5. Click the "New" button. This will create a "New Weapon" at the bottom of the list below.
6. Click on the New Weapon. To the right, you should see box with a list of parts types. Above that box is an "Import Weapon" drop-down button. Click on it, then choose "from Clipboard". If there is an error, make sure you copied the above code correctly, then try again. If all else fails, you can copy each individual line and edit them in manually.
7. Click the "Save Changes" button. The "New Weapon" should now have a blank name in the list to the left.
8. Now save your file (click WT icon in upperleft and hit save). You are done!


