Other user's assetsAll the assets in this file belong to the author, or are from free-to-use modder's resources
Upload permissionYou are not allowed to upload this file to other sites under any circumstances
Modification permissionYou must get permission from me before you are allowed to modify my files to improve it
Conversion permissionYou are not allowed to convert this file to work on other games under any circumstances
Asset use permissionYou must get permission from me before you are allowed to use any of the assets in this file
Asset use permission in mods/files that are being soldYou are not allowed to use assets from this file in any mods/files that are being sold, for money, on Steam Workshop or other platforms
Asset use permission in mods/files that earn donation pointsYou are not allowed to earn Donation Points for your mods if they use my assets
Author notes
This author has not provided any additional notes regarding file permissions
File credits
3Dmigoto tool - bo3b
Shader injection mod - Tenshiken1
Donation Points system
This mod is not opted-in to receive Donation Points
Update: Removed v2.1 due to lighting shader errors. Update V2.1: v2.1 fixes texture replacement during mystic arts.
Update V2.0:
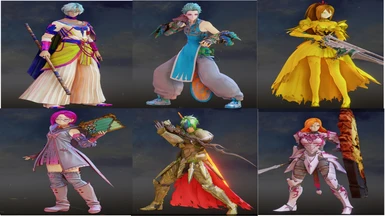
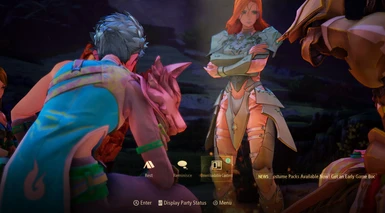
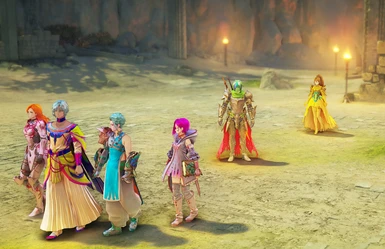
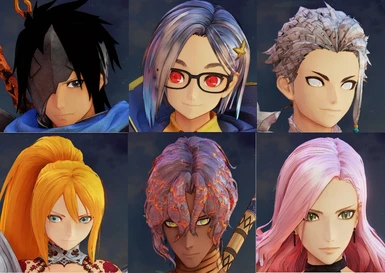
v2.0 adds the ability to edit face textures and default body textures. To specify the body textures that are editable are:
Alphen: ocean blue battle garb, sincleaver armor
Dohalim: il Qaras Traditional Attire
Kisara: Gaurdsman Armor
Law: Silver Wolf Vest
Rinwell: Inherited Coat
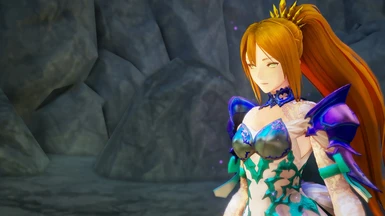
Shionne: Noble Scarlet
In addition new ini files have been added for not only the new textures but have been split up to give more control over what to enable/disable. If you feel that your game performance has lowered, commenting out/ taking out include statements can help. This is what the current include statements look like:
include = ReplacementTextures\Rinwell\RinwellEyeTextureOverride.ini include = ReplacementTextures\Rinwell\RinwellHairTextureOverride.ini include = ReplacementTextures\Rinwell\RinwellFaceTextureOverride.ini include = ReplacementTextures\Rinwell\body\Inherited Coat\RinwellInheritedCoatTextureOverride.ini
include = ReplacementTextures\Shionne\ShionneEyeTextureOverride.ini include = ReplacementTextures\Shionne\ShionneHairTextureOverride.ini include = ReplacementTextures\Shionne\ShionneFaceTextureOverride.ini include = ReplacementTextures\Shionne\body\Noble Scarlet\ShionneNobleScarletTextureOverride.ini
include = ReplacementTextures\Alphen\AlphenEyeTextureOverride.ini include = ReplacementTextures\Alphen\AlphenFaceTextureOverride.ini include = ReplacementTextures\Alphen\AlphenHairTextureOverride.ini include = ReplacementTextures\Alphen\AlphenMaskTextureOverride.ini include = ReplacementTextures\Alphen\body\ocean blue battle garb\AlphenOceanBlueBattleGarbTextureOverride.ini include = ReplacementTextures\Alphen\body\sincleaver armor\AlphenSincleaverArmorTextureOverride.ini
include = ReplacementTextures\Law\LawEyeTextureOverride.ini include = ReplacementTextures\Law\LawFaceTextureOverride.ini include = ReplacementTextures\Law\LawHairTextureOverride.ini include = ReplacementTextures\Law\body\Silver Wolf Vest\LawSilverWolfVestTextureOverride.ini
include = ReplacementTextures\Kisara\KisaraEyeTextureOverride.ini include = ReplacementTextures\Kisara\KisaraFaceTextureOverride.ini include = ReplacementTextures\Kisara\KisaraHairTextureOverride.ini include = ReplacementTextures\Kisara\body\Gaurdsman Armor\KisaraGaurdsmanArmorTextureOverride.ini
Installation is the same. Version 1.0 information continues below. -----------------------------------------------------------------------------------------------------------------------------
To Install:
After downloading the mod, open the folder and extract the contents to Tales of Arise\Arise\Binaries\Win64 (where the .exe is).
How to use: Replacement textures are found in the ReplacementTextures folder, separated by a folder for each character. Edit the existing example texture or replace it with your own with the same name.
If you want to change it to inject a different image type (png, jpg), go into the character ini folder (ex: ReplacementTextures\Alphen\AlphenTextureOverride.ini) and change the ResourceReplaceTexture at the top from a .dds file to a different image extension. Make sure the file name listed in ResourceReplaceTexture matches the name of the texture you want to inject in.
How to disable texture replacement for certain characters:
By default I set it up to inject similar dds textures to the ones the engine expects internally though the final output is slightly different. If you want to stop the tool doing any injection work on a certain character (and just have the textures go back to normal again) go into the d3dx.ini file, look for the include statements under “exclude_recursive = DISABLED*” and either comment out or remove the entire “include =**** “ line for the respective character that you want to return to normal.
This is what the include statements initially look like:
include = ReplacementTextures\Rinwell\RinwellTextureOverride.ini include = ReplacementTextures\Shionne\ShionneTextureOverride.ini include = ReplacementTextures\Alphen\AlphenTextureOverride.ini include = ReplacementTextures\Law\LawTextureOverride.ini include = ReplacementTextures\Kisara\KisaraTextureOverride.ini include= ReplacementTextures\Dohalim\DohalimTextureOverride.ini
Notes:
If you want to use this with the hud mod, move the include statements from the d3dx.ini file and place them in the same spot in the d3dx.ini file that was for the hud mod. Then cut/copy the entire ReplacementTextures folder and place that in the same place where the exe or ShaderFixes folder is.
To get the right injected textures to show up in the right place, you may have to get the game camera up close to the characters face so it loads in the highest LOD textures, which is what the injection tool mainly overrides. You only need to do this once after you load in the game since the highest LOD versions typically stay active.
When editing a texture and looking at it in game, you may find that the image looks faded out/brighter than what you expected it to be, make sure to darken the image to actually get the in-game result to match more closely to what you wanted.
Created and tested on Nvidia hardware.
To Uninstall: Either remove the mod files manually or use the uninstall.bat file.