About this mod
Explains how to implement a auto-looting mechanism when crafting in Skyrim. It also provides the needed scripts throughout the steps. This method does not require SKSE.
- Permissions and credits
- Changelogs
- Donations
=====================================================================
Author: esuriddick
=====================================================================
Description
=====================================================================
Below, I'll explain the steps needed to implement this auto-looting system for when you approach a crafting station. Since there might be others out there, it should be pointed that I did this guide for people with some experience in the CreationKit (please, no questions asking how the CreationKit works and stuff like that), as well as for personal reasons in case I wanted to add this mechanism to a housing mod. Furthermore, I made this guide taking into consideration that only one chest for each crafting station was needed. The way I have set it up is easy enough for you to add/remove the necessary script lines and properties in such a way as to add extra chests to each crafting station. In addition, when you start crafting and get the items from the specified chest, if you already had the same item on your inventory, it will be automatically transferred to the chest once you are done at the station, regardless of whether you use it or not. Finally, no SKSE is required for this method.
All of these steps have images associated to them in this mod's "Images" section.
Step 1 – Global Variables
- Navigate to Miscellaneous->Global.
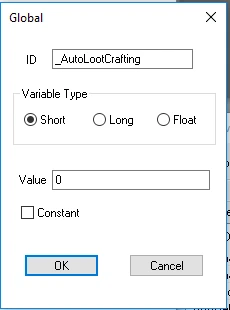
- Right click and select new. In the ID field type in something like “_AutoLootCrafting” and leave the rest of the options as they are. Press “OK”.
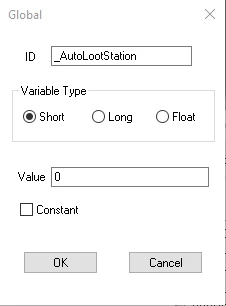
- Right click and select new. In the ID field type in something like “_AutoLootStation” and leave the rest of the options as they are. Press “OK”.
Step 2 – FormList
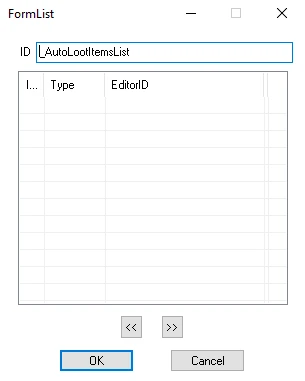
- Navigate to Miscellaneous->FormList. Right click and select new.
- In the ID field, type in something like “_AutoLootItemsList”. Press “OK”.
Step 3 – Chest
- Navigate to WorldObjects->Container.
- Select any chest that you would like (e.g., “NobleChest01”) and right-click it to select “Duplicate”.
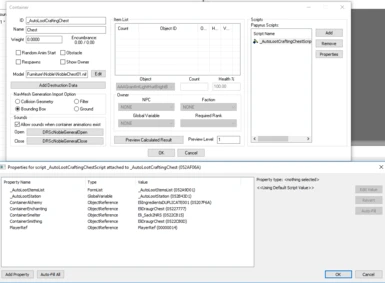
- Open the duplicate and erase everything you have on the item list and on the scripts list. Also make sure it does not have any of the 4 options ticked (“Random Anim Start”, “Obstacle”, “Respawns”, and “Show Owner”).
- Change the ID to something more recognizable, such as “_AutoLootCraftingChest”.
- Press “OK” and select “No” when it asks whether you want to create a new Form (followed by a “Yes”).
- Open the created chest again. Click on the “Add” button to create a new script
- Select [New Script].
- In the Name field, type something like “_AutoLootCraftingChestScript”. Copy paste script "_AutoLootCraftingChestScript.psc" into this new script, and then save.
- Press “Properties” and fill these options. The Global Variable will be the one created in Step 1 (the one I entitled "_AutoLootStation"). On the FormList, select the one created in Step 2. For the property “PlayerRef”, select under “Cell” the “Any” option and then select under “Reference” on “Player”. For the Containers, be sure to select the containers you want to send back the stuff to. Press “OK”.
- Press "OK".
Step 4 – Cell
- Press on the CreationKit's top on the “World” option and select “Cells…”.
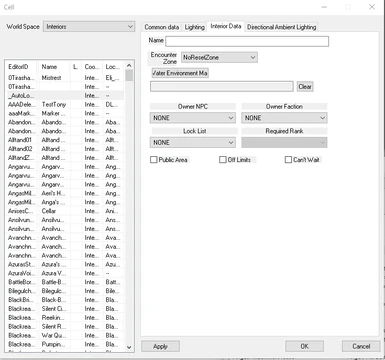
- On the window that opens, make sure that the World Space selected is “Interiors”.
- Right-click on the area with several columns, such as EditorID. Select the option “New”.
- As ID, type something like “_AutoLootCraftingCell”. Press “OK”. Press “OK” again.
- On the "Interior Data" tab of this cell, make sure that in "Encounter Zone" you have the option "NoResetZone" selected.
- On the “Cell View Window”, double click on the cell we just created so it loads.
- Drag and drop into the loaded cell the chest we just created in Step 3.
Step 5 – Magic Effect
- Navigate to Magic->MagicEffects. Right-click and select new.
- In the ID-field, type something like "_AutoLootCraftingEffect".
- Type something in the name like “AutoLootCraftingEffect”.
- Set archetype to “Script”.
- Set Casting Type to “Constant Effect”.
- Set Delivery to “Self”.
- Tick the “No Area”, “No Magnitude” and “Hide in UI” tickboxes. Press “OK”.
- Reopen this magic effect and press “Add” on the bottom right.
- Select [New Script].
- In the Name field, type something like “_AutoLootCraftingEffectScript”
- Open the script and copy paste the code from the file "_AutoLootCraftingEffectScript.psc". Save and close.
- Press on “Properties”. The Global Variable will be the one created in Step 1 (the one I entitled "_AutoLootCrafting"). On the FormList, select the one created in Step 2. For the property “PlayerRef”, select under “Cell” the “Any” option and then select under “Reference” on “Player”. For the property "_AutoLootCraftingChest", select the chest created and placed in the new cell in Steps 3 and 4.
Step 6 – Spell
- Navigate to Magic->Spell. Right-click and select new.
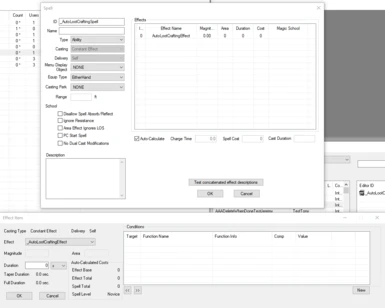
- In the ID-field, type in something like “_AutoLootCraftingSpell”.
- Set the type to “Ability”.
- Set casting type to “Constant effect”.
- Set delivery Type to “Self”.
- In the effects field, right-click and select New. Select from the list the magic effect we created in Step 5. Press “OK”.
Step 7 – Perk
- Navigate to Actors->Perk. Right click and select new.
- In the ID-field, type in something like “_AutoLootCraftingPerk”.
- Make sure only the “Playable” tickbox is selected. Press "OK" and then reopen this new perk.
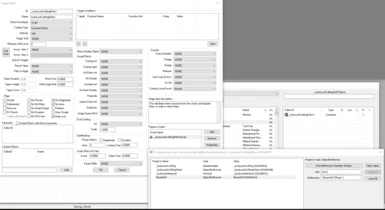
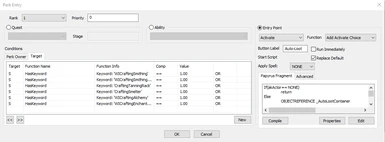
- Press with the right mouse button on the “Perk Entries” and select “Add”. Select “Entry Point” and choose “Activate” and as Function choose “Add Activate Choice”. If you are not using a mod that adds new crafting options to the crafting stations, such as SPERG, tick both the “Run Immediately” and the “Replace Default”, otherwise tick only the “Replace Default” option (for compatibility reasons) and type a name for the option, such as “Auto-Loot”.
- On the “Target” tab, press “New” and select as “Condition Function” the option “HasKeyword” and on the next box select either “WICraftingAlchemy” (if for an alchemy table), “WICraftingEnchanting” (if for an enchanting table), “WICraftingSmithing” (if for a forge), “WICraftingSmithingTempering” (if for a tempering station), or “CraftingSmelter” (if for a smelter), so this only trigger on the specified table. On the value make sure it is 1. You can also add all these keywords and tick the "OR" checkbox.
- On the “Perk Owner” tab, press “New” and select as “Condition Function” the option “GetIsID” and on the next box select “Player”, so this only triggers on the player. On the value make sure it is 1. Press “OK”.
- (Optional) On the “Perk Owner” tab, press “New” and select as “Condition Function” the option “GetInCell” (alternatively, you can select “GetInWorldspace” if it is better for your mod) and on the next box select the cell you intend the auto-looting to work in, so this does not trigger in every station in the world. On the value make sure it is "1". Press “OK”.
- On the “Papyrus Fragment” tab, write something like ";test", click compile, and then close the perk window by pressing in all "OK". Reopen the perk and go back to where you were.
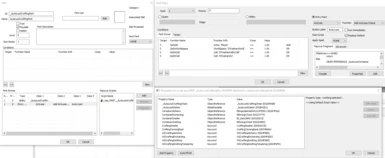
- Press “Properties”. Now, press “Add Property” and add all the properties present in image "7_b". Make sure to press the "Auto-Fill All" before you start filling the properties. The Global Variable will be the one created in Step 1 (the one I entitled "_AutoLootStation"). For the property "_AutoLootCraftingChest", select the chest created and placed in the new cell in Steps 3 and 4. For the Containers, be sure to select the containers you want to send back the stuff to (they should be the same ones as in Step 3). Press “OK”. The Keywords should have been automatically filled, otherwise check the ones in image "7_b". Press "OK".
- Press “Edit” on the bottom right and copy paste the code in the file "aaa_PRKF__AutoLootCraftingPer_05294F69.psc" (replace only the part that we wrote previously: ";test"). Save and close all the windows related to the perk.
- Re-open the perk.
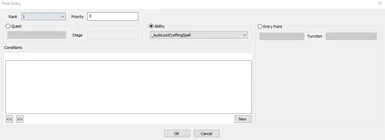
- Press with the right mouse button on the “Perk Entries” and select “Add”. Select “Ability” and choose the spell created in Step 6. Press "OK" and then "OK" again to close all the windows related to the perk.
Step 8 – Quest
- Navigate to Character->Quest. Right click and select new.
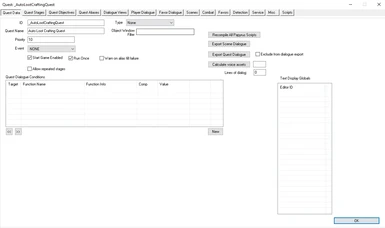
- In the ID field type something like “_AutoLootCraftingQuest”.
- In the Quest Name field type something like “Auto Loot Crafting Quest”
- In the Priority field type “10”.
- Untick the “Run Once” tickbox.
- Press “OK” and then reopen the quest.
- In the scripts tab, press “Add” and then [New Script].
- Type something in the name as “_AutoLootCraftingQuestScript”.
- Copy and paste the script provided in the file “_AutoLootCraftingQuestScript.psc”, and then press save the script.
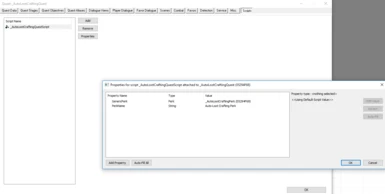
- Click on “Properties”. In the property “PerkName”, type something like “Auto-Loot Crafting Perk”. In the property “GenericPerk”, select the perk created in Step 7.
=====================================================================
Variables Glossary
=====================================================================
- _AutoLootCrafting: when something gets into the player's inventory from the _AutoLootCraftingChest, this variable will make sure that we only register a single time the animation event of the player leaving the crafting station.
- _AutoLootStation: It is used to specify which crafting station is being used by the player, in order for the script to go get the proper chest (1: Smithing, Tempering and Tanning / 2: Smelter / 3: Alchemy / 4: Enchanting).
- _AutoLootItemsList: It is a list that stores the information about which items were in the chest, so we know which ones we have to remove from the player once he is done in the crafting station.
- ContainerSmithing: Chest from which we will get all the items when the player interacts with a Forge, a Tempering station, or a Tanning Rack.
- ContainerSmelter: Chest from which we will get all the items when the player interacts with a Smelter.
- ContainerAlchemy: Chest from which we will get all the items when the player interacts with an Alchemy station.
- ContainerEnchanting: Chest from which we will get all the items when the player interacts with an Enchanting station.


