how many polys do these weapons have? and what resolution are they? i'm asking this cause i really like this mod but i have a low end pc... if you want, can you make a lower resolution pack? something like 1k or 512?
@lovexxx5 I don't know what you mean. You may have used google translate, which only translates word for word. Going back from English to your language will probably make this nonsensical, so you probably don't understand what you are reading right now.
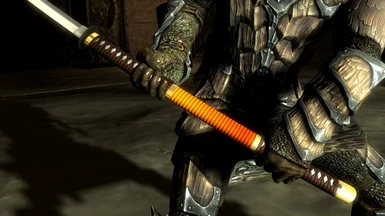
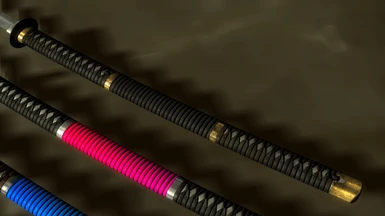
Thanks, I think that the textures for this weapon are my best to date. The textures were helped by my recent discover of the glossiness, specular strength, and specular colour settings in nifskope.
I do agree that texturing is the most tedious and boring part of the process, but good textures are what really makes a model look great. Improving your textures goes hand-in-hand with understanding what the various maps do, being able to predict how they will look in-game, and determining how a particular material should look given how it looks in real life. Experience helps, too.
When creating these textures I used the normal map quite a lot. I converted it to various cavity maps using the xNormals PS plugin. I also used it to create various layer masks.
As for your question about the UV maps, here is how I did it (I use 3ds max just so you are aware). I organize the various pieces as if I were using a 1:4 height to width ratio texture. In other words, I go out of the normal square bounds indicated in the UV editor. After I've set up the UVs, I select them all and horizontally scale them to fit inside the square bounds. Now, when I bake out the normals or any kind of map, I render the map with a 1:4 height to width ratio.
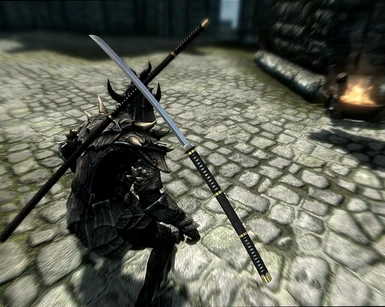
one thing that amaze me is the impressive texture that you made for this Nagamaki, it just so detailed. i take that you not just modeller that loves to mod a game. i'm beginner with modelling stuff, even tho i've made my own weapons and armors quite alot. i can stand with modelling all i day long but i find texturing is really boring thats why i mostly use plain/pattern texture.
anyway if i may ask some technical question, how do you make a non proportional uv map for your your model (using 4096x1024 not 1024x1024) ? i'm using blender, dont know if the method will be the same tho.
Thanks, it would be, but I'm not an animator and I don't know exactly how this weapon would have been wielded. I would like to have fixed the third person blocking hand positions as well.


16 comments
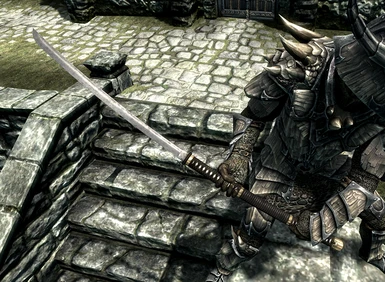
I must say the axe animations fill perfectly and is the right choice for this type of weapon.
If I had any modding talent I would create an elven themed version with the same handle size... Elven weapon mods generally are not good.
i'm asking this cause i really like this mod but i have a low end pc... if you want, can you make a lower resolution pack? something like 1k or 512?
maybe you want to make some realistic Katanas? because the could look very good!
@lovexxx5 I don't know what you mean. You may have used google translate, which only translates word for word. Going back from English to your language will probably make this nonsensical, so you probably don't understand what you are reading right now.
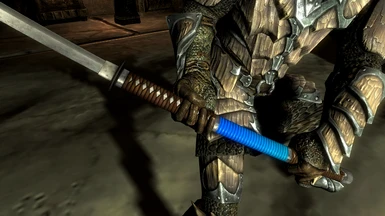
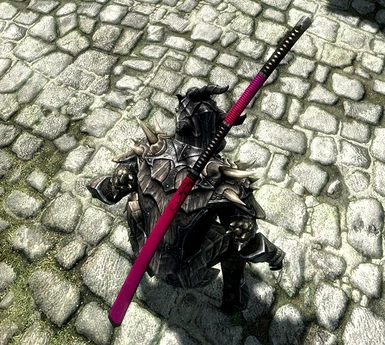
thank you very, very much for that double-nagamaki!
to bad that i can't endorse a second time
greetings from germany
FeSch33
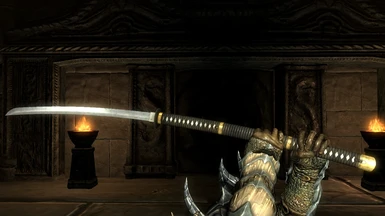
I do agree that texturing is the most tedious and boring part of the process, but good textures are what really makes a model look great. Improving your textures goes hand-in-hand with understanding what the various maps do, being able to predict how they will look in-game, and determining how a particular material should look given how it looks in real life. Experience helps, too.
When creating these textures I used the normal map quite a lot. I converted it to various cavity maps using the xNormals PS plugin. I also used it to create various layer masks.
As for your question about the UV maps, here is how I did it (I use 3ds max just so you are aware). I organize the various pieces as if I were using a 1:4 height to width ratio texture. In other words, I go out of the normal square bounds indicated in the UV editor. After I've set up the UVs, I select them all and horizontally scale them to fit inside the square bounds. Now, when I bake out the normals or any kind of map, I render the map with a 1:4 height to width ratio.
anyway if i may ask some technical question, how do you make a non proportional uv map for your your model (using 4096x1024 not 1024x1024) ? i'm using blender, dont know if the method will be the same tho.
Great work and thanks for sharing.