


*Contains spoilers for new quests
Last Update: September 9, 2021
[Quest title A~B]
A Fellow Traveler
Spoiler:
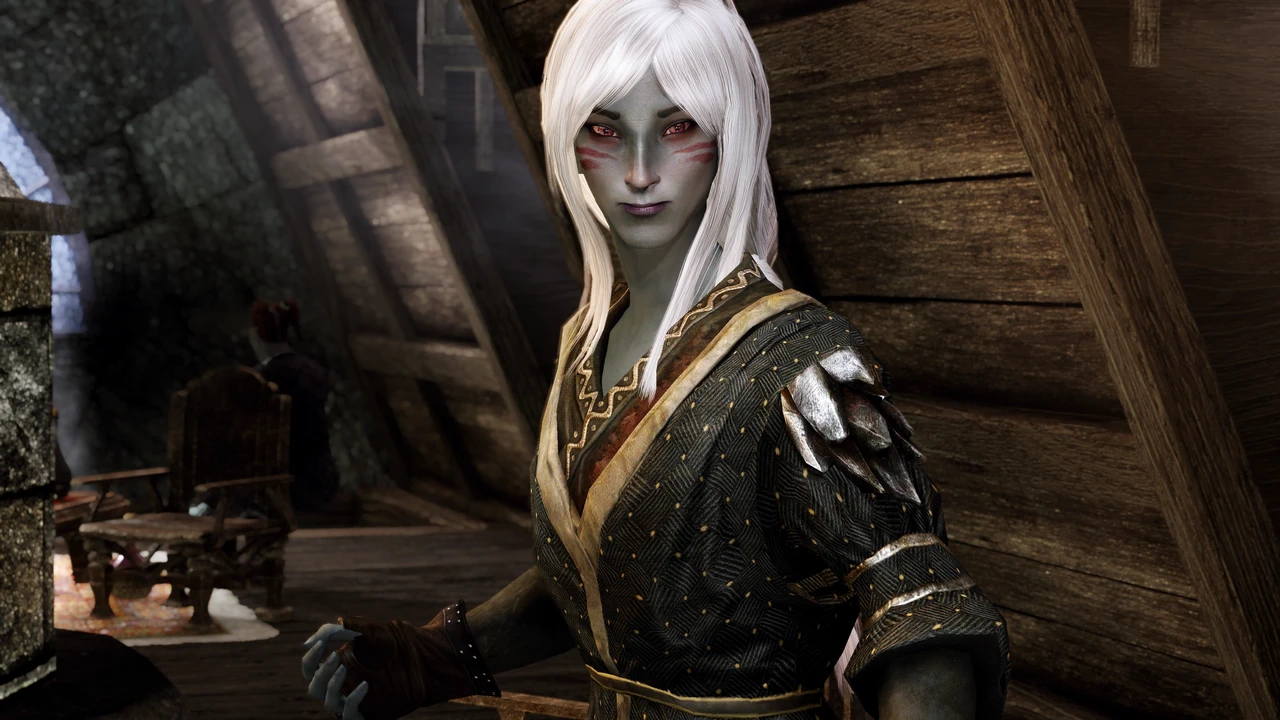
When you visit popular locations among the travelers, an NPC named "Traveler" may spawn asking if you're available to hire. They may appear in the taverns of Skyrim in addition to a Divine's temples, and a few other alehouse-type places such as Drunken Huntsman and Helga's Bunkhouse.
The Traveler has one of a few occupations: a farmer, a warrior, a scholar, a peddler, a noble, and a pilgrim. Traveler's occupation affects multitudes of things in this quest including the price they offer you to pay, their ability to fight alongside you and more.
You can name the price for your service in one of two ways. One way is by simply choosing from three dialogue options each specifying 250, 500, 750, and 1000 Gold (Septims). The higher the price, the more difficult the persuasion check gets. If you have a high skill in Speechcraft, your chance of getting a better price increases. A lower class citizen such as a farmer may not agree to pay you a thousand Septims while you may find a better chance of success with a noble. The second way to name the price is by specifying the exact amount you want by using a special text prompt, accessed by choosing the "let's haggle..." dialogue option. You can see the "suggested price" on the menu which is the current bid offered by Traveler. You can see if you can increase that amount and reach an agreement with Traveler. This method employs a slightly different and a little more complicated formula to calculate the price. In addition to your Speechcraft skill and the social status of Traveler, your achievements in the main quest and your character's current level will also affect your price.
After deciding the price with one of two ways, Traveler will start following you and the side quest "A Fellow Traveler" will be added to your quest journal. The journal points you to Traveler's destination. Escort him there, and speak to him once you're there and receive your reward to complete the quest.
During this quest, Traveler will act as your follower who can share your burdens and fight your enemies. The follower framework this mod uses is unique, so even if you already have a follower with you he will have no issue performing his follower duties. Upon recruiting him as a follower, you will receive a buff to your various skills depending on the Traveler's occupation. A noble Traveler may refuse your command to trade items with you, and his inability to fight back may make it challenging for you to keep him alive while you travel with him. Same goes for a farmer and a peddler who possess no remarkable combat skills and have a high chance of fleeing from enemies. A warrior may seem like a reliable fighter but you can never overestimate his skills in combat. He mentions that he is past his prime and may get killed by stronger enemies.
As for the payment, Traveler will give you 100 Septims upfront and pay the rest at the end of the journey. To prevent you from getting 100 and immediately dismissing him, you will be able to dismiss Traveler only after leaving the city where you found him.
Show
ID:
SetteCitizen03
Repeatable?:
Yes
How to Start Quest:
Player must be level 10 or above.
Speak with a Traveler NPC who can appear in the taverns and other public locations, and agree to escort him to his destination.
Detailed Walkthrough:
SetteCitizen03
Repeatable?:
Yes
How to Start Quest:
Player must be level 10 or above.
Speak with a Traveler NPC who can appear in the taverns and other public locations, and agree to escort him to his destination.
Detailed Walkthrough:
When you visit popular locations among the travelers, an NPC named "Traveler" may spawn asking if you're available to hire. They may appear in the taverns of Skyrim in addition to a Divine's temples, and a few other alehouse-type places such as Drunken Huntsman and Helga's Bunkhouse.
The Traveler has one of a few occupations: a farmer, a warrior, a scholar, a peddler, a noble, and a pilgrim. Traveler's occupation affects multitudes of things in this quest including the price they offer you to pay, their ability to fight alongside you and more.
You can name the price for your service in one of two ways. One way is by simply choosing from three dialogue options each specifying 250, 500, 750, and 1000 Gold (Septims). The higher the price, the more difficult the persuasion check gets. If you have a high skill in Speechcraft, your chance of getting a better price increases. A lower class citizen such as a farmer may not agree to pay you a thousand Septims while you may find a better chance of success with a noble. The second way to name the price is by specifying the exact amount you want by using a special text prompt, accessed by choosing the "let's haggle..." dialogue option. You can see the "suggested price" on the menu which is the current bid offered by Traveler. You can see if you can increase that amount and reach an agreement with Traveler. This method employs a slightly different and a little more complicated formula to calculate the price. In addition to your Speechcraft skill and the social status of Traveler, your achievements in the main quest and your character's current level will also affect your price.
After deciding the price with one of two ways, Traveler will start following you and the side quest "A Fellow Traveler" will be added to your quest journal. The journal points you to Traveler's destination. Escort him there, and speak to him once you're there and receive your reward to complete the quest.
During this quest, Traveler will act as your follower who can share your burdens and fight your enemies. The follower framework this mod uses is unique, so even if you already have a follower with you he will have no issue performing his follower duties. Upon recruiting him as a follower, you will receive a buff to your various skills depending on the Traveler's occupation. A noble Traveler may refuse your command to trade items with you, and his inability to fight back may make it challenging for you to keep him alive while you travel with him. Same goes for a farmer and a peddler who possess no remarkable combat skills and have a high chance of fleeing from enemies. A warrior may seem like a reliable fighter but you can never overestimate his skills in combat. He mentions that he is past his prime and may get killed by stronger enemies.
As for the payment, Traveler will give you 100 Septims upfront and pay the rest at the end of the journey. To prevent you from getting 100 and immediately dismissing him, you will be able to dismiss Traveler only after leaving the city where you found him.
Beli Sut Salskap, En Sut Lo
Spoiler:
ID:
SetteBard02Evelyna
Repeatable?:
No
How to Start Quest:
This quest automatically starts after completing "We're Out of the Woods", if you choose to deliver the Sealed Letter from Bards College to Evelyna in Windhelm.
Detailed Walkthrough:
You'll find Evelyna near the New Gnisis Corner Club in the city of Windhelm. She's being harassed by a rude Nord drunkard, and your intervention will cause him to attack you. You don't have to kill him, just reducing his health by a certain amount would be enough, but even if you do kill him you won't be accused of murder. After the drunken thug has been dealt with, speak with Evelyna again. She remembers you from the last time you've interacted with her, as you've probably seen her perform with her band mates.
Evelyna guides you inside the Cornerclub, where you'll disclose her letter from Bards College. The letter turns out to be the acceptance letter from Bards College, and Evelyna is thoroughly amazed and worked up by this most unexpected turn of events. She'll have a conversation or two with her band mates Beeele and Roxelle, and then asks you if you are willing to be her ward on her way to Solitude. Upon agreeing to escort her to Bards College in Solitude, she will start following you closely.
At this point, Evelyna is not properly equipped to be your "follower" in terms of equipment and skills. You cannot trade items with her and she won't be able to do things you'd expect from followers, yet. The mod author suggests that you ask a couple of questions by choosing the "Can I ask you something?" dialogue option to get to know her better, as some of these questions are only available during this quest.
On your way to Solitude, Evelyna might mention how she's worried about her band mates in Windhelm, if you check up on her. Once you've arrived in Solitude, go to the courtyard of Bards College and you'll see a crowd of bards and citizens gathering at the festival of songs known as Salskap. The appraiser named Wrenard Phifer will greet Evelyna and then you, and Salskap commences. You should stick around and choose what song the new applicants should perform, and interact with several new faces at the College.
Evelyna will thank you for bringing her to Solitude and hands you a total of 750 Septims and the quest will be completed with her saying she wants to join your adventures.
After 3 days in game time, visit her again and she will speak with you regarding 3 bardic skills she can specialize in. You need to choose her specialization before she can act as a follower, so you're advised to make this decision right away.
Minstrel of Mischief is one of the skills to choose from, and with this skill learned Evelyna will be able to use a special ability by using her lute, once per day. In combat, she plays her lute to cause nearby living enemies (not effective against undead, automatons or powerful creatures) to lose their minds, with a similar effect to Fear, Calm, or Frenzy in Illusion magic. Evelyna will be also adept in using daggers and light armor.
Another skill she can specialize in is called College of Might. With this skill studied, Evelyna will use a special ability using her drum, once per day. Her drum will shake the ground causing her nearby enemies to stagger, and rallies up her allies including you and your followers. Evelyna will learn to be skilled in using heavy armor, both one-handed and two-handed swords and shields, and her default equipment will change to a set of Steel Plate Armor to reflect her new specialization.
And lastly, College of Luck will teach her versatile skills for a capable bard who can support you in in combat. She will be able to cast the Healing spell, Flesh (Mage Armor) spells, Resist Magic spell, and Resist Poison spell depending on the enemies you'll encounter. Her combat skill in using one-handed sword, bows, light armor, and Alteration spells will increase as well.
Once you've chosen her new specialty, Evelyna will head to the classroom in Bards College. Soon after, you'll be able to recruit her as your follower.
Show
ID:
SetteBard02Evelyna
Repeatable?:
No
How to Start Quest:
This quest automatically starts after completing "We're Out of the Woods", if you choose to deliver the Sealed Letter from Bards College to Evelyna in Windhelm.
Detailed Walkthrough:
You'll find Evelyna near the New Gnisis Corner Club in the city of Windhelm. She's being harassed by a rude Nord drunkard, and your intervention will cause him to attack you. You don't have to kill him, just reducing his health by a certain amount would be enough, but even if you do kill him you won't be accused of murder. After the drunken thug has been dealt with, speak with Evelyna again. She remembers you from the last time you've interacted with her, as you've probably seen her perform with her band mates.
Evelyna guides you inside the Cornerclub, where you'll disclose her letter from Bards College. The letter turns out to be the acceptance letter from Bards College, and Evelyna is thoroughly amazed and worked up by this most unexpected turn of events. She'll have a conversation or two with her band mates Beeele and Roxelle, and then asks you if you are willing to be her ward on her way to Solitude. Upon agreeing to escort her to Bards College in Solitude, she will start following you closely.
At this point, Evelyna is not properly equipped to be your "follower" in terms of equipment and skills. You cannot trade items with her and she won't be able to do things you'd expect from followers, yet. The mod author suggests that you ask a couple of questions by choosing the "Can I ask you something?" dialogue option to get to know her better, as some of these questions are only available during this quest.
On your way to Solitude, Evelyna might mention how she's worried about her band mates in Windhelm, if you check up on her. Once you've arrived in Solitude, go to the courtyard of Bards College and you'll see a crowd of bards and citizens gathering at the festival of songs known as Salskap. The appraiser named Wrenard Phifer will greet Evelyna and then you, and Salskap commences. You should stick around and choose what song the new applicants should perform, and interact with several new faces at the College.
Evelyna will thank you for bringing her to Solitude and hands you a total of 750 Septims and the quest will be completed with her saying she wants to join your adventures.
After 3 days in game time, visit her again and she will speak with you regarding 3 bardic skills she can specialize in. You need to choose her specialization before she can act as a follower, so you're advised to make this decision right away.
Minstrel of Mischief is one of the skills to choose from, and with this skill learned Evelyna will be able to use a special ability by using her lute, once per day. In combat, she plays her lute to cause nearby living enemies (not effective against undead, automatons or powerful creatures) to lose their minds, with a similar effect to Fear, Calm, or Frenzy in Illusion magic. Evelyna will be also adept in using daggers and light armor.
Another skill she can specialize in is called College of Might. With this skill studied, Evelyna will use a special ability using her drum, once per day. Her drum will shake the ground causing her nearby enemies to stagger, and rallies up her allies including you and your followers. Evelyna will learn to be skilled in using heavy armor, both one-handed and two-handed swords and shields, and her default equipment will change to a set of Steel Plate Armor to reflect her new specialization.
And lastly, College of Luck will teach her versatile skills for a capable bard who can support you in in combat. She will be able to cast the Healing spell, Flesh (Mage Armor) spells, Resist Magic spell, and Resist Poison spell depending on the enemies you'll encounter. Her combat skill in using one-handed sword, bows, light armor, and Alteration spells will increase as well.
Once you've chosen her new specialty, Evelyna will head to the classroom in Bards College. Soon after, you'll be able to recruit her as your follower.
Bounty Hunt
Spoiler:
Route 1: Traveling without the Adventurer
After reading the piece of notice the Adventurer shows you, you may choose to "sign up for Bounty Hunting on your own" which leads you to this route.
You will get an objective to clear out wherever the location the notice has pointed at.
Once you've cleared the enemies off the location, you will need to speak with the Jarl's Steward and receive a sum of gold as your reward. The quest will be completed and you can move on to do hopefully something more interesting with your adventure life.
Route 2: Traveling with the Adventurer
As the quest begins, the Adventurer starts following you to the location that needs to be cleared and considering you as his/her ally. The Adventurer is not Protected and may fall to the enemy's vicious attack though, so you may want to look out for him/her if you're a nice person.
If the Adventurer dies while on this quest, you will get a message box that says something along the line of "Adventurer has fallen...do you want to proceed or cancel your quest?" And if you wish to cancel the quest altogether, you can choose to do so and the quest will be failed immediately. If not, you will need to complete this quest on your own. See route 1 from this point forward.
If you and the Adventurer are both alive after clearing out the location, you can go talk to the Jarl's Steward to receive your reward. The Adventurer will get his/her share which is exactly a half no matter how much work he/she has actually done.
Show
ID:
SetteWERoad06Cont
Repeatable?:
Yes
How to Start Quest:
Player must be level 20 or above. (Same condition as Vanilla Skyrim)
Encounter the Adventurer on a road from one of the Vanilla Encounter events. Tell him/her you can be of help or want to sign up for the bounty hunting on your own.
Detailed Walkthrough:
Route 1: Traveling without the Adventurer
After reading the piece of notice the Adventurer shows you, you may choose to "sign up for Bounty Hunting on your own" which leads you to this route.
You will get an objective to clear out wherever the location the notice has pointed at.
Once you've cleared the enemies off the location, you will need to speak with the Jarl's Steward and receive a sum of gold as your reward. The quest will be completed and you can move on to do hopefully something more interesting with your adventure life.
Route 2: Traveling with the Adventurer
As the quest begins, the Adventurer starts following you to the location that needs to be cleared and considering you as his/her ally. The Adventurer is not Protected and may fall to the enemy's vicious attack though, so you may want to look out for him/her if you're a nice person.
If the Adventurer dies while on this quest, you will get a message box that says something along the line of "Adventurer has fallen...do you want to proceed or cancel your quest?" And if you wish to cancel the quest altogether, you can choose to do so and the quest will be failed immediately. If not, you will need to complete this quest on your own. See route 1 from this point forward.
If you and the Adventurer are both alive after clearing out the location, you can go talk to the Jarl's Steward to receive your reward. The Adventurer will get his/her share which is exactly a half no matter how much work he/she has actually done.
Boy's Endeavor
Spoiler:
ID:
SetteBoy00
Repeatable?:
No
How to Start Quest:
Encounter a boy practicing sword fighting in the wilds and take him to fight bandits, or by take him straight back to his home village.
Detailed Walkthrough:
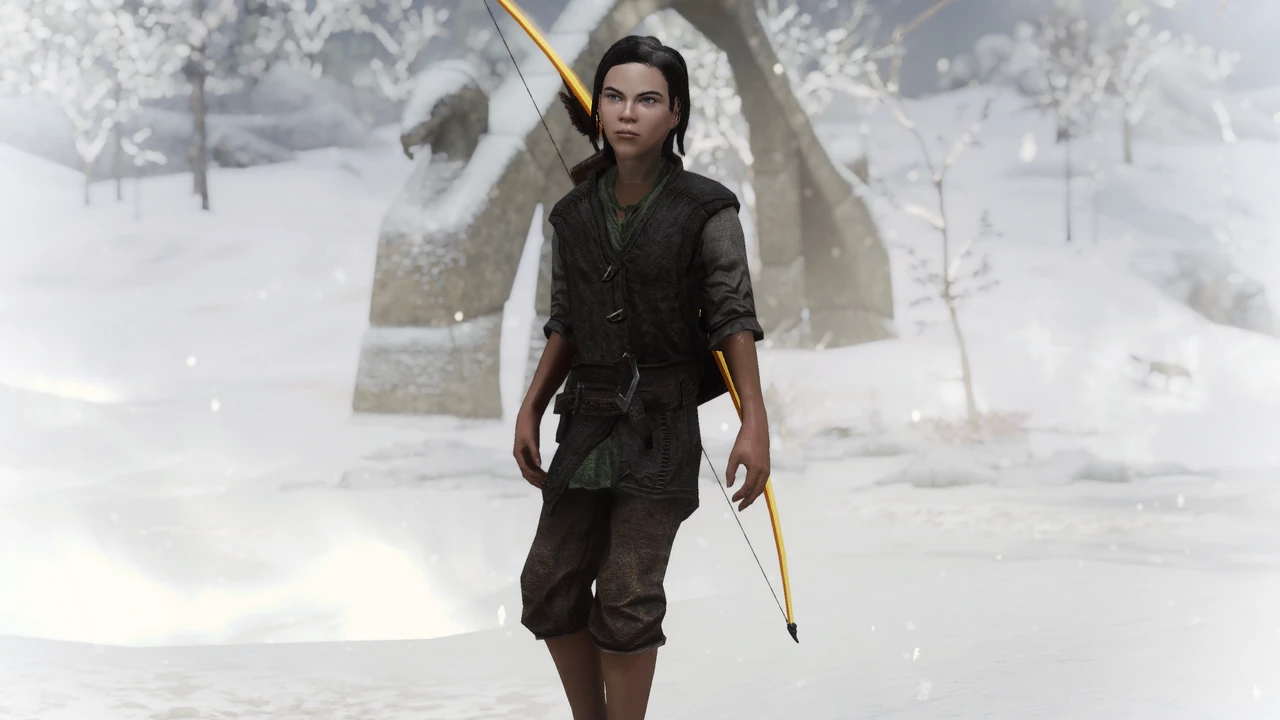
An NPC named Boy is practicing sword fighting in the wilderness. After trading a few words with him, you can choose either to take him back to his village where his Mother is waiting for his return, or go on an adventure to kill some bandits.
Route 1: If you decide to bring the boy straight back to his village
On your map, the location of Boy and his village are shown with markers. Boy is a fragile warrior-at-heart, so be sure to protect him while traveling through the dangers of Skyrim although like any other children of Skyrim Boy cannot die, or even bleed. Even if you have a mod that enables killing of child NPCs, Boy is still un-killable.
Once you've arrived in the village, look for Boy's Mother. She might show up the second after your arrival. If not, look for her in a town's tavern or town's other buildings. It may take a while before Mother shows up if you are running many mods and are experiencing delayed scripts.
Route 2: If you decide to go on an adventure together with Boy
On your map, the location of Boy and the bandit's hideout are shown with markers. Your objective is to kill the leader of bandits. Just like other child NPCs in Skyrim, Boy cannot die, bleed, or even fight back against threats. If you have a mod that modifies these behaviors of child NPCs, Boy might be able to fight along side you against the bandits.
In combat, Boy will equip and try to fight with his bow. However, in vanilla Skyrim, all child NPCs are unable to participate in combat. If you are using a mod that changes this behavior, you'll be able to see Boy fighting alongside you.
After successfully killing the bandit leader, speak to Boy and he will mark the location of his village where his Mother is waiting. Your next objective is to escort Boy back to his village.
Once you've arrived in the village, look for Boy's Mother. She might show up the second after your arrival. If not, look for her in a town's tavern or town's other buildings. It may take a while before Mother shows up if you are running many mods and are experiencing delayed scripts.
Use this console command if you can't get Mother to appear in the village:
setstage setteboy00 40
Conclusion of the quest
After a brief conversation between Boy and his Mother, you can speak to Mother to receive a reward.
If you decided to escort the boy without taking him on an adventure, Boy's Mother will be most appreciative and be willing to reward you with 150 gold.
You can accept the 150 gold and receive Homemade Stew along with a few potions and alchemy ingredients. Or, you can tell Mother to keep the gold, by persuading her by using the Speech skill. If your speech attempt succeeds, you will receive the magic ability "Gift of Charity" instead of 150 gold, and a few potions and alchemy ingredients.
If you decided to take Boy to battle before bringing him back to his village, Mother will be less appreciative and offer you 100 gold as a reward. You can accept the gold to conclude the quest, or persuade her by using your Speech skill to keep her gold. If your Speech attempt succeeds, you will receive Homemade Stew along with a few potions and alchemy ingredients.
Troubleshooting
Q. I went to the bandit camp with the Boy, but there are no bandits and the quest marker is floating in mid-air.
A. If this happens in your game, the console command you can use to advance the quest without killing the bandits is:
SetStage SetteBoy00 22
Q. Boy's Mother is nowhere to be found in the village!!!!1
A. Mother is supposed to show up right when you and Boy have arrived at the village, but this may not be the case if your game is experiencing delayed scripts due to other mods you have installed. Look for her in the village's tavern, houses, or other interiors if Mother doesn't seem to show up.
Show
ID:
SetteBoy00
Repeatable?:
No
How to Start Quest:
Encounter a boy practicing sword fighting in the wilds and take him to fight bandits, or by take him straight back to his home village.
Detailed Walkthrough:
An NPC named Boy is practicing sword fighting in the wilderness. After trading a few words with him, you can choose either to take him back to his village where his Mother is waiting for his return, or go on an adventure to kill some bandits.
Route 1: If you decide to bring the boy straight back to his village
On your map, the location of Boy and his village are shown with markers. Boy is a fragile warrior-at-heart, so be sure to protect him while traveling through the dangers of Skyrim although like any other children of Skyrim Boy cannot die, or even bleed. Even if you have a mod that enables killing of child NPCs, Boy is still un-killable.
Once you've arrived in the village, look for Boy's Mother. She might show up the second after your arrival. If not, look for her in a town's tavern or town's other buildings. It may take a while before Mother shows up if you are running many mods and are experiencing delayed scripts.
Route 2: If you decide to go on an adventure together with Boy
On your map, the location of Boy and the bandit's hideout are shown with markers. Your objective is to kill the leader of bandits. Just like other child NPCs in Skyrim, Boy cannot die, bleed, or even fight back against threats. If you have a mod that modifies these behaviors of child NPCs, Boy might be able to fight along side you against the bandits.
In combat, Boy will equip and try to fight with his bow. However, in vanilla Skyrim, all child NPCs are unable to participate in combat. If you are using a mod that changes this behavior, you'll be able to see Boy fighting alongside you.
After successfully killing the bandit leader, speak to Boy and he will mark the location of his village where his Mother is waiting. Your next objective is to escort Boy back to his village.
Once you've arrived in the village, look for Boy's Mother. She might show up the second after your arrival. If not, look for her in a town's tavern or town's other buildings. It may take a while before Mother shows up if you are running many mods and are experiencing delayed scripts.
Use this console command if you can't get Mother to appear in the village:
setstage setteboy00 40
Conclusion of the quest
After a brief conversation between Boy and his Mother, you can speak to Mother to receive a reward.
If you decided to escort the boy without taking him on an adventure, Boy's Mother will be most appreciative and be willing to reward you with 150 gold.
You can accept the 150 gold and receive Homemade Stew along with a few potions and alchemy ingredients. Or, you can tell Mother to keep the gold, by persuading her by using the Speech skill. If your speech attempt succeeds, you will receive the magic ability "Gift of Charity" instead of 150 gold, and a few potions and alchemy ingredients.
If you decided to take Boy to battle before bringing him back to his village, Mother will be less appreciative and offer you 100 gold as a reward. You can accept the gold to conclude the quest, or persuade her by using your Speech skill to keep her gold. If your Speech attempt succeeds, you will receive Homemade Stew along with a few potions and alchemy ingredients.
Troubleshooting
Q. I went to the bandit camp with the Boy, but there are no bandits and the quest marker is floating in mid-air.
A. If this happens in your game, the console command you can use to advance the quest without killing the bandits is:
SetStage SetteBoy00 22
Q. Boy's Mother is nowhere to be found in the village!!!!1
A. Mother is supposed to show up right when you and Boy have arrived at the village, but this may not be the case if your game is experiencing delayed scripts due to other mods you have installed. Look for her in the village's tavern, houses, or other interiors if Mother doesn't seem to show up.
Bring Me Home
Spoiler:
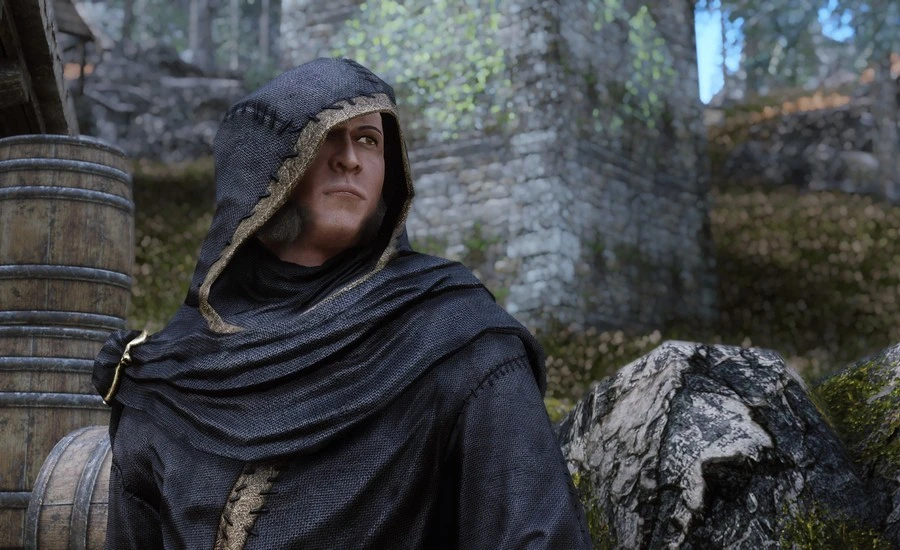
A Spirit of Boy is helplessly wandering the land. At first he seems so puzzled by the fact that he is dead. He then makes a wish to go back to his hometown so he may find peace beside his mother's bones. You can choose to escort Spirit of Boy to the priest of Arkay in his hometown, or carry his remains and bring it to the priest.
Route 1: Escort Spirit of Boy to the Arkay priest
Spirit of Boy will follow you closely. He cannot participate in combat in any way, or be hit by any means physical or magical. Your objective is to find and speak with the priest of Arkay in his hometown. They are usually found in the Hall of the Dead.
Route 2: Carry Boy's Remains and take it to the Arkay priest
Boy's Remains weigh 10 units. It is a lot of burden to carry, and you cannot drop it during this quest. So your objective is to find and speak with the priest of Arkay in his hometown as soon as possible. They are usually found in the Hall of the Dead.
Conclusion of the Quest
Speaking with the priest with Quest Marker will open up a dialogue. The priest will commend your effort and reward you with various gifts that are slightly different depending on what method did you use in order to bring Boy's Spirit to the priest.
Show
ID:
SetteBoy01
Repeatable?:
No
How to Start Quest:
Encounter the Spirit of Boy during night time. Speak with him and offer him a help so he can "see her mother" again.
Detailed Walkthrough:
SetteBoy01
Repeatable?:
No
How to Start Quest:
Encounter the Spirit of Boy during night time. Speak with him and offer him a help so he can "see her mother" again.
Detailed Walkthrough:
A Spirit of Boy is helplessly wandering the land. At first he seems so puzzled by the fact that he is dead. He then makes a wish to go back to his hometown so he may find peace beside his mother's bones. You can choose to escort Spirit of Boy to the priest of Arkay in his hometown, or carry his remains and bring it to the priest.
Route 1: Escort Spirit of Boy to the Arkay priest
Spirit of Boy will follow you closely. He cannot participate in combat in any way, or be hit by any means physical or magical. Your objective is to find and speak with the priest of Arkay in his hometown. They are usually found in the Hall of the Dead.
Route 2: Carry Boy's Remains and take it to the Arkay priest
Boy's Remains weigh 10 units. It is a lot of burden to carry, and you cannot drop it during this quest. So your objective is to find and speak with the priest of Arkay in his hometown as soon as possible. They are usually found in the Hall of the Dead.
Conclusion of the Quest
Speaking with the priest with Quest Marker will open up a dialogue. The priest will commend your effort and reward you with various gifts that are slightly different depending on what method did you use in order to bring Boy's Spirit to the priest.
Dragon Hunters
Spoiler:
3 Blades are traveling in a group. Speak with the NPC leading the group and ask them where they are going, and then offer them help will trigger this quest.
Travel with the Blades to the target Dragon's nest. You can let the leader NPC take the lead, or lead them to the Dragon's nest in case they might have some trouble finding a way to get there, by selecting either "Lead on" or "Let me take the lead".
After successfully killing the targeted Dragon, you will automatically obtain your reward. Your reward is a bundle of one rare Alchemy ingredient and two bottles of Black-Briar Reserve. The Blades NPCs in this quest are marked as Essential so they cannot be killed.
Show
ID:
SetteBladesDragonHunt
Repeatable?:
Yes
How to Start Quest:
You have brought 3 followers to Delphine. The Faction events for Blades Faction must be enabled in the MCM.
Encounter a group of Blades in wilds of the Reach. Speak with the one leading the group and ask them where they are going.
Detailed Walkthrough:
3 Blades are traveling in a group. Speak with the NPC leading the group and ask them where they are going, and then offer them help will trigger this quest.
Travel with the Blades to the target Dragon's nest. You can let the leader NPC take the lead, or lead them to the Dragon's nest in case they might have some trouble finding a way to get there, by selecting either "Lead on" or "Let me take the lead".
After successfully killing the targeted Dragon, you will automatically obtain your reward. Your reward is a bundle of one rare Alchemy ingredient and two bottles of Black-Briar Reserve. The Blades NPCs in this quest are marked as Essential so they cannot be killed.
Fellowship of Fighters
Spoiler:
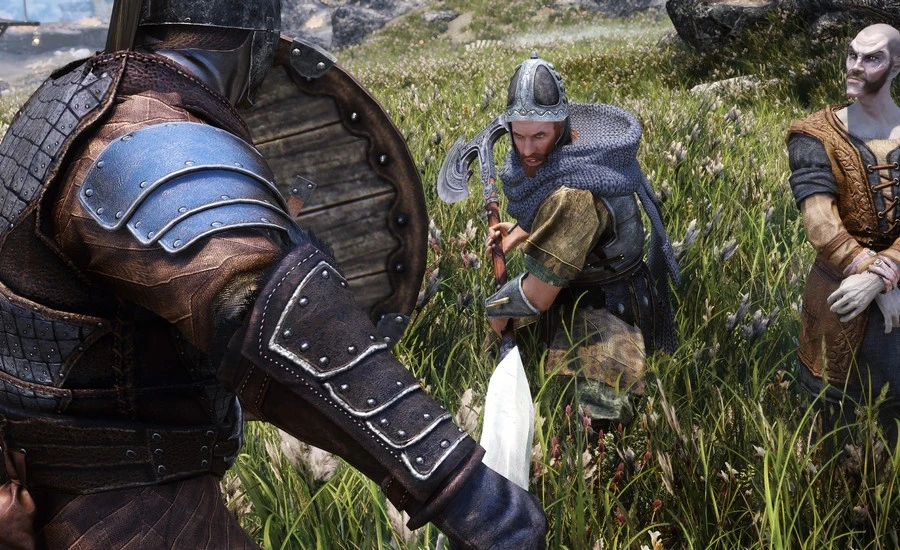
Speak with the leader of the Adventurers and agreeing to help them kill this "Evil", follow the Adventurers to the location of the Evil. Adventurers will stop to escort you when you are tagging along with them. But of course, you don't have to follow Adventurers if you know this location already. Get there on your own or fast-travel there, and Adventurers will still be able to catch up with you.
The leader and another Adventurer cannot be killed by anyone except Player (= Protected). So make sure not to hit them with your attack! If the leader gets killed before reaching the "evil" the quest will instantly fail, and you cannot receive any reward at the end of the quest.
Once you've arrived in the hideout of the "Evil", which is usually a bandit camp or a cave, make your way through the "Evil" by following the leader of Adventurers. It is in this moment that you will finally learn what the Evil actually is. It is also in this moment that the Adventurer leader's true identity is revealed and why he wanted to vanquish it so badly.
Depending on what you've learned, you may or may not choose to turn against the leader you've been following this whole time. Otherwise, you can accept a bundle of useful potions as a reward for helping the leader vanquish the "evil", at the end of the quest.
A variety of Adventures with different skill sets will appear in this Encounter/Quest. Wizards in your group might heal you and other Adventures by using Heal Other spell.
Troubleshooting
Q. We followed Adventurers to outside the dungeon, but they are not going inside and just standing there!
A. The quest journal is supposed to update once you've arrived the exterior of the dungeon, but if your game is experiencing delayed scripts due to other mods you have installed, the quest won't update and Adventurers won't move to kill the Evil. If this happens, talk to the leader of Adventurers and tell him "We have arrived" and the quest journal will be updated and Adventurers will get moving.
In prior to Version 2.1, it had been noted that some locations marked as inaccessible until quests related to this location starts can be chosen as the location of "Evil". (e.g. Ilinalta's Deep) If this happens in your game, you might need to use console command or kill the leader of Adventurers in order to proceed or fail this quest.
Show
ID:
SetteAdventurer01
Repeatable?:
No
How to Start Quest:
Player must be level 10 or above.
Encounter the band of Adventurers. There are 3 of them, but only one of them (the leader) can offer this quest.
Detailed Walkthrough:
SetteAdventurer01
Repeatable?:
No
How to Start Quest:
Player must be level 10 or above.
Encounter the band of Adventurers. There are 3 of them, but only one of them (the leader) can offer this quest.
Detailed Walkthrough:
Speak with the leader of the Adventurers and agreeing to help them kill this "Evil", follow the Adventurers to the location of the Evil. Adventurers will stop to escort you when you are tagging along with them. But of course, you don't have to follow Adventurers if you know this location already. Get there on your own or fast-travel there, and Adventurers will still be able to catch up with you.
The leader and another Adventurer cannot be killed by anyone except Player (= Protected). So make sure not to hit them with your attack! If the leader gets killed before reaching the "evil" the quest will instantly fail, and you cannot receive any reward at the end of the quest.
Once you've arrived in the hideout of the "Evil", which is usually a bandit camp or a cave, make your way through the "Evil" by following the leader of Adventurers. It is in this moment that you will finally learn what the Evil actually is. It is also in this moment that the Adventurer leader's true identity is revealed and why he wanted to vanquish it so badly.
Depending on what you've learned, you may or may not choose to turn against the leader you've been following this whole time. Otherwise, you can accept a bundle of useful potions as a reward for helping the leader vanquish the "evil", at the end of the quest.
A variety of Adventures with different skill sets will appear in this Encounter/Quest. Wizards in your group might heal you and other Adventures by using Heal Other spell.
Troubleshooting
Q. We followed Adventurers to outside the dungeon, but they are not going inside and just standing there!
A. The quest journal is supposed to update once you've arrived the exterior of the dungeon, but if your game is experiencing delayed scripts due to other mods you have installed, the quest won't update and Adventurers won't move to kill the Evil. If this happens, talk to the leader of Adventurers and tell him "We have arrived" and the quest journal will be updated and Adventurers will get moving.
In prior to Version 2.1, it had been noted that some locations marked as inaccessible until quests related to this location starts can be chosen as the location of "Evil". (e.g. Ilinalta's Deep) If this happens in your game, you might need to use console command or kill the leader of Adventurers in order to proceed or fail this quest.
Into the Deep
Spoiler:
ID:
SetteAdventurer03
Repeatable?:
No
How to Start Quest:
Player must be level 25 or above.
Encounter a scholar named Alistar Rabb in the wilds. Offer to help him with his expedition to a Dwarven ruin.
Detailed Walkthrough:
Speak with the Alistar Rabb, a depressed visiting scholar from the city of Daggerfall. He will explain to you how he came to Skyrim hoping to assist Calcelmo in Markarth with an important research on Dwemer. He now has to retrieve an old document from a ruin of Dwemer, and you can help him survive this overwhelming task.
You will accompany him to the Dwemer ruin in the region, along with his two bodyguards. In combat, Alistar is able to fend off mid-tier enemies using his skill in magic on his own. He is marked as Protected so as long as you don't kill him, he will survive this journey.
Once you're in the Dwemer dungeon, find the document Alistar is after by looting the boss chest. Find "Nherloar Codex" and give it to Alistar and receive your reward.
Show
ID:
SetteAdventurer03
Repeatable?:
No
How to Start Quest:
Player must be level 25 or above.
Encounter a scholar named Alistar Rabb in the wilds. Offer to help him with his expedition to a Dwarven ruin.
Detailed Walkthrough:
Speak with the Alistar Rabb, a depressed visiting scholar from the city of Daggerfall. He will explain to you how he came to Skyrim hoping to assist Calcelmo in Markarth with an important research on Dwemer. He now has to retrieve an old document from a ruin of Dwemer, and you can help him survive this overwhelming task.
You will accompany him to the Dwemer ruin in the region, along with his two bodyguards. In combat, Alistar is able to fend off mid-tier enemies using his skill in magic on his own. He is marked as Protected so as long as you don't kill him, he will survive this journey.
Once you're in the Dwemer dungeon, find the document Alistar is after by looting the boss chest. Find "Nherloar Codex" and give it to Alistar and receive your reward.
O, Help Me Kind One
Spoiler:
1 day in game time needs to pass after receiving "The Gift of Charity" effect in order to receive a letter from someone in the same Hold asking for your kind spirit.
The letter may be sent from a citizen who has one of several possible requests for you, such as collecting 5 Potions of Cure Disease and finding their lost ring or book.
Or if you have repeatedly helped the poor people, the Jarl themselves may send you some inquiries. To fix their greatsword, you can either speak with the local blacksmith or fix it by yourself using 1 Steel Ingot (Requires "Steel Smithing" perk). To help someone for the Jarl, try speaking with anyone in the Hold and ask them "Need help with anything?". They may or may not have requests for you, and if they do, the quest journal will give you one of a few possible objectives such as tracking down a thief who has recently stolen an item from them, or if the person is a Court Wizard, collecting 10 Dragon Bones/Scales for them. Once you've fulfilled their request, speak with the Jarl again who will reward you with a couple of jewelry items.
Show
ID:
Helping a citizen with their troubles: SetteGiftOfCharityFollowUp01
Helping the Jarl by fixing their greatsword: SetteGiftOfCharityFollowUp02
Helping the Jarl by helping a citizen: SetteGiftOfCharityFollowUp03
Repeatable?:
Yes
How to Start Quest:
Help people, such as beggars and receive "Gift of Charity".
Detailed Walkthrough:
1 day in game time needs to pass after receiving "The Gift of Charity" effect in order to receive a letter from someone in the same Hold asking for your kind spirit.
The letter may be sent from a citizen who has one of several possible requests for you, such as collecting 5 Potions of Cure Disease and finding their lost ring or book.
Or if you have repeatedly helped the poor people, the Jarl themselves may send you some inquiries. To fix their greatsword, you can either speak with the local blacksmith or fix it by yourself using 1 Steel Ingot (Requires "Steel Smithing" perk). To help someone for the Jarl, try speaking with anyone in the Hold and ask them "Need help with anything?". They may or may not have requests for you, and if they do, the quest journal will give you one of a few possible objectives such as tracking down a thief who has recently stolen an item from them, or if the person is a Court Wizard, collecting 10 Dragon Bones/Scales for them. Once you've fulfilled their request, speak with the Jarl again who will reward you with a couple of jewelry items.
Outbreak
Spoiler:

ID:
SetteWR01
Repeatable?:
No
How to Start Quest:
Encounter an NPC named Farmer on a road near Whiterun, who tells you that his farm is having a festering problem with some kind of beasts. Once you offer your help, he will lead you to his farm.
Detailed Walkthrough:
Follow Farmer to his farm. The farm could be either Battle-Born Farm or Chillfurrow Farm, but if you have Cutting Room Floor installed it could also be Barleydark Farm near the puzzle pillars.
Once you are at the farm, Farmer will speak with you again and tell you what exactly is his problem. You should probably know by now that the beasts his farm is in trouble with are a Giant and its pet Mammoth. Neither of them is hostile and will remain that way unless you attack them first.
You might have also noticed that the other farmers at the farm are in distress and trying to scare off the Giant. You might want to speak with the quest giver Farmer again and tell him those farmers need to back down, if you value their safety.
Your quest journal hints 3 possible solutions.
Solution 1: Kill the Giant and the Mammot
Perhaps the most straight-forward and challenging one especially if you're still at low level. Simply attack either the Giant or the Mammoth and it will turn them hostile to you and everyone at the farm.
Slay both of them, and the quest journal will update and tell you to speak with the quest giver Farmer for reward.
Solution 2: Use certain Shouts to command the Giant and the Mammoth
Use Animal Allegiance, Bend Will, or Kyne's Peace shout at either the Giant or the Mammoth will allow you to control their minds and make them follow you. The quest journal will update and tell you to lead the beasts to outside the farm. Simply walk out of the farm while they are still under your control.
After successfully leading them to outside the farm, they will be on their way to their cam, pand the quest journal will update and tell you to speak with the quest giver Farmer for reward.
Solution3: Talk to the Giant
You can talk to the Giant and ask him some questions. Although his reply may seem indistinguishable, you are on the right track if you ask him "What do you want?". After asking him if he wants gold or food, choose the dialogue option "I need to tell that to the farmer" and end the conversation.
Then, talk to the quest giver Farmer and tell him what you think the Giant wants. He will tell you about their heifer named Esme, which the farmer seems to care much about. You can convince Farmer to give Esme to the Giant, and he will reluctantly do so after having a brief conversation with Esme.
Once this is over, the quest journal will update and tell you to speak with the quest giver Farmer for reward.
Conclusion of the Quest
The quest giver Farmer will make different comments depending on what you did to solve this infestation problem and if you are a member of the Companions. Your reward will be a sum of Gold.
Show
ID:
SetteWR01
Repeatable?:
No
How to Start Quest:
Encounter an NPC named Farmer on a road near Whiterun, who tells you that his farm is having a festering problem with some kind of beasts. Once you offer your help, he will lead you to his farm.
Detailed Walkthrough:
Follow Farmer to his farm. The farm could be either Battle-Born Farm or Chillfurrow Farm, but if you have Cutting Room Floor installed it could also be Barleydark Farm near the puzzle pillars.
Once you are at the farm, Farmer will speak with you again and tell you what exactly is his problem. You should probably know by now that the beasts his farm is in trouble with are a Giant and its pet Mammoth. Neither of them is hostile and will remain that way unless you attack them first.
You might have also noticed that the other farmers at the farm are in distress and trying to scare off the Giant. You might want to speak with the quest giver Farmer again and tell him those farmers need to back down, if you value their safety.
Your quest journal hints 3 possible solutions.
Solution 1: Kill the Giant and the Mammot
Perhaps the most straight-forward and challenging one especially if you're still at low level. Simply attack either the Giant or the Mammoth and it will turn them hostile to you and everyone at the farm.
Slay both of them, and the quest journal will update and tell you to speak with the quest giver Farmer for reward.
Solution 2: Use certain Shouts to command the Giant and the Mammoth
Use Animal Allegiance, Bend Will, or Kyne's Peace shout at either the Giant or the Mammoth will allow you to control their minds and make them follow you. The quest journal will update and tell you to lead the beasts to outside the farm. Simply walk out of the farm while they are still under your control.
After successfully leading them to outside the farm, they will be on their way to their cam, pand the quest journal will update and tell you to speak with the quest giver Farmer for reward.
Solution3: Talk to the Giant
You can talk to the Giant and ask him some questions. Although his reply may seem indistinguishable, you are on the right track if you ask him "What do you want?". After asking him if he wants gold or food, choose the dialogue option "I need to tell that to the farmer" and end the conversation.
Then, talk to the quest giver Farmer and tell him what you think the Giant wants. He will tell you about their heifer named Esme, which the farmer seems to care much about. You can convince Farmer to give Esme to the Giant, and he will reluctantly do so after having a brief conversation with Esme.
Once this is over, the quest journal will update and tell you to speak with the quest giver Farmer for reward.
Conclusion of the Quest
The quest giver Farmer will make different comments depending on what you did to solve this infestation problem and if you are a member of the Companions. Your reward will be a sum of Gold.
Roadside Dispute
Spoiler:
ID:
SetteWR02
Repeatable?:
No
How to Start Quest:
In the wilds of the Whiterun Hold, encounter a Whiterun Guard and a Falkreath Guard vigorously arguing on the road over the custody of a Dark Elf Criminal. Speak with one of them and offer to help them end this dispute.
Detailed Walkthrough:
The argument between the two guardsmen gradually escalates. Although this may be entertaining to witness, they will start killing each other if you don't intervene. Before this happens, you can talk to one of them - the Whiterun Guard and the Falkreath Guard who both believe themselves to be the rightful captor of the Dark Elf Criminal, whom you can also talk to.
After offering to help one of them (for now it doesn't matter to whom you should ask "how can I help?"), "Roadside Dispute" will be added to your quest journal. Your goal is to tell one or both of the guards to back down, and you can either bribe one of the guards, use your persuasion skills, kill someone, or demonstrate that you have connections with someone important that can compensate for their trouble.
Show
ID:
SetteWR02
Repeatable?:
No
How to Start Quest:
In the wilds of the Whiterun Hold, encounter a Whiterun Guard and a Falkreath Guard vigorously arguing on the road over the custody of a Dark Elf Criminal. Speak with one of them and offer to help them end this dispute.
Detailed Walkthrough:
The argument between the two guardsmen gradually escalates. Although this may be entertaining to witness, they will start killing each other if you don't intervene. Before this happens, you can talk to one of them - the Whiterun Guard and the Falkreath Guard who both believe themselves to be the rightful captor of the Dark Elf Criminal, whom you can also talk to.
After offering to help one of them (for now it doesn't matter to whom you should ask "how can I help?"), "Roadside Dispute" will be added to your quest journal. Your goal is to tell one or both of the guards to back down, and you can either bribe one of the guards, use your persuasion skills, kill someone, or demonstrate that you have connections with someone important that can compensate for their trouble.
Show Me The Way
Spoiler:

ID:
SetteAdventurer02
Repeatable?:
No
How to Start Quest:
Player must be level 25 or above.
Encounter an Imperial woman in the wilds, who is initially only known as "Wife". Help her find a way to the city of Solitude.
Detailed Walkthrough:
Speak with the Wife, and you should (albeit reluctantly) help her find a way to go to the city of Solitude. Then, the quest "Show Me the Way" will be added to your quest journal. Although your goal is to escort her and her Husband to Solitude, there will be an irregular turn of events.
The Husband can be found tinkering with his Scroll of Clairvoyance, and instead of following your lead, he starts mindlessly following the trails shown by his magic spell without realizing the spell is leading them to a cave full of Falmers.
Route 1: Follow the Husband
The Husband foolishly ushers into the den of Falmers as his wife, Beatria, follows him helplessly. The Husband gets immediately captured by the Falmers once inside, leaving Beatria alone in the cave with you.
Your objective is to rescue the Husband from the depth of the cave, fighting off the army of Falmers along the way. You may speak to Beatria a few times to assure her you will help her husband. Upon receiving your rally, Beatria finds courage to fight alongside you, picking up a magic staff and a set of Falmer Heavy Armor. She has the Protected status so as long as you don't mistakenly kill her, she should be able to survive in this cave.
In the final boss chamber, Beatria is shocked to see her horse stolen from her a few days ago by a Khajiit burglar(who is also found dead in this room), is now an undead horse reanimated by a Falmer Shaman. Kill the dead horse, and Beatria's Husband emerges, heavily wounded and poisoned by a Chaurus. He has a brief conversation with his wife before he dies, and then Beatria turns to you and hands you a sum of gold for your service.
Route 2: Tell the Husband to follow you
This will require a good persuasion skill, but you have a chance to tell the Husband to follow your lead before he takes you and Beatria to the Falmer cave. If you succeed, he will start following you so you can take him and Beatria to Solitude. Once you've arrived in Solitude, speak with Beatria to receive your reward.
Show
ID:
SetteAdventurer02
Repeatable?:
No
How to Start Quest:
Player must be level 25 or above.
Encounter an Imperial woman in the wilds, who is initially only known as "Wife". Help her find a way to the city of Solitude.
Detailed Walkthrough:
Speak with the Wife, and you should (albeit reluctantly) help her find a way to go to the city of Solitude. Then, the quest "Show Me the Way" will be added to your quest journal. Although your goal is to escort her and her Husband to Solitude, there will be an irregular turn of events.
The Husband can be found tinkering with his Scroll of Clairvoyance, and instead of following your lead, he starts mindlessly following the trails shown by his magic spell without realizing the spell is leading them to a cave full of Falmers.
Route 1: Follow the Husband
The Husband foolishly ushers into the den of Falmers as his wife, Beatria, follows him helplessly. The Husband gets immediately captured by the Falmers once inside, leaving Beatria alone in the cave with you.
Your objective is to rescue the Husband from the depth of the cave, fighting off the army of Falmers along the way. You may speak to Beatria a few times to assure her you will help her husband. Upon receiving your rally, Beatria finds courage to fight alongside you, picking up a magic staff and a set of Falmer Heavy Armor. She has the Protected status so as long as you don't mistakenly kill her, she should be able to survive in this cave.
In the final boss chamber, Beatria is shocked to see her horse stolen from her a few days ago by a Khajiit burglar(who is also found dead in this room), is now an undead horse reanimated by a Falmer Shaman. Kill the dead horse, and Beatria's Husband emerges, heavily wounded and poisoned by a Chaurus. He has a brief conversation with his wife before he dies, and then Beatria turns to you and hands you a sum of gold for your service.
Route 2: Tell the Husband to follow you
This will require a good persuasion skill, but you have a chance to tell the Husband to follow your lead before he takes you and Beatria to the Falmer cave. If you succeed, he will start following you so you can take him and Beatria to Solitude. Once you've arrived in Solitude, speak with Beatria to receive your reward.
Stronghold Celebration
Spoiler:
After reading the invitation letter, a new journal entry appears under the miscellaneous category. It tells you to attend the Grand Feast at the Stronghold and from this point thereon, you have about 3 days to get to the Stronghold and attend the Grand Feast there. The Stronghold for this quest is chosen randomly.
If you make it to the Stronghold within a 3 days time, you will receive a reasonably warm welcome from the members of the Stronghold. Speak with an Orc called "Orc Gatekeeper" who is holding a tray to serve the guests. After a brief conversation with him, hewill properly announce your arrival to his clan.
At the same time you will receive some raw venison, 2 cups of venison stew, and a few other items as a gift. At this point you are free to leave the Stronghold whenever you feel like. But if you have brought Volendrung, the Hammer of Might given to you by Malacath, make sure to speak with the Gatekeeper again. He will show Volendrung to the Stronghold's chieftain, who then rewards you with a bundle of items such as Soulgems, Orcish helmets, and more.
Once you leave the Grand Feast, the quest log on your journal "Stay and rejoice at the Feast" will be automatically completed.
Troubleshooting
Q. Nothing happens after speaking with Attendant when he says, "Let me introduce you to my kin!"
A. The scene is supposed to play after that. If for whatever reason the scene did not happen, try typing this in your console:
[font=Courier New]SetStage SetteDA06 25
Show
ID:
SetteDA06
Repeatable?:
No
How to Start Quest:
After completing the Daedric quest "The Cursed Tribe", encounter an NPC called Orc Ranger out in the wilds and read the letter "Invitation: Feast at Stronghold" he gives you.
Detailed Walkthrough:
SetteDA06
Repeatable?:
No
How to Start Quest:
After completing the Daedric quest "The Cursed Tribe", encounter an NPC called Orc Ranger out in the wilds and read the letter "Invitation: Feast at Stronghold" he gives you.
Detailed Walkthrough:
After reading the invitation letter, a new journal entry appears under the miscellaneous category. It tells you to attend the Grand Feast at the Stronghold and from this point thereon, you have about 3 days to get to the Stronghold and attend the Grand Feast there. The Stronghold for this quest is chosen randomly.
If you make it to the Stronghold within a 3 days time, you will receive a reasonably warm welcome from the members of the Stronghold. Speak with an Orc called "Orc Gatekeeper" who is holding a tray to serve the guests. After a brief conversation with him, hewill properly announce your arrival to his clan.
At the same time you will receive some raw venison, 2 cups of venison stew, and a few other items as a gift. At this point you are free to leave the Stronghold whenever you feel like. But if you have brought Volendrung, the Hammer of Might given to you by Malacath, make sure to speak with the Gatekeeper again. He will show Volendrung to the Stronghold's chieftain, who then rewards you with a bundle of items such as Soulgems, Orcish helmets, and more.
Once you leave the Grand Feast, the quest log on your journal "Stay and rejoice at the Feast" will be automatically completed.
Troubleshooting
Q. Nothing happens after speaking with Attendant when he says, "Let me introduce you to my kin!"
A. The scene is supposed to play after that. If for whatever reason the scene did not happen, try typing this in your console:
[font=Courier New]SetStage SetteDA06 25
Suspect of Misfortune
Spoiler:
The Bounty Hunter is easily alerted by your presence, so if you get too close to them or try to snatch their Criminal off their hands, it will make them hostile towards you. You should probably kill the Bounty Hunter to proceed with your journey to take your Criminal to justice.
Given that you chose to "seize this Criminal" from the menu options that are displayed when you activate the Ctiminal, "Suspect of Misfortune" will be added to your quest journal and the Criminal will start following you (and bitching you for capturing them). Your objective is to bring your Criminal safely to the Jarl's Steward who should be found in the Hold's castle. If the Criminal gets killed on the way, the quest will immediately fail. Therefore if you wish to successfully complete the quest and receive your reward, you should probably stay out of trouble as much as possible.
Now, during this quest, all of the Encounter events from this mod get replaced with events with Bounty Hunters who are hostile to you. This means if you set the percentage for the new WE events to be 60% in your MCM, then you have that much of possibility to encounter hostile Bounty Hunters during your journey to the castle. These hostile Bounty Hunters may also be in the city where the castle is located. They will attack you on sight so be very cautious!
When you activate your captured Criminal, you will get a message box with a couple of options. You may choose to abandon your Criminal where you are, while doing so you will fail this quest will not be able to capture them again or restart the quest. Your message box also tells you whether or not you recognize your Criminal's face from a local notice board. If you recognize your Criminal's face, it means you can be assured that your Criminal is indeed, the criminal, with a price on their head. If you don't recognize your Criminal's face, however, it could mean bad news because whoever captured this Criminal before you might have made a mistake. But it could also mean that you haven't paid much attention to the notice board. You never know for sure, so you should travel to the Jarl's castle anyway!
Once you successfully enter the Jarl's castle with your Criminal, congratulations! You should speak with the Jarl's Steward and choose a dialogue option to exchange your Criminal for your reward.
Route 1: If Criminal was the right person with bounty on their head
With you recognizing the Criminal's face from a notice board or not,, there is a chance for you to be able to receive your reward from Steward if bounty was indeed placed on that person's head.You will receive a sum of gold as your reward and the quest will be completed.
Route 2: If Criminal was not the right person
The Steward will express distress, and you will realize that the person you've been escorting was not the right person after all.Unfortunately there will be no reward for you as there was no bounty placed on that person's head to begin with, and the quest will be failed.
Show
ID:
SetteBountyHunter01
Repeatable?:
Yes
How to Start Quest:
Encounter the Bounty Hunter escorting a captured Criminal. Kill the Bounty Hunter and claim the Criminal as your own.
Detailed Walkthrough:
SetteBountyHunter01
Repeatable?:
Yes
How to Start Quest:
Encounter the Bounty Hunter escorting a captured Criminal. Kill the Bounty Hunter and claim the Criminal as your own.
Detailed Walkthrough:
The Bounty Hunter is easily alerted by your presence, so if you get too close to them or try to snatch their Criminal off their hands, it will make them hostile towards you. You should probably kill the Bounty Hunter to proceed with your journey to take your Criminal to justice.
Given that you chose to "seize this Criminal" from the menu options that are displayed when you activate the Ctiminal, "Suspect of Misfortune" will be added to your quest journal and the Criminal will start following you (and bitching you for capturing them). Your objective is to bring your Criminal safely to the Jarl's Steward who should be found in the Hold's castle. If the Criminal gets killed on the way, the quest will immediately fail. Therefore if you wish to successfully complete the quest and receive your reward, you should probably stay out of trouble as much as possible.
Now, during this quest, all of the Encounter events from this mod get replaced with events with Bounty Hunters who are hostile to you. This means if you set the percentage for the new WE events to be 60% in your MCM, then you have that much of possibility to encounter hostile Bounty Hunters during your journey to the castle. These hostile Bounty Hunters may also be in the city where the castle is located. They will attack you on sight so be very cautious!
When you activate your captured Criminal, you will get a message box with a couple of options. You may choose to abandon your Criminal where you are, while doing so you will fail this quest will not be able to capture them again or restart the quest. Your message box also tells you whether or not you recognize your Criminal's face from a local notice board. If you recognize your Criminal's face, it means you can be assured that your Criminal is indeed, the criminal, with a price on their head. If you don't recognize your Criminal's face, however, it could mean bad news because whoever captured this Criminal before you might have made a mistake. But it could also mean that you haven't paid much attention to the notice board. You never know for sure, so you should travel to the Jarl's castle anyway!
Once you successfully enter the Jarl's castle with your Criminal, congratulations! You should speak with the Jarl's Steward and choose a dialogue option to exchange your Criminal for your reward.
Route 1: If Criminal was the right person with bounty on their head
With you recognizing the Criminal's face from a notice board or not,, there is a chance for you to be able to receive your reward from Steward if bounty was indeed placed on that person's head.You will receive a sum of gold as your reward and the quest will be completed.
Route 2: If Criminal was not the right person
The Steward will express distress, and you will realize that the person you've been escorting was not the right person after all.Unfortunately there will be no reward for you as there was no bounty placed on that person's head to begin with, and the quest will be failed.
The Pilgrim
Spoiler:
After reading the "Journal - Dawnguard Zidele's" given to you by the Dog, the quest will update and show you the location Zidele was supposedly going before she went missing. I suggest you take the Dog as with you as your companion! You can give it a name by selecting the dialogue option "Let's give you a name" anytime hereon.
Travel to the destination, and you'll find Zidele in the boss chamber, who has already turned into a Vampire. Kill Zidele, and tell your Dog you are sorry for its loss.
Show
ID:
SetteHusky02
Repeatable?:
No
How to Start Quest:
Following the first part of the quest, "Without a Trace", this quest starts when you find the Dog again in Fort Dawnguard. Interact with the Dog, and you will be shown a journal the doggy has found. Read the journal to start this quest.
Detailed Walkthrough:
After reading the "Journal - Dawnguard Zidele's" given to you by the Dog, the quest will update and show you the location Zidele was supposedly going before she went missing. I suggest you take the Dog as with you as your companion! You can give it a name by selecting the dialogue option "Let's give you a name" anytime hereon.
Travel to the destination, and you'll find Zidele in the boss chamber, who has already turned into a Vampire. Kill Zidele, and tell your Dog you are sorry for its loss.
The Raid of Markarth/Solitude/Whiterun/Windhelm
Spoiler:
ID:
Bandits objectives: SetteSiege01Bandits
Wizards objectives: SetteSiege02Warkicks
Vampires objectives: SetteSiege03Vampires
Forsworns objectives: SetteSiege04Forsworns
Repeatable?:
Yes
How to Start Quest:
Player must be level 20 or above.
While in one of four major cities, the Guard Commander approaches and asks you if you're willing to help his army of guards defending the city against an incoming group of raiders. Volunteer, and the quest will start.
Detailed Walkthrough:
Upon agreeing to join in the city's defense, Guard Commander along with a few other city guards will move to their positions. There might be other volunteers who are able to fight, such as members of the Companions, who will also join in this fight. Group with the soldiers outside the gate, and wait for your command.
A group of attackers will show themselves soon after. Fight with your comrades, kill all of the attackers and land the finishing blow to their leader. If Guard Commander survives this battle, you will be able to receive your reward at the end by speaking with him.
Show
ID:
Bandits objectives: SetteSiege01Bandits
Wizards objectives: SetteSiege02Warkicks
Vampires objectives: SetteSiege03Vampires
Forsworns objectives: SetteSiege04Forsworns
Repeatable?:
Yes
How to Start Quest:
Player must be level 20 or above.
While in one of four major cities, the Guard Commander approaches and asks you if you're willing to help his army of guards defending the city against an incoming group of raiders. Volunteer, and the quest will start.
Detailed Walkthrough:
Upon agreeing to join in the city's defense, Guard Commander along with a few other city guards will move to their positions. There might be other volunteers who are able to fight, such as members of the Companions, who will also join in this fight. Group with the soldiers outside the gate, and wait for your command.
A group of attackers will show themselves soon after. Fight with your comrades, kill all of the attackers and land the finishing blow to their leader. If Guard Commander survives this battle, you will be able to receive your reward at the end by speaking with him.
The Touring Bard
Spoiler:
If you've finished "Beli Sut Salskap, En Sut Lo" and come back to Solitude, there's a chance for Wrenard Phifer to appear in the city and speak with you. He will tell you either Adderick or Leleanna has an upcoming assignment and thereby wants your help. Speaking with Wrenard will add an objective under misc. category to talk to the new student. Alternatively, speaking directly to Adderick or Leleanna without speaking with Wrenard will also let you start this quest.
Choose the dialogue option "You look like you could use some help" with the student.
Since this is a recurring quest, the dialogue options for completing this quest for the first time and the second time thereon will be slightly different. If this is your first time completing it, you'll have the option to escort Adderick to the Candlehearth Hall in Windhelm, and Leleanna to a Jarl's residence.
If you've finished their favor before, Adderick will ask to be escorted to 2 randomly-chosen inns in another Hold, and Leleanna will wish to go to the residences belonged to 2 different Jarls from different Holds.
Either way, once you've agreed to the price of your service they'll be able to accompany you, and the journal will be kept under a new side quest entry. The student is Protected, meaning they can die if you purposefully or mistakenly attack them. Once they've successfully arrived at their destination, you'll need to speak with the Innkeeper if you're with Adderick, or with the Jarl if you're with Leleanna in order to let the student perform. Wait for them to finish their performance and receive some applause, and speak with the student again to receive your promised reward.
Show
ID:
SetteBard05
Repeatable?:
Yes
How to Start Quest:
You must finish the quest "Beli Sut Salskap, En Sut Lo". 2 new students, Adderick Belio and Leleanna Ratena who were welcomed into Bards College at the end of that quest needs to be alive and well in Solitude. When you're in Solitude, a Breton named Wrenard Phifier might start a conversation with you, triggering this quest.
Detailed Walkthrough:
If you've finished "Beli Sut Salskap, En Sut Lo" and come back to Solitude, there's a chance for Wrenard Phifer to appear in the city and speak with you. He will tell you either Adderick or Leleanna has an upcoming assignment and thereby wants your help. Speaking with Wrenard will add an objective under misc. category to talk to the new student. Alternatively, speaking directly to Adderick or Leleanna without speaking with Wrenard will also let you start this quest.
Choose the dialogue option "You look like you could use some help" with the student.
Since this is a recurring quest, the dialogue options for completing this quest for the first time and the second time thereon will be slightly different. If this is your first time completing it, you'll have the option to escort Adderick to the Candlehearth Hall in Windhelm, and Leleanna to a Jarl's residence.
If you've finished their favor before, Adderick will ask to be escorted to 2 randomly-chosen inns in another Hold, and Leleanna will wish to go to the residences belonged to 2 different Jarls from different Holds.
Either way, once you've agreed to the price of your service they'll be able to accompany you, and the journal will be kept under a new side quest entry. The student is Protected, meaning they can die if you purposefully or mistakenly attack them. Once they've successfully arrived at their destination, you'll need to speak with the Innkeeper if you're with Adderick, or with the Jarl if you're with Leleanna in order to let the student perform. Wait for them to finish their performance and receive some applause, and speak with the student again to receive your promised reward.
Two Sisters
Spoiler:
You have to persuade Roxelle to tell her more about her and her separated sister. You'll learn that Roxelle was raised among the Forsworns, and she escaped them leaving her sister behind. She will mark a location of the camp she used to live in. The Forsworn camp for this quest is chosen randomly. Once there, you may unsurprisingly find a horde of Forsworns trying to kill you. Among them is Roxelle's sister Roza, who doesn't attack you unlike the other Forsworns. That is only before you have a conversation with her, however, and you'll likely have to kill her as she will be hostile towards you. Return to Roxelle and tell her what happened, and she will give you a sum of gold and 1 Statue of Dibella for bringing closure to her story.
Show
ID:
SetteBard04Roxelle
Repeatable?:
No
How to Start Quest:
Speak with Roxelle, the Breton bard who can be found with Evelyna in her band of bards after completing the quest "We're Out of the Woods", and ask her about her past.
Detailed Walkthrough:
SetteBard04Roxelle
Repeatable?:
No
How to Start Quest:
Speak with Roxelle, the Breton bard who can be found with Evelyna in her band of bards after completing the quest "We're Out of the Woods", and ask her about her past.
Detailed Walkthrough:
You have to persuade Roxelle to tell her more about her and her separated sister. You'll learn that Roxelle was raised among the Forsworns, and she escaped them leaving her sister behind. She will mark a location of the camp she used to live in. The Forsworn camp for this quest is chosen randomly. Once there, you may unsurprisingly find a horde of Forsworns trying to kill you. Among them is Roxelle's sister Roza, who doesn't attack you unlike the other Forsworns. That is only before you have a conversation with her, however, and you'll likely have to kill her as she will be hostile towards you. Return to Roxelle and tell her what happened, and she will give you a sum of gold and 1 Statue of Dibella for bringing closure to her story.
We Are the Imperial Legion
Spoiler:
ID:
Kill the Bandits or Predator objectives: SetteSoldiers01ImpObjA
Kill the Dragon objectives:SetteSoldiers01ImpObjB
Repeatable?:
No
How to Start Quest:
Encounter a group of Imperial soldiers and speak with their leader called Imperial Captain. Offer them your help with their mission.
Detailed Walkthrough:
Upon speaking with the Imperial Captain, he may give you one of three different objectives. There are a total of 6 soldiers including Imperial Captain to assist you in this quest, but beware that most of his soldiers are young recruits and much weaker than the regular Imperial soldiers found in Skyrim.
Route 1: Kill the Dangerous Predator
Follow Imperial Captain to the animal's den. Imperial Captain will stop to escort you when you are tagging along with him. But of course, you don't have to follow Imperial Captain if you know this location already. Get there on your own or fast-travel there, and the soldiers will still be able to catch up with you.
If your objective was to slay the beast terrorizing the Hold, successfully killing this animal in its den will complete the quest with you receiving a reasonable amount of gold in the end.
Route 2: Kill the Bandits, and rescue the Imperial Envoy
Follow Imperial Captain to the bandits' hideout. Imperial Captain will stop to escort you when you are tagging along with him. But of course, you don't have to follow Imperial Captain if you know this location already. Get there on your own or fast-travel there, and the soldiers will still be able to catch up with you.
Rescue the hostage and kill the bandit's leader to receive your reward.
Once you've arrived at the hideout, you must find the hostage (Imperial Envoy). Speak with him and collect your bonus reward. You can command him to either follow you around or stay at his current position.There is a chance for Imperial Envoy to get swapped by one of the bandits posing to be Imperial Envoy. If this happens, unfortunately you won't receive your bonus as the hostage is already dead.
Route 3: Kill the Dragon
Imperial Captain will try to lead his men to the Dragon's nest, believed to be somewhere nearby. That's when the Dragon strikes the soldiers from above, taking them by surprise. Work together with the soldiers to kill the Dragon to receive a generous amount of reward.
Show
ID:
Kill the Bandits or Predator objectives: SetteSoldiers01ImpObjA
Kill the Dragon objectives:SetteSoldiers01ImpObjB
Repeatable?:
No
How to Start Quest:
Encounter a group of Imperial soldiers and speak with their leader called Imperial Captain. Offer them your help with their mission.
Detailed Walkthrough:
Upon speaking with the Imperial Captain, he may give you one of three different objectives. There are a total of 6 soldiers including Imperial Captain to assist you in this quest, but beware that most of his soldiers are young recruits and much weaker than the regular Imperial soldiers found in Skyrim.
Route 1: Kill the Dangerous Predator
Follow Imperial Captain to the animal's den. Imperial Captain will stop to escort you when you are tagging along with him. But of course, you don't have to follow Imperial Captain if you know this location already. Get there on your own or fast-travel there, and the soldiers will still be able to catch up with you.
If your objective was to slay the beast terrorizing the Hold, successfully killing this animal in its den will complete the quest with you receiving a reasonable amount of gold in the end.
Route 2: Kill the Bandits, and rescue the Imperial Envoy
Follow Imperial Captain to the bandits' hideout. Imperial Captain will stop to escort you when you are tagging along with him. But of course, you don't have to follow Imperial Captain if you know this location already. Get there on your own or fast-travel there, and the soldiers will still be able to catch up with you.
Rescue the hostage and kill the bandit's leader to receive your reward.
Once you've arrived at the hideout, you must find the hostage (Imperial Envoy). Speak with him and collect your bonus reward. You can command him to either follow you around or stay at his current position.There is a chance for Imperial Envoy to get swapped by one of the bandits posing to be Imperial Envoy. If this happens, unfortunately you won't receive your bonus as the hostage is already dead.
Route 3: Kill the Dragon
Imperial Captain will try to lead his men to the Dragon's nest, believed to be somewhere nearby. That's when the Dragon strikes the soldiers from above, taking them by surprise. Work together with the soldiers to kill the Dragon to receive a generous amount of reward.
We Are the Children of Skyrim
Spoiler:
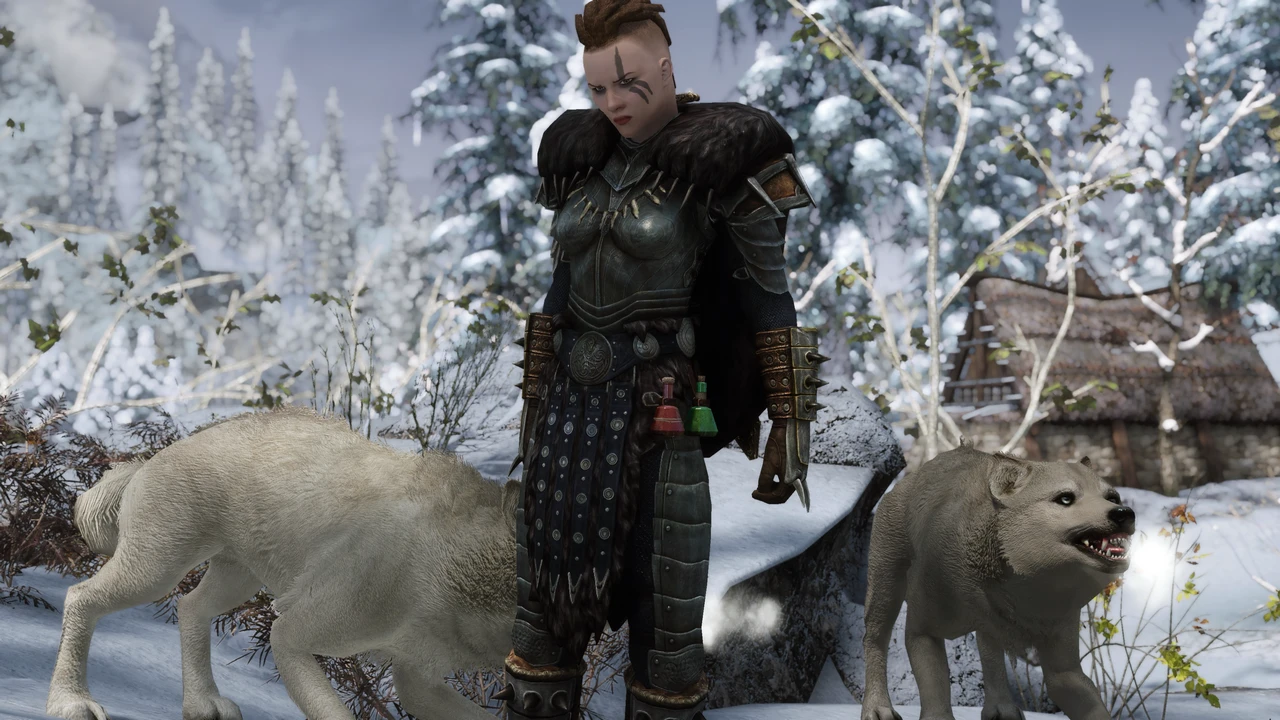
ID:
Kill the Bandits or Predator objectives: SetteSoldiers01SonsObjA
Kill the Dragon objectives:SetteSoldiers01SonsObjB
Repeatable?:
No
How to Start Quest:
Encounter a group of Stormcloak soldiers and speak with their leader called Stormcloak Leader. Offer them your help with their mission.
Detailed Walkthrough:
Upon speaking with the Stormcloak Leader, he may give you one of three different objectives. There are a total of 6 soldiers including Stormcloak Leader to assist you in this quest, but beware that most of her soldiers are young recruits and much weaker than the regular Stormcloak soldiers found in Skyrim.
Route 1: Kill the Dangerous Predator
Follow Stormcloak Leader to the animal's den. Stormcloak Leader will stop to escort you when you are tagging along with him. But of course, you don't have to follow Stormcloak Leader if you know this location already. Get there on your own or fast-travel there, and the soldiers will still be able to catch up with you.
If your objective was to slay the beast terrorizing the Hold, successfully killing this animal in its den will complete the quest with you receiving a reasonable amount of gold in the end.
Route 2: Kill the Bandits, and rescue the Windhelm Daughter
Follow Stormcloak Leader to the bandits' hideout. Stormcloak Leader will stop to escort you when you are tagging along with him. But of course, you don't have to follow Stormcloak Leader if you know this location already. Get there on your own or fast-travel there, and the soldiers will still be able to catch up with you.
Rescue the hostage and kill the bandit's leader to receive your reward.
Once you've arrived at the hideout, you must find the hostage (Windhelm Daughte). Speak with her and collect your bonus reward. You can command her to either follow you around or stay at her current position.There is a chance for Windhelm Daughter to get swapped by one of the bandits posing to be Windhelm Daughter. If this happens, unfortunately you won't receive your bonus as the hostage is already dead.
Route 3: Kill the Dragon
Stormcloak Leader will try to lead her men to the Dragon's nest, believed to be somewhere nearby. That's when the Dragon strikes the soldiers from above, taking them by surprise. Work together with the soldiers to kill the Dragon to receive a generous amount of reward.
Show
ID:
Kill the Bandits or Predator objectives: SetteSoldiers01SonsObjA
Kill the Dragon objectives:SetteSoldiers01SonsObjB
Repeatable?:
No
How to Start Quest:
Encounter a group of Stormcloak soldiers and speak with their leader called Stormcloak Leader. Offer them your help with their mission.
Detailed Walkthrough:
Upon speaking with the Stormcloak Leader, he may give you one of three different objectives. There are a total of 6 soldiers including Stormcloak Leader to assist you in this quest, but beware that most of her soldiers are young recruits and much weaker than the regular Stormcloak soldiers found in Skyrim.
Route 1: Kill the Dangerous Predator
Follow Stormcloak Leader to the animal's den. Stormcloak Leader will stop to escort you when you are tagging along with him. But of course, you don't have to follow Stormcloak Leader if you know this location already. Get there on your own or fast-travel there, and the soldiers will still be able to catch up with you.
If your objective was to slay the beast terrorizing the Hold, successfully killing this animal in its den will complete the quest with you receiving a reasonable amount of gold in the end.
Route 2: Kill the Bandits, and rescue the Windhelm Daughter
Follow Stormcloak Leader to the bandits' hideout. Stormcloak Leader will stop to escort you when you are tagging along with him. But of course, you don't have to follow Stormcloak Leader if you know this location already. Get there on your own or fast-travel there, and the soldiers will still be able to catch up with you.
Rescue the hostage and kill the bandit's leader to receive your reward.
Once you've arrived at the hideout, you must find the hostage (Windhelm Daughte). Speak with her and collect your bonus reward. You can command her to either follow you around or stay at her current position.There is a chance for Windhelm Daughter to get swapped by one of the bandits posing to be Windhelm Daughter. If this happens, unfortunately you won't receive your bonus as the hostage is already dead.
Route 3: Kill the Dragon
Stormcloak Leader will try to lead her men to the Dragon's nest, believed to be somewhere nearby. That's when the Dragon strikes the soldiers from above, taking them by surprise. Work together with the soldiers to kill the Dragon to receive a generous amount of reward.
We're Out of the Woods
Spoiler:
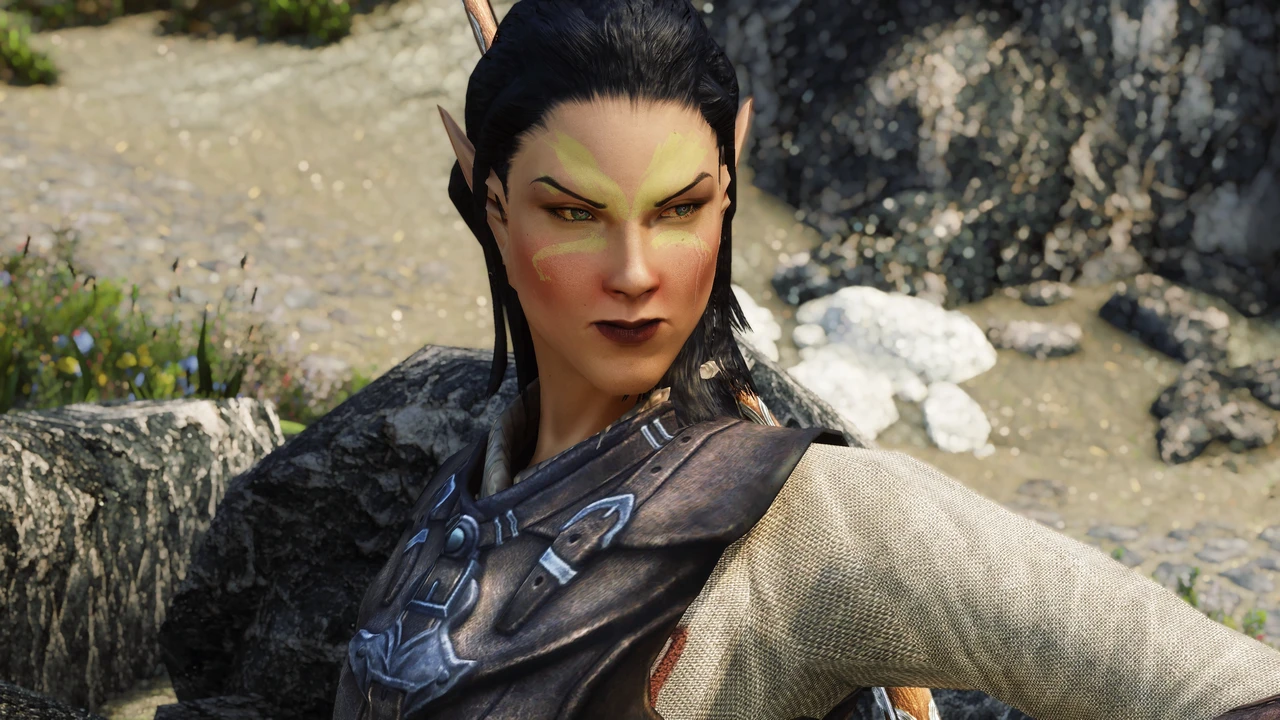
ID:
SetteBard01
Repeatable?:
No
How to Start Quest:
Encounter Nestynia in the wilds of the Reach, a bard-huntswoman sent from Bards College. She's seen being attacked by a pack of feral wolves, so help her fight them off first.
Detailed Walkthrough:
After the feral wolves are dealt with, Nestynia will thank you and introduces herself as a bard-huntswoman sent from Bards College in order to rescue one of the College's associates who was captured by the Forsworns in the region. Offer your help rescue this captive, and "We're Out of the Woods" will be added to your quest journal.
Travel to the Forsworn camp (chosen randomly) with Nestynia. You can either let her take the lead or tell her to follow you, in case she gets stuck on the way. In combat, Nestynia will summon the acolyte of nature (a green wolf) and should prove herself as a powerful ally to you. She has the Protected status so she should survive the battles as long as you don't accidentally kill her.
Near the Forsworns' boss, you'll find a corpse of the Bards College Courier. You'll also find a Sealed Letter from Bards College in his pocket. Show it to Nestynia, and she will tell you this letter must be delivered to Evelyna who lives in the city of Windhelm. If you wish to unlock the unique, custom-voiced follower Evelyna, make sure to tell her you'll deliver this letter. If you choose another dialogue option "I'm no courier", the subsequent quest in which you'll unlock Evelyna as your follower will not start!
Nestynia will reward you with a sum of gold. She can be found again as a permanent resident in the city of Solitude after this quest.
Show
ID:
SetteBard01
Repeatable?:
No
How to Start Quest:
Encounter Nestynia in the wilds of the Reach, a bard-huntswoman sent from Bards College. She's seen being attacked by a pack of feral wolves, so help her fight them off first.
Detailed Walkthrough:
After the feral wolves are dealt with, Nestynia will thank you and introduces herself as a bard-huntswoman sent from Bards College in order to rescue one of the College's associates who was captured by the Forsworns in the region. Offer your help rescue this captive, and "We're Out of the Woods" will be added to your quest journal.
Travel to the Forsworn camp (chosen randomly) with Nestynia. You can either let her take the lead or tell her to follow you, in case she gets stuck on the way. In combat, Nestynia will summon the acolyte of nature (a green wolf) and should prove herself as a powerful ally to you. She has the Protected status so she should survive the battles as long as you don't accidentally kill her.
Near the Forsworns' boss, you'll find a corpse of the Bards College Courier. You'll also find a Sealed Letter from Bards College in his pocket. Show it to Nestynia, and she will tell you this letter must be delivered to Evelyna who lives in the city of Windhelm. If you wish to unlock the unique, custom-voiced follower Evelyna, make sure to tell her you'll deliver this letter. If you choose another dialogue option "I'm no courier", the subsequent quest in which you'll unlock Evelyna as your follower will not start!
Nestynia will reward you with a sum of gold. She can be found again as a permanent resident in the city of Solitude after this quest.
When the Night Falls Down
Spoiler:
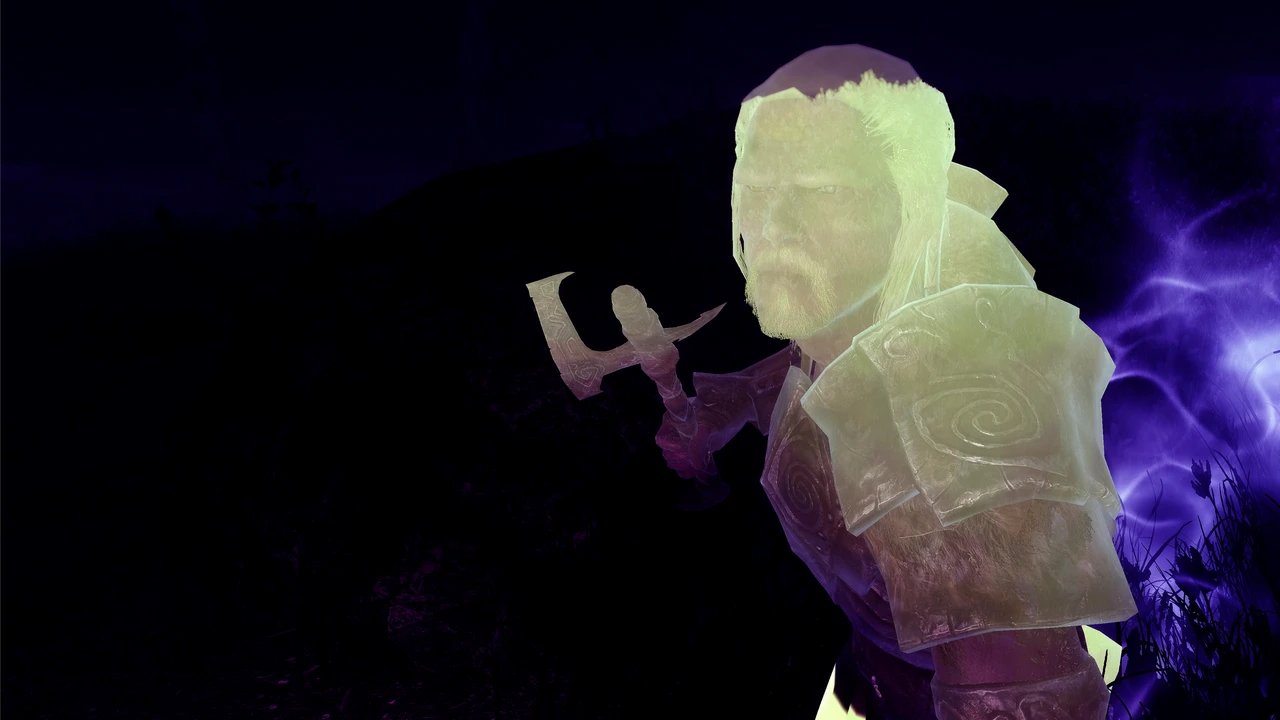
ID:
SetteNord01
Repeatable?:
No
How to Start Quest:
In the wilds, encounter the spirit of Nord warrior named Brar the Fool at night time. Speak with Brar and accompany him to retrieve an artifact from the bandits' hideout.
Detailed Walkthrough:
Although you can challenge Brar the Fool to fight you immediately after meeting him, to start this quest you must "offer your help" when he mentions an artifact of Ysil, the witch who has sent Brar from Sovngarde to Skyrim and made a promised to bring him back to life if he retrieves the said artifact. The artifact was stolen by the grave-robbing bandits who dwell somewhere nearby. Travel to their hideout with Brar, and enjoy the killing spree as your new ghost friend wrecks his foes with powerful Shouts.
You'll find Ysil's Ornate Cup inside the boss chest. Brar will be shocked when you deliver this item to him, and his omen, Ysil, silently appears in front of him. Turns out, Ysil the Witch her former lover, brought the spirit of Brar to Skyrim so she can marry him - it was never her intention to grant him another life. To resist her soul-binding spell, Brar will try to vanquish Ysil. And you can choose to help Brar to kill Ysil together, or turn on Brar to join Ysil.
Route 1: Kill Ysil the Witch by helping Brar the Fool
After landing the final killing blow on Ysil, Brar thanks you for your companionship. He will grant you a skill increase in one of the skills of fighting of your choice, and disappears.
Route 2: Kill Brar the Fool by helping Ysil the Witch
Brar will not turn hostile towards you unless you hit him a number of times. Use this for your advantage to destroy him, and speak with Ysil. If you have somehow angered Ysil (by either attacking her or her summoned creature), you could try casting a Calm spell on her, and if that doesn't work you may want to reload your latest save and try again. If you kill both Brar and Ysil, you will very surely fail this quest.
Ysil will grant you a skill increase in one of the magic skills of your choice, and disappears.
Show
ID:
SetteNord01
Repeatable?:
No
How to Start Quest:
In the wilds, encounter the spirit of Nord warrior named Brar the Fool at night time. Speak with Brar and accompany him to retrieve an artifact from the bandits' hideout.
Detailed Walkthrough:
Although you can challenge Brar the Fool to fight you immediately after meeting him, to start this quest you must "offer your help" when he mentions an artifact of Ysil, the witch who has sent Brar from Sovngarde to Skyrim and made a promised to bring him back to life if he retrieves the said artifact. The artifact was stolen by the grave-robbing bandits who dwell somewhere nearby. Travel to their hideout with Brar, and enjoy the killing spree as your new ghost friend wrecks his foes with powerful Shouts.
You'll find Ysil's Ornate Cup inside the boss chest. Brar will be shocked when you deliver this item to him, and his omen, Ysil, silently appears in front of him. Turns out, Ysil the Witch her former lover, brought the spirit of Brar to Skyrim so she can marry him - it was never her intention to grant him another life. To resist her soul-binding spell, Brar will try to vanquish Ysil. And you can choose to help Brar to kill Ysil together, or turn on Brar to join Ysil.
Route 1: Kill Ysil the Witch by helping Brar the Fool
After landing the final killing blow on Ysil, Brar thanks you for your companionship. He will grant you a skill increase in one of the skills of fighting of your choice, and disappears.
Route 2: Kill Brar the Fool by helping Ysil the Witch
Brar will not turn hostile towards you unless you hit him a number of times. Use this for your advantage to destroy him, and speak with Ysil. If you have somehow angered Ysil (by either attacking her or her summoned creature), you could try casting a Calm spell on her, and if that doesn't work you may want to reload your latest save and try again. If you kill both Brar and Ysil, you will very surely fail this quest.
Ysil will grant you a skill increase in one of the magic skills of your choice, and disappears.
Without A Trace
Spoiler:
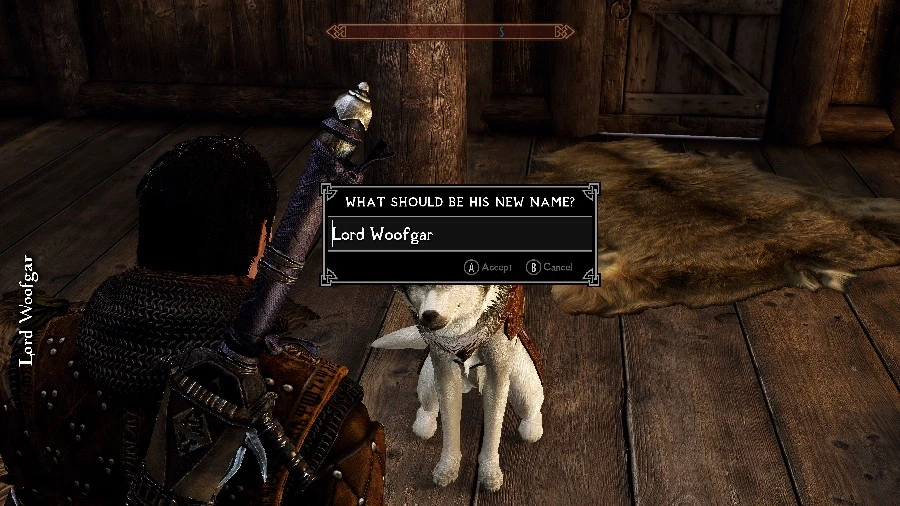
ID:
SetteHusky01
Repeatable?:
No
How to Start Quest:
In the wilds, encounter a stray Dawnguard Husky who runs up to you calling for your attention. You sense some fowl deed may have happened to its owner, so choose to follow it.
Detailed Walkthrough:
Follow the Husky, she should escort you to a Vampire's den somewhere nearby. However, this is Skyrim - NPCs often struggle to find their way to the destination. If the Husky seems to be clueless about where she's going, kindly talk to her again and she'll be able to place a quest marker on your map with her paw.
Once you've arrived at the Vampire's den, fight your way into the boss chamber. The Husky will fight alongside you. In the Boss chamber, she won't reunite with her master but instead a Khajiit thief, who is likely a corpse already at this point, can be found. If he's still alive, you'll need to end him yourself and find Zidelle's Ring in his pocket. Show the ring to the dog, she'll recognize it belonging to her lost master who was likely to be kidnapped by the other Vampires. You'll tell the dog to wait for you at Fort Dawnguard, and she will make her way there right away. The quest is finished at this point, but you'll be able to find the Husky inside Fort Dawnguard and resume your search for her lost master, in the subsequent quest "The Pilgrim".
Show
ID:
SetteHusky01
Repeatable?:
No
How to Start Quest:
In the wilds, encounter a stray Dawnguard Husky who runs up to you calling for your attention. You sense some fowl deed may have happened to its owner, so choose to follow it.
Detailed Walkthrough:
Follow the Husky, she should escort you to a Vampire's den somewhere nearby. However, this is Skyrim - NPCs often struggle to find their way to the destination. If the Husky seems to be clueless about where she's going, kindly talk to her again and she'll be able to place a quest marker on your map with her paw.
Once you've arrived at the Vampire's den, fight your way into the boss chamber. The Husky will fight alongside you. In the Boss chamber, she won't reunite with her master but instead a Khajiit thief, who is likely a corpse already at this point, can be found. If he's still alive, you'll need to end him yourself and find Zidelle's Ring in his pocket. Show the ring to the dog, she'll recognize it belonging to her lost master who was likely to be kidnapped by the other Vampires. You'll tell the dog to wait for you at Fort Dawnguard, and she will make her way there right away. The quest is finished at this point, but you'll be able to find the Husky inside Fort Dawnguard and resume your search for her lost master, in the subsequent quest "The Pilgrim".
15 comments
I'm having some trouble with
'O' Help me kind one.'
Basically, Susanna the Wicked sent me a letter then died for 'Blood on the Ice.' Before i got a chance to even talk to her. I tried the setstage followup01 command but it only completed the other quest I had. Any advice on how to get it out of my quest log,
Type this into the console
player.setstage SetteSiege04Forsworns 100
The commander will speak to you then, completing the quest.I got sent to npc that you can not get dialogue options for. Currently it is Leglied(?) crew man on the ship that sails you to Solstheim.
So console through looks like bad plan, seems there are follow up with that quest assumely with same npc that you cant talk to, for me its dlc2 dragonborn npc so i cant tell quest alias to avoid him with condition checks. He has dremera class for no good reason(might be default) and i attached that to quest alias condition to avoid. got revert back some saves so quest can trigger again without lygrleid being the npc
UPDATE: HE WON'T STOP FOLLOWING ME. HE FOLLOWED ME INTO DUNGEONS.
Update: I just killed him and failed the quest. He wouldn't stop following me, no matter where I went.