


So apparently, after a lot of requests regarding modding RE games audio, here's a little guide that will (hopefully) help you make (more) audio mods.
These should work on all modern-day Resident Evil games (and potentially other RE Engine games like MH or DMC).
It's what I followed when creating mods for RE2, and this mod for RE4R.
First, the process of modding bnk and pck are a little bit different (we'll see them in detail below).
But for both, I use these tools:
Fusion Tools for extracting the wems (can also extract them in WAV format)
RingingBloom for replacing the wems
VGMStream to listen to wems with FusionTools
Audacity for editing the extracted wav files
WWise Audiokinetic Launcher to convert the wavs to wems
Once you have a sbnk or spck you want to mod, place it in a folder somewhere, remove the extension (1.X64), and replace sbnk with bnk (and spck with pck).
That way, it'll be easier for the tools to read the files.


Note:
Check Update 1 & 2 if you don't hear your modded audio ingame.
Check Update 3 if a PCK is not working, for a potential workaround.
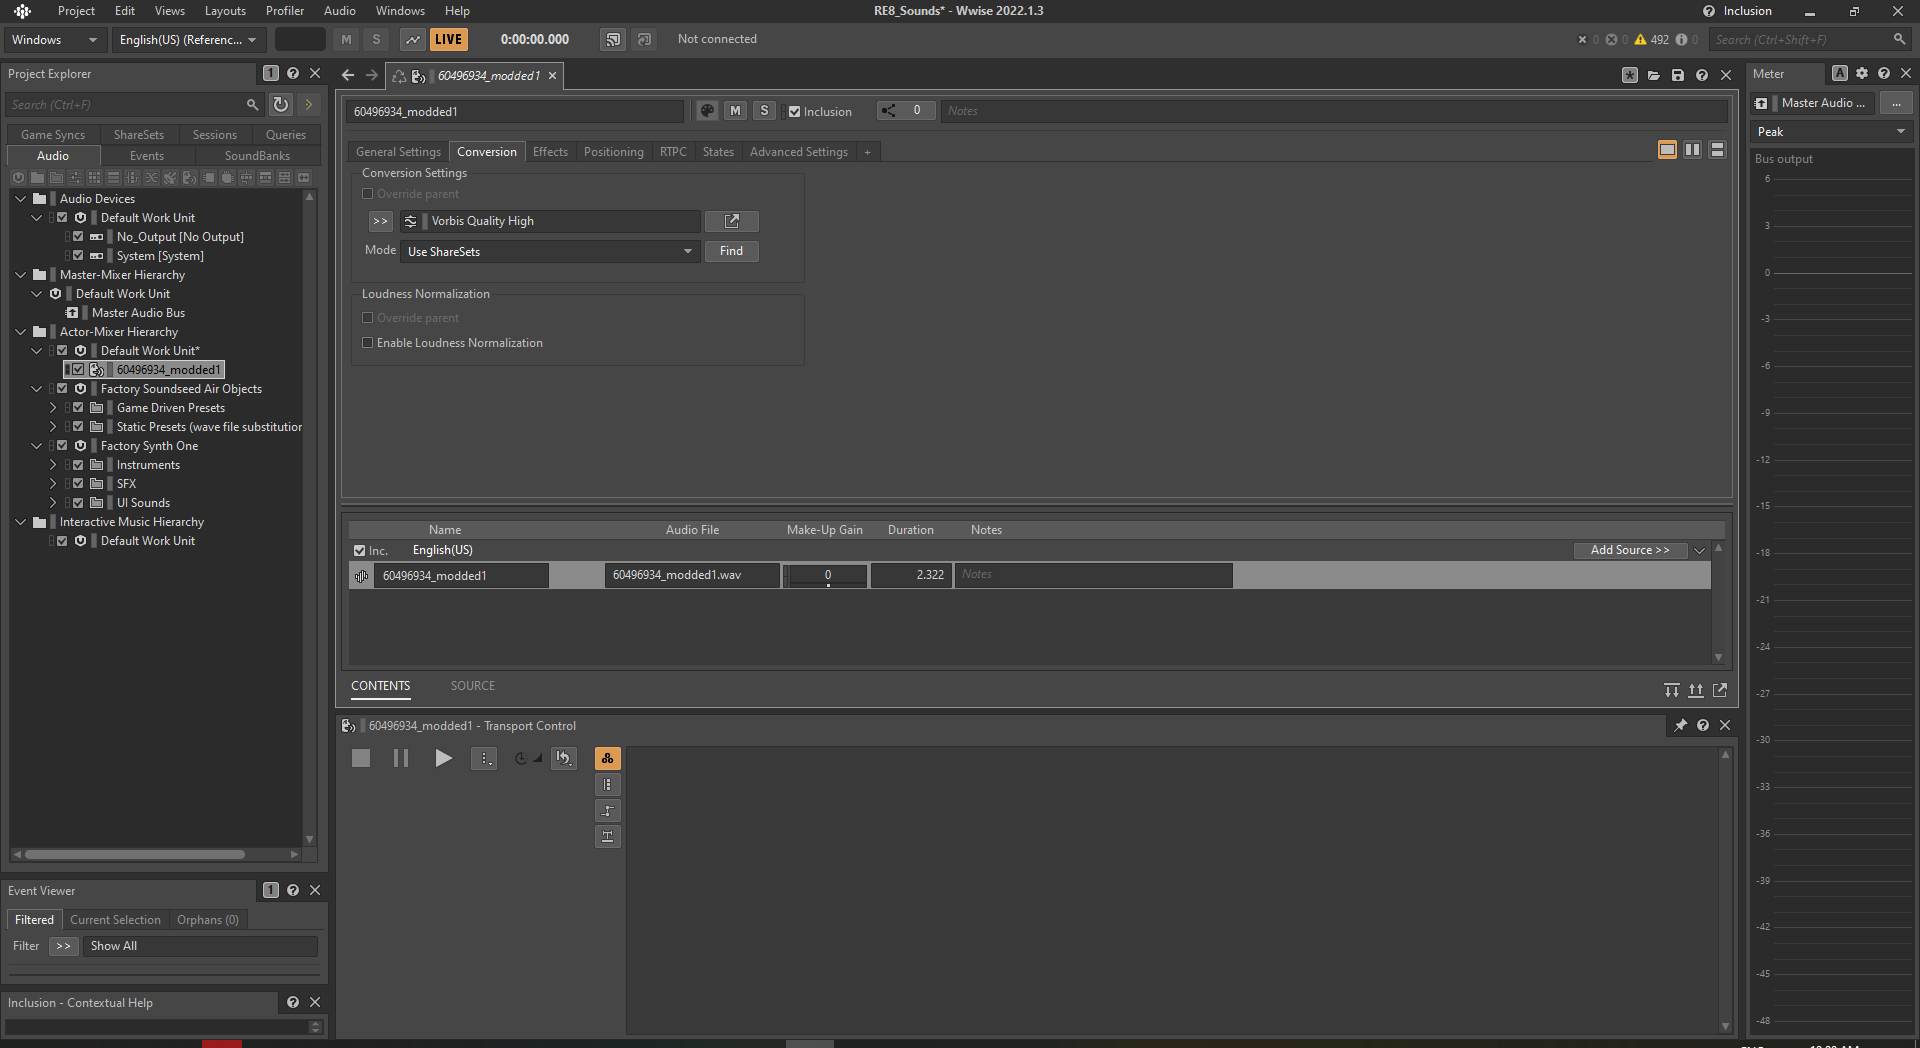
Modding a BNK
1- Open FusionTools
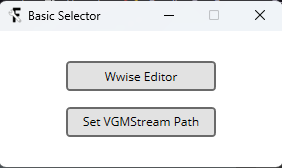
2- If you have downloaded VGMStream, you can listen directly to the tracks with the built-in player (set the path).
Extract the VGMStream archive, and in Fusion Tools, click on "Set VGMStream Path", and select the exe found inside the archive.
3- Click on "Wwise Editor", and then File options -> Open file and select your bnk. You'll have a list of all the tracks in this file.

4- When you have the track you want to mod, right-click on it, and choose "Export wem to wav" (make note of the ID). Select "No" in the popup window.

5- You now have the track in wav format. You can then open it, and modify it with Audacity.

If you want to replace it, it's best to use a track that has the same length or less.
What I usually do is, if I want to replace a track, I leave the one I opened, add a new track, and "Solo" it.
The other tracks will then be muted.
(Important: "Soloing" the tracks only works for BNKs, for PCKs you'll need to keep all the tracks unmuted, and apply the steps in the Update 1 below).
Also, try to keep the same properties (the Format, the Rate, if it's mono or stereo, etc...). (Right-click on the track and change the Format, Rate, to match the original track. Also, split to mono if the original is a mono track, and keep a single track).
When you're done, export the track (File -> Export as WAV)

Update 1:
Generally, it you do the steps above, it'll work.
But sometimes, after producing the modded audio file and testing it ingame, you can't hear the part you modded.
If that's the case, you can try this:
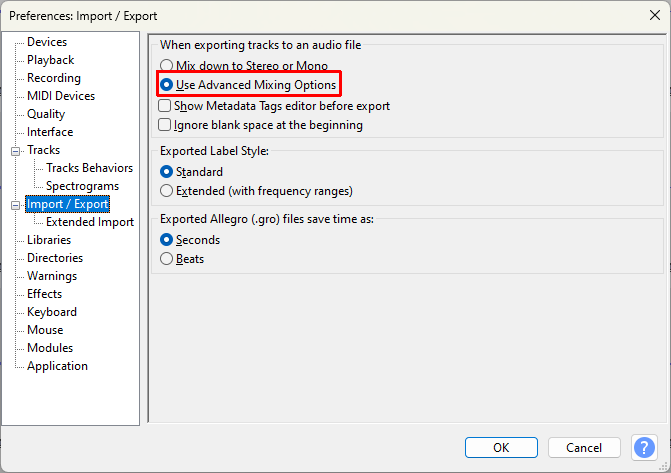
In audacity, click on Edit -> Preferences
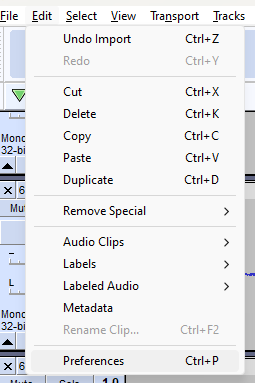
Click on the "Import/Export" option on the right, and on the new window, make sure you select "Use Advanced Mixing Options".
"OK" when you're done.
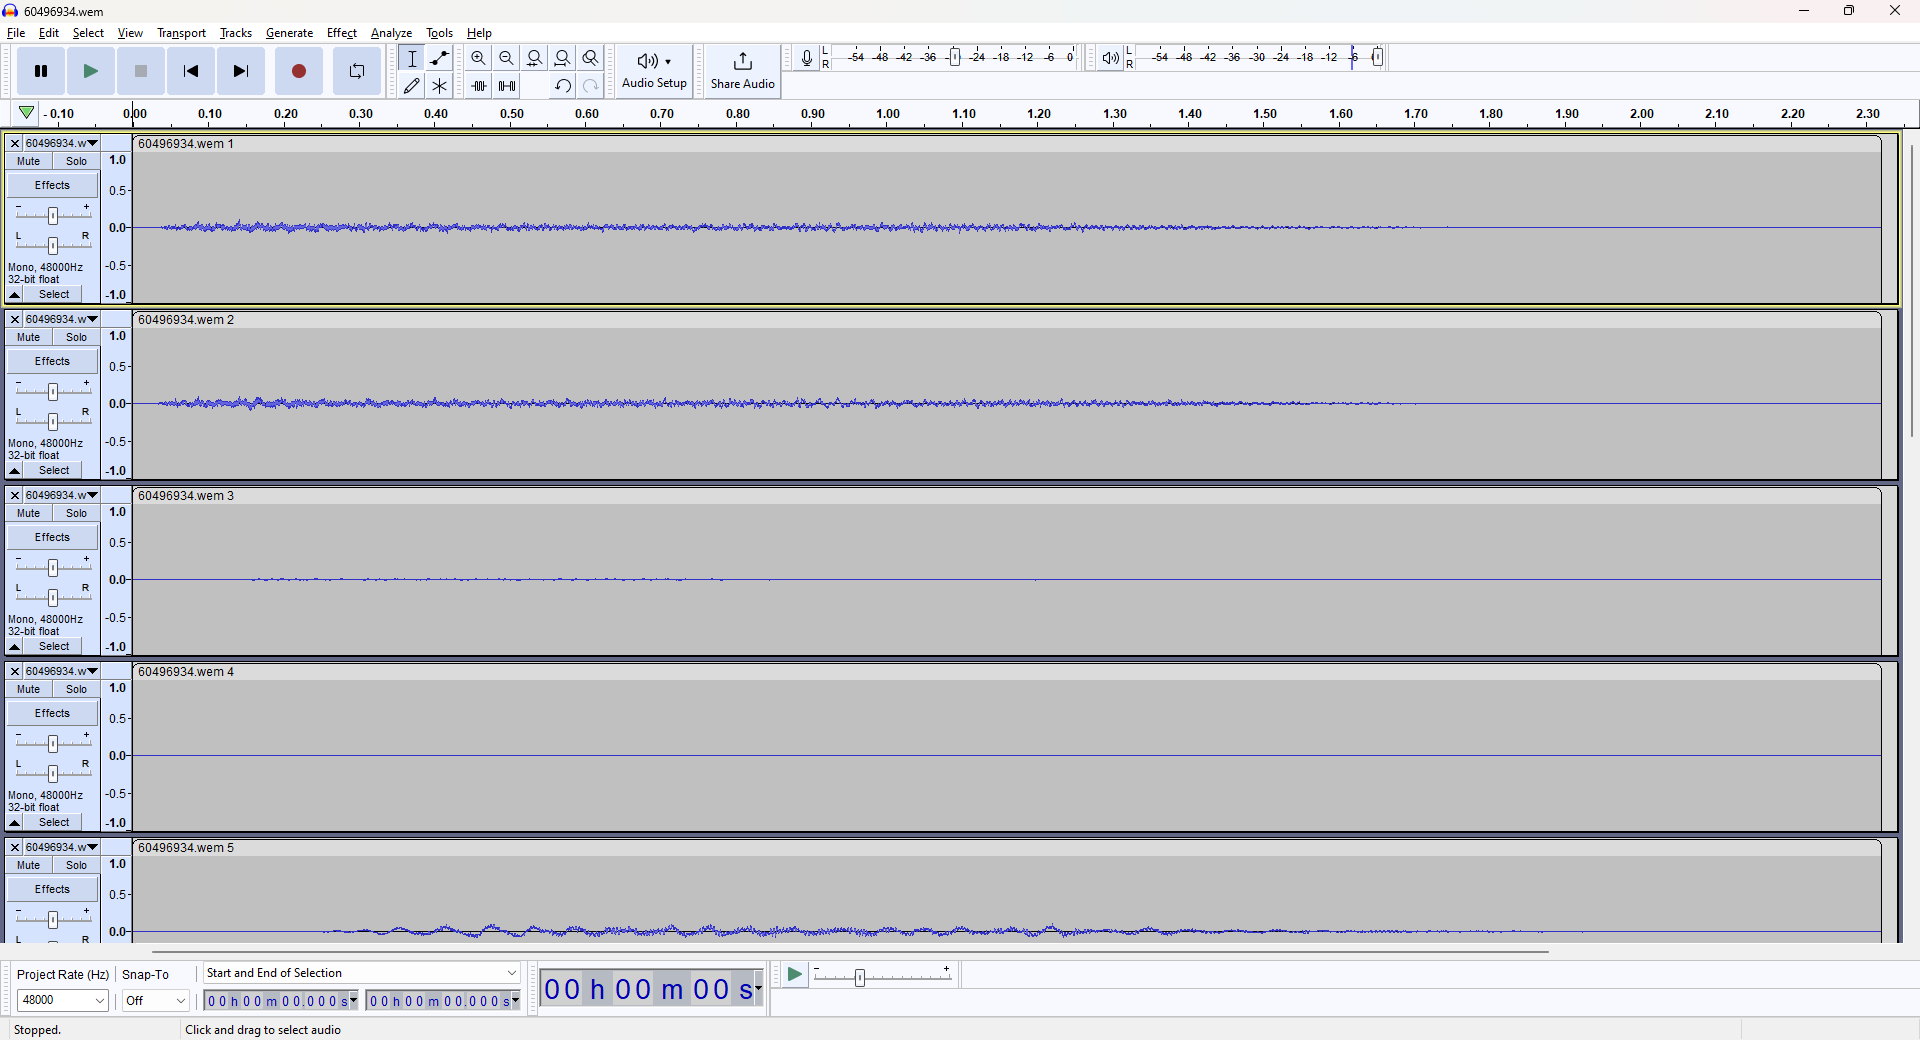
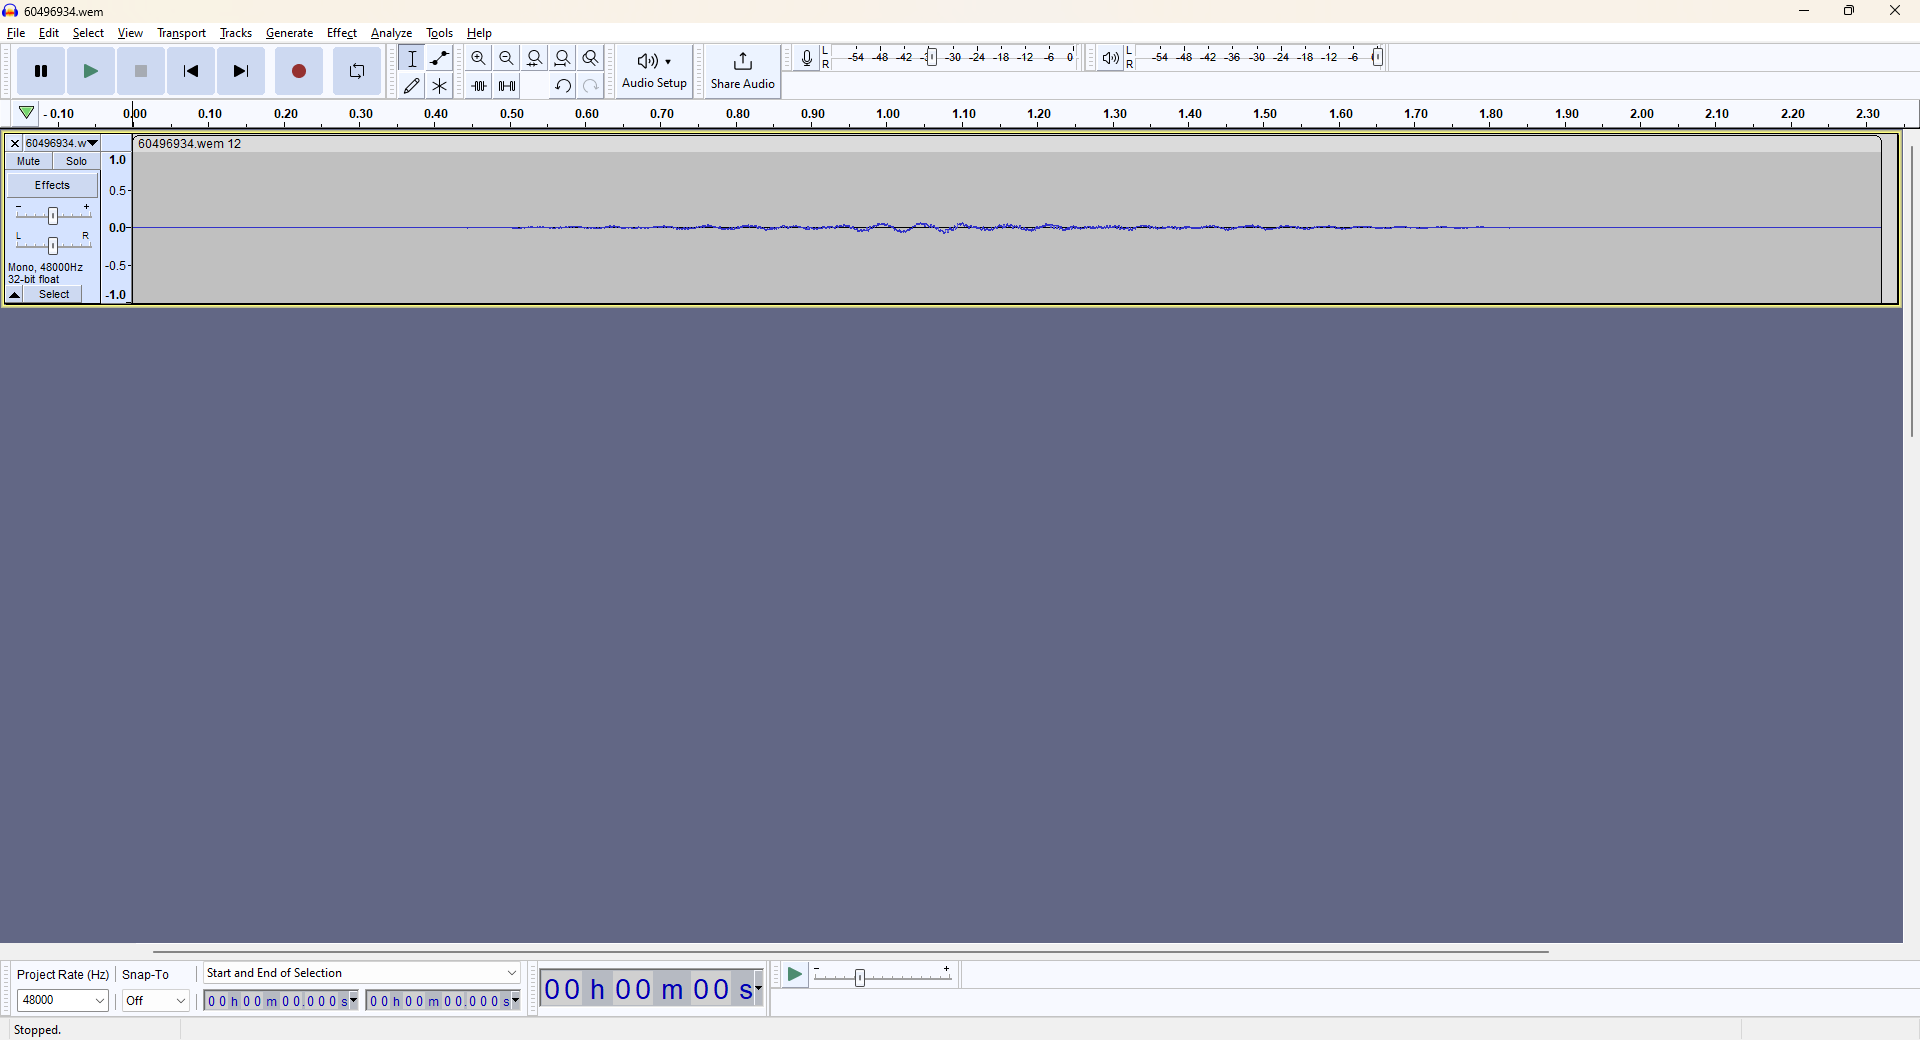
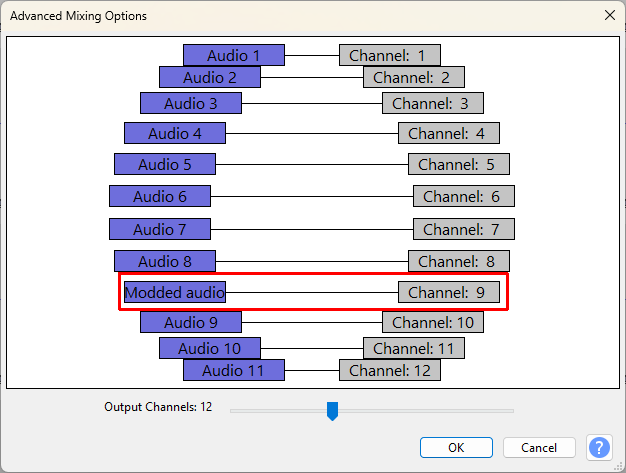
So, in the example above, we can see the original audio file has already 12 tracks.
And let's say the track you want to mod is the 9th track.
What you'll need to do is replace the other 11 tracks with silences (that have the same length as the original tracks).
We'll start by deleting all the tracks (leave one for reference, to get the exact length).
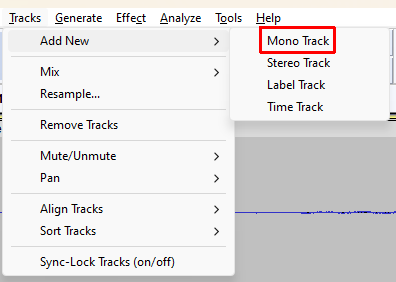
Once you've done that, you'll need to add 8 tracks (your modded track will be in the 9th position).
So do this, by clicking on Tracks -> Add New -> Mono Track, 8 times.

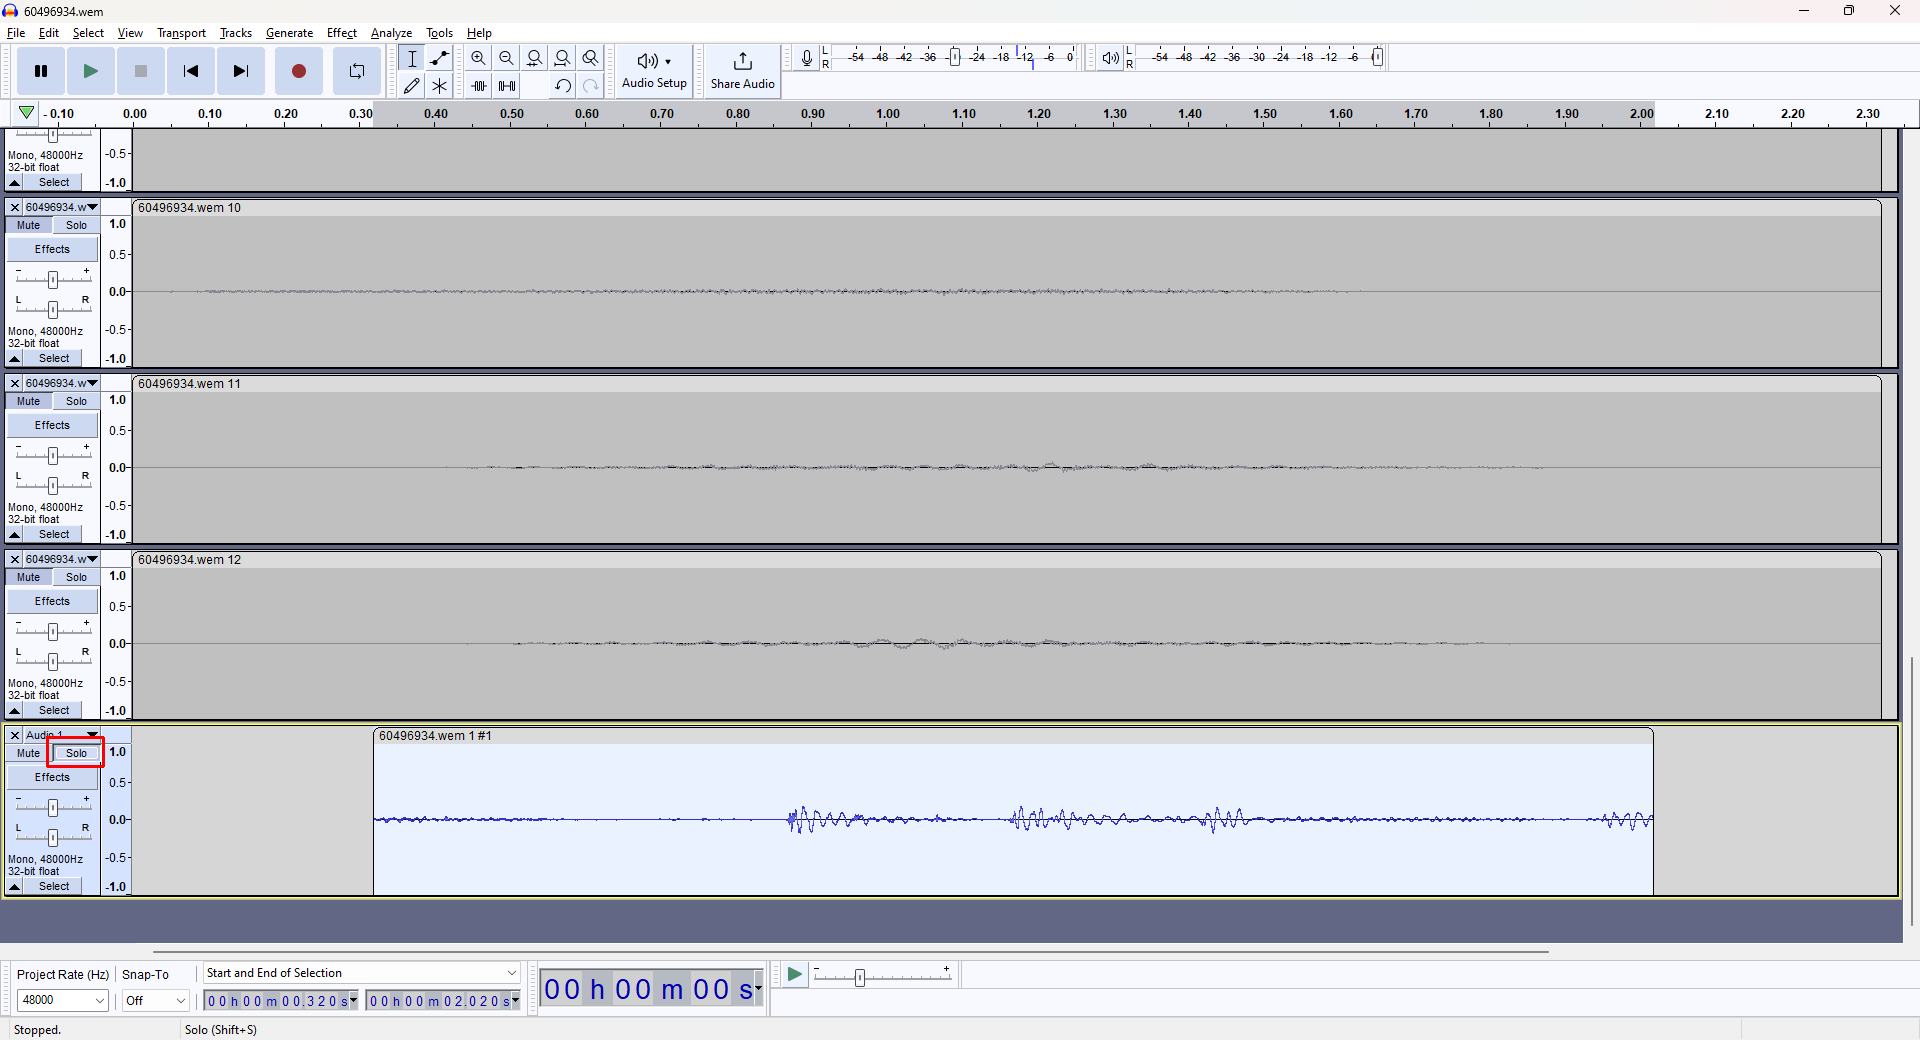
Now for each track, you're going to replace them with silences.
We'll be doing in for the 1st track.
Start by clicking on the track, hit the "Home" key on your keyboard, and then Shift+End, to select the whole track.
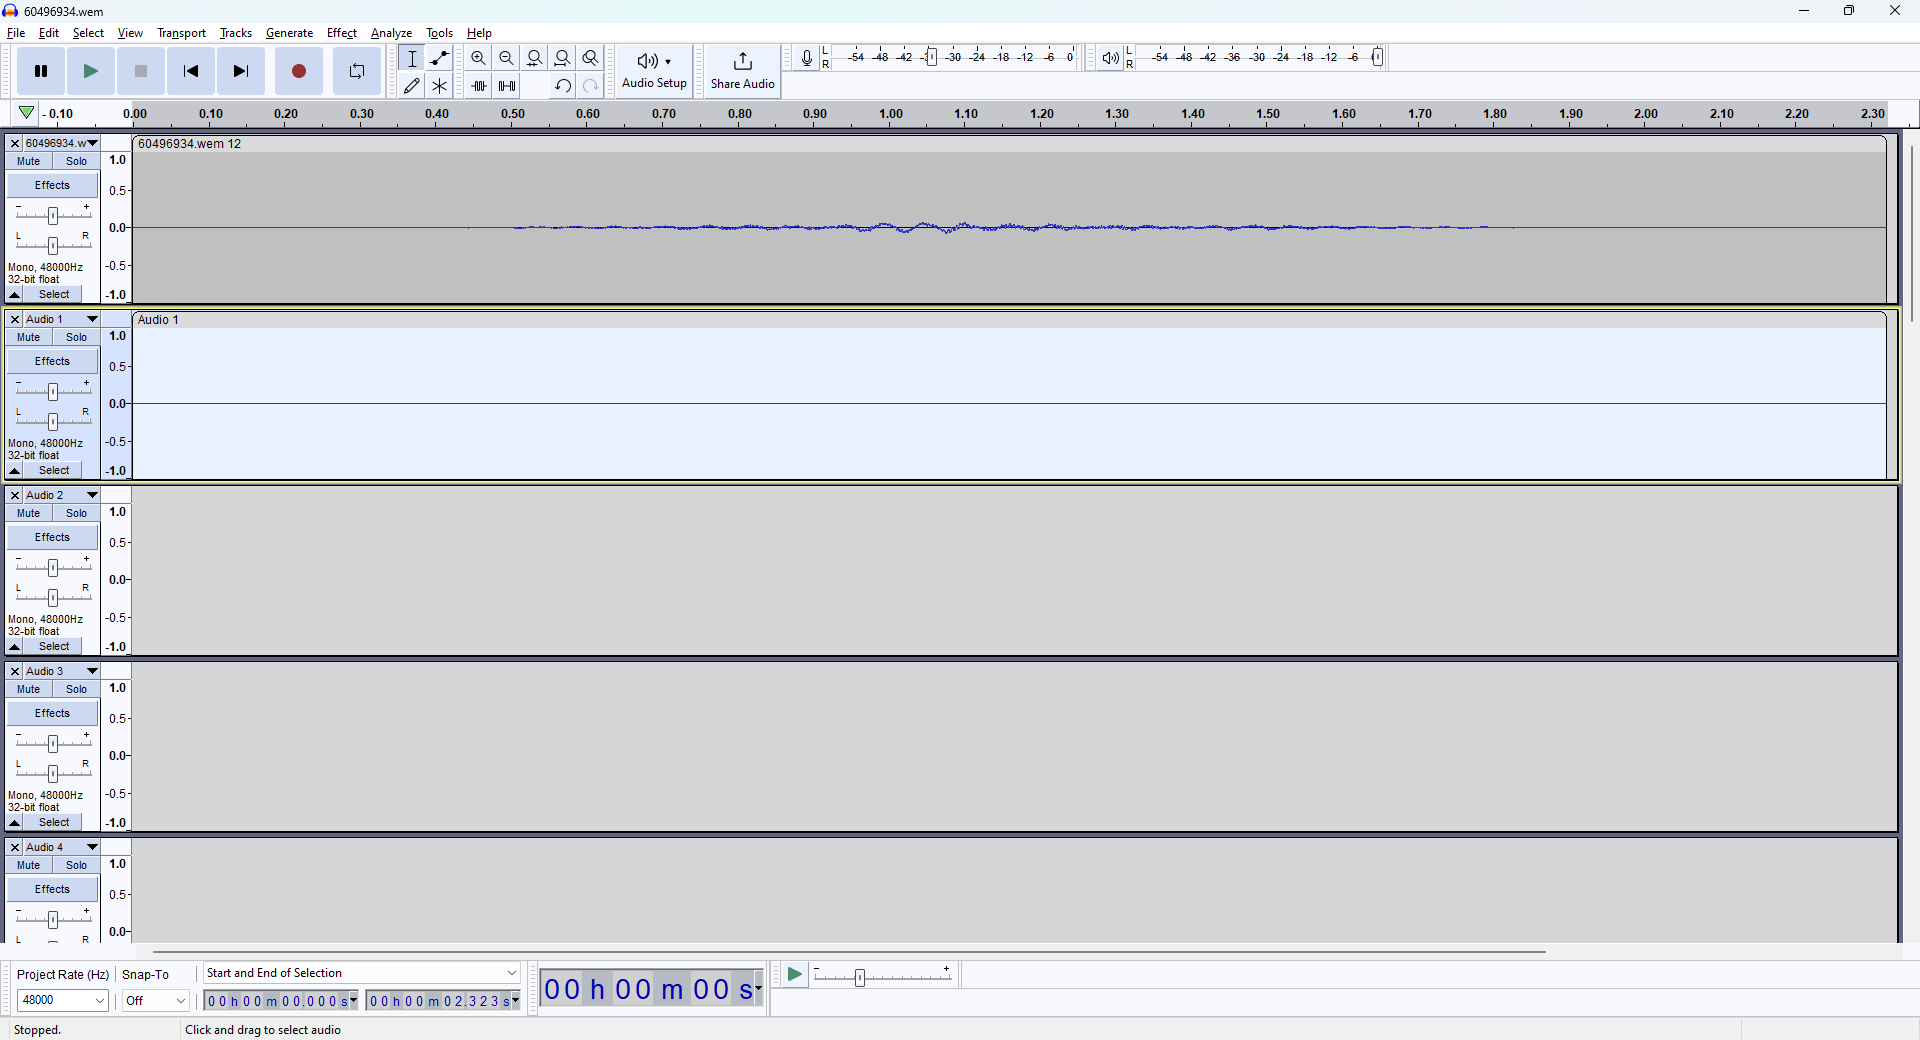
Now you need to click on Generate -> Silence, and click on "Generate" in the next window.
Now do these steps for the other 7 tracks.
(You can get rid of the first track we left for reference once you're finished)

Now insert your 9th modded track

And add the remaning 3 tracks, and silence them.

You can now export your wav.
When you do this, you'll get a new window.
You'll have to match tracks with their corresponding channel.
Audicity does that automatcally, but make sure your modded track is linked to the right channel (in our case, the modded audio must be attached to the 9th channel, since that was the case in the original audio file).
Once you do that, click OK, and you'll get your modded wav file.
It should have the exact same properties as the original one.
You can now continue with the rest of the steps.
End of update 1
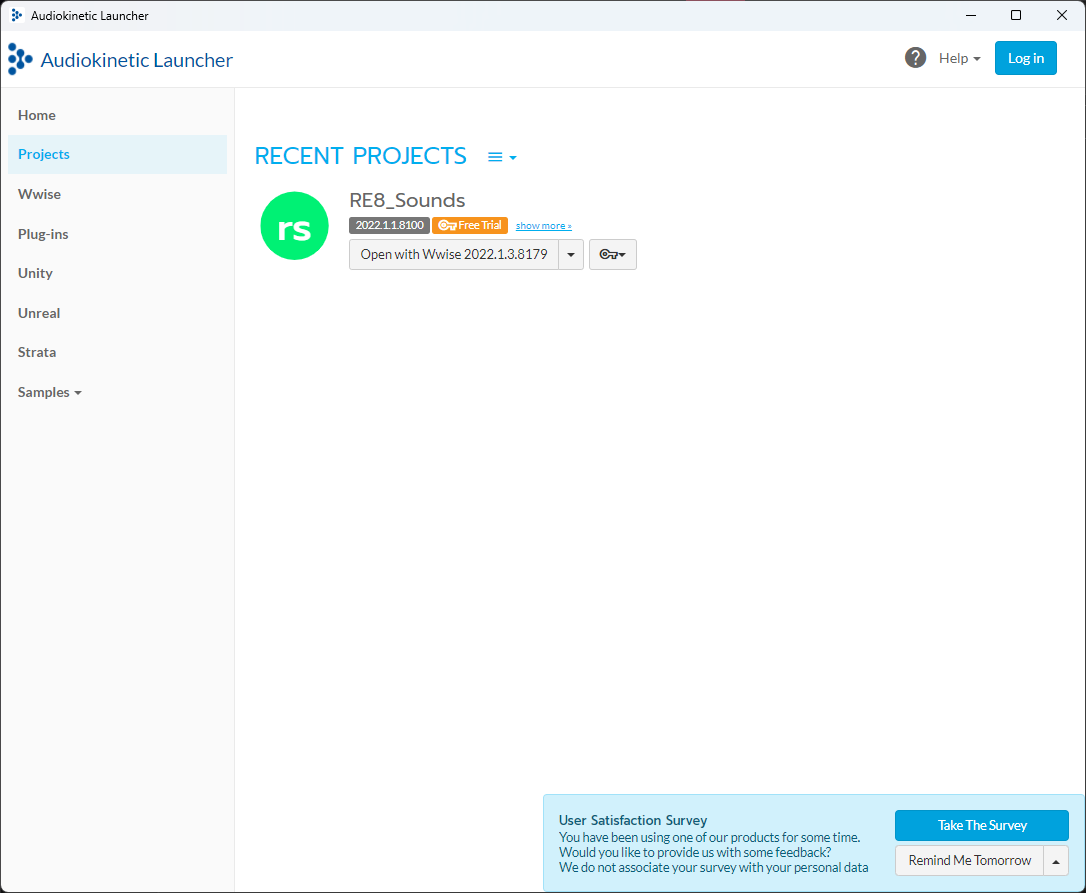
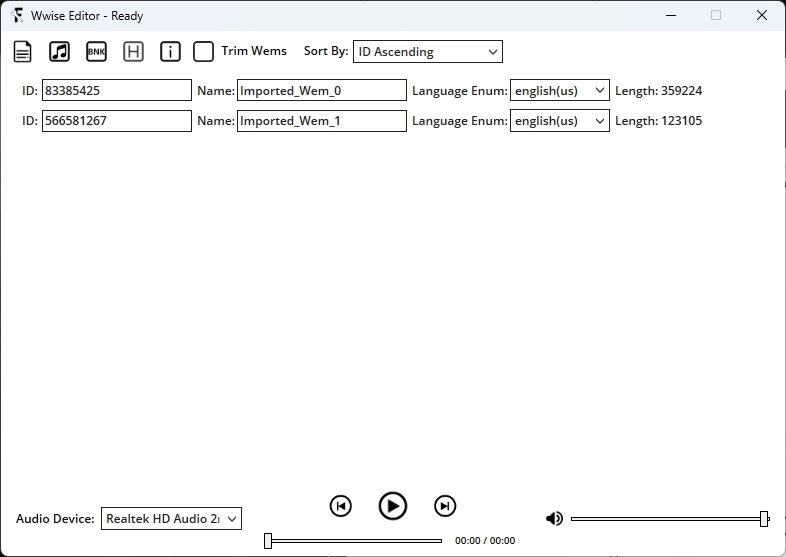
6- Now that you have your modified wav file, open WWise launcher, and in the "Projects" tab, create a project (or select the one you created).
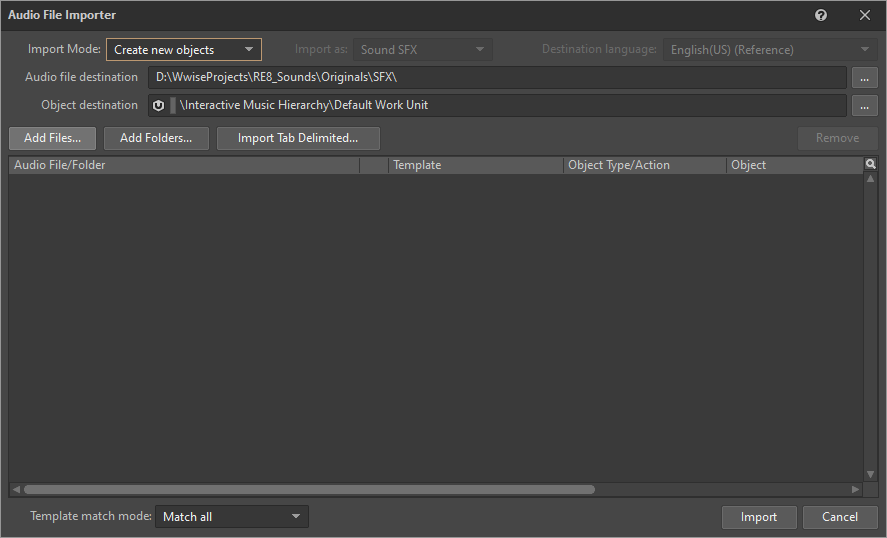
On the main page, you can import your modified wav. To do so, click on Project -> Import audio files, and then "Add files" in the new window.
And finally, "Import".
To convert it, click on Project -> Convert All Audio Files.
On the new window, click on "Convert".

To locate the converted files, click on Project -> File Manager, and then on the "Project folder", right-click on the path and select "Open Containing folder".

Your converted wem(s) will be in the ".cache\Windows\Voices\English(US)" folder (or "".cache\Windows\SFX"" if it's a SFX).

Update 2:
Now, it's possible that the converted wem file will be larger than the original one (and that would be a problem).
So, if that's the case, in Wwise, select the track you imported on the left (it should be inside "Default work unit"), and on the main window, click on the "Conversion" tab
Here, we can see the conversion setting is set to "Vorbis Quality High".
You can change by clicking on the 2 arrows on the left, Factory Conversion Settings -> Vorbis, and select another (lower) setting.

If the generated wem is still larger than the original one, we can try another solution.
Click on the button on the right side of the conversion setting.

On this new window, scroll to the right, until you see a "Format" column.
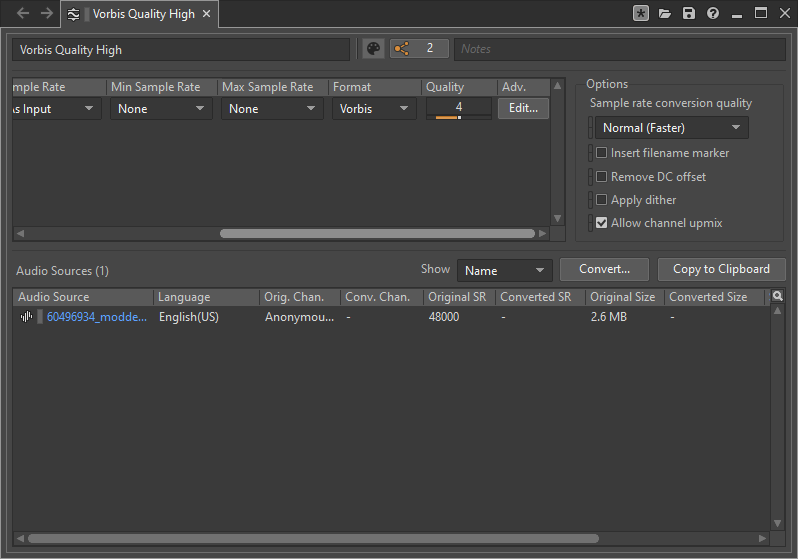
Click on the list, and select "Wem Opus".
The default quality is 64.
You can try different values until you get a size that's smaller than the original.
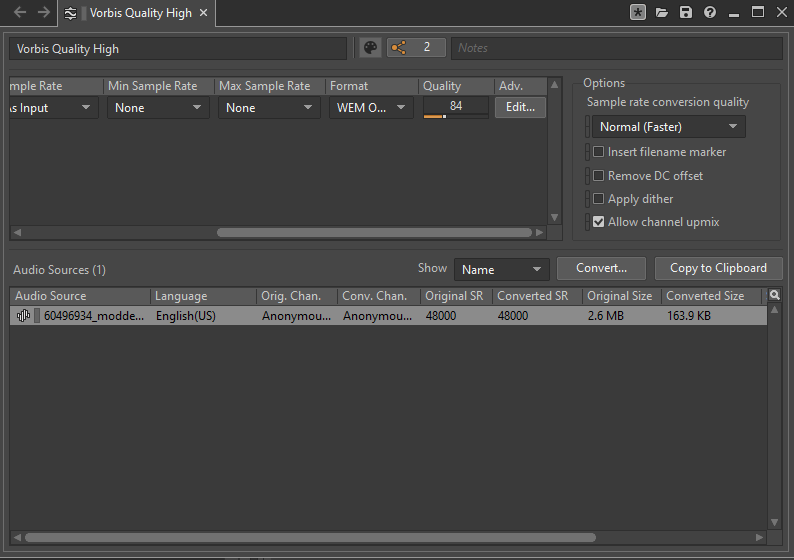
When you want to convert your file, right click on the source at the bottom, and select Convert (and then OK).
We can have an idea of the final size if we check the "Converted Size" column.
In our case, it's 145.4 kb, which is smaller than the original (165 kb).

You can finetune the quality to get a better file, and get a size as close to the original, but without exceeding it.
I managed to get a size of 163.9 kb with a quality of 84.
Once you're done, you can continue with the rest of the steps.
End of update 2
7- Now that you have your converted wems, rename them (it has to have same name as the original, I don't know if it's mandatory, but I do it anyway).

8- I noticed that replacing the wems using FusionTools doesn't always work, so we'll be using RinginBloom.
Open the program, select a "Mode" (it doesn't have a RE4R option (yet), but you can select any other RE option, and it'll work just fine), and then select "BNK editor".

Click on "Import BNK", and select the original bnk. Click on the "Data index" list, and you'll see all the tracks, names "Imported Wem #".
When you click on one, you'll have its detail (name, ID and length).

Select the one that has the same ID as the one you noted before, right-click on it, and select "Replace". Choose the wem you converted before.
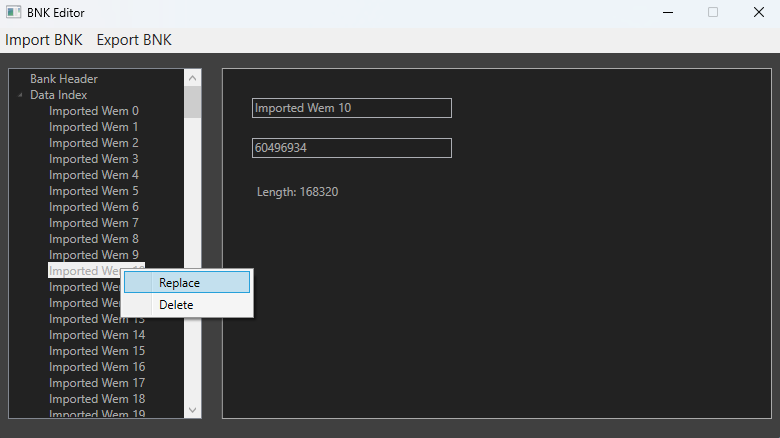

Click on "Export BNK". You now have a modded bnk. Place it in the right folder where it belongs, with the right name, and create your archive.

Note:
If modding a bnk doesn't work (usually it does just by following these steps), you can try the method at the end of the PCK part.
Modding a PCK
The process is similar, but has some extra steps.
The same steps apply, but there's a difference in step 4. You'll also need to "Export wem" (leave it somewhere, we'll come back to it later).
Then, the following steps are the same, up to step 7. Step 8 is a bit different.
You now have the original wem, and the modded one. By experience, I noticed if you try to import a wem which has not the exact same size, you won't hear it ingame.
So this is what I do:
1- In the example, the original wem (we'll name it 934602276_1_orig.wem) has a size of 12860536 bytes, and your converted one (named 934602276_2_modded.wem) 835613.
The size is smaller (there's a difference of 12024923 bytes), but it won't work.


You'll have to create a "blank" file which has a size corresponding to that difference. You can do that with the following DOS command:
fsutil file createnew 934602276_3_blank.wem 12024923
After launching the command, you'll now have 3 files:

3- The next step will be to join them. You can do that with the following command:
copy /b 934602276_2_modded.wem+934602276_3_blank.wem 934602276_4_joined.wem
So what is does is concatenate the modded wem with the blank wem, and if all goes well, the "934602276_4_joined.wem" file will have the same size as the original wem.

4- You can now use RinginBloom to replace the wem. Same process as before, but select "PCK Editor" instead.
Import, select the original PCK, you'll have a list of all the tracks (like in FusionTools).
Select the track you want to replace, and select "Replace wem" in the menu.
Choose your "joined" wem (934602276_4_joined.wem, which you have renamed with its original name, 934602276.wem).
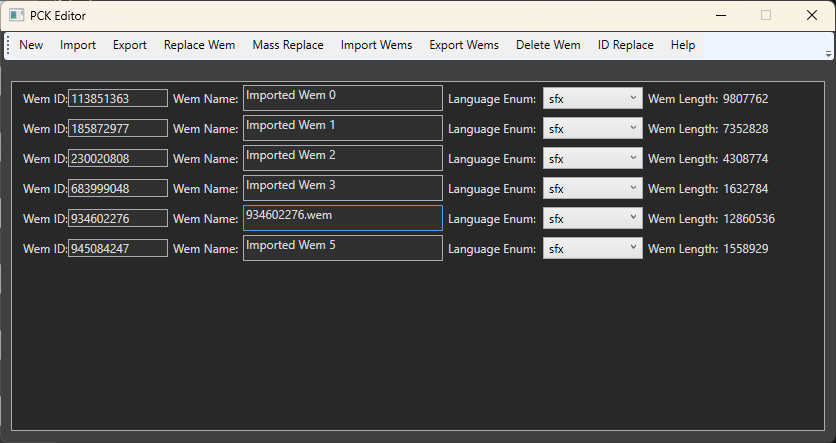
Once replaced, click on "Export" in the menu, save it in the right folder, with the right name, and create your archive.
If ALL went well, the modded PCK will have the same size as the original.

Update 3
So if after many efforts, no matter what you do, what parameters you used while exporting from Audaciy/Wwise, the final modded pck doesn't work for you and you don't hear your tracks ingame, maybe you can try this.
You have your original pck, with all the tracks in it (which you found in the "streaming" folder).
What you could do is search in the "normal" folder for the BNK that has the exact same name (but has sbnk instead of pck) and mod that one instead.
Let's say your PCK is ch_csa159_dialogue.spck.1.X64.En, that you found in natives/STM/streaming/_Chainsaw/Sound/Wwise.
Then, look inside the folder natives/STM/_Chainsaw/Sound/Wwise for the file ch_csa159_dialogue.sbnk.1.X64.En.

You'll see that its size is much smaller than the PCK, and if you try to play the tracks inside (by exporting them to wav or directly in Fusion Tools), you'll find that they are either silent or incomplete.
BNK:

PCK:
The first step of the process is to extract all the wems from the PCK.

Next wll be to import them into the bnk, replacing all the other ones (use RingingBloom for better results), also importing and replacing the track(s) you modded in the process.
When finished, export the BNK, and your exported BNK will have a bigger size than the original, a size much closer than the size of the original PCK.

Again, save it with the right name, put it in the right folder (the "normal" one, not the "streaming" one).

And it should work.
This solution doesn't work for ALL the pcks (there are some bnks that are empty, have no tracks in them to replace, and adding them manually doesn't solve the problem, I haven't found a proper solution for them yet), but the process works for most of the other files.
End of update 3
So now, you have all the knowledge and tools to make cool audio mods.
I hope that wasn't (that much) confusing, but feel free to ask if you need help.
86 comments
I tried everything you mentioned: padding the wem with 0s to match the size of the original wem, using different conversion formats, etc. but the modified audio is muted in the game no matter what. I tried editting the bnk but it doesn't contain any wems.
The file I'm trying to change is in streaming/_chainsaw/sound/wwise and it's called ch_cha0_voices.spck.1.x64.en. It contains all of Leon's grunts and screams. I'm trying to modify his scream that can be triggered by death from doctor chainsaw in the first part of the game, as it's the easiest to test
Thing to note tho: even if I convert the wav file back to wem without any changes, the file size is larger than the original for all vorbis (high, medium, low). I have to either use Wem Opus with less than 32 bitrate or Vorbis with quality lower than 0
Have you had any luck with Leon voice replacement? Anything can do to fix this?
[email protected]
I just want to edit two SFX from MH wilds..
I always get the error " To run this application, you must install .NET Core. " I have downloaded .NET core several times but it dosn't work :/
EDIT: I fixed it. I downloaded .NET Core from this link: https://dotnet.microsoft.com/download/dotnet/thank-you/runtime-desktop-3.1.20-windows-x64-installer
and it worked after that! For anyone who had same problems.
I always get the error " To run this application, you must install Windows"
EDIT: I fixed it. I downloaded Windows from this link: Download Windows 11
and it worked after that! For anyone who had same problems.