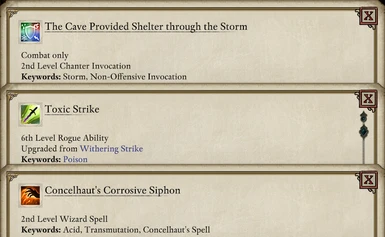
I noticed that in the Description tab, you wrote Adds "Acid" Keyword to "Ectopsychic Echo" but in game, th Acid keyword is added to Antipathetic Field (PL1).
I assume Antipathetic Field is the skill you wanted to add the Acid keyword (since it deals Corrode dmg), but I wanted to make sure !
And if its not too much of a bother, could you explain what is the purpose of giving skills the 'Attack' or the 'Ability' keyword ? For example Minoletta's Minor Missiles - Added to "ability" and "attack"
Whoops, thanks for catching that. As for the second part... An ability like Minoletta's Minor Missiles in the data is actually multiple parts: 1) The Ability data which determines its class, power level, cost etc. 2) The Attack data which determines which how much damage it deals, its damage type, range etc. 3) The Statuseffect data(s) which determines what additional effects it has. There is a keyword field in each of these, which determines what keywords it has. Most of the time these have the same keywords in both Ability and Attack each even though I'm fairly positive (haven't tested) the keyword data flows downward, so an Ability that has keywords would pass that on to its Attack, which would pass that on to its Statuseffect. Putting the keyword into Abilty and Attack is just good practice. However there are some cases where the Attack data has a keyword that the Ability does not have; while And Evil Turned Away From The Sun's Attack IS keyworded with Fire, it's ability does not reflect that. This has the side effect of the keyword not showing up on the Keyword Line on the Ability Description screen when you right click it (the Counters line is correct though). For some of these Abilities, this is seemingly intentional (like Iconic Projection), for some it's not (looking at you, Death Ring). For clarity's sake I copied the missing keyword onto the Ability data; however this leads to sacrifices in edge cases: it is entirely likely someone immune to Frost keyword abilities being immune to Iconic Projection's heal for example (again, no testing, but I'm sure-ish, because Tekehu WILL cancel And Evil Turned Away From the Sun's Resolve Affliction immunity but not Rejoice, My Comrades! Two Fingers Of Daylight!'s Resolve Affliction immunity).
It reminds me how Tekehu was immune to the healing of Moonwell, a druid PL4 skill with a Water keyword, back at launch. The devs didn't fix this by removing the Water keyword from the Ability or Attack (since we can still see it in the description window), they instead change his passive to only protect him agaisnt hurtful effects - maybe the same can be done for the Fire keyworded skills, so instead of changing And Evil Turned Away From the Sun, you would change his passive ?
Do you have any thoughts about the Acid and Poison keywords ? They seems so similar, but they are also be added so ininconsistently - some skills have only one of them, some skills have both of them. And I personnaly thing Decay shouldn't have been added on top of that.
No problem! In truth, in Vanilla, Tekehu already interacts with And Evil Turned Away in that way, and changing how his passive works is beyond the scope of this mod (which is pretty much adding keywords to where keywords where not). I do plan on migrating some of these changes to my Ability Tweaks mod. As for the Acid/Poison/Decay distinction: I honestly _really_ like the keyword system and would like it expanded with more granularity. That said I do agree that there does seem to be inconsistencies with how they are applied; Acid SHOULD be applied to all Corrode damage attacks to make it work with Spirit of Decay but isn't, Decay SHOULD be a Druid specific keyword. When all the patches are done and when I'm finished doing other things (like making a massive Skyrim modlist that I will never actually play...) I would like to do a top to bottom look at all the abilities and their keywords.
Hm, thats fair enough, you are right that Decay should be a Druid-only keyword. I'm probably just salty that there's no item with Decay or Acid Power Level, but there are some for Poison (unless I'm mistaken ?)
I'll keep an eye out for any mods of yours, I find them all very interesting !
Chromoprismatic Quarterstaff has an Acid Power Level boost as part of its Bound Blights enchantment, but yeah that's completely understandable. There's quite a few missed opportunities when it comes to certain systems in the game. I myself really want one-way Keyword counters (which are hard coded to be two way), as well as having more Grimoires have an enchant to them (other than the Grimoire of Vaporous Wizardry) to be more specialized.
Thanks for having an interest in my mods! I hope to keep producing more content with this game because I really do love it.
After some more testing, I can't seem to be able to get + Deception PL on the Eye of Wael or on the Whitewitch Mask. How can I fix that ? Also, are the "[Insert Archmage's name]'s spell' keyword on some Wizard spells just there for flavor ? Like Kalokoth's Sunless Grasp (PL1) being keyworded as a Kalakoth's spell - but then if its only to add flavor, why doesn't Minoletta's spells have the same treatment ?
Looking into it, cheers. The vanilla keywords are there because I assume there is or was planned to be a status effect to boost them. I know one of the pets provide a Power Level boost to Concelhaut Spells. Although having one more there would make my job easier for Grimoire modding...
Oh, I can already imagine Minoletta's Marvelous Manual, a grimoire regrouping all of her spells, and adding a bonus projectile to applicables spells ! :D Iron-Clasped Grimoire, the one you loot from Concelhaut, could add a siphoning effect on every spells you cast - I honestly could spend hours thinking about Wizards' spells, I love them :D
Alright fix uploaded! What I'll probably do (in the far far far in the future because I am a big procrastinator) is make each (or at least all unique) grimoires have a positive and a drawback to encourage switching.
Hi. Would it be difficult to add the keyword "poison" to the druid spells that can be countered by antidotes ? It's just plague of insects and Venombloom if I recall correctly. I have no experience on modding.
Okay. The proper initial tutorial to make a mod is found here: https://forums.obsidian.net/topic/103384-tutorial-modding-basic-concepts/ so if you just skim through that first, that'll be great because I'm going to refer to that one. The video's okay and is a 5 minute watch. Working with stringtables is here: https://forums.obsidian.net/topic/100818-how-to-work-with-stringtables/ and the official documentation for the data formats can be found here: https://eternity.obsidian.net/game-data-formats/concepts and I will be referring to it every now and then. I also have this: https://www.guidgenerator.com/online-guid-generator.aspx bookmarked because this is where I pull unique GUIDs from and you'll be making a few of them.
The vanilla gamedatabundle files are located in the [ROOT PILLARS FOLDER]\PillarsOfEternityII_Data\exported\design\gamedata folder, and we're going to be working off the items.gamedatabundle and the statuseffects.gamedatabundle. For this mod, we're going to: 1) Make a custom item mod, with a custom name 2) Make a custom status effect that the item mod will cause and, 3) Attach the item mod to an item.
Step 1) Making the item mod After you do the whole rigamarole of making the basic mod structure (i.e. making the folder, creating a gamedatabundle file with the GameDataObjects structure in it) you're going to first make an item mod. I like to copy an existing mod from the items.gamedatabundle and changing the necessary fields, because something like a missing comma WILL cause the mod to not function properly, and doing it from scratch is a hassle.
Change the "DebugName" to something like "BonusPowerLevelItemMod" Replace the "ID" entry with a GUID you've generated from the third bookmark. Leave the "DisplayName" line for now, "Cost" can be changed. I don't know its official formula-relationship with the cost of an item. Ensure that all the lines from "StatusEffectsOnEquipIDs" and onwards just have : [], as their entry.
Step 1 a) Making the Item Mod - String TIME! In your mod folder, make the following folders (names have to be exact): [YourModName]\localized\en\text\game\ Inside this folder, make a text file named 'itemmods.stringtable' and input the following inside it:
<?xml version="1.0" encoding="utf-8"?> <StringTableFile xmlns:xsi="http://www.w3.org/2001/XMLSchema-instance" xmlns:xsd="http://www.w3.org/2001/XMLSchema"> <Name>game\itemmods</Name> <Entries> <Entry> <ID>[CHOOSE A NUMBER. There's a tool somewhere on the Modding forum that generates one to prevent overlap, but it's a small modding community so if you make it sufficiently high it's likely to be okay]</ID> <DefaultText>ITEM MOD NAME HERE</DefaultText> <FemaleText /> </Entry> </Entries> </StringTableFile>
Save it, then input the number you chose as the "DisplayName" entry for your Item Mod:
Step 2) Making the Status Effect This is the basic structure of a status effect that increases Power Level that I have annotated. This one should be okay to use if you delete the annotations: { "$type": "Game.GameData.StatusEffectGameData, Assembly-CSharp", "DebugName": "ItemMod_BonusPowerLevel", "ID": "5a741119-6688-4b4e-8398-40cf16e8cf7e", <---------------- Remember to generate a unique one for each object. THIS IS IMPORTANT. "Components": [{ "$type": "Game.GameData.StatusEffectComponent, Assembly-CSharp", "StatusEffectType": "PowerLevel", "OverrideDescriptionString": -1, "UseStatusEffectValueAs": "None", "BaseValue": 2, <---------------- Change this to however you want. "DynamicValue": { "Stat": "None", "SkillDataID": "00000000-0000-0000-0000-000000000000", "ClassID": "00000000-0000-0000-0000-000000000000", "MultiplyBy": 1, "Operator": "Add" }, "KeywordsIDs": [], "DurationType": "Infinite", "Duration": 0, "MaxStackQuantity": 0, "ApplicationBehavior": "UseLongerDurationIfAlreadyApplied", "ApplicationType": "ApplyOnStart", "IntervalRateID": "00000000-0000-0000-0000-000000000000", "StackedChildrenApplyEffects": "false", "ApplicationPrerequisites": { "Conditional": { "Operator": 0, "Components": [] } }, "TriggerAdjustment": { "TriggerOnEvent": "None", "TriggerOffEvent": "None", "ValidateWithAttackFilter": "false", "ParamValue": 0, "ValueAdjustment": 0, "DurationAdjustment": 0, "ResetTriggerOnEffectTimeout": "false", "MaxTriggerCount": 0, "IgnoreMaxTriggerCount": "false", "RemoveEffectAtMax": "false", "ChanceToTrigger": 1 }, "PowerLevelScaling": { "UseCharacterLevel": "false", "BaseLevel": 0, "LevelIncrement": 1, "MaxLevel": 0, "ValueAdjustment": 0, "DurationAdjustment": 0 }, "IsHostile": "false", "ClearOnCombatEnd": "false", "ClearOnRest": "false", "ClearOnFoodRest": "false", "ClearWhenAttacks": "false", "ClearOnDeath": "false", "HideFromCombatTooltip": "true", "HideFromCombatLog": "false", "HideFromUI": "false", "VisualEffects": [], "MaterialReplacementID": "00000000-0000-0000-0000-000000000000", "AttackFilter": { "KeywordsIDs": [], "KeywordLogic": "Or", "Race": "None", "IsKith": "false", "HealthPercentage": 0, "HealthOperator": "EqualTo", "Range": "None", "ClassTypeID": "00000000-0000-0000-0000-000000000000", "Source": "None", "DefendedBy": "None", "Empowered": "false", "Disengagement": "false", "Stealthed": "false", "UseStealthLinger": "false", "PowerLevel": 0, "PowerLevelOperator": "EqualTo", "ChanceToApply": 1, "AttackHostility": "Default", "TargetType": "None" }, "AttackTargetFilter": { "KeywordsIDs": [], "KeywordLogic": "Or", "Race": "None", "IsKith": "false", "HealthPercentage": 0, "HealthOperator": "EqualTo", "Distance": 0, "DistanceOperator": "EqualTo", "HasDOT": "false", "IsMarked": "false", "TargetHostility": "Default" }, "ExtraValue": 0, "OverridePenetration": 0, "DamageTypeValue": "All", "KeywordValueID": "00000000-0000-0000-0000-000000000000", <---------------- The Keyword GUIDs can be found in the gui.gamedatabundle. Look for KeywordGameData. "RaceValue": "None", "StatusEffectTypeValue": "None", "ItemValueID": "00000000-0000-0000-0000-000000000000", "AfflictionTypeValueID": "00000000-0000-0000-0000-000000000000", "StatusEffectsValueIDs": [], "AttackValueID": "00000000-0000-0000-0000-000000000000", "AttackOverrideValue": "None", "EventValue": "OnApply", "ClassValueID": "00000000-0000-0000-0000-000000000000", <---------------- The Class GUIDs can be found in the global.gamedatabundle/. Look for ClassGameDataID. "WeaponTypeValue": "None", "AttackHitType": "None", "SkillValueID": "00000000-0000-0000-0000-000000000000", "AudioEventListID": "00000000-0000-0000-0000-000000000000", "BedRestDaysMinimum": 0, "BedRestDaysMaximum": 0 }] },
Leaving the "KeywordValueID" and the "ClassValueID" as zeroes means the "PowerLevel" effect applies to all of the character's power levels. If you want to restrict the power level bonus to specific keywords or class abilities, just change the GUIDs. If you want to grant bonus power levels to multiple keywords, you're going to need multiple status effects objects. If you use both "KeywordValueID" and "ClassValueID" on a single data object, that means that bonus will only apply to specific Class abilities that have that specific keyword. Useful if you just want to enhance, say, a Universalist's Cleric's Fire Keyword abilities but not touch their Druid Fire keyword abilities.
Step 2a) Attaching the keyword to the item mod Now that you've made the status effects, now you can put them in as entries to the item mod. Example: { "$type": "Game.GameData.ItemModGameData, Assembly-CSharp", "DebugName": "ThisIsAnItemMod", "ID": "a8f7550e-894c-471e-8e9d-7bfb1924d5b4", "Components": [{ "$type": "Game.GameData.ItemModComponent, Assembly-CSharp", "DisplayName": 11223344, "HideFromUI": "false", "EnchantCategory": "None", "Cost": 14, "CursesItem": "false", "DurabilityDamage": 0, "StatusEffectsOnEquipIDs": ["5a741119-6688-4b4e-8398-40cf16e8cf7e"], <---------------- For a single status effect. If you're putting multiple, remember to separate the GUIDs with commas. "StatusEffectsOnLaunchIDs": [], "StatusEffectsOnAttackIDs": [], "AbilityModsOnEquipIDs": [], "OnEquipVisualEffects": [], "DamageProcs": [], "AbilitiesOnEquipIDs": [] }] },
Step 3) Attaching the Item Mod to the item. All that's left to do is attaching the item mod to the item itself. Pretending for a second that we're attaching this to the Devil of Caroc Breastplate to make it even more powerful, all we need is a few of the object's data structure. Example:
Insert the item mod's GUID into the "ItemModIDs" entry, separating it from the existing entries with a comma. This will attach the item mod to the item.
{ "$type": "Game.GameData.EquippableGameData, Assembly-CSharp", "DebugName": "Breastplate_Armor_U_Devil_of_Caroc_Breastplate", "ID": "1a2a2118-230c-4538-936a-0f8f43daeb83", "Components": [ { "$type": "Game.GameData.EquippableComponent, Assembly-CSharp", "ItemModsIDs": ["f23d7b9f-563a-4a5a-b7c4-d572e2386ddf", "53f92f5e-94b7-482b-9d95-b92afa15b319", "be20ec96-68be-40f1-a05c-267933ea5eef", "a8f7550e-894c-471e-8e9d-7bfb1924d5b4"], <---------------- Note the comma on the previous line. }] },
Now save your mod's gamedatabundle, enable the mod ingame, and it should work! Due to how the game engine works though, your mod will only affect items you have NOT obtained yet, so if you want to test it out, enable the console cheats and spawn a new version of the item via its debug name.


19 comments
I noticed that in the Description tab, you wrote
Adds "Acid" Keyword to "Ectopsychic Echo"
but in game, th Acid keyword is added to Antipathetic Field (PL1).
I assume Antipathetic Field is the skill you wanted to add the Acid keyword (since it deals Corrode dmg), but I wanted to make sure !
And if its not too much of a bother, could you explain what is the purpose of giving skills the 'Attack' or the 'Ability' keyword ? For example
Minoletta's Minor Missiles - Added to "ability" and "attack"
An ability like Minoletta's Minor Missiles in the data is actually multiple parts:
1) The Ability data which determines its class, power level, cost etc.
2) The Attack data which determines which how much damage it deals, its damage type, range etc.
3) The Statuseffect data(s) which determines what additional effects it has.
There is a keyword field in each of these, which determines what keywords it has. Most of the time these have the same keywords in both Ability and Attack each even though I'm fairly positive (haven't tested) the keyword data flows downward, so an Ability that has keywords would pass that on to its Attack, which would pass that on to its Statuseffect. Putting the keyword into Abilty and Attack is just good practice.
However there are some cases where the Attack data has a keyword that the Ability does not have; while And Evil Turned Away From The Sun's Attack IS keyworded with Fire, it's ability does not reflect that. This has the side effect of the keyword not showing up on the Keyword Line on the Ability Description screen when you right click it (the Counters line is correct though). For some of these Abilities, this is seemingly intentional (like Iconic Projection), for some it's not (looking at you, Death Ring). For clarity's sake I copied the missing keyword onto the Ability data; however this leads to sacrifices in edge cases: it is entirely likely someone immune to Frost keyword abilities being immune to Iconic Projection's heal for example (again, no testing, but I'm sure-ish, because Tekehu WILL cancel And Evil Turned Away From the Sun's Resolve Affliction immunity but not Rejoice, My Comrades! Two Fingers Of Daylight!'s Resolve Affliction immunity).
It reminds me how Tekehu was immune to the healing of Moonwell, a druid PL4 skill with a Water keyword, back at launch.
The devs didn't fix this by removing the Water keyword from the Ability or Attack (since we can still see it in the description window), they instead change his passive to only protect him agaisnt hurtful effects - maybe the same can be done for the Fire keyworded skills, so instead of changing And Evil Turned Away From the Sun, you would change his passive ?
Do you have any thoughts about the Acid and Poison keywords ? They seems so similar, but they are also be added so ininconsistently - some skills have only one of them, some skills have both of them. And I personnaly thing Decay shouldn't have been added on top of that.
Anyway, thanks again for the explanation ! :)
In truth, in Vanilla, Tekehu already interacts with And Evil Turned Away in that way, and changing how his passive works is beyond the scope of this mod (which is pretty much adding keywords to where keywords where not). I do plan on migrating some of these changes to my Ability Tweaks mod.
As for the Acid/Poison/Decay distinction: I honestly _really_ like the keyword system and would like it expanded with more granularity. That said I do agree that there does seem to be inconsistencies with how they are applied; Acid SHOULD be applied to all Corrode damage attacks to make it work with Spirit of Decay but isn't, Decay SHOULD be a Druid specific keyword. When all the patches are done and when I'm finished doing other things (like making a massive Skyrim modlist that I will never actually play...) I would like to do a top to bottom look at all the abilities and their keywords.
I'll keep an eye out for any mods of yours, I find them all very interesting !
Thanks for having an interest in my mods! I hope to keep producing more content with this game because I really do love it.
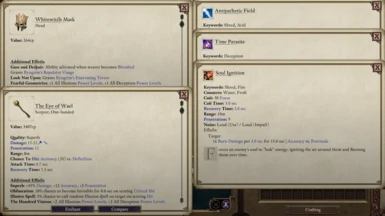
After some more testing, I can't seem to be able to get + Deception PL on the Eye of Wael or on the Whitewitch Mask. How can I fix that ?
Also, are the "[Insert Archmage's name]'s spell' keyword on some Wizard spells just there for flavor ? Like Kalokoth's Sunless Grasp (PL1) being keyworded as a Kalakoth's spell - but then if its only to add flavor, why doesn't Minoletta's spells have the same treatment ?
The vanilla keywords are there because I assume there is or was planned to be a status effect to boost them. I know one of the pets provide a Power Level boost to Concelhaut Spells. Although having one more there would make my job easier for Grimoire modding...
Iron-Clasped Grimoire, the one you loot from Concelhaut, could add a siphoning effect on every spells you cast - I honestly could spend hours thinking about Wizards' spells, I love them :D
What I'll probably do (in the far far far in the future because I am a big procrastinator) is make each (or at least all unique) grimoires have a positive and a drawback to encourage switching.
The proper initial tutorial to make a mod is found here:
https://forums.obsidian.net/topic/103384-tutorial-modding-basic-concepts/
so if you just skim through that first, that'll be great because I'm going to refer to that one. The video's okay and is a 5 minute watch. Working with stringtables is here:
https://forums.obsidian.net/topic/100818-how-to-work-with-stringtables/
and the official documentation for the data formats can be found here:
https://eternity.obsidian.net/game-data-formats/concepts
and I will be referring to it every now and then. I also have this:
https://www.guidgenerator.com/online-guid-generator.aspx
bookmarked because this is where I pull unique GUIDs from and you'll be making a few of them.
The vanilla gamedatabundle files are located in the [ROOT PILLARS FOLDER]\PillarsOfEternityII_Data\exported\design\gamedata folder, and we're going to be working off the items.gamedatabundle and the statuseffects.gamedatabundle. For this mod, we're going to:
1) Make a custom item mod, with a custom name
2) Make a custom status effect that the item mod will cause and,
3) Attach the item mod to an item.
Step 1) Making the item mod
After you do the whole rigamarole of making the basic mod structure (i.e. making the folder, creating a gamedatabundle file with the GameDataObjects structure in it) you're going to first make an item mod. I like to copy an existing mod from the items.gamedatabundle and changing the necessary fields, because something like a missing comma WILL cause the mod to not function properly, and doing it from scratch is a hassle.
Change the "DebugName" to something like "BonusPowerLevelItemMod"
Replace the "ID" entry with a GUID you've generated from the third bookmark.
Leave the "DisplayName" line for now,
"Cost" can be changed. I don't know its official formula-relationship with the cost of an item.
Ensure that all the lines from "StatusEffectsOnEquipIDs" and onwards just have : [], as their entry.
Example:
{
"$type": "Game.GameData.ItemModGameData, Assembly-CSharp",
"DebugName": "ThisIsAnItemMod",
"ID": "a8f7550e-894c-471e-8e9d-7bfb1924d5b4",
"Components": [{
"$type": "Game.GameData.ItemModComponent, Assembly-CSharp",
"DisplayName": 1002,
"HideFromUI": "false",
"EnchantCategory": "None",
"Cost": 14,
"CursesItem": "false",
"DurabilityDamage": 0,
"StatusEffectsOnEquipIDs": [],
"StatusEffectsOnLaunchIDs": [],
"StatusEffectsOnAttackIDs": [],
"AbilityModsOnEquipIDs": [],
"OnEquipVisualEffects": [],
"DamageProcs": [],
"AbilitiesOnEquipIDs": []
}]
},
Step 1 a) Making the Item Mod - String TIME!
In your mod folder, make the following folders (names have to be exact):
[YourModName]\localized\en\text\game\
Inside this folder, make a text file named 'itemmods.stringtable' and input the following inside it:
<?xml version="1.0" encoding="utf-8"?>
<StringTableFile xmlns:xsi="http://www.w3.org/2001/XMLSchema-instance" xmlns:xsd="http://www.w3.org/2001/XMLSchema">
<Name>game\itemmods</Name>
<Entries>
<Entry>
<ID>[CHOOSE A NUMBER. There's a tool somewhere on the Modding forum that generates one to prevent overlap, but it's a small modding community so if you make it sufficiently high it's likely to be okay]</ID>
<DefaultText>ITEM MOD NAME HERE</DefaultText>
<FemaleText />
</Entry>
</Entries>
</StringTableFile>
Save it, then input the number you chose as the "DisplayName" entry for your Item Mod:
Example:
{
"$type": "Game.GameData.ItemModGameData, Assembly-CSharp",
"DebugName": "ThisIsAnItemMod",
"ID": "a8f7550e-894c-471e-8e9d-7bfb1924d5b4",
"Components": [{
"$type": "Game.GameData.ItemModComponent, Assembly-CSharp",
"DisplayName": 11223344, <---------------- This is the string number
"HideFromUI": "false",
"EnchantCategory": "None",
"Cost": 14,
"CursesItem": "false",
"DurabilityDamage": 0,
"StatusEffectsOnEquipIDs": [],
"StatusEffectsOnLaunchIDs": [],
"StatusEffectsOnAttackIDs": [],
"AbilityModsOnEquipIDs": [],
"OnEquipVisualEffects": [],
"DamageProcs": [],
"AbilitiesOnEquipIDs": []
}]
},
This is the basic Item Mod.
Step 2) Making the Status Effect
This is the basic structure of a status effect that increases Power Level that I have annotated. This one should be okay to use if you delete the annotations:
{
"$type": "Game.GameData.StatusEffectGameData, Assembly-CSharp",
"DebugName": "ItemMod_BonusPowerLevel",
"ID": "5a741119-6688-4b4e-8398-40cf16e8cf7e", <---------------- Remember to generate a unique one for each object. THIS IS IMPORTANT.
"Components": [{
"$type": "Game.GameData.StatusEffectComponent, Assembly-CSharp",
"StatusEffectType": "PowerLevel",
"OverrideDescriptionString": -1,
"UseStatusEffectValueAs": "None",
"BaseValue": 2, <---------------- Change this to however you want.
"DynamicValue": {
"Stat": "None",
"SkillDataID": "00000000-0000-0000-0000-000000000000",
"ClassID": "00000000-0000-0000-0000-000000000000",
"MultiplyBy": 1,
"Operator": "Add"
},
"KeywordsIDs": [],
"DurationType": "Infinite",
"Duration": 0,
"MaxStackQuantity": 0,
"ApplicationBehavior": "UseLongerDurationIfAlreadyApplied",
"ApplicationType": "ApplyOnStart",
"IntervalRateID": "00000000-0000-0000-0000-000000000000",
"StackedChildrenApplyEffects": "false",
"ApplicationPrerequisites": {
"Conditional": {
"Operator": 0,
"Components": []
}
},
"TriggerAdjustment": {
"TriggerOnEvent": "None",
"TriggerOffEvent": "None",
"ValidateWithAttackFilter": "false",
"ParamValue": 0,
"ValueAdjustment": 0,
"DurationAdjustment": 0,
"ResetTriggerOnEffectTimeout": "false",
"MaxTriggerCount": 0,
"IgnoreMaxTriggerCount": "false",
"RemoveEffectAtMax": "false",
"ChanceToTrigger": 1
},
"PowerLevelScaling": {
"UseCharacterLevel": "false",
"BaseLevel": 0,
"LevelIncrement": 1,
"MaxLevel": 0,
"ValueAdjustment": 0,
"DurationAdjustment": 0
},
"IsHostile": "false",
"ClearOnCombatEnd": "false",
"ClearOnRest": "false",
"ClearOnFoodRest": "false",
"ClearWhenAttacks": "false",
"ClearOnDeath": "false",
"HideFromCombatTooltip": "true",
"HideFromCombatLog": "false",
"HideFromUI": "false",
"VisualEffects": [],
"MaterialReplacementID": "00000000-0000-0000-0000-000000000000",
"AttackFilter": {
"KeywordsIDs": [],
"KeywordLogic": "Or",
"Race": "None",
"IsKith": "false",
"HealthPercentage": 0,
"HealthOperator": "EqualTo",
"Range": "None",
"ClassTypeID": "00000000-0000-0000-0000-000000000000",
"Source": "None",
"DefendedBy": "None",
"Empowered": "false",
"Disengagement": "false",
"Stealthed": "false",
"UseStealthLinger": "false",
"PowerLevel": 0,
"PowerLevelOperator": "EqualTo",
"ChanceToApply": 1,
"AttackHostility": "Default",
"TargetType": "None"
},
"AttackTargetFilter": {
"KeywordsIDs": [],
"KeywordLogic": "Or",
"Race": "None",
"IsKith": "false",
"HealthPercentage": 0,
"HealthOperator": "EqualTo",
"Distance": 0,
"DistanceOperator": "EqualTo",
"HasDOT": "false",
"IsMarked": "false",
"TargetHostility": "Default"
},
"ExtraValue": 0,
"OverridePenetration": 0,
"DamageTypeValue": "All",
"KeywordValueID": "00000000-0000-0000-0000-000000000000", <---------------- The Keyword GUIDs can be found in the gui.gamedatabundle. Look for KeywordGameData.
"RaceValue": "None",
"StatusEffectTypeValue": "None",
"ItemValueID": "00000000-0000-0000-0000-000000000000",
"AfflictionTypeValueID": "00000000-0000-0000-0000-000000000000",
"StatusEffectsValueIDs": [],
"AttackValueID": "00000000-0000-0000-0000-000000000000",
"AttackOverrideValue": "None",
"EventValue": "OnApply",
"ClassValueID": "00000000-0000-0000-0000-000000000000", <---------------- The Class GUIDs can be found in the global.gamedatabundle/. Look for ClassGameDataID.
"WeaponTypeValue": "None",
"AttackHitType": "None",
"SkillValueID": "00000000-0000-0000-0000-000000000000",
"AudioEventListID": "00000000-0000-0000-0000-000000000000",
"BedRestDaysMinimum": 0,
"BedRestDaysMaximum": 0
}]
},
Leaving the "KeywordValueID" and the "ClassValueID" as zeroes means the "PowerLevel" effect applies to all of the character's power levels. If you want to restrict the power level bonus to specific keywords or class abilities, just change the GUIDs. If you want to grant bonus power levels to multiple keywords, you're going to need multiple status effects objects. If you use both "KeywordValueID" and "ClassValueID" on a single data object, that means that bonus will only apply to specific Class abilities that have that specific keyword. Useful if you just want to enhance, say, a Universalist's Cleric's Fire Keyword abilities but not touch their Druid Fire keyword abilities.
Step 2a) Attaching the keyword to the item mod
Now that you've made the status effects, now you can put them in as entries to the item mod. Example:
{
"$type": "Game.GameData.ItemModGameData, Assembly-CSharp",
"DebugName": "ThisIsAnItemMod",
"ID": "a8f7550e-894c-471e-8e9d-7bfb1924d5b4",
"Components": [{
"$type": "Game.GameData.ItemModComponent, Assembly-CSharp",
"DisplayName": 11223344,
"HideFromUI": "false",
"EnchantCategory": "None",
"Cost": 14,
"CursesItem": "false",
"DurabilityDamage": 0,
"StatusEffectsOnEquipIDs": ["5a741119-6688-4b4e-8398-40cf16e8cf7e"], <---------------- For a single status effect. If you're putting multiple, remember to separate the GUIDs with commas.
"StatusEffectsOnLaunchIDs": [],
"StatusEffectsOnAttackIDs": [],
"AbilityModsOnEquipIDs": [],
"OnEquipVisualEffects": [],
"DamageProcs": [],
"AbilitiesOnEquipIDs": []
}]
},
Step 3) Attaching the Item Mod to the item.
All that's left to do is attaching the item mod to the item itself. Pretending for a second that we're attaching this to the Devil of Caroc Breastplate to make it even more powerful, all we need is a few of the object's data structure. Example:
{
"$type": "Game.GameData.EquippableGameData, Assembly-CSharp",
"DebugName": "Breastplate_Armor_U_Devil_of_Caroc_Breastplate",
"ID": "1a2a2118-230c-4538-936a-0f8f43daeb83",
"Components": [
{
"$type": "Game.GameData.EquippableComponent, Assembly-CSharp",
"ItemModsIDs": ["f23d7b9f-563a-4a5a-b7c4-d572e2386ddf",
"53f92f5e-94b7-482b-9d95-b92afa15b319",
"be20ec96-68be-40f1-a05c-267933ea5eef"],
}]
},
Insert the item mod's GUID into the "ItemModIDs" entry, separating it from the existing entries with a comma. This will attach the item mod to the item.
{
"$type": "Game.GameData.EquippableGameData, Assembly-CSharp",
"DebugName": "Breastplate_Armor_U_Devil_of_Caroc_Breastplate",
"ID": "1a2a2118-230c-4538-936a-0f8f43daeb83",
"Components": [
{
"$type": "Game.GameData.EquippableComponent, Assembly-CSharp",
"ItemModsIDs": ["f23d7b9f-563a-4a5a-b7c4-d572e2386ddf",
"53f92f5e-94b7-482b-9d95-b92afa15b319",
"be20ec96-68be-40f1-a05c-267933ea5eef",
"a8f7550e-894c-471e-8e9d-7bfb1924d5b4"], <---------------- Note the comma on the previous line.
}]
},
Now save your mod's gamedatabundle, enable the mod ingame, and it should work! Due to how the game engine works though, your mod will only affect items you have NOT obtained yet, so if you want to test it out, enable the console cheats and spawn a new version of the item via its debug name.
thank you very much for this. i hope they make a statue of you