Documentation
Readme
View as plain text
===============================
The Golden Crest
===============================
Content:
1.1 Author
1.2 Author Contact
2.1 Description
2.2 Features
3.1 Installation
3.2 Requirements
3.3 Credits
3.4 Disclaimer
4.1 Walkthrough
4.1a Abecean Pirates
4.1b The Straight Arrow
4.1c The Hidden Treasure
5.1 Closing
===============================
1.1 Author
===============================
Kafana (Nikola Luburic)
===============================
1.2 Author contact
===============================
[email protected]
===============================
2.1 Description
===============================
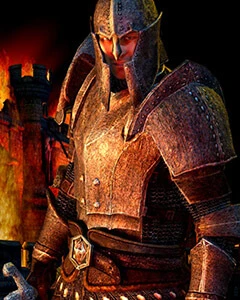
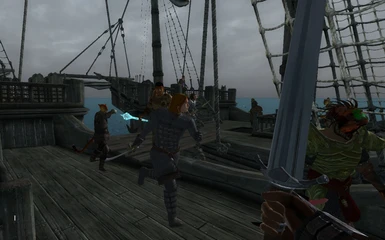
The Golden Crest is a major quest mod that in it's current version has over 40 quests and currently offers at the very least 30+ hours of gameplay.
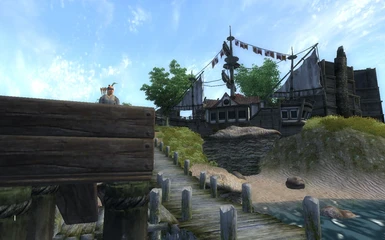
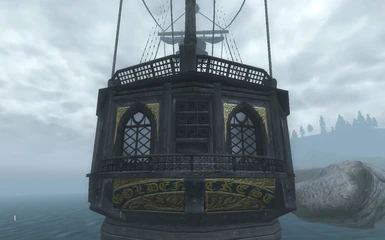
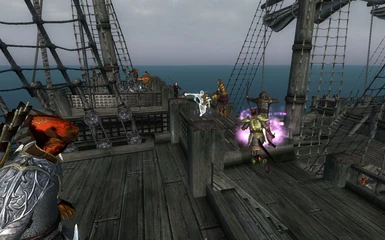
Once you help a pirate in Anvil escape the clutches of the Imperial Guard you are on your way to becoming a pirate. At the start you serve on The Wailing Butcher, a strong and sturdy vessel.
It isn't long before you go from the rank of Swabie to boatswain and start raiding ships, islands and castles with your crew mates. Eventually you acquire a ship of your own and become captain.
With a home on the water and a crew under your command the plunderin' beings!
===============================
2.2 Features
===============================
- A number of quests, most of which last longer than most vanilla quests.
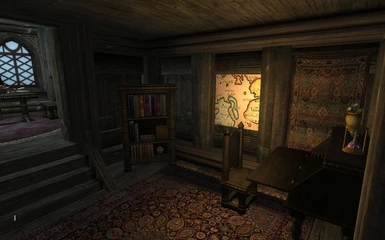
- As you play you eventually acquire your own small quarters in the ship, but once you acquire a ship of your own you get a fully crewed ship equipped with your own smith, cook and doctor as well as half a dozen boatswains.
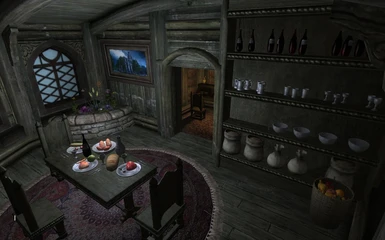
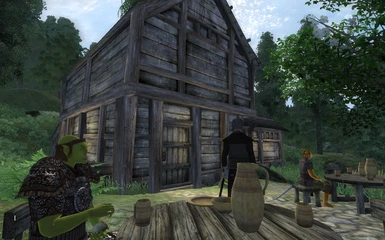
- A cozy acquirable house in the Nibenay Basin. A perfect location for any outlaws, vampires, thieves and, of course, pirates. Of course, what wilderness hideout would be complete without a secret?
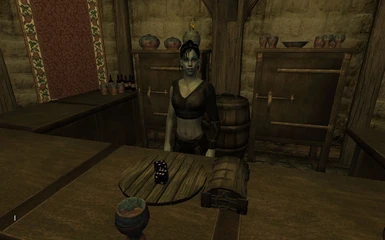
- A tavern for pirates, thieves, treasure hunters and bounty hunters. What tavern would be complete without an underground ring? Features a dice game, a fight club and a long list of people with bounties on their heads for you to hunt.
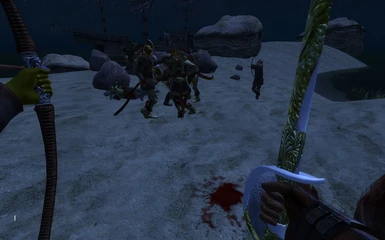
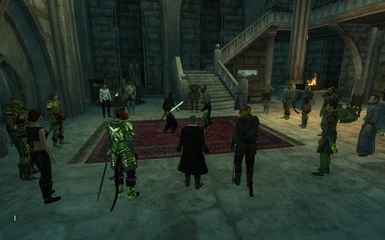
- Quests raining from large scale battles, larger than the Battle of Bruma, boarding and plundering ships and islands, laying siege on enemy castles, horse chasing, hidden treasure hunting.
- Exploring vast islands with horrible and difficult creatures.
- Quests with moral and practical choices, with multiple endings and optional outcomes.
- Repetable quests which allow you to plunder ships
===============================
3.1 Installation
===============================
Simply extract the .rar file to your Oblivion\Data directory and open up the Oblivion Launcher where you will have to check the GoldenCrest.esp in the Data files menu.
===============================
32. Requirements
===============================
- OBSE -Elys- Universal Silent Voice which can be found here: http://www.tesnexus.com/downloads/file.php?id=16622
(Alternatively you can download the Golden Crest silent mp3 from this site (TESNexus), included in the file section of the mod and extract the files to your Oblivion\Data directory)
===============================
3.3 Credits
===============================
- pale_rider for the pirate coat and pants
- mirind09 for the black leather outfit
- Tda for the black scythe
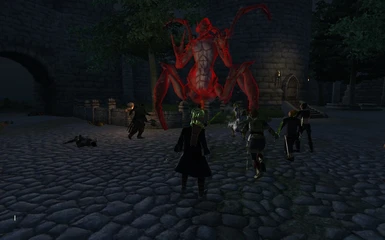
- Goblin King for the lava golem
- InoZenosis for the outfit used for Jasmine Shadow
- Trollf for the dark altar
===============================
3.4Disclaimer
===============================
While the mod seems to work fine and doesn't cause any errors I would strongly recommend you back up all your saves. I am not responsible for any bugs that might occur.
===============================
4.1 Walkthrough
===============================
This walkthrough is meant as a "last means" tool. If you are sure you can't complete the quest and have tried at least twice to do so consult this walkthrough. I advise you not to turn to it as soon as you see the quest has no map marker.
+++++++++++++++++++++++++++++++
4.1a The Abecean Pirates
+++++++++++++++++++++++++++++++
===Joining a Pirate Crew===
To start the quest line (and this mod) you have to go to the Anvil main gate. Enter the town and a quest update should appear.
After speaking to the citizens about the Pirates it will be suggested to search the docks at night. You are looking for Landsmen Earl, who can be found at the docks at night, behind Lelle's Quality Merchandise.
After that you need to speak to Radovan Marsh, who can be found at the dock end, next to the Sea Tub Clarabella.
Once you've spoken to Earl once more you'll need to get two potions of invisibility. There are three in the Mage's Guild in Anvil so I suggest you get a hold of them.
The rest of the quest is pretty straight forward and shouldn't require a walkthrough.
===Errand Boy===
The quest is completely straight forward. All of the items can be purchased or stolen from the Imperial City Market District.
===Thieves and Beggars===
This quest can be difficult if you don't have invisibility or a high sneak level. If you do manage to get passed the guard Marlow will tell you exactly where the key is.
If not, however, you need to understand the encrypted words he gives to you. "Under the full moon look for the poor". The beggars are sleeping at night, so the location is next to one of their bedrolls. Behind the chapel, to be exact, at the base of a tree.
===Gathering a Crew===
---Odis's Dept---
The quest isn't confusing. Simply follow the directions given through the journal and dialogues.
---Posttraumatic Stress Disorder---
Once again easy and straightforward.
---A Cure for Depression---
The hard part of this quest is herb gathering. Consult Helen's Cure for Depression to see which herb grows where. If you follow it right you'll have the ingredients in no time. If you have access to the Arcane University you can find some (if not most) ingredients there.
The final part of Gathering a Crew is to find Hides-all-Day. This can be quite difficult if you restrict yourself to the interior cell of the Two Sisters Inn.
Hides-all-Day is outside, on the terrace of the inn. He will be there at any time.
===A Sister's Love===
A straightforward quest. Make sure you read the Forgotten Power when the chance arrises.
The only thing you might have trouble with is finding a clue of Mal's location. Rent or sneak into his old room and look behind the drawers to the left.
===A Pirate's Greed===
Requires next to no travelling so it is rather easy not to get lost.
===The Tobacco Business===
Once again easy and straightforward.
===Local Gossip===
The amulet is called the Summoner's Amulet and can be found on the chest near the right corner of the terrace. The terrace can be reached using the underground tunnels, or trying your luck to sneak past the guards.
===Stolen Cargo===
James can be found in the Silverhome on the Water, top floor, locked in his room. You'll need to pick the lock. After that it gets straightforward.
===Prepare to Board!===
No need for a walkthrough.
===Blessed Forefathers===
While a difficult quest, it isn't confusing and requires no real detective work.
===Business Trip===
To make things easier the key to the Best Defense basement is on a drawer between the beds on the top floor of the shop. You can also pick the lock if you are skilled enough.
Anything you don't need you leave in a secure container as the crates are heavy and to avoid more trips (though you'll most likely make at least two).
===Information===
No detective work. If you can't find Bartholomew, he is actually the white horse near the Anvil stables. If you can strike the courier before he enters the cave, but after he dismounts, you'll save yourself the trouble of killing half a dozen bandits.
===All or Nothing===
In order to enter the castle you need to climb the walls and enter through the terrace. There are two ways to climb and it doesn't take an acrobat to complete this mission.
Don't attack the first boss (swashbuckler) until he talks to you.
Once inside you'll have to defeat three boss-type characters, but also slay a dozen or so guards. The faster you unlock the doors the faster your crewmates come to aid.
===Reestablishment===
Simply check every inn (usually there are two, sometimes three in each city), and gather 6000 gold.
===Pirate Hunter===
To start this quest simply go to Bleak Farm and approach the large map on the wall on the floor where you found the map. This is one of the very few quests that has map markers (though they do not point to the exact location of the target)
===Marsh's Guardian Angel===
Quite a difficult quest, both detective-wise and combat-wise.
The first main obstacle is finding a connection between Ersted Lebridge and the pirates. It's on the table next to where Ersted was standing, between two books. It's a letter.
The second is finding a note in the Store Room of Fort Cutha (the room with a lot of expensive stuff) where you need to get the key for the Trash Chute.
The final, and most difficult, is finding something that belonged to Marh's sister. Jump into the trash chute and you'll see, well, trash.
You need to look between the crates, on top of one of the crates, deep in the center of the chute, you'll see a green robe. Take it or move it and below that you'll see a chest. This is what you need.
After that go out the way you came in and you should be confronted by Imperial Guards. Don't fast travel and they will take you to Marsh.
===The Great Escape===
This quest can become hard as you basically are working against the clock.
The first thing you need to do is go to the Dinning room and find the medicine inside the kitchen.
Secondly you need to reach the swashbuckler's quarters where you will fight Ormil (but don't attack him until he talks to you), get your stuff and find the map of where you are.
After that just make your way out of the castle and onto your new ship.
Congratulations, you became the captain of the famous Golden Crest!
===The Curse of Savage Island===
This quest will start two days after the Great Escape ends. Head to the Golden Crest and you will encounter Eva from the Wailing Butcher. It's pretty straightforward until a storm pulls you to Savage Island. This is where the fun starts.
This quest is incredbly long and twined with three more additional quests, only one of which is mandatory.
The first thing you need to do is find and speak with Azul. He should be on the beach near the Golden Crest.
Next you need to search the beach for any supplies or survivors. After a long walk you will encounter a strange sheep herder who will tell you to climb the dark hill.
After you climb the hill and activate the altar the storm will disperse.
Go back and talk to the shepherd, then go back to the Golden Crest and speak with Jones/Azul (depending on your choices so far).
Head back to where you met the shepherd and follow the road deeper into the island. You should reach another beach and if you look around carefully you will see some lights and a tent.
If the shepherd isn't here yet press T and wait and hour for him to appear.
The shepherd will require various "random" items for you to complete the quest:
- Aloe Vera leaves - can be found on a plant of the same name. Pretty common on the island, just search for it where the grass meets the road.
- Tiger Lilly Nectar - there are six or so plants in the canyon, quite close to Deisha's house.
- Repair Hammer - there are several in the lighthouse basement, one is near where your ship crashed, one is in the cartographer's house, one is in Deisha's house.
- Skull - several can be found in Deisha's house, a few can be found on the dark hill and one can be found in the settlement.
- Scythe - two can be found near the farmhouse next to the settlement.
- Orange - three can be found in the exterior of the settlement, one or two can be found in the Iron Wench, and a few more can be found scattered in other interiors of the settlement.
- Wolf Pelt - one can be found in the cartographer's quarters and one can be found on the road towards the lighthouse, on a stump next to the road.
- Varla Stone - one can be found in the ayleid ruin on top of the canyon, in the grass below the altar and one can be found in a chest on the east beach of the canyon, next to a dead adventurer (appears only after you find out who Sam is).
- Troll fat - two portions are in a bowl near the entrance to the basement of the lighthouse and one appears in Deisha's house, under a bowl (only after you find out who Sam is).
Once you find out how to get rid of the curse you have two options, both of which can't be done until you finish the quest "Planks, Sailcloth and Two Smoking Charts".
The first option is to fight the rage of Samuel Flint. Quite a difficult task as his fury is a formidable foe. Doing this saves you half an hour or an hour of gameplay, but your reward is, in turn not as good.
The other option is to do the three tasks. The mayor is a formidable foe, but not nearly as strong as the rage of Samuel Flint. After you kill him the entire village turns against you which can be very bad if you lack crowd control spells.
The ship is under the water, near the docks. Simply swim away from the village, diagonally and you should encounter the ship. The sword is on a desk, in the middle portion of the ship. Light/Night Eye and Water Breathing is recommended.
Convincing Deisha is pretty straightforward.
After dealing with the essence of Samuel's Rage find his tomb and activate it. Make sure you took everything you wanted before leaving. You will get a Buccaneer's Pearl upon leaving.
===Planks, Sailcloth and Two Smoking Charts===
The quest is acquired automatically once you stop the storm.
You can ask the Hermit where to acquire these items and he will tell you, for one pearl. Not flawed or flawless, just regular. It can be found in the many clams along the beach.
You can skip the Hermit part and simply head to the village and speak to the Merchant and Cartographer.
You can pay them for all the items for a total of 3800 septim, or you can complete their tasks.
Once you have secured all the supplies speak with Azul who will head with Jones to the village to recover the planks and sailcloth. Once they return to the ship the quest is complete.
You don't need to follow them, but it can speed up things, though you can just press T and wait a few hours.
===Healing by Killing===
This quest is completely optional. It can be acquired by speaking with either Emily or Bill, or both of them once you speak with Azul about the damage to the ship.
The Hermit has information that can help you. He requires Ginseng (for Bill's request) and Fly Amanita Cap (for Emiliy's). Ginseng is a red or yellow flower which is spread throught the island. Fly Amanita Cap is a red mushroom which is also spread across the island, but can be easiest to find in the center of the village on the island.
You don't have to speak with the Hermit, but you can head directly to the Lighthouse Keeper (for Bill's task) and Deisha (for Emily's). The lighthouse keeper, after and if you get his disposition high enough will tell you to simply kill the creatures in the basement. Report to Bill once you do that.
Deisha will request a dragon's tongue flower (though she only says flower, but thanks to Sam's memory you know what flower she is talking about). Head back through the canyong until you come across the fork in the road, near the exit of the canyon. Head to the dead end where you will find 7 or so dragon's tongues.
Report to Emily and Bill when you complete their tasks.
The quest will end once you exit the Buccaneer's resting place. Speak with Bill and Emily inside the ship after this quest but before the next one ends to get your reward (if you completed their tasks, of course).
===Sea Creature: Origins===
This quest is optional and easily missable. Once the innkeeper dies loot his corpse to find a note. Read the note.
There are seven additional quest updates.
The first one is in the mayor's quarters, top floor, on a table near his bed. It's a letter.
The second one you receive when speaking with the merchant about Samuel Flint and the Sea Creature (only if you got the letter from the Mayor).
The third you can get by speaking with the cartographer about the same subject(only after you get the letter in the Mayor's office).
The fourth update can be received by reading a scroll that is on the small outpost tower at the docks.
The fifth update is received by speaking with the Hermit about this subject. Requires one rum bottle. Search the village for it (the inn in particular).
The sixth update is received by speaking with Deisha on the matter.
The seventh and final update is received by looting the dead agent at the ayleid ruin on top of the canyon.
This quest will end once you deal with Samuel's Rage and exit his tomb. The quest can be completed with any number of updates (it will still complete, for example, if you only looted the innkeeper's corpse and read the letter), however, certain information learned can be used in future quests to change the events.
===Divide and Conquer===
This quest holds many forks in the road, but ultimately is pretty straightforward. I'll just elaborate on the forks in the road.
If you decide to allow your crew to sail without a captain while you are on the Wailing Butcher they will capture the outpost on the southern beach and save you from having to fight 5 pirates (though it is quite an easy battle as it's practically 15 vs 5 in your favor).
Taking out the patrol is the easier task if you can score a 6x critical with melee and have a good blade skill. Use poisons if you have to or lower the difficulty.
Taking out the archers is difficult but can be done with magic if spells are strong enough to score an insta-kill. Use poisons on arrows to improve your chances.
Putting Jones in charge improves his disposition towards you (not the vanilla Oblivion disposition, but the new system implemented in this version) and also increases the attack of your crew slightly. Puttin Azul in charge increases his disposition and slighly increases the defense of the crew.
Once you enter the dungeons of the castle pay attention to the one prisoner. If you free her she will join you and become a new crew member and potential romance option for male players.
The courtyard is where it's at. Quickly rush to the gate in front of you and open it, leave the crew to fight and rush to the other gate and open it.
If you choose to lay siege of the castle instead of the barracks, you will be involved in a difficult duel where your enemy is extremely hard to hit. You will then have to fight him again, only he will be much much easier to hit.
If you choose to take over the barracks the captain, Kafana, will face off with the enemy and die (but will at least put on a good show). This way you avoid the harder of the two duels but lose a "friend".
You can take over the barracks and fight against the enemy swashbuckler if you have read the scroll on the dock tower outpost in the quest "Sea Creature: Origins".
The rest of the quest is straightforward.
===No Quarter===
Straightforward, try to keep your crew alive for easier crowd control. Donating after raids towards improving the crew makes the fights easier.
===The Imperial Navy===
Same as before, any form of crowd control helps.
===The Plague Ship===
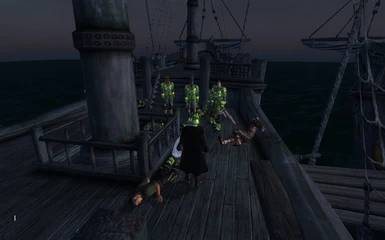
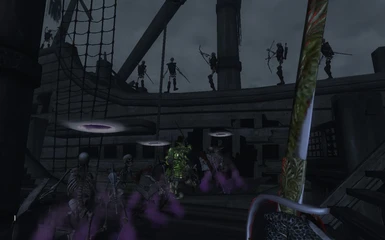
Try to deal with the melee skeletons as fast as you can, whilst keeping your crew alive. Once you've dealt with the first and if you managed to keep your crew alive you can let your crew take care of the second wave, while you dispatch the archers.
There's a crate with a few helpful arrows and scrolls near the front of the ship. If you run out of arrows collect the ones shot by the skeleton archers.
For a future quest, it'd be wise to save at least 12 daedric arrows shot by the archers.
===The Ritual of the Sacred Mold===
Try not to anger the spirit of the altar and be mindful of your choices as your every answer will impact the rest of the game. Try to save up on Varla Stones as you will need them for the final stages of the quest.
===Failure to Prepare is Preparing to Fail===
Straightforward. Just collect all the supplies needed.
===Training Cocoon===
Save often and only in the training grounds. The game is pretty bugged when it comes to quicksaving so if you die during one of the tests in this quest and load a save which was somewhere mid-test you'll probably find it to be bugged.
A solution for this would be to quit the game and load it up again. This way you avoid the bug, but since this is a difficult quest my guess is you won't like entering and exiting the game over and over.
Your best bet is to save only before and after each test, and not during.
As for the tests themselves:
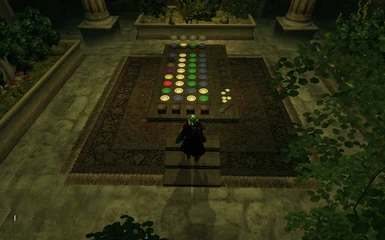
Test of Wit - This is pretty much a game of Mastermind. You need logic to pass this, but if you're having trouble, you can use "tcl" to look under the silver covers and see what the combination is.
Test of Assessment - Make your way through the darkness until you receive a bow. Use the 12 arrows to shoot down the silver urns. Do not miss! There are exactly 12 silver urns and you'll probably need to jump and look in every nook and crany to find them.
Test of Faith - Walk over the first pit. Jump on the second pilliar and once you get the mark don't move. Wait for the fire in the far end of the room to start shooting towards you and then drink the potion. Timing is everything here.
Once you've been told to jump down, try to slide on the lower platform, taking minimal damage. Avoid the rage golem and activate the stairs. Make your way to the trap door. Try to slide down again. This time jump over the pit.
Test of Deception - Make your way to the top floor, take the dagger, avoid the fire atronach, run downstairs and kill the merchant. Drop the dagger. Try to push the person in front of you into the flame and make your way up, avoiding the fire.
Find the skamp that has wrist irons and kill him.
Training Grounds - Kill Blackwood using the turrets and then using the fury of the sea kill the rest.
===Polymerization===
Pretty straightforward. For the Blue Buccaneer you'll need to have completed "Freerunning". For the White Buccaneer you'll need to have acquired the Diamond of Might and for the Green Buccaneer you'll need to have acquired the Insightful Emerald.
Accordingly, the bonuses, powers and homes you'll get are for a Warrior(White), Mage(Green), Rogue(Blue).
Congratulations, you're now one of the nine fabled Buccaneers.
+++++++++++++++++++++++++++++++
4.1b The Straight Arrow
+++++++++++++++++++++++++++++++
===The Straight Arrow===
After coming up with a plan to spend a few hours each day at the inn, simply stand or jump around, practice your self spells or something for two hours, until you get a journal update. Come back tomorrow and repeat. Do this three times.
Once your journal updates for the third time go somewhere, possibly the IC or something, go away from the inn and come back the day after. You will be confronted by someone after a while.
===Errand Boy II===
Slavko is in one of the rooms of the Jerall view inn. You'll need to pick the lock. When facing the innkeeper, turn right and climb the stairs. That's the room, next to a bench.
The rest of the quest doesn't require a walkthrough.
===The Underground===
Jump down the hole, kill the undead, kill the horde of zombies, fight Nebula's Champion, grab the amulet, read the book, activate the device, report your success. Simple.
===Honor Among Thieves===
After talking to everyone mentioned in the journal, donate gold, items, win fights and spend time doing nothing. This quest should be done over time instead of all at once. You should enjoy the Straight Arrow for all its potential and over time you will be an Honorary Member.
===Attack on Silinois===
Straight and to the point. Don't attack Miranda until she talks to you.
===The Wrong Brothers===
Not much to say, really. Watch out for traps and you should be fine.
===Everyone Dances with the Grim Reaper===
Head to the All-Saints inn in the Imperial City Temple District.
You can solve this quest in two ways, if you find the letter in Ra'Zhid's room or if you speak with the innkeeper and then speak to whoever he points you to and so on.
The scythe(mentioned later) can be bought from the countess of Bruma or stolen from her. It's in her room, next to her bed, on a clothing cabinet.
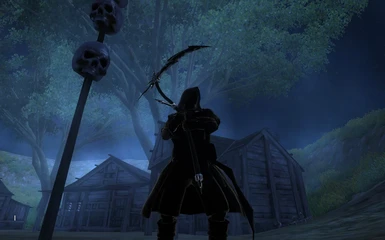
You can only complete this quest if you have the Black Hood, Black Robe and Scythe equiped, have your weapon drawn and you speak with Ra'Zhid between midnight and four am.
Otherwise, you will be killed by Ra'Zhid.
+++++++++++++++++++++++++++++++
4.1c The Hidden Treasure
+++++++++++++++++++++++++++++++
===Captain Ormil's Treasure===
The quest is started by talking to Azul, your new first mate, after acquiring the Golden Crest. The chest is located on the mid-deck, once you go down to your left, in the large room.
===Freerunning===
An easy quest for a highly skilled acrobat, but also quite possible for a journeyman of acrobatics. Simply look before you leap and try to devise a plan how you will reach your target.
===An Old Lock===
While most of the gems are given through the main quest line, there are a few that are not tied to any quest. The Diamond of Might is located in a chest of the Captain's quarters of the Golden Crest. The Insightful Emerald is located in Hollow Log Cavern. Sapphire of Guile is given as a reward of Freerunning. The ruby and topaz are given through the main quest line. The others will come in later versions.
===A Message from the Sea===
This quest can only be started once you complete "Divide and Conquer". Search the coastline near the Golden Crest (next to the rowboat) to find a covered pot.
The count mentioned in the note is the count of Cheydinhal. Everything else is straight to the point.
===============================
5.1 Closing
===============================
I'd like to thank all of you out there for playing my mod. Future updates will come and will focus even more on the story, adding more practical and moral choices, as well as adding as much background as possible on the whole questline.
Once again I thank you for playing my work :)
