About this mod
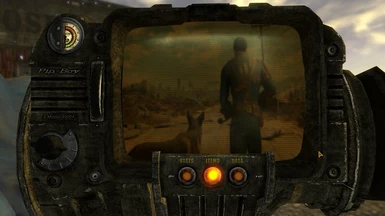
Makes it possible to play videos on your Pip-Boy for immersive entertainment.
- Requirements
- Permissions and credits
- Changelogs
- Donations

This mod makes your Pip-Boy able to play videos. You're probably wondering how this works, considering the game doesn't actually support
video playback like this. What it actually does is it changes the Pip-Boy background image several times per second, with each image being a frame extracted from a video, creating a motion picture. It can play back the audio that was extracted from the original video, and as long as the game keeps a steady 60FPS going they should play in sync. On top of that, this mod makes it easy to add your own videos without having to use the GECK at all. (see instructions below)
Install & Getting Started
- Install the mod using your favorite mod organizer (or manually, if you prefer)
- Start the game and wait a few seconds for Pip-Flicks to be added to your inventory.
- In your inventory under Apparel you'll find "[ Pip-Flicks 3000 ]". Equip it, choose which video you'd like to play, sit back and enjoy.
Requirements
- NVSE 4.6 beta 1 (or higher)
- Lutana NVSE Plugin
- JIP NVSE Plugin
- Consistent 60FPS when in Pip-Boy menu, otherwise the timing of the video will be off.
Compatibility
Should be compatible with anything. Also works on Pip-Boy replacers like the Readius or Pip-Boy 2500.
Known issues
- The game needs to run at 60FPS for the image to remain in sync with the audio. If your FPS is unstable it'll go out of sync eventually.
- You can stop the video from playing at any time by simply closing the Pip-Boy or switching to the Stats or Data screen. However, the audio will keep playing. You can simply wait until the audiotrack ends, but a quick save and reload will do the trick as well in case it's a long audio file you don't want to sit through.
The following video packs can be downloaded as optional files:
Vault-Tec Commercials, includes the following videos:
- Prepare for the Future 1: Jimmy & the Fatman
- Prepare for the Future 2: Growing Up
- Prepare for the Future 3: Tomorrow's Technology Today
- Prepare for the Future 4: Tickets Please
- Fallout 3 E3 Trailer (Vault-Tec commercial)
Fallout 4 Trailer
15 Pre-War TV Commercials (see permissions for full list)
If you have any cool ideas for videos let me know in the comments section and I'll see if I can add it as an optional file.
How to add your own videos
This is where the real fun begins. You can add any video you want, and as many as you want, without having to use the GECK at all.
There are many different ways of doing this (see comments section for more tips on how to do this!) but I'll explain the way I did it.
You're gonna need:
- VLC
- DDS converter
- Any Video Converter (or any other video converter)
Notes:
- If you don't want/have an audio track you can skip step 2 and 3.
- If you need more help with step 4 - 8 check out this tutorial.
Instructions:
1. Make sure your video is 30FPS. You can check by opening it in VLC -> Ctrl+I -> Codec, If it's not, use a converter like Any Video Converter to convert it to a 30FPS video. If you don't do this first the video will not sync up with the audio.
2. Convert your video to WAVE 16-bit 44.1khz (audio)
3. Place the .wav-file in Data\sound\fx\Pip-Flicks\VideoName.wav
4. Open VLC -> Tools -> Preferences -> Show Settings: All (bottom left) -> Expand "Video" (left hand side) -> Click "Filters" -> Tick "Scene video filter" and click "Save" (bottom right).
5. Repeat step 4, except now expand Filters and click on "Scene Filter".
6. Set it up as follows: PNG, width: 320, height: 240, Filename prefix: whatever you want, Directory path prefix: a temporary folder, Recording ratio: 3 (this is important). Click "Save".
7. Play your 30FPS video in VLC from start to finish.
8. Once it has stopped playing you'll have stills from 1 out of every 3 frames in the folder your specified. Don't forget to uncheck "Scene video filter" in the settings afterwards or it'll keep doing this to all the files you play with VLC.
9. Open DDS Converter, choose the proper Source and Target folder and click the big Convert button.
10. Once this is done, move all .dds files to Data\textures\Pip-Flicks\VideoName\example00001.dds etcetera.
11. Now go to Data\Pip-Flicks\ and create a .txt-file named "VideoName.txt". The .txt-file itself can be empty, only the filename is used to make the option available in the menu.
12. Done. Start your game, equip Pip-Flicks 3000 and it should be in the list. If it doesn't work, make sure you named everything properly. The folder structure should look like this:

(This is what eventually has to go in the Data folder.)
If you ever feel the need to temporarily remove videos from the Pip-Flicks menu without having to move files around, just type "hidden" in the video's text file and save it, like so:

Modder's Resource
As of version 0.2 modders can now use this mod as a resource for adding playable videos in their quest mods. See "Modder's Resource" under the Articles tab for instructions.
If you like this mod, you might like these as well:


