


0 of 0
Documentation
Readme
View as plain text
The WANDERER II
Author: B W-Husey (B G P Hughes)
Hours of Play: 15
Levels: 6 - 12 (recommend start of 7 or 8)
Players: 1+ (5 recommended max/1 party only)
Patch: k
Other work by B G P Hughes can be followed at the vault with the portfolio B G P Hughes Tracker.
Contents:
Background and play
Additional Background Notes
Before starting
Notes on rules
About the map
Map of What You Know
This Patch
Credits
Map (SPOILER)
Character Guide (SPOILER)
Background and Play:
Set in the world of the upcoming Bloodknight Trilogy (B G P Hughes).
King Tharg has noted your exploits in establishing the colony at Mithri, and has been impressed by your resourcefulness (from part I). As a result he has sent his herald Silverhand with a simple task � he needs his Court Wizard to help deal with the upcoming invasion of the Black Hand. The problem? The Court Wizard is at a monastery in the Wilderness, in the lands that the Black Hand is marching out of.
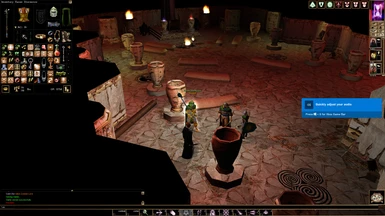
Part II of the Wanderer starts where part I left off: in the house of Marlin Vror, the headman of Mithri; where he details your mission. Unlike part I, you or not based on the village, you will be setting out on a journey. You will need to prepare yourself properly: cures and ammunition, and Raise Dead if you are taking henchmen with you, and if you should decide to trust them�
You have a limited amount of time to complete your mission, and your reward will reflect how quickly you do it (you have a few days so don�t need to skip resting entirely). I recommend playing the module more than once, because there are many ways to complete your journey, and many things to discover in between. But in order to keep a balanced character, you should retain your PC for part III from your first playthrough. If you play several times you will learn all the secrets, have a lot of fun, but end up with a powerful character who may be less suitable (and less of a challenge) for part III.
Notes: The Wanderer II
The module is designed to be as realistic as a fantasy world can be. It draws from the world of the Bloodknight Trilogy by B G P Hughes (currently seeking publishers), which has been developed by the author of this module and his brother (D & B Hughes) over a period of fifteen years. This gives some depth to the backdrop and reason for items being where they are, how they work etc. The mechanics of the module are also enhanced by limited rest (with wandering monsters) which is now optional, bleeding rules with an accompanying chance of being finished off by nearby enemies, and NPC�s that in the most part die.
Characters themselves are not one dimensional: NPC�s will respond dependent on class, charisma, race, deity, intelligence or wisdom (or who else you have spoken to), and there are several special NPC classes (scribe, smith) that fulfil other functions. Most monsters and items are also customised in some way (including potions you have to drink to identify like in good old PnP!).
================================================
Before Starting:
Classes
Sorcerers and wizards receive a special feat as an extra � this is awarded in part I.
Skill & Attribute uses:
In order to be fully informed about the choices you make in generating your character, it is worth knowing that in this module (and the previous one) your skills and attributes have the following effects/uses:
�Strength Moving obstacles, Intimidation bonus (in addition)
�Dexterity Climbing
�Constitution Recovery from coma
�Wisdom Knowledge of the world you live in (additional conversation options), detecting illusions, reading runes
�Intelligence Insight (additional conversation options),
�Charisma Number of helpful rumours available, extensive conversation options, bonus to opinions (part I).
Many skills give experience when used, plus have the additional benefits below:
�Heal Stabilising in a coma (preparation through understanding trauma)
�Persuade Additional conversation options & quests
�Search Finding secret doors, hidden ways and illusions. Lucky finds in containers
�Spot Detecting Illusions, Observation (conversation), tracking
�Lore Detecting Illusions, reading runes
�Appraise Non-store prices
In addition class & alignment can affect the experience you get, how characters react, and is modified on occasion � neutral characters may experience double shifts, where one shift cancels another, this is not a bug! Each religion/alignment has benefits that differ from part I and part II. Playing an evil character is not forbidden but is not as enriching.
The module has more variation based on religion, although which religions are most beneficial differs from part I. If you do not have a deity chosen, then you will be assigned one at the start of the module, but I recommend you pick your own from the list below: (type just the name in Proper Case on the Customise screen when you generate your PC):
* Kos, god of nature � Not widely worshipped except in Phoenicia, Kos uses the symbol of Bud and Bone, and preaches that harmony and balance reside in the natural order. Kos is suitable for roleplaying any alignment group or racial group, although it is most frequent amongst dwarves and half-orcs, and Kos is commonly worshipped by rangers and druids.
* Vangorn, god of chaos � Vangorn uses the symbol of the trident and lightening bolt. He is worshipped in the far south, and is suitable for any chaotic or neutral character. Suitable races are human and half-orc, but also dwarves and gnomes.
* Oten, god of storms � The formidable mountain god uses the hammer and anvil as his symbol, and is also the god of smithcraft (and most dwarves). Characters of all alignments worship Oten (who may even be a more modern incarnation of the ancient god Coream), and he is a favourite of dwarves, half-orcs and humans alike, particularly barbarians, fighters and clerics.
* Mithras, god of light - suitable for lawful good/true neutral/neutral good characters. The patron deity of most kingdoms, and of many knightly Orders (alongside Helios and Beregan) uses the symbols of the cross and the sun, and is a favourite of humans, half-elves and elves, particularly paladins and clerics.
* Beregan, the One God � The youngest religion, worship of Beregan is strictly monotheistic and dedicated to the destruction of evil. Founded by the prophet Bedrin and championed by the Bloodknight, followers of Beregan are almost uniquely high-born human, elf, dwarf or halfling (and always good alignment) and often cleric, paladin or wizard.
* Setur, god of darkness � The Great Serpent uses the symbols of the spear and snake (which is holy to Setur). Not as secretive as Ashar or Bel (the god of thieves), Setur nevertheless is cloaked in secrecy, and favours the night. Setur is suitable for any alignment (although good is more rare) and is favoured by humans, gnomes and half-orcs.
* Ashar, the Hidden One � almost nothing is known of Ashar, except that his followers pursue knowledge relentlessly, and carry this pursuit out almost invisibly. Ashar�s holy symbol is a double circle on a stem, obscured by clouds. Ashar is popular for any alignment, particularly amongst elves, half-elves, halflings and humans. Sorcerors, bards and less frequently rogues are common worshippers.
Gods that confer no starting bonus:
Baracon � ancient god of the warrior and day
Coream � ancient god of the warrior and storms
Helios � ancient god of the sun and nemesis of the undead
Bel � god of thieves
Adunis � god of the sea
Halix � goddess of the moon, night and madness
Zalith � an older god of Order.
You can pick any god � they all have items that can grant specific powers.
Special Notes & rules:
HENCHMAN COMMANDS: New as of version c, you can now shout commands at your henchmen (press enter and type the command in game, or assign a custom text macro to your quickbar). If you add the first letter of the henchman's name at the beginning, only he or she will obey the command. For example, ecome will make just Erlik move to you, whereas come will bring all your henchmen running.
* come - move henchmen to the PC (this command is disabled in a couple of areas for gameplay reasons). Remove stand ground commands.
* open - open the nearest lock (if it is possible)
* hide - into/out of stealth mode
* search - into/out of search mode
* combat - attack nearest perceived enemy. It clears the stand ground command, and reapplies standard HotU combat behaviour after the first action.
* disarm - disarm the nearest trap (if possible)
* melee - switch to melee weapon
* ranged - switch to ranged weapon. Both of the switch commands do not work well if the NPC is actually engaged, as combat behaviour can be interrupted, and the NPC may not actually switch weapons. As long as an enemy is not actually hacking up the NPC, they work fine.
* flee - flee from the enemy you are currently fighting, and remain out of combat (stand ground) unless attacked. Use this one only in emergencies, as the direction and reliability of 'flee' is dependant on NPC facing, enemy positions, etc.
* stop � puts the henchman in stand ground mode
1. A dead NPC is generally permanantly dead, with the exception of henchmen, who can sometimes be raised (depending on how they died).
2. Dead characters go into a coma which they may or may not stabilise in/recover from. Stabilising is influenced by the PC�s Heal skill (base 10% + Heal per round). Coma recovery time is dependant on constitution (recover 1hp/round on a percentile less than constitution x2+constitution bonus x5, i,e constitution 15 has 20+10 = 40% per round).
3. Death carries a light xp and gold penalty by default, to encourage players to care about their characters, but you can switch this off. Playing with intelligence brings much greater rewards than charging in!
4. The module includes secret doors that rely on your search skill.
5. Character statistics, skills and classes do affect conversation nodes. This makes the module more replayable. Sometimes this is advised to the PC, but rarely. Instead the PC is advised through the dialogue: an example might be to talk about something breaking your vows (paladin), or your belief in not taking the so-called civilised path (barbarian), etc�
6. If you can�t seem to progress, try another method. The true �choke points� have many ways to get around them.
7. There are wandering monsters when you try to rest. The chance and type is dependant on where you are.
8. Resting is limited dependent on level, modified by items, and always possible in Inns and Refuges. Limited rest can also be switched off completely.
9. I advise playing the module with item level requirements switched OFF: magic is rarely given, but is often too high to use when it is.
10. Some placeables glow under the TAB key, but do nothing. Don�t be concerned if you can�t open them. This is often so you can examine them or bash them.
11. Be WARNED! The more henchmen you take, the harder it is � due to changes in Bioware�s encounter system from patch 1.62 onwards. It�s a balance, because many have commented how much they enjoy the henchmen dialogue/decision making, but the choice is there so you are informed!
About the map:
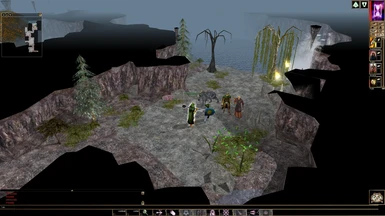
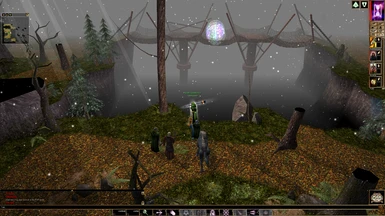
You know almost nothing about where you are going, except that it is north, along the eastern edge of the Mithri Mountains�
Map of What You Know:
=================================================
Additional Credits for Part II:
Thanks to Huntsman for help on Henchmen.
A big thank you to the beta testers (see mod description) who have helped improve this module immeasurably.
Enjoy this - and send feedback (please!) or requests to [email protected]
Changes in this version:
Changes in patch k
* Change to Kale�s levelling.
* Added 1.68 cloaks � no tan cloaks here! (I hope)
* Added Bag of Beans
* Changed all monastery occupants to a new faction.
Changes in patch i
* Rebuilt Erlik to address odd AI behaviour.
* Redesignated all henchman packages to get a better mix of feats.
* Removed autosave from Karl and moved to a trigger outside Mithri.
Changes in patch h (as of this patch there is also a CEP version)
* 1 new quest added.
* 3 new feats added: alchemy, herbalism and scribing (wizards/sorcerors only)
* Many new items (and new treasure system)
* New music added
* Slowed time
* If Nyana or Salim leave the party, they will return items in their inventories.
* Dialogue change: Nyana, Gulgar Sagamaster
* Stores changed: All
* TileMagic water added to bridge and chasm
* Sagamaster now IDs items and has bluff, persuade and lore dialogue options.
* Generated magic armour now changes appearance.
* Added a warning from the dwarves if you pass the main gate.
* New acolyte, bugbear, secretary and goblin creature variants added (and CEP specific creatures to CEP version)
* Multiplayer fix to the dwarven raid on the Guardian.
* The door out of the refuge/exit is now indestructible so the cube doesn�t destroy it.
* Prayer items work correctly for Setur
* Kazinal�s Bron dialogue options minor bug fixed.
* Holy Amulet has Kossian benefit, Rathnor has Ashar benefit.
* Inn transition takes associates.
* Gem crafting dialogues now work in multiplayer without odd stacking that occasionally occurs.
* Kazinal gives a jumpstone to each party member in multiplayer.
* The smith virtues are slightly less powerful.
* Some item descriptions corrected.
* Secret Passage journal entry does not appear if you approach from the outside.
* Marlin does not state his original conversation multiple times.
* Added a floaty to explain open caves.
* Dancer�s boots proper description.
Changes in patch g
* Added more books
* New deity specific and blessed items added
* If you carry more than one recharging item, they now behave properly
* Rest and Death options are set party wide.
* Tracks now have DC that requires tracking (uses Spot and class and level dependant)
* By popular demand, Blue Fenberries have been upgraded!
* Melf�s rod fixed.
* Cursed items can�t be sold.
* Added more hides and items
* Tanner�s conversation expanded to include hide selling.
* Additional conversation: Dwarven captain (Gallery), Bolgar (now use help with more than one of his tests), Kale.
* Corrected a couple of scribed creations.
* Chasm sentry now correctly calls reinforcements
* Added bugbear wizards.
* Corrected a journal entry on Bron and on Hardrul.
* Last Letter now taken correctly.
* Kazinal now hands out a jumpstone even if the PC did not know about the heirlooms.
Changes in patch f
* Items switched to tag based scripting
* Deity bonuses added for specific items (including lesser deities) � 35 items effected.
* Cursed items now properly cursed, with journal entries on how to deal with them.
* Removed AoE spell from the Gulgar Sagamaster to stop faction issues with henchmen.
* Snap Remove Curse scrolls added to stores (Fram, Beres, Hap).
Changes in patch e
* Stone Gate Journal entry added
* Dwarven Treasury had additional wards and guards beefed up.
* Repaired Adamantium options on Halbad.
* Fixed a curing mischarge on Beres caused by patch d.
* Fixed an exploit where you can get multiple jumpstones from Kazinal.
* Fixed an exploit where you can get multiple xp from Hap
* Dwarven axes can no longer be sold
* Some placeables moved & general optimisation
* Correction to a journal entry
* Moved Sphinx teleport point to prevent getting his help against his own minions.
* Sphinx dialogue changed
* Kazinal now refuses to talk about Bron multiple times.
* A couple more spello�s removed.
* Fixed Melf�s Miniature Wand.
* XP Value of Sphinx increased.
* Fixed Portals journal so it updates correctly if you get the keys followed by the book.
* Reduced Wizard loot.
* Removed the numbers from the scribing desk.
* Fixed an area transition.
Changes in patch d
* Death GUI changed
* Odd message removed in Northern Halls
* Iron Ore �talks� to indicate it can�t be used.
* Removed a couple of magic items
* Removed some spelling and grammar errors
* Fram now correctly says he will charge 100 gold to heal you.
* New random virtue items added.
* New (with craft bonus) virtue adding items
* New dialogue added to Marlin, Ishtar, Kazinal, Erlik, Hap and Ungoli.
* Change to Black Hand leader and letters added.
* Fix on multiplayer resting when only 2 players.
Changes in patch c
* Increased henchman functionality with shoutable commands for group or individual henchmen (flee, attack, hide, search, switch weapons, open lock, stop and disarm trap)
* Rebuilt Salim to cure odd behaviour in combat.
* Added journal entries for the time limit and henchman functions.
* All henchman items should be identified � they will no longer carry unidentifiable potions at spawning.
* Erlik now has some very basic disarm and open lock skills.
* Cursed items can now be picked up.
* Added a couple more items
* Removed some placeables that crossed tile edges to increase performance in the Northern Caves and Eastern Halls
* Corrected some of Salim�s dialogue about Baldro that was lost in the crash before the final version.
* Removed the skybox from the Gorge.
* If you refuse Salim, his second conversation now has more options.
* More interaction with the tribal chief.
* Journal notes are notified with a different sound.
Changes in version b.
* Fix to ensure betraying henchmen drop items (those that are not destroyed) and update journal.
* Darkness added to Fire Demon
* Some objects can now be turned
* Added additional key to Hardrul for the wizard treasury.
* Doors opened by PCs take longer to close.
* Added phosphoresecent rocks.
* The sealed door cannot be opened by Knock, no matter what.
* Wizards have had their spellcasting randomised
* Modified heirlooms journal
* Corrected an erroneous journal entry on Bron
* Modified and added to sphinx�s dialogue and journal.
* Changed some henchman dialogue
* Boots of Akendelve no longer fit half-elves (this mod only)
* Corrected an erroneous journal entry on Hardrul
* Cleaned up some of the reactions of Belimar�s faction
* Hardul�s key no longer disappears if you open the door.
* Hap will warn you to unlock the gate before you give away the key.
* Changed visuals for north gate to fix odd visual effect
* Circle now appears in Belimar�s chamber, and faction goes hostile correctly no matter what previous actions PC took.
SPOILERS
MAP of all points of Interest: (SPOILER)
Lower levels extended since this map was drawn, to include another large cave (Western Caves)
Character Guide:
This section talks briefly about some of the characters in W2, and tells you some of the things they might do in the module. It is full of spoilers:
Henchmen:
* Erlik Redwing � the recommended henchmen, and brother of Mablung from part I, Erlik can be trusted. He will leave you a little way into the Halls, to investigate the route you do not take, and you will meet him once more at the Audience Hall. Erlik can be asked for his opinion in several conversations, and will answer cautiously, but usually his true meaning can be ascertained.
* Baldro � Baldro, a secret plant of the Black Hand. At some point he is likely to turn on you during your quest, and attempt to slay you. His lack of dwarven lore is a sure clue, and Salim may also start to voice some doubts about him.
* Kale � An older plain speaking sorcerer. Blunt he may be, but he is honest. He and Salim do not get on, but Kale will stick with you through thick and thin right to the end.
* Nyana � The only henchman that charges for her service, she has a contract which will limit the time she spends with you, somewhat tempering her value as a great fighter. Nyana and Salim soon will have �something going on�, to the disgust of Kale, and when Nyana�s contract finishes, she may ask Salim to leave with her too. Try and stop Nyana leaving, and she will face you with her blade, and possibly also have the aid of Salim. Nyana is of limited help outside combat, although she will help with one riddle.
* Salim � the priest of Ashar is a spy of Wahgir, sent by the king to help on your mission. He knows Ungoli, which can be helpful if you�ve lost the letter, and he also has occasional and incisive comments to make on the characters around you (Baldro and Hardrul in particular), and can actually help with some of the riddles. Salim�s budding romance with Nyana and his interchanges with Kale might appear to threaten party stability, and in time his loyalty to the king is challenged by his feelings for Nyana.
The Dwarves
* Kazinal � Kazinal is the regent of the dwarves, and the source of most of the information on the Halls. Via Kazinal it is possible to learn the whereabouts of two of the heirlooms, and obtain the keys to get both. He will also tell PCs about the dragon and the sphinx, the nature of the wards on the bridge, how the portals work, and about the lost book of lore. A great deal of experience can be got from Kazinal, by returning the heirlooms, the last note of the dwarves guarding the treasury, the book of lore, and the portal door keys. In return, he will give out (variously), a jumpstone keyed to his location, the portal door keys and an offer to use the help of the dwarves in an assault on the sphinx. He will welcome news of Bron; setting his mind at rest will cause a good shift and making him feel bad about not helping the Gulgar will cause a shift towards evil. He also has information on the various things you might have seen in the Halls, plus, if you have killed the sphinx will offer his help to you in the future should you need it, something which might prove useful to Ungoli.
* Maglor � not just a pretty face, he is a commander of the dwarves. If you return one of the heirlooms to Kazinal, an additional conversation option may become available on Maglor, to assault the Sphinx. Maglor, and 5 heavily armoured dwarves, plus one druid will join you in an attack on the Guardian, should you wish to take them. If Maglor survives, he will return to the caves, although he and his men might be useful to clear out the Guardian�s denizens as well.
* Fram � The chaplain of the dwarves. Fram has a store, and is useful as a source of curing/raising items. He will also cure and heal characters (followers of Oten will benefit here), cast spells on them, as well as give the password and bless those heading out to recover the crown of Goldenaxe from the Temple of Oten. He will warn characters of what they might face, and how to overcome it.
* Halbad � smith of the dwarves. Halbad has a store which is good for armour and weapons, particularly axes. Halbad can also imbue properties on the weapon in the PC�s right hand � although these enhancements do not stack. Virtues available are dependent on gold (and some are class specific). In addition Halbad can use both the adamantine ore and the mithril ore. With adamantine he will craft a number of items and add them to his store. If you wish to sell him the ore, you can persuade him to raise the price, but a failure will result in Halbad offering nothing at all. Halbad will also make mithril items, offer one to the PC, and add others to his store, but only if the PC brings both mithril ore and refining oil from the western and eastern caves (Entry Levels).
* Bolgar � Bolgar is Halbad�s apprentice, and is currently sweating over his apprentice pieces, a fact that will only become apparent to those who try and sell him ore, or who have good insight (intelligence). Bolgar can be helped in three ways. (1) Give Bolgar the adamantine ore, with a resulting shift to good, (2) try and value a ring for him (appraise and/or lore), or (3) use crafting skill to tell him how to layer metals.
* Dwarf Boy � in reality the Goldenaxe heir. Killing him will cause a significant shift to evil.
* Dwarven Captain (Gallery) � there is no visual clue that this captain is different than any other, but he does have additional conversation options. He will ask you if you will lead an attack on the Black Hand at the other end of the Gallery, as long as you came via the 13th Guard Chamber. If he survives the assault, he and his men can be persuaded to follow you deeper into the Eastern Halls�
Other Characters
* Karl � The innkeeper of the Red Lion is familiar to those who played part I. Karl already seems to know where the PC is going, and as long as the PC does not directly deny it, Karl will offer a cloak. Whether to take it or not will reward the PC experience based on alignment. Karl will also comment on Salim, and let the PC know there are others who he may wish to talk to. Karl has a store, and can identify items (quite cheaply).
* Ishtar � One of the storekeepers of Mithri. The initial conversation will depend on how the PC ended part I, and some conversation options are alignment choices which are rewarded. Ishtar can identify potions, and also has a fairly comprehensive store. In addition he will give each PC a jumpstone that will return them to Mithri once. PCs can purchase a Rod of Invigoration from Ishtar (which shortens rest times, and time between sleep). The price of this can be brought down using persuade and appraise.
* Bron of the Gulgar � the chieftain of the Gulgar is likely to be the first store encountered in the Halls. Although his stock is limited, he does have potions to resist fear (useful for the dragon). His greetings are affected by class, and it is possible to lie or bluff about knowing Kazinal, although forgetting you bluffed is not wise! Bron also has the ring of Goldenaxe � only apparent if you know of its existence. Bron can be persuaded to release the ring in return for a promise not to break his oath (a shift to evil if you leave the halls with the ring), or intimidate him � he will always trust a paladin. If he refuses, the ring can be pickpocketed, or if the dragon is slain, Bron will relinquish the ring. Bron can also be enlisted to attack the dragon: by a barbarian, use of persuade or intimidate. In this instance, the Gulgar will charge to do battle, their Sagamaster casting protections from fear upon them.
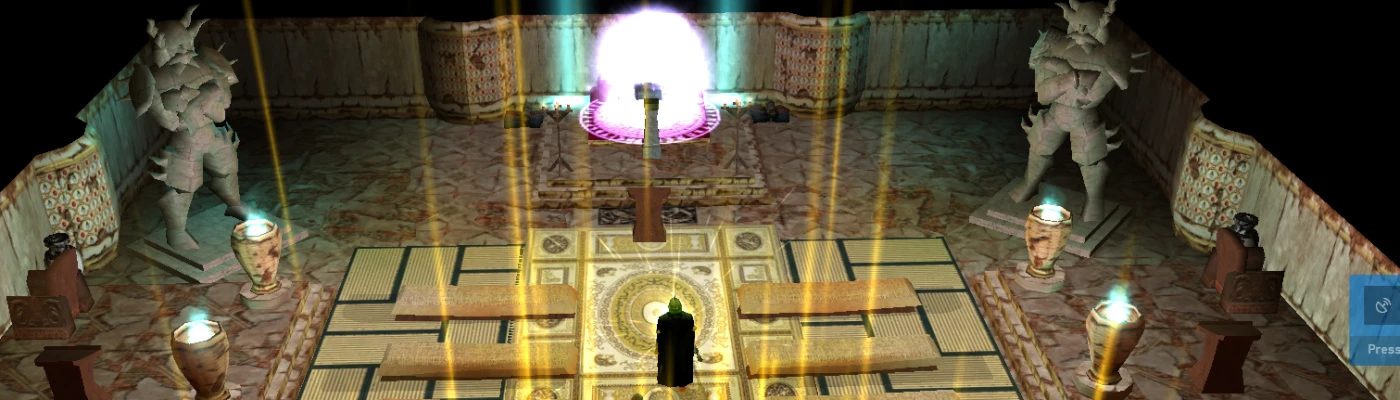
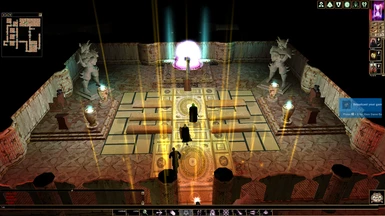
* The Guardian � The sphinx is of course fond of riddles, and not fond of dwarves. The PC can get into a debate on friendship with the dwarves of the Halls, and try to out riddle the sphinx. At the end of the day though, passing the sphinx can be done in a number of ways (1) correctly answering riddles (these will not always be the same) (2) buying his way past with gold or magic (3) slaying the sphinx, with or without the help of the dwarves, or (4) bypassing the sphinx via the portals. Slaying the sphinx is made more difficult by the fact that it will summon a number of helpers. Even opening the doors is not the end of the story, as the PC will soon discover they still can�t actually pass through the doors without fulfilling a second task, a riddle in itself. The correct answer is to pick up the item that corresponds to the door the PC has just opened.
* Moragaur � the dragon. Killing the dragon is the only way to remove the wards on the bridge. Beware though, for when Moragaur lies dead, it is not long before his mate arrives�
* Hap � the final storekeeper of the Halls, Hap is located near the north gate. He is free with information on Hardrul and Belimar, for he is largely a prisoner of the Halls. He will also give information on the brindles and how to get the key to the portcullis outside his store. Hap is also a scribe, and can craft items and scrolls out of wizard�s components that are scattered through both modules. These scrolls are useable by all character classes. Dried Pink Orchid will make these items far more powerful, and Hap can craft from most of the basic religious ring types. He will withdraw his crafting if the PC brings the key back, and wishes to be paid for it (persuade fails).
* Hardrul � Lieutenant of Belimar, and secretly a servant of the Black Hand. Hardrul can be hoodwinked by sorcerors or wizards into believing they have come to join him (gaining a couple of items), but when discussion turns to the key he will realise he has been fooled, although without taking it to heart. Paladins get a different set of options, it quickly becoming clear that Hardrul is evil, although they can still choose to follow his requests (against their own nature). Hardrul will use ploys to get the PC killed rather than give him the key � first to bring back the head of the brindle queen. His information is misleading, and those who spoke to Hap, have Salim with them, and/or have good insight or lore, may start to see Hardrul�s directions unravelling, and may if they wish attack him (paladin�s once more get their own options). If the head is returned, instead of giving the key, Hardrul will send the PC with a false permission to enter Belimar�s chambers. The chambers are warded, and the key is not even there. Trapped between the Balor and the guards, the PC is meant to perish here, but should he survive, Hardrul will attempt the foul deed himself. Only his death or a bit of pickpocketing will yield the key.
* Belimar � servant of the Black Hand who is currently at the Monastery. Hardrul�s commander who will make his appearance in part III.
* Ungoli � The wizard is the PC�s destination, and makes only a brief appearance before the module ends. A proof of your purpose is likely(the letter or Salim) before he will reward you, and the reward is based on the time taken to reach Ungoli � from 250 to 10,000xp, up to 15,000gold, and from 0 to several magic items. Additional xp is on offer for offering (or not, depending on alignment) the help of the dwarves, has Kazinal promised it. Once Ungoli has briefly talked of the task ahead, the module will end. Erlik will offer his help to Ungoli, but Nyana will draw her contract to an end, with the same consequences as before (see henchmen) if the PC seeks to prevent her.
7