


0 of 0

Documentation
Readme
View as plain text
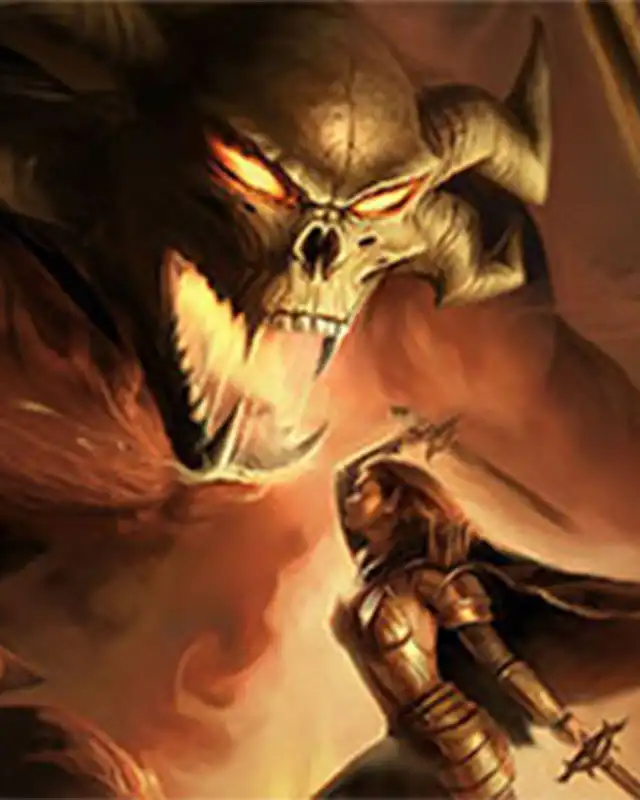
* Madness and Magic *
by Sphynxette
[email protected]
A single-player module for 15th level characters.
(Spellchecked by Iguana-on-a-Stick & with additional scripting from CaveGnome.)
The version on the Neverwinter Vault is the non Enhanced Edition version. If you want the Enhanced Edition version, you will find it on Steam. (There is no difference of content between the two versions.)
--------------------
I) How to install the module
II) Description and tips
III) Walkthrough
IV) Credits
--------------------
I) Installation
Download the files. Unzip them - you'll need Winrar or some other program in order to do that
- and you'll end up with a lot of files.
The file 'Madness and Magic.mod' should go into the modules folder.
The file 'Madness and Magic.hak' should go into the hakpack folder.
The .bmu files should go into the music folder.
--------------------
II) Description and tips
"You were minding your own business, taking a little time off between two world-saving
adventures, when suddenly you found yourself snatched away to a wizard's lab.
The wizard's name is Melvin, and sure enough, he needs your help. He lost something - a sphere -
and wants you to get it back for him. Sounds like a regular fetch quest, right? There's just one
problem: the sphere is sentient and is tearing holes in the fabric of time and space, jumping from
one dimension to another.
You'll have to follow in its wake, world after world, and hope reality simply doesn't cease to exist
before you can reach the sphere."
You are given 110 000 xp when you start, which should put you somewhere around lvl 15. There is
also some equipment provided at the beginning, should you need any.
Things to watch out for:
- Don't hit escape when you're in conversation. This can seriously mess up your game.
- Most quests have multiple solutions. If one thing doesn't work, try another.
- You don't have to use the henchman provided if you don't like her. The module can be completed without her. However, having her with you leads to more clues and a better understanding of the module's plot.
- The module makes extensive use of skills such as Persuade, Bluff, and Intimidate. You don't need
these skills in order to complete it, though.
- There is some special content for the Red Dragon Disciple class and the Rogue class.
- Respawning is allowed. In fact, I recommend you try it at least one time.
-------------------
III) Walkthrough
1. Melvin's lab (and later Melvin's island)
'The lair of a madman...'
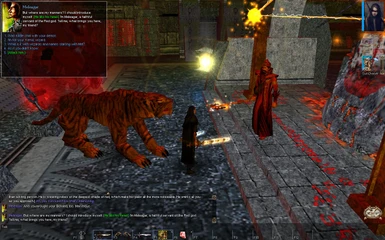
This is the starting area. At the beginning of the module, you're stuck in the laboratory, but later you will be able to explore the island if you ask Melvin for more freedom or if you trigger certain quests for which you need to go upstairs. After the cutscene and the conversation with Melvin, SunChaser joins you as a henchman. Take the time to level up if you're under level 15th, loot the chest if you need equipment, and jump into the rift to start the adventure.
Optional quest: if you don't comply with Melvin's wishes or try to bargain when he asks you to go fetch the sphere, he will curse you so that you have only one year to live and you will need to find a way to undo this.
2. Underwater base
'A secret laboratory at the bottom of the sea...'
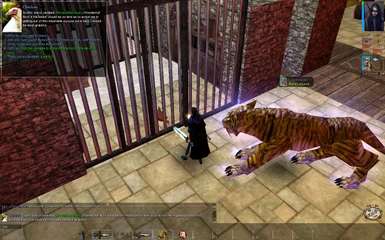
Explore the area and eventually you'll come upon two people arguing about clothes. Upong seeing you they'll promptly forget their argument and ask you to explain your presence here. No matter what you answer, they don't trust you and Treyla decides to lock you up while she figures out what's going on. You can choose to surrender, or resist and fight them.
If you surrender, they lock you up in Kryll's room. You can have a chat with him or go back to Melvin if you want, but either way you'll need to sleep to pass the time. You dream about the sphere, and when you wake up, the base is under attack. Spiders are killing everyone and they inadvertently free you by breaking down the warded door. Now you have to move up, to the upper part of the base, and reach the ocean floor.
Optional: you can get Treyla as a temporary henchman; she is fighting spiders not far from where you first met her.
If you choose to fight them, you can keep going with no idea of where the sphere went once they're dead, or go back to Melvin and ask for his help in the matter. He will give you a rod of Zombification. (Be careful, as zombify people will net you 5 evil points every time you do it.) Use it on Kryll and he will tell you about the sphere. Keep going until you reach the ocean floor.
Once you're outside the base, look for a cave in the cliff side on the right. Inside is the Hivemother, a big spider who decided to attack the humans when they invaded her territory. You have a number of choices here:
- kill her: the most straightforward solution.
- convince her to leave: you have to pass a skill check (Persuade, Bluff, Intimidate), or have high enough wisdom (14), or pretend to be on her side. If you have Treyla with you, you first need to convince her talking to the spider could be interesting (Persuade, Intimidate or Bluff check), and she isn't very happy with this peaceful solution.
- convince her to stay and fight: if Treyla is with you, she will attack you.
Once you've dealt with the Hivemother, all that is left to do is jump into the rift.
3. Winterscale
'A city on the brink of war...'
If Treyla was with you when you arrive in this dimension, she will choose to leave your side to go adventuring on her own. If you offended her (by being very rude or straight up evil), she will fight you.
Winterscale is a big city and you're going to spend a lot of time here. First you need to get information about the sphere, and there are three ways you can do that:
a. The chicken
Go to the Pet Palace in the lower town and either buy the chicken or steal it. Then when she wonders how she could pay you back for rescuing her, ask her if she saw the sphere. Surprise, she has. It's the simplest way to get information on the sphere, since it can be done within seconds of arriving in Wintercale (if it's day, that is), and it has the nice side bonus of annoying Melvin.
b. Ellana
Go to the wizard's tower in the upper part of the city and talk to Ellana, the wizard in question. Ask her about sphere, and she will propose that you do something for her in exchange for the information. (If you gave her a potion of waterbreathing for free, you can pass a Persuade check to skip that step.) She wants you to deliver a card to Galen Starshine in the Golden Duck Inn. He is upstairs in room n�10. Once that's done, go back to Ellana and she will tell you where the sphere went.
c. Meleagar
This method is linked to the orphanage sidequest (see further down for more details). If you chose to solve that quest by going to the temple of the Red god, you can ask Meleagar about the sphere in exchange for your silence.
///
Once you know that the sphere left the city and went in the direction of the elven forest, you need to get a permit to be able to do same. First you have to talk with the guard in upper town near the gate to become aware you need a permit, and then there are four ways you can get one:
a. From the elven champion of the Pits
The Pits is basically an arena in Winterscale harbor where people fight each other with their Bonded at their side (see further down for details on how to access it, under the sidequest 'The Pits'). To get the permit you need to defeat all the opponents until the next fight is with the elven champion. Then go talk to him and ask him if he'd like to up the ante and make the fight more interesting by betting something of value. You have to agree to his proposal of his jaguar 'using' SunChaser unless you manage to pass a skill check. Once you've beaten him, just ask for his permit.
You can also pickpocket it if you have the skill.
b. From the Thief Guild (the only way that doesn't require you to have SunChaser)
In the Broken Arrow shop, mention to the shopkeeper that you're looking for a permit and he will direct you downstairs. Talk to Zachary, the leader of the Guild, and he will agree to help you if you make the ongoing negotations between Winterscale and its elven neighbours fail. To that end, he gives you an invitation to the ball which the elven ambassador is attending. Once you're there, go talk to him (he's in the upper right corner), wait for the King to start his speech, and then either goad the crowd into rioting, or insult the elf, or reveal he's already married (only if you pass a Lore check or you are yourself of elven blood). When the ball ends, go back to Zachary. You'll get a note from him, which you have to give to the bartender of the Golden Duck Inn to obtain a permit.
You can choose to betray Zachary if you talk to the princess (who is in the upper left corner of the ball room) about needing to leave the city. She says she'll help you, and when the ball is over, simply talk to the guard at the city gates to receive a permit.
Alternatively, you can buy a permit from Zachary, but the price is very steep (200 000 gold).
c. From the princess
That option is only available if you have Sunchaser with you. If at least four people have taken notice of her (you know they have when they comment on her presence), a cat will appear when you're walking in the lower town on the way from the upper town to the harbor and give you an invitation to the ball. Once you're there, talk to the princess and mention that you need a permit to leave the city, and she offers to help you. When the ball is over, simply talk to the guard at the city gates to receive a permit.
d. From Simeon
Go the Pet Palace in lower town and speak to the owner about needing a permit. He will offer you one in exchange for SunChaser. (SunChaser will always come back to you in the elven forest, just before you step into the rift, even if she doesn't like you at all.)
///
/Sidequests/
a. Trouble at the orphanage
You need to talk to the little girl just outside of the orphanage to trigger this quest. She tells you that her friend Bael has changed and that he doesn't play with her anymore. Agree to help her and go talk to Bael (he is the one facing the bookcase in the play room). If you're a paladin, you sense something is wrong with him; you can also pass a check to uncover him (Persuade, Bluff, or Intimidate as usual), and if you fail Sunchaser will sense something is wrong and the demon will reveal himself. (If you fail the checks and don't have Sunchaser with you, then the quest ends here.)
Once you're aware Bael is possessed by a demon, you have several options:
- report to Sister Leara and let her call the city Guard => this ends the quest here.
- exorcise the demon with Melvin's help => talk to Melvin about it, he will give you a spell to banish the demon. You need to get the ingredients from the storage room, upstairs on the right. (This is one of the earliest way you can gain access to the rest of the island, the other is to do the Lost God quest.) Go back to Bael and talk to him. If you use dragon's blood, there is a 25 % chance Bael will suffer brain damage when the demon leaves him, as opposed to a 50 % chance if you don't.
- go to temple of the Red god and kill the demon's summoner => the temple of the Red god is located on the left of the city gates. Talk to the guard at the doors on either side and tell him you know about the demon, he will open the door for you. Make your way downstairs until you reach Meleagar. You can kill him or cut a deal with him in exchange for money or information about the sphere if you need it.
b. Tickle this, tickle that
There is a talking building having problems with rats near the transition to upper town. You can convince the rats to leave, simply kill them, or have them agree they need to leave, but not right now. The building will be satisfied in all cases.
c. The Pits
The Pits is the arena of Winterscale where people fight with their Bonded. (You need Sunchaser to participate in the fights.) The arena is located in a backroom of the Hairy Mermaid tavern in the harbor, and you need a password to enter. You can get it in several ways: ask the beggar in lower town what can be done for fun in this city (you need to have SunChaser with you for this one), or talk to the tavern owner about Bonded tournaments and how that's your kind of game (you need to pass a Persuade check), or pass a successful Listen check on the two people standing around talking on the far right when you enter the Hairy Mermaid.
Then it's just a matter of fighting your way to the top.
d. The evil of red tape
The captain of a ship in Winterscale harbor is having problems with a annoying gnome who insists he has to inspect all of his merchandise. Accept to help him and simply talk to the gnome until you get the option to use the gem. Now you shouldn't have any problems to get him to back off.
e. Storytelling
In the library of the wizard's tower, take the 'Book of stories' and use it, you'll find yourself in the Garden of Stories. Talk to the storyteller, and accepts her offer of caring for a story. Choose between the three she has in store and then you'll have to tell it to different people to get it to grow.
Here is a list of the people that will help spread the story:
- in Winterscale, the mute boy in the orphanage sitting on the couch
- in Winterscale, the bard named Velvet at the Golden Duck inn
- on Melvin's island, the little dragon Sweeper, in the library
- in the singing trees forest, the kobold Glupp
- in the wasteland, the old man teaching the kids in the refugee camp
You only need to tell your story four times, so there is one spare.
f. In the shadows (you need the pickpocket skill for this questline to open up)
This quest is triggered by bumping into Nightshade while 'visiting' a house in winterscale (the one north of the wizard's tower). If you didn't steal from her or tried to kill her, she will be willing to chat with you when she later appear in the basement of the Broken Arrow. She will give you a series of tasks:
The first one is to steal the wedding ring of lady Kilberg. You will find her in one of the private rooms of the Great Library (only in the afternoon). Pickpocket her to get the ring.
The second one is to go put the ring you just stole in a chest in room n�11 of the Golden Duck Inn.
For the third and final one, you have to steal the princess' diadem from her room at the castle. Nightshade will join you as a temporary henchman. The diadem is on the second floor, in the room to the far right, in a locked desk. When you have it, Nightshade will suggest you two split up; you can meet her at the Guild later to get your payment. (You can doublecross Nightshade, but she will try to kill you later in the farmlands near Winterscale.)
g. A lost child
In the farmlands after leaving Winterscale, there is a halfling couple whose baby was taken by a wolf. In the next forest area, go north until you find a cave (if Sunchaser with you, she can track the scent of the child). Inside the cave, you will be stopped by a wolf that will prevent you from getting the baby back, since it now considers it its cub. You can kill the wolf, or succeed at a Persuade/Intimidate/Bluff check to convince the wolf to let you take the baby. You can also agree to recover its own cub, who was taken by hunters. If you fail the Persuade/Intimidate/Bluff checks but you go to check on the child, there is another opportunity to be able to take the child without violence, if you succeed at a Bluff check.
If you managed to get the child, and didn't agree to search for the cub, the quest ends when you gave the infant back to her parents (you can still search for the cub if you want to, but the quest will be marked as done in your journal).
The hunters with the wolf cub are in the forest area with the elven temple, to the north. You can buy the cub from them (100k gold, or 50k if you pass a Persuade check), or you can pass an Intimidate or a Bluff check. You can also ask to see the papers they mentioned, and pass a Bluff check to make them believe there is a problem (if you're an elf, you also get an option that does not require any checks). You can also decide that their actions were within the law, and that the cub belongs with them (that ends the quest to retrieve the cub). Lastly, you can, of course, kill them.
4. Elven forest
'A forest in spring, bleeding red...'
Go talk to the elven king, and after that meet with Revraluen near the old temple. He has seen the sphere and is willing to tell you where it went in exchange for your help. You can accompany him to the Drowned Wood, in which case the dryad will kill him, and you can find a map that indicates the sphere's path on his body. You can also kill him yourself to get the map, or kill him and raise him as a zombie if you have the rod of Zombification.
a.�Looking for Liara
This quest can be started by talking to an elven woman named Nelleda in green and gold clothing in the eastern part of the tree city, and asking her if you can help her. She will explains that she worries about her sister, who has been stalking a human explorer recently arrived in the elven forest, and seems to want to enact her own justice by killing him for trespassing. She will ask you to go check on her sister, Liara. You can find her in the second level of the elven ruins in the western part of the forest. The body of the explorer is at her feet. If you question her, she will explain he was killed by a trap. You can confirm that it's indeed the truth if you pass a Spot check, or if you ask Sunchaser her opinion. If you antagonize her too much, or refuse to leave when she asks you too, she will attack you. When you go back to Nelleda, you can lie to her or tell her the truth.
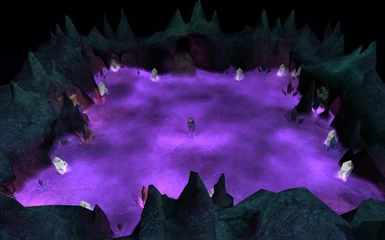
5. Middle of nowhere
'A dark cavern and a luminous being...'
Simply talk to the mysterious being, or attack him if you're in a hurry, then jump into the rift behind him.
6. Forgotten tomb
'Paladins and zombies: the eternal tale...'
Talk to the paladins, and they will explain that they are under siege by zombies. You can choose to help them, let them deal with their problems, or kill them. They have erected a barrier on the room's door to stop the zombies from coming in, you will need to get them to deactivate it before continuing on. Ask Osric to lower it (killing him works too). Keep going and you will eventually stumble upon the rift: unfortunately fences are blocking your way. You can reach the rift by climbing the fences. There is also a secret door in one of the two rooms containing a single sarcophagus down the corridor.
/Sidequests/
a. The walking dead
If you have agree to help the paladins, you will notice that the zombies get back up almost immediately when you kill them. Talk to Melvin about it and he will explain that the sphere's magic is keeping them alive. Then it's just a simple matter of stepping into the rift.
7. Wayfarer
'A ship, yes, but not a ship that travels across oceans...'
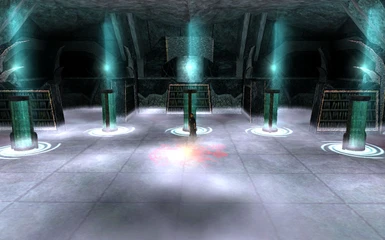
You find yourself in a darkened room. Kick down the door to get access to the rest of the ship. You'll need to find a way to open the locked doors: go into the room with the pods in a circle, open the one in front of the entrance, and get the blue gauntlet from the corpse that tumbles out. It will open every door except the one leading to the command center. For this one you need a red gauntlet; you will find it on the corpse in the greenhouse. Now all the parts of the ship are accessible.
That's all well and good, but you'll be going nowhere without power. There is a console in the big center room that can switch the power on, but it's missing something in order to function. Go get the two cristals needed to get it working: one is on yet another corpse in the middle pod on the right side of the ship, and the other is inside a crate in the infirmary. Put them in the console, and activate the power source. Then go to the command center, click on the six balls to get them floating, and talk to the computer. It can explain where you are and what happened. Ask him to deactivate the forcefield it erected around the rift and you'll be able to keep going.
Before you go, the computer will ask of you that you order it to steer the ship into the nearest star, so that the deadly pathogen that is still onboard will be destroyed. You can choose to comply or not.
8. Forest of singing trees
'A melodious song sung by trees...'
Walk to the north and you will eventually come upon a tree house. Go inside: it is clear someone lives here, but they don't seem to be home at the moment. When you walk back outside you will meet Glupp, the owner of the house. Talk to him and you will learn that there are secret tunnels under the forest. Glupp himself hasn't seen the sphere, but the kobolds who live there might have. (You can also kill Glupp and zombify him if you have the rod.)
In the tunnels, you can either kill the kobolds or let them take you prisonner. If you kill them, you will find a bone key on the chieftain's corpse that will let you access the locked room where the rift is. Otherwise, you find yourself with some fellow prisonners. Pass the time by sleeping or going back to Melvin and a kobold will come to take you to their chieftain. Here, you have again the choice to use violence to solve your problem, or you can agree and perform a task to become a friend of the clan. You can either repair the clan's murals, or get Glupp's famous soup recipe.
If you choose to repair the murals, you'll need to talk to the shaman. She is in front of the murals, trying to make the stone glow again. She will explain to you that she requires 5 glowing mushrooms in order to do so. You can find the mushrooms outside.
If you choose to get the soup recipe, you'll have to talk to Glupp. A zombified Glupp will tell you its secret very easily. However, if he's alive, you'll need to pass a check (Persuade, Intimidate, Bluff, or Taunt) to get him to trust you with the recipe. If you fail, he will tell he wants you to find him a friend in exchange for the recipe. Go back to Melvin and he will propose to use either the chicken, if you rescued her, or one of his old experiment. The chicken is outside under a palm tree on your left when exiting the lab, and the experiment is in the room with the altar in the upper right.
Once the kobolds declare you their friend, you can access to the Bone God's chapel where the rift is. You can also free the other prisonners if you manage to convince the chieftain.
/Sidequest/
a. The strange statue
It's not a real quest as it won't appear in your journal, but at the back of the cavern, there is a kobold with a collection of objects, and a strange statue amongst them. If you ask the kobold for information about the statue, and SunChaser is with you, she will remark that the statue doesn't smell like a statue, but rather like someone. You can then pass a Lore check to understand that it's a person that has been petrified, and another, harder Lore check to remember what could undo that petrification. You can cast Restoration, Greater Restoration or Stone to Flesh on the statue to free the person, or go ask Melvin for help if you don't have any of those spells.
9. Lost in the mists
'Where dreams come to wither and die...'
This area is simple. Move around until you arrive in the room with a cat and a little girl, and talk to her. When you get back to the 'real' world, you can find the rift in the lower right corner of the area. If you step on one of the three circles with a black tentacle in the middle, you will find yourself dreaming again.
The dreams offer two visions about Melvin and his past, and one about the potential future of the PC (outside of the module's scope, though). There is also a dream for SunChaser if you travel with her, which you can share if you touch her when she falls asleep.
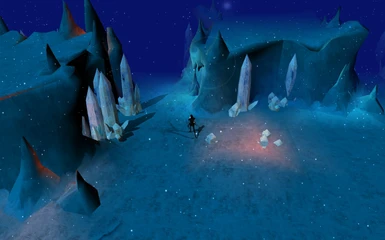
10. Wasteland
'The apocalypse already happened there...'
You find yourself in a big cavern where people are huddled around campfires. At first glance, there is no way out. Go talk to Hyel, the self-proclaimed leader of the refugees (he is easy to find, there is only one real house and it's his'). He will greet you rather warmly, but before answering any of your questions or helping you at all, he wants you to solve his problem. According to him, there is a traitor amongst the refugees. Your task is to ferret him out. You can do that by talking to the fishermand and the old man teaching the kids about the subject of their leader. Then go back to Hyel: you can tell him the traitor is the fisherman, the old man, both of them, or persuade him that there is no traitor and he is just a little too paranoid. Whatever your choice, Hyel will then ask his guards to escort you to the tunnels leading to the surface. Comply or fight him, as you want. (If you kill Hyel, the old woman named Isatis will thank you for helping the refugees and somehow teleport you to the tunnels.)
Keep going until you reach the surface. Once outside, if you sleep, there is a risk Bubbles will find you, which triggers a game over. Sleeping inside, for example in a cave or a building, is safe.
There is a cave to the south-east in the area called "Wasteland - Desert" where you can meet an old man who can identify your items, if you have food to give him in exchange. He will ask you to share a meal with him, and if you accept, try to poison you so he can eat you. If you're immune to poison or have the ability to cast Neutralize Poison, you will be fine, but if not, you need to succeed at a fortitude save. You get three chances to do so; if you fail, you're dead. If SunChaser is with you, she is also attempting to save from the poison, and will save your life if she succeeds (she automatically succeeds on her third attempt if you failed each time).
Explore the wasteland and at one point you will reach a spire. Upon entering it, you find yourself surrounded by Bubbles. A voice coming from nowhere orders them not to kill you, and it takes SunChaser away from you if she's with you. Then it issues a challenge: survive the three floors of the tower and make it to the top.
On the first floor, there are many keys lying on the floor, and a single locked door preventing you from moving forward. The keys will affect you with nasty effects when you pick them up, such as lowering your ability scores, hurting you, summoning monsters... The right key is the small ivory one.
On the second floor, there is an altar, four pools, and three powder bags on the floor. Take the powder bags, use the yellow one on the altar and search the southern pool. You will find a grey stone, which is needed to use the portal. To make the portal appear, use the blue bag on the altar. You can other objects if you search the pools after using the red or blue bags, such as bloodied body parts, a rusted helmet, and even a red gem like the one Melvin gave you.
The third floor is the least difficult one: simply cut the tree, the rock, the deer, and then yourself to make the portal appear.
A strange man looking like an elf will greet you on the fourth floor of the tower and congratulate you for staying alive. SunChaser is here too, unharmed (and she even seems to feel better if she was dying). Talk to the man, ask your questions or not, and he will then teleport you to the rooftop, where the sphere is. You can a conversation with SunChaser about what you'll do now that you've got the sphere, and then all that is left to do is take the sphere.
/Sidequests/
a. Out of magic
If you have SunChaser with you, she will feel ill-at-ease upon entering the dimension, and explains to you that there appear to be no magic at all here. As she needs magic to survive, she is now in danger of starving to death. Everytime you rest, SunChaser will weaken. You can help her by feeding her the power core found in the underwater base if you kept it, or a bottle of magic water if you took one from Melvin's lab, or you can feed her your own magic if you're a spellcaster (at the cost of a level drain). Those actions will give you two additionnal day each. You can also solve the problem permanently by letting her eat the talking cristals' magic in the tunnels.
If you don't do any of that, she will die after three days. You can either take her body and carry her around if you don't want to give up on her, or do just that.
b. Cursed
In the refugee camp, the old woman named Isatis will cure you of Melvin's curse.
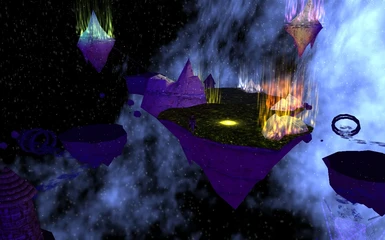
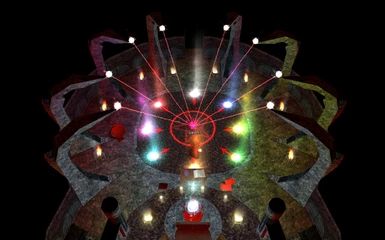
11. Inside the Sphere
'The sphere devours. The sphere consumes. The sphere takes all.'
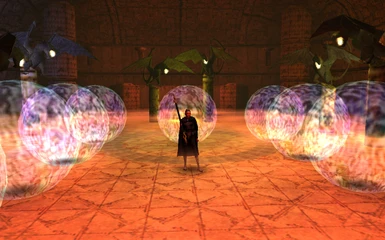
This area is there to look pretty, and solving the puzzle should be a simple matter of luck. Use the portals until you reach the big island in the middle. (Each portal you're not arriving from has two possible destinations and chooses at random to send you to one, excep for the final portal, which is blue instead of yellow, and always sends you to the big island.)
Then talk to Cyrielle who will explains the situation. After that, she sends you back to your body.
12. The end
'A soul saved, a soul condemned...'
After the cutscene, you wake up in Melvin's lab. You are on your back, incapable to move, entirely at his mercy. Fortunately, he needs you alive. You can ask him your questions and he will answer thruthfully, something he doesn't do very often... Thus you learn that he knew where the sphere was the entire time and that this whole quest was just a trick to get you to form a link with the sphere. Now he wants to harness the power of the sphere through that link.
You have two choices here:
- resist
It leads to a fight with him. If SunChaser is here, she will automatically choose your side if she likes you enough or if you have enough influence over her. Otherwise you need to pass a check, and if you fail, she'll stand with Melvin. The fight happens on the outside; Melvin will first face you as a human, and then when he start losing, he'll change into a dragon. When you kill him, his curse ends if he had cast it on you, and you are free to use the sphere as you see fit. You can destroy it, keep it hidden, or absorb its power. Once you've made your choice, there is an epilogue where all the consequences of your actions gets summarized, and the module ends.
- let him do it
If you choose to let Melvin use the power of the sphere, you again have two choices: actively help him, or not. He can't succeed without your help, and will kill himself by trying to make the magic work. If you help him, you figure out the soul of his daughter is (or was) in SunChaser's body. Again, if SunChaser died in the wasteland dimension, there can be no happy end and you get the same result as if you didn't help him. If SunChaser is alive, you have to pass a check to get the ritual to work (Persuade, Intimidate, Bluff, Wisdom/Intelligence, or use your friendship or your influence on SunChaser). If you succeed, you black out, and when you wake up you are in Melvin's bedroom, with the mage, Liliana and SunChaser surrounding you. Talk to everyone, enjoy the success of having gotten the best ending of the module, and all that's left to do is decide Melvin's fate. You can let him enjoy the rest of his life as he wants, or decide he should be judged, in which case he will suggest to go to the Citadel to see the Keepers. After that, there is an epilogue where all the consequences of your actions gets summarized, and the module ends.
Bonus area: Death
This is where you end up when you die. You have to make a deal with Death to get back to life. He will ask you to kill Melvin, and you can either accept or lie and pretend to accept.
/Sidequests/
a. Revraluen's ghost
You can meet Revraluen's ghost in the inn. His reaction to you depends on whether you've met him before or not. If you haven't been to the elven forest yet, you don't recognize him and you can't help him. If you've met him and killed him, he won't talk to you. However if he was killed by the dryad, then you can convince to stop dwelling on the past and he will move on beyond the Falls.
b. The Lost God
There is a demi-god in the inn that wants your help to get resurrected. If you agree, you can perform the necessary ritual in Melvin's altar room. Once it's done, choose your reward. You can ask for money, knowledge, a sword, a cloak, a ring, or his help in killing Melvin in which case he will show up during the final battle (but only when Melvin transforms into a dragon).
Achievements
1. Joined crackpot cult
In Winterscale, in the Pits, talk to Kalvar and agree with him about the danger posed by the Keepers, then take the oath without lying.
2. Acquired dragon's memory
You need to be a dragon disciple for this one. Talk to Mist on Melvin's island and tell her you have dragon blood in your veins, then accept when she offers you her knowledge. (You also need to have talked to Sweeper to have that option.)
3. Made Melvin laugh
Equip SunChaser with one the cloaks sold in the Pet Palace in Winterscale, talk to Melvin, and either call SunChaser a friend, or tell Melvin she didn't complain about your gifts and then scratch her behind the ears.
4. Baby rat named after you
In Winterscale, when doing the quest of the living building, if you agree the rats need more time before leaving the building, the big rat will propose that one of their youngs be named after you.
5. Punched a demi-god
When you have successfully resurrected the Lost God, choose the option to punch him in the face.
6. Solved all the riddles
Solve all the riddles of Old Vrela. You can find her in her shop, the Seeing Orb, in the harbor of Winterscale.
7. Mistaken for a goddess
Bluff the paladins in the forgotten tomb into thinking you're Mother Light. If you're male or have SunChaser with you, you'll need to pass an additional check.
8. Master Zombifier
Zombify Treyla, Kryll, Anevla, Revraluen and Glupp.
9. Great Provider
Feed all the refugees in the wasteland dimension. You'll need to carry food around, either meat or fish from the underwater base, or mushroom from the singing forest.
10. Got covered in dragon's snot
When talking to Sweeper, the little dragon in the library on Melvin's island, choose to discuss the subject of his training, then ask him to show you his dragon rage, and then choose the option 'That was pitiful, try again.'
11. Slayer of the Monstrosity
You have to kill the Monstrosity in the tunnels in the wasteland dimension.
About SunChaser
There are two different systems to track the way she relates to the PC.
The first one deals with her level of happiness. It's the most straightforward one: say nice things to her, let her hunt mice when the opportunity arises, and she will like your PC more. Conversely, if you treat her badly, her happiness will decrease. (I won't list all the happiness gains or decrease because there are many, and they're easy to guess.)
The second system deals with the influence your PC has over SunChaser. The opportunities to gain influence on her are scarce, and not as obvious as the ones to gain happiness.
You can gain influence over her�:
- if you force her to kill the boar in the Hairy Mermaid Inn in Winterscale (you need to pass a skill check, either Persuade, Taunt or Intimidate, or you can use your frienship with her if it's high enough)
- if you made a deal with the elven champion in the Pits for his jaguar to 'use' her, and you lose, but it was your first defeat and you haven't died yet (if you have died at least once, or lost to any other fighter in the Pits, you lose influence instead)
- during the conversation when entering the ball in Winterscale, if you choose "Do you ever stop whining?", then tell her to speak up, then that being nice is a waste of time, and you pass the check in either Persuade, Intimidate or Bluff
- during the conversation with the unpetrified woman in the kobold caverns, if you choose the "SunChaser." option when the woman brandishes her sword, and you have already 1 point of Influence over her and your PC is of evil alignment, or if you forced her to kill the boar in Winterscale. Then you need to compliment her.
The two systems are not mutually exclusive: SunChaser can hate your character (low happiness) and still do everything he asks (high influence).
-------------------
IV) Credits
Haks :
Fireflies by zdaddy (updated by dobervich).
Whitefall Exotic Flowers (original textures and models by Adam Miller, modified by Jez).
The Suspended City for Bioware Forest by Helvene.
Aethyr Tileset by Timdalos.
Maztica Pots Revisited by Hydromancerx.
GAMinerals by Gaia_Werewolf.
Night Masks (original models by Kinarr Greycloak, repackaged by Kenneth J. La Mella).
Two skyboxes from the NanoSky High Res Packs by Nanosphere.
6 Tiles and 3 Carpets from Arias Floorings by Aria 1221.
A mist placeable by Mckrautski.
Scripts :
Sunjammer's Tilemagic System.
Pentagrams_Summoning Circles script by gaoneng.
And a huge thank you to Lilac Soul for the Script Generator.
Musics :
The track "mus_mm_dark" is from the game "Anachronox."
The track "mus_mm_elven" is from the game "Arcanum: of Steamworks and Magic Obscura."
The track "mus_mm_ruins" is by Nathan McCree, from one of the tomb-raider games.
(Thanks to Randalish for tracking down those ones.)
Unfortunately I am unable to properly credit the authors of the others music files, as I used musics
found in other modules. If you recognize a track besides the ones already listed, please send me a
message.
Other :
Thanks to CaveGnome for many ideas to improve the module and the scripts he wrote for the Wayfarer's destruction sequence.
And a massive thank you to Randalish for proof-reading the module and having the patience to correct my clumsy mistakes.
---------------------
Version history :
Version 1.4 (20/04/2020)
- Added two quests�: one in the farmlands after Winterscale, one in the elven forest.
- Added an option to save the man from the shadow in his nightmare in Winterscale, and another possible encounter with the shadow in the tunnels under the Spire in the Wasteland.
- Added a kobold merchant with some interesting items.
- Added additional areas to the elven forest and the elven temple.
- Added an interaction with a kobold who collects things, and a statue in particular.
- Added a dream for SunChaser in the "Lost in the mists" dimension, which the player can participate in.
- Added an interaction that can go in an interesting direction with the old man in the cave in the last dimension.
- Spellchecked the dialogue some more.
- Enhanced some dialogues (The adventurers in the Hairy Mermaid, Bael, various animal conversations, the kobold shaman, Velvet, the Wayfarer AI).
- Added more books to the Great Library
- Expanded some areas in size
- Modified the last portal in the sphere so it always teleports the PC to the final location.
- Removed the mist placeable in the Princess' birthday party area that caused a slowdown for some computers.
- Added a little more combat encounters.
- Changed the requirement for Nightshade's series of quests: the PC doesn't have to be a rogue anymore, just to have points in the pickpocket skill.
Version 1.3 (Final one) (08/10/2013)
- Added several conversations with SunChaser when entering some areas: three in Winterscale, one
in the Singing Forest, one in the Wasteland.
- Added some banter between SunChaser and the chicken.
- Added more opportunities to influence SunChaser.
- Tweaked some dialogs: Galen, the kobold chief and the guards, Melvin, the Guardian.
- Added more custom content for Red Dragon Disciple (dialogs and items).
- Enhanced the Wayfarer destruction.
- Fixed a few remaining spelling errors.
Version 1.2 (25/02/2013)
- Module spellchecked by Iguana-on-a-stick.
- Corrected some errors in the ending speech by the storyteller.
- Made combat harder in general and added some creatures to fight.
Version 1.1 (08/11/2012):
- Correction of many many typos.
- Added more Bags of Holding.
- Revraluen now correctly behaves after going with him to see the dryad.
- Changed the descriptions of some items.
- Added some safeguards to prevent SunChaser from stealing final kill and render the module
unwinnable.
- Fixed some loops in conversation that could be used to gain infinite XP.
- Changed SunChaser's class from fighter to monk.
- Added more items for SunChaser at the Bonded shop in Winterscale.
- Grounded the various flying trees throughout the module.
- Tweaked some conversations to make some things clearer to the player.
Version 1.0 (08/10/2012):
Module released.
--------------------