If it dies, its skull should reappear in your inventory. As long as the skull is in your inventory, you can use the Felthorn spell and resummon it. There is a bug that I've seen rarely where its body stays when it should disappear. If that happens, talk to the body and resummon it that way.
This guide will give fine details regarding your weapon/companion, and provide a complete walkthrough of the related quests. Spoilers will be everywhere, obviously.
***
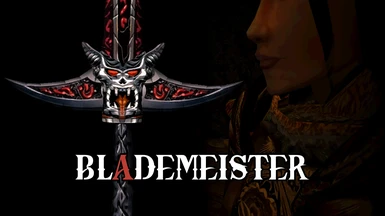
First, travel to Addamasartus near Seyda Neen. In the back tunnels behind the main slaver camp you will find a skeleton with an enchanted rapier lodged through its ribs. Take the sword, and when it starts talking to you, follow the conversation until you're given the option to take it. When you try to take it, you will be attacked by a scamp after being hit with a spell. Defeat the scamp and wait a few seconds.
Once Felthorn introduces itself, you will be given a spell called "-Felthorn-" that allows you to speak with it while it is a) in weapon form, and b) in your inventory.
The topic "- form: creature" will allow you to choose what creature form Felthorn takes. Each creature form has its own magicka cost (which will bleed into a health cost if you run out), and you start with only the Scamp form available.
The -Felthorn- spell also calls Felthorn to you while it is in creature form, but only if you are both in the same cell. When used correctly, Felthorn will be teleported next to you, and will stop combat if it is fighting. Keep in mind, though, Felthorn will immediately resume combat if you're actively being attacked, so be quick if you want to talk to it.
The topic "- form: weapon" allows you to choose what weapon form Felthorn takes. All weapon forms cost 10 magicka, which bleeds into a health cost if you run out, just like the creature forms. You start off with only the iron rapier form available.
The topic "your story" gives a little bit of background on Felthorn. It's not the most talkative Daedra, but it will give you a vague outline of where it comes from.
The "spells" and "travel" topics are more general follower functions, and they are only available when Felthorn is in creature form.
NOTE: The "spells" topic may not make any difference for some creature forms, including the basic Scamp form (which can't cast any spells). Certain forms are limited to certain types of spells. A full list of available spells by creature form is included below.
In order to advance, you must prod Felthorn through the "what do you need" topic. If you show interest, it will explain exactly what it needs in order to grow stronger. This will open up several topics, the most important being "- more power". This topic will be the main way to increase Felthorn's power.
Felthorn needs six things to reach its full potential: filled soul gems, unique weapons, daedra hearts, gems, ores, and your experience.
Filled soul gems: You will need to feed Felthorn one filled soul gem for each of the basic Vvardenfell Daedra, besides the Scamp: Clannfear, Dremora, Flame Atronach, Frost Atronach, Storm Atronach, Ogrim, Daedroth, Hunger, Winged Twilight, and Golden Saint. When you feed it a new soul, it will unlock that creature transformation.
Unique Weapons: Shards of Felthorn were long ago scattered all across the island. Each one that you find and return to it will unlock the corresponding weapon transformation. More details regarding their locations are listed below.
Daedra Hearts: Felthorn feeds on Daedra hearts to empower its creature forms. Every Daedric creature form will benefit from hearts, but its strength is also limited by the player’s level. Exact details are listed below.
Gems and Ores: Gems and ores are used to increase the power of Felthorn’s weapon forms, but these forms are also limited by the player’s level. Exact details are listed below.
Experience: As mentioned before, the player’s level also dictates how powerful Felthorn is. Exact details are listed below.
The quest will not progress until you have COMPLETELY upgraded Felthorn and have reached level 10. Once you have accomplished this, speak to Felthorn about its “perfect form”. It will then direct you to a Daedric ruin within the Ghostfence called Ularradallaku. No specific directions are provided, other than the fact that the ruin is directly west of Dagoth Ur’s citadel. Use UESP if you have trouble finding it.
Travel to the ruin and make your way behind the main shrine. If your journal is up to date with the correct entry, you will see a shimmering portal at the end of the back hallway. Put Felthorn into your inventory, save the game, and travel through the door.
Inside, you will face this mod’s final challenge. The fight consists of three phases. For the first phase, reduce Anarys to 0 hit points. For the second, destroy all of his conjured atronachs while he is invulnerable. For the third, reduce him to 0 hit points again. NOTE: It’s a good idea to soul trap Anarys during his third phase, as this is the only way to unlock Felthorn’s glass berserker transformation without losing money (there are two grand soul gems on his desk). If you forget to do this, you can spend 1000 gold at his altar to summon a berserker husk that will serve the same purpose, since Felthorn will gladly eat either soul.
After the battle is over, get the etched bone from Anarys’s body (as well as the enchanted ring!) and give the bone to Felthorn. Doing so will unlock Felthorn’s “perfect form” and finish the mod’s quest content. After that, Felthorn will serve as a powerful companion for the rest of your adventure. Or you could turn them into a weapon and sell them to Creeper. That would be funny.
UNIQUE WEAPON LOCATIONS:
Felthorn will give you vague directions under the topic “weapon locations”, but you can get more detailed directions from scouts in Seyda Neen, Balmora, Ald-ruhn, Tel Branora, Gnisis, Khuul, Molag Mar, and Maar Gan. Any scout will do as long as they’re in the correct city, but extra scouts have been added to each area in order to make this easier. Keep an eye out for new NPCs with bonemold cuirasses and chitin gauntlets. If following in-game directions is too tiresome, there is no shame in looking up the following locations on the UESP wiki. Once you get to a location, keep an eye out for a lightly-colored chest. NOTE: The chests will not open until the appropriate journal entry has been triggered, so don’t try to visit these locations early.
Each basic creature transformation has 3 levels of power. The tier that is used is determined by two things: the number of Daedra hearts fed to Felthorn and the player’s level. Tier one is the baseline, tier two requires level 5 and 5 Daedra hearts, and tier three requires level 10 and 10 Daedra hearts. Higher tiers give more spells, magical passive abilities, and higher health, magicka, fatigue, and damage.
NOTE: Cursed Daedra hearts (usually found in Daedric shrines) count for 2 hearts when given to Felthorn. If you have both kinds in your inventory, Felthorn will take the cursed version first.
There are also a couple of odd forms listed here that you will unlock later. These two forms only have one tier each.
Scamp 1 No spells
Scamp 2 No spells
Scamp 3 Single Target Ranged, Fire / Disintegrate Armor
Hunger 3 Single Target Touch, Paralysis Single Target Touch, Paralyze / Absorb Fatigue
Winged Twilight 1 No spells
Winged Twilight 2 No spells
Winged Twilight 3 Single Target Touch, Lingering Absorb Health
Golden Saint 1 Self, Dispel Self, Shock Shield
Golden Saint 2 Self, Dispel Self, Shock Shield
Golden Saint 3 Self, Dispel Self, Shock Shield Self, Restore Health Self, Lightning Shield / Shield / Fortify Luck
Glass Berserker Self, Fire Shield / Shield / Spell Absorption Self, Restore Health
“Perfect Form” Self, Restore Health Self, Lightning Shield / Shield / Fortify Luck Single Target Touch, Paralyze / Lingering Poison Area, Fire / Frost / Shock (all Lingering)
WEAPON FORM UPGRADES:
The power of Felthorn’s weapon forms is based on three things: number of gems given, number of ores given, and player level. Weapon forms are broken into six tiers, roughly based on the vanilla weapons that they resemble. NOTE: Some stats will be different from the vanilla counterparts in order to create a desirable curve as Felthorn’s power increases.
Gem and ore offerings are calculated based on a point system:


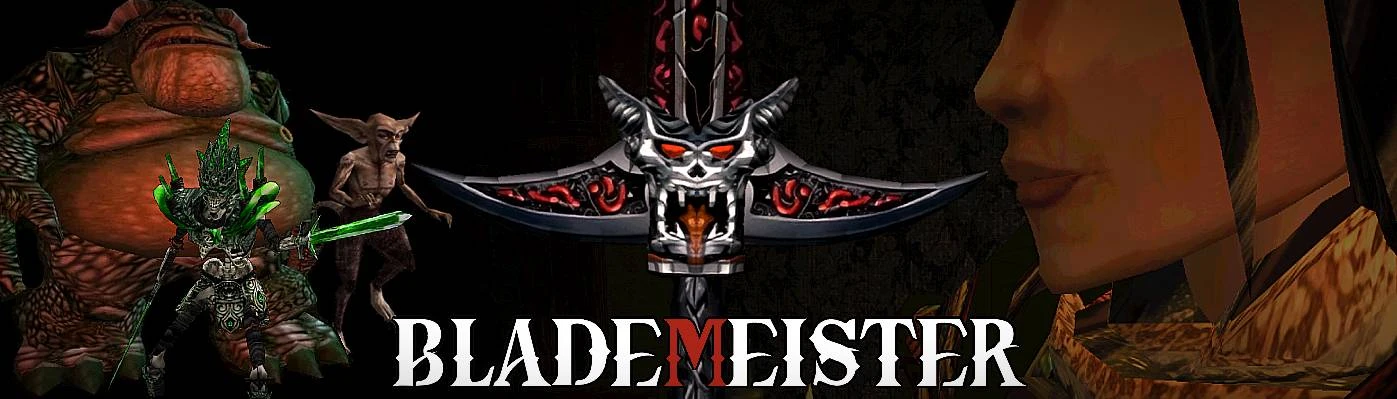
Guide / Walkthrough (*SPOILERS*) (3 comments)
***
First, travel to Addamasartus near Seyda Neen. In the back tunnels behind the main slaver camp you will find a skeleton with an enchanted rapier lodged through its ribs. Take the sword, and when it starts talking to you, follow the conversation until you're given the option to take it. When you try to take it, you will be attacked by a scamp after being hit with a spell. Defeat the scamp and wait a few seconds.
Once Felthorn introduces itself, you will be given a spell called "-Felthorn-" that allows you to speak with it while it is a) in weapon form, and b) in your inventory.
The topic "- form: creature" will allow you to choose what creature form Felthorn takes. Each creature form has its own magicka cost (which will bleed into a health cost if you run out), and you start with only the Scamp form available.
The -Felthorn- spell also calls Felthorn to you while it is in creature form, but only if you are both in the same cell. When used correctly, Felthorn will be teleported next to you, and will stop combat if it is fighting. Keep in mind, though, Felthorn will immediately resume combat if you're actively being attacked, so be quick if you want to talk to it.
The topic "- form: weapon" allows you to choose what weapon form Felthorn takes. All weapon forms cost 10 magicka, which bleeds into a health cost if you run out, just like the creature forms. You start off with only the iron rapier form available.
The topic "your story" gives a little bit of background on Felthorn. It's not the most talkative Daedra, but it will give you a vague outline of where it comes from.
The "spells" and "travel" topics are more general follower functions, and they are only available when Felthorn is in creature form.
NOTE: The "spells" topic may not make any difference for some creature forms, including the basic Scamp form (which can't cast any spells). Certain forms are limited to certain types of spells. A full list of available spells by creature form is included below.
In order to advance, you must prod Felthorn through the "what do you need" topic. If you show interest, it will explain exactly what it needs in order to grow stronger. This will open up several topics, the most important being "- more power". This topic will be the main way to increase Felthorn's power.
Felthorn needs six things to reach its full potential: filled soul gems, unique weapons, daedra hearts, gems, ores, and your experience.
Filled soul gems: You will need to feed Felthorn one filled soul gem for each of the basic Vvardenfell Daedra, besides the Scamp: Clannfear, Dremora, Flame Atronach, Frost Atronach, Storm Atronach, Ogrim, Daedroth, Hunger, Winged Twilight, and Golden Saint. When you feed it a new soul, it will unlock that creature transformation.
Unique Weapons: Shards of Felthorn were long ago scattered all across the island. Each one that you find and return to it will unlock the corresponding weapon transformation. More details regarding their locations are listed below.
Daedra Hearts: Felthorn feeds on Daedra hearts to empower its creature forms. Every Daedric creature form will benefit from hearts, but its strength is also limited by the player’s level. Exact details are listed below.
Gems and Ores: Gems and ores are used to increase the power of Felthorn’s weapon forms, but these forms are also limited by the player’s level. Exact details are listed below.
Experience: As mentioned before, the player’s level also dictates how powerful Felthorn is. Exact details are listed below.
The quest will not progress until you have COMPLETELY upgraded Felthorn and have reached level 10. Once you have accomplished this, speak to Felthorn about its “perfect form”. It will then direct you to a Daedric ruin within the Ghostfence called Ularradallaku. No specific directions are provided, other than the fact that the ruin is directly west of Dagoth Ur’s citadel. Use UESP if you have trouble finding it.
Travel to the ruin and make your way behind the main shrine. If your journal is up to date with the correct entry, you will see a shimmering portal at the end of the back hallway. Put Felthorn into your inventory, save the game, and travel through the door.
Inside, you will face this mod’s final challenge. The fight consists of three phases. For the first phase, reduce Anarys to 0 hit points. For the second, destroy all of his conjured atronachs while he is invulnerable. For the third, reduce him to 0 hit points again. NOTE: It’s a good idea to soul trap Anarys during his third phase, as this is the only way to unlock Felthorn’s glass berserker transformation without losing money (there are two grand soul gems on his desk). If you forget to do this, you can spend 1000 gold at his altar to summon a berserker husk that will serve the same purpose, since Felthorn will gladly eat either soul.
After the battle is over, get the etched bone from Anarys’s body (as well as the enchanted ring!) and give the bone to Felthorn. Doing so will unlock Felthorn’s “perfect form” and finish the mod’s quest content. After that, Felthorn will serve as a powerful companion for the rest of your adventure. Or you could turn them into a weapon and sell them to Creeper. That would be funny.
UNIQUE WEAPON LOCATIONS:
Felthorn will give you vague directions under the topic “weapon locations”, but you can get more detailed directions from scouts in Seyda Neen, Balmora, Ald-ruhn, Tel Branora, Gnisis, Khuul, Molag Mar, and Maar Gan. Any scout will do as long as they’re in the correct city, but extra scouts have been added to each area in order to make this easier. Keep an eye out for new NPCs with bonemold cuirasses and chitin gauntlets. If following in-game directions is too tiresome, there is no shame in looking up the following locations on the UESP wiki. Once you get to a location, keep an eye out for a lightly-colored chest. NOTE: The chests will not open until the appropriate journal entry has been triggered, so don’t try to visit these locations early.
Nissintu - Dagger
Odibaal - Waraxe
Kumarahaz - Mace
Mat - Spear
Adanumuran - Short Bow
Alen Ancestral Tomb - Longsword
Arano Ancestral Tomb - Shortsword
Drinith Ancestral Tomb - Battleaxe
Missamsi - Warhammer
Zaintiraris - Claymore
CREATURE FORM UPGRADES AND SPELLS:
Each basic creature transformation has 3 levels of power. The tier that is used is determined by two things: the number of Daedra hearts fed to Felthorn and the player’s level. Tier one is the baseline, tier two requires level 5 and 5 Daedra hearts, and tier three requires level 10 and 10 Daedra hearts. Higher tiers give more spells, magical passive abilities, and higher health, magicka, fatigue, and damage.
NOTE: Cursed Daedra hearts (usually found in Daedric shrines) count for 2 hearts when given to Felthorn. If you have both kinds in your inventory, Felthorn will take the cursed version first.
There are also a couple of odd forms listed here that you will unlock later. These two forms only have one tier each.
Scamp 1
No spells
Scamp 2
No spells
Scamp 3
Single Target Ranged, Fire / Disintegrate Armor
Clannfear 1
No spells
Clannfear 2
Single Target Touch, Lingering Poison
Clannfear 3
Self, Chameleon / Sanctuary
Single Target Touch, Lingering Poison
Dremora 1
Self, Second Barrier
Dremora 2
Self, Second Barrier
Self, Third Barrier
Dremora 3
Self, Second Barrier
Self, Third Barrier
Self, Fourth Barrier
Area, Fire Storm
Flame Atronach 1
Area, Firebloom
Flame Atronach 2
Area, Firebloom
Self, Fireshield
Flame Atronach 3
Area, Firebloom
Area, Fire / Drain Agility
Self, Fireshield
Frost Atronach 1
Area, Frostbloom
Frost Atronach 2
Area, Frostbloom
Self, Frostshield
Frost Atronach 3
Area, Frostbloom
Area, Frost / Drain Speed
Self, Frostshield
Storm Atronach 1
Area, Shockbloom
Self, Shockshield
Storm Atronach 2
Area, Shockbloom
Self, Shockshield
Storm Atronach 3
Area, Shockbloom
Area, Shock / Drain Agility
Self, Shockshield
Ogrim 1
No spells
Ogrim 2
No spells
Ogrim 3
Self, Shield / Fortify Attack
Daedroth 1
Self, Third Barrier
Self, Regenerate
Area, Poisonbloom
Area, Shockbloom
Daedroth 2
Self, Third Barrier
Self, Regenerate
Area, Poisonbloom
Area, Shockbloom
Daedroth 3
Self, Third Barrier
Self, Regenerate
Area, Poisonbloom
Area, Shockbloom
Area, Poison / Shock
Hunger 1
Single Target Touch, Paralysis
Hunger 2
Single Target Touch, Paralysis
Hunger 3
Single Target Touch, Paralysis
Single Target Touch, Paralyze / Absorb Fatigue
Winged Twilight 1
No spells
Winged Twilight 2
No spells
Winged Twilight 3
Single Target Touch, Lingering Absorb Health
Golden Saint 1
Self, Dispel
Self, Shock Shield
Golden Saint 2
Self, Dispel
Self, Shock Shield
Golden Saint 3
Self, Dispel
Self, Shock Shield
Self, Restore Health
Self, Lightning Shield / Shield / Fortify Luck
Glass Berserker
Self, Fire Shield / Shield / Spell Absorption
Self, Restore Health
“Perfect Form”
Self, Restore Health
Self, Lightning Shield / Shield / Fortify Luck
Single Target Touch, Paralyze / Lingering Poison
Area, Fire / Frost / Shock (all Lingering)
WEAPON FORM UPGRADES:
The power of Felthorn’s weapon forms is based on three things: number of gems given, number of ores given, and player level. Weapon forms are broken into six tiers, roughly based on the vanilla weapons that they resemble. NOTE: Some stats will be different from the vanilla counterparts in order to create a desirable curve as Felthorn’s power increases.
Gem and ore offerings are calculated based on a point system:
Pearl: 1
Cursed Pearl: 2
Emerald: 2
Cursed Emerald: 3
Ruby: 3
Cursed Ruby: 4
Diamond: 4
Cursed Diamond: 5
Raw Ebony: 2
Cursed Raw Ebony: 3
Raw Glass: 2
Raw Stalhrim: 3
Adamantium Ore: 3
Weapon Tier Requirements:
Tier 1
None
Tier 2
Gems 4 pts
Tier 3
Gems 8 pts
Ores 2 pts
PC Level 4
Tier 4
Gems 12 pts
Ores 5 pts
PC Level 6
Tier 5
Gems 16 pts
Ores 9 pts
PC Level 8
Tier 6
Gems 20 pts
Ores 12 pts
PC Level 10