Documentation
Readme
View as plain text
Reduced Lens Flares 0.9 (Partially Tested Beta Version)
What This Mod Does:
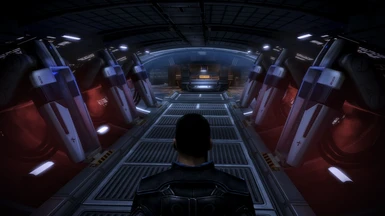
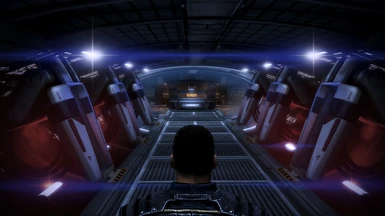
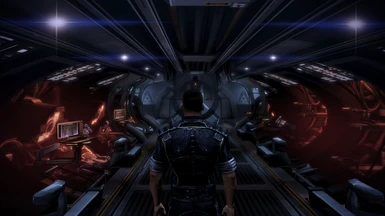
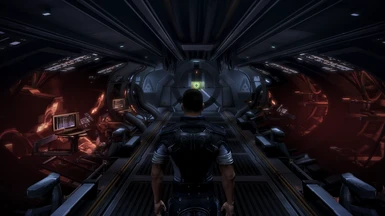
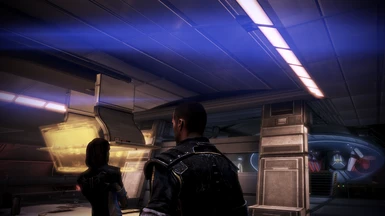
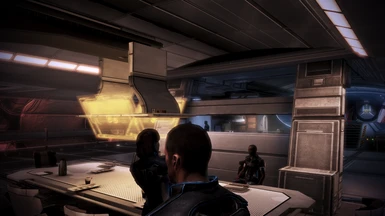
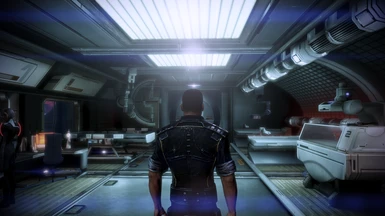
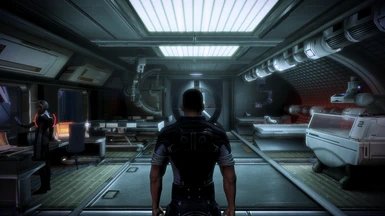
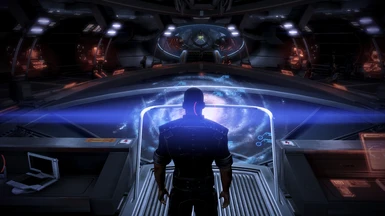
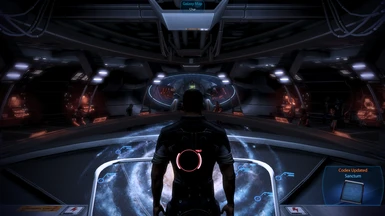
This is a fairly simple mod, which I made because the constant lens flares coming out of every light source, especially on board the Normandy, really annoyed me. Specifically, I blacked out the textures for most of the lens flare textures, so that most lights in the game will now have a soft, natural glow to them instead of harsh purple lines and weird-looking coronas plastered over everything.
Quick Note:
Don't be intimidated by the long instructions. I'm just trying to be detailed as possible. Not so long ago, I was a fresh newbie to the Nexus, and I probably would have needed instructions this extensive to get this mod to work.
Quick Installation Instructions:
For those with experience using MassEffectModder (MEM), make sure that you've started from a vanilla game, installed any vanilla DLCs you want, along with any DLC mods, and successfully generated your texture tree in MEM's Textures Manager. Extract the downloaded mod folder, and install the provided "Reduced Lens Flares" mod file in the folder, using MEM's Mods Installer.
If you aren't sure what that means, or could just use a refresher, take a look at the full instructions. Again, this installation is not nearly as hard as it sounds, and installing pretty much any mod becomes quite easy after you perform a first-time setup for the modding tools.
Note For Installation Order:
This should be installed AFTER any DLC mods, such as Bonus Power Packs (https://www.nexusmods.com/masseffect3/mods/344), as the texture tree can only be properly generated after all vanilla DLCs and DLC mods have been installed. Once all DLCs are in place, the texture tree can then be generated in MEM. And it should be installed AFTER any big texture overhauls or compilations, such as A Lot Of Textures (ALOT) For ME3 (http://www.nexusmods.com/masseffect3/mods/363/?), as these may overwrite my edited lens flare textures, which would defeat the purpose of my mod.
Full Installation Instructions:
(Requires MassEffectModder (https://github.com/MassEffectModder/MassEffectModder/releases))
1. First, BACK UP your game files by copying the BioGame folder from your Mass Effect 3 installation directory, to somewhere else on your computer, such as on your desktop. Make sure to label it so that you know it's the original, unmodified version of the folder. This takes a few minutes, but it's definitely worth the time you save in case anything goes wrong. Please do not skip this step, for your own good.
2. As mentioned above, make sure you have installed all the vanilla DLCs and DLC mods you want to use, as texture mods should only be installed after these.
3. After all DLC files are installed, open MEM, and under the Mass Effect 3 Game Utilities module, click on "Unpack DLCs", which will take a good few minutes. This allows MEM to detect all vanilla DLCs and DLC mods, and apply any texture changes or other modifications to the DLC content as well as the base game.
4. Open the Mass Effect 3 Textures Manager, and it should automatically start scanning game files, and prompt you to begin building the texture tree. If your DLC files are all in order and you know your textures are in an unmodified state as they should be, click "Continue". It will also give you the option to "Remove Empty Mips", which is entirely optional. I recommend it, as it reduces the required file size for installing mods, but it does make for a slower installation. This process will probably take the better part of an hour either way. Note that MEM will automatically refuse to build its texture tree if it detects that any texture files have already been modified.
If MEM detects modified texture files, you'll have to revert your game to a vanilla state, using the backup files you created earlier. Just copy them back into your Mass Effect 3 installation directory and rename them to the original file/folder names, and you're good to go.
If you're like I once was and you skipped Step 1, because you're impatient or are just new to modding, or the backup files you used still didn't work, don't panic. Delete the entire Mass Effect 3 folder from your Origin Games directory, and also delete the Mass Effect 3 folder from your Documents directory. You can also manually uninstall the game through Origin and the Control Panel, but if you do, manually check to ensure both of these folders are fully deleted, or you may end up with corrupted game files.
If you open Origin after uninstalling the game, Mass Effect 3 should now be marked as not installed, and ready for download. Click "Download", and it will re-download all of the game files, including any DLCs you have. This will probably take several hours, but it does work, and it completely resets the game to a vanilla state. If Origin prompts you to choose a cloud or local save, choose the local save to overwrite. Be sure to also go to Mass Effect 3's settings in Origin, by clicking the gear icon on the game tile, selecting "Game Properties", and under the Cloud Saves tab, un-tick the option to enable cloud saves. Once your game has been reverted to a vanilla state, go back to Step 1, and start again.
5. Assuming you built your texture tree successfully in MEM, install any other big texture mods before this one, to ensure they don't overwrite it.
6. Extract the compressed folder labeled "Reduced Lens Flares" that you downloaded from the Nexus page, using 7zip (http://www.7-zip.org/), WinRAR (http://www.rarlab.com/download.htm), or a similar program.
7. In MEM, go to the Mass Effect 3 Mods Manager, and click on "Mods Installer".
8. In the Mods Installer module, click on "Add to list", and select the extracted "Reduced Lens Flares.mem" file in the folder, and click "Open". It should now appear on the list of mods displayed in MEM.
9. Click on the "Reduced Lens Flares" mod in the list, and click on "Install Selected Mods" (or "Install All Mods" if you have other individual texture mods you want to install). Sit back and let MEM do its thing. It may take a good while since the lens flare textures are used extensively, in pretty much every location in the game. There are a lot of files, in a lot of folders, for it to go through and replace.
10. (Optional) For good measure, exit the Mods Installer module, and go to the Mass Effect 3 Texture Utilities. Click on "Apply HQ LODs Settings" and "Apply HQ GFX Settings". These aren't necessary to run this mod, or any other mods, but they automatically change your game's graphical settings to look prettier, which is nice.
11. (Not optional) Under Mass Effect 3 Game Utilities, click on "Update TOCs". This updates the PCConsoleTOC marker and directory files to a state consistent with the changes your mods have made to the vanilla game files. The game will likely refuse to even reach the start menu if you don't do this, and it takes all of five seconds, so don't skip this step.
12. If you do not already have this, download the two DLC Patcher (https://github.com/Erik-JS/masseffect-binkw32/tree/master/ME3/Release) files here. Copy both the "bink23.dll" and "binkw32.dll" files into your Win32 folder, under Binaries, under the Mass Effect 3 installation directory. If prompted to overwrite an existing file, select "Overwrite". This prevents Origin from detecting any modified game files as "unauthorized DLC".
13. Start up ME3, and enjoy your modified, lens-flare-free game!
Troubleshooting:
- Remember that you must first have a valid texture tree before installing any texture mods. If you do not build your tree in MEM first, you cannot install any texture mods at all, including this one. And if you have already modified textures manually, before building the tree, you will have to revert the game to vanilla, as MEM will refuse to build a tree if it detects any modified textures.
- Also remember that installing any new DLC, or DLC-type mods, can screw up your texture tree. (The new content also will NOT have these textures installed; you must add the new DLC to your tree, and reinstall the mod if you wish to add them.)
- If the textures and everything else installed correctly, but the game won't actually start up properly, go back to MEM and make sure you've run the "Update TOCs" function, as in Step 11. And make sure you've put both the modified "binkw23.dll" and "binkw32.dll" files into your Binaries folder, as in Step 12. These can be easy steps to forget if you're like me, and you excitedly rush to play immediately after you see MEM say that the textures all installed successfully.
- When in doubt, if you don't know what else is going wrong, just revert your BioGame folder to the vanilla version you made as a backup, and try again. If you really still need help with installation, do feel free to ask your questions here on the Nexus discussion page, or send me a direct message.


