


0 of 0


About this mod
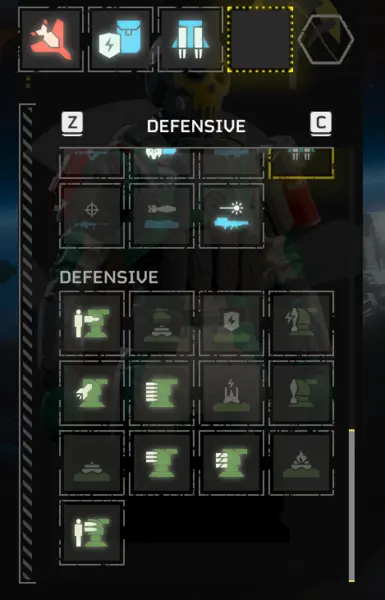
This mod allows users to combine stratagem art from different mods and highlight favorite stratagems for much quicker selection in the loadout menu.
- Requirements
- Permissions and credits
- Changelogs
7/15 update is now fully supported Including new stratagems.
To retain save, move savedata.json from resource/deps into new extract location.
Imported Archives can be saved by moving resource/Archives folder
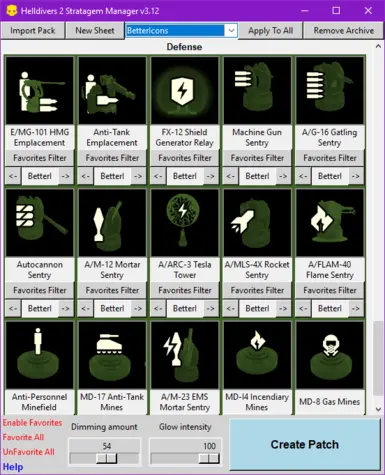
Stratagem Icons Manager
Stratagem Icons Manager designed to assist with simple quick stratagem selection when in the loadout screen
as well as allowing combining stratagem sprites from multiple packs
This mod has a built in packager that will create a zipfile that can be imported into HD2 Mod Manager
The Mod Manager can be found here: https://www.nexusmods.com/helldivers2/mods/109
Make sure you setup the game directory in the mod manager in order to have your mods applied properly
How to use:
To use the application:
Unzip the archive
if upgrading a previous version just copy all files from the zip archive into the old location to keep your save data and archives.
Open the StratagemIconManager.exe application
If you have any additional packs you would like to include, import them now.
If you would like to delete a pack you previously have imported, select it in the dropdown and click remove archive
A new archive can be created and edited by using the "New sheet" button and then it can be edited in the EditableSheets folder
Favoriting Stratagems:
Once you have selected your starting pack and applied it, you can begin favoriting or swapping icons
By default, the favorites filters are on, nothing is favorited, and original art is selected
Favorites Filters can be turned on or off using the "Enable Favorites" button in the bottom left
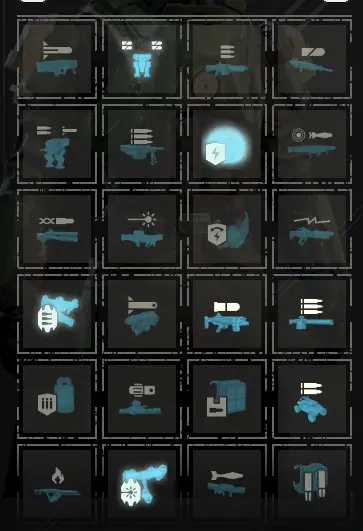
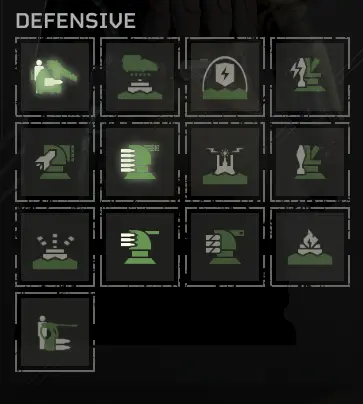
Left click each stratagem that you would like to favorite, they will glow in the loadout screen
Right click each stratagem you would like to unfavorite, they will dim in the loadout screen
<- and -> buttons will switch which pack this stratagem comes form.
If favorites are disable the stratagem will be the default color/brightness and right and left click will do nothing.
Dimming or glowing amounts can be adjusted using the settings in the bottom middle of the screen
After you have selected each of your favorites, press the "Create Patch" button
Installing the Mod:
A zip folder will appear based on your chosen name in the
same folder as the application (StratagemIconManager.exe)
After pressing this button, any settings or selections you changed will be saved and be re-loaded next time you open the manager
Now that you have your .zip file, open HD2 Mod Manager
Click "Add" then navigate to the .zip file that was created.
To install the mod you just created, press the "Deploy button"
Due to a limitation of the HD2 Mod Manager, each time you make updates to your favorites,
you will need to remove by pressing the trash, re-add, then re-deploy the mod
Modders / Artists:
A new sprite sheet can be created by using the New sheet button. This will copy the 0riginal icons from resource/archives with a given name
The new sprite sheet will be found in EditableSheets folder as well as a mask that you can use to identify Icon positions.
Any edits here will be used next time the application is launched but the original archive is not modified.
To undo all changes to a sheet, delete the sheet from EditableSheets.
Keep in mind the game interprets green (0x00FF00) to be white and red (0xFF0000) to be the stratagem group color.
Brightness of the red/green can be adjusted dim/brighten the object and this will be reflected in game.
Other colors may not be supported by the mod but unknown if they will display in game.
Once you have created the custom mod, it can be renamed by renaming the zip file and editing the manafest.json file to setup your custom naming
Adding new icons:
IconData.json can also be edited to point to additional icons in the sprite sheet.
If an additional archive is added, the archive must be in the resource/archive/0riginal folder.
The format for the .json is [size,xgridoffset,ygridoffset],[gridindexx,gridindexy],[saveID,group(limited),description]
these grid locations can be easily found by opening a PNG through GIMP and using the grid editor.
Hope you enjoy!
Please post here if you have any suggestions to improve!
To retain save, move savedata.json from resource/deps into new extract location.
Imported Archives can be saved by moving resource/Archives folder
Stratagem Icons Manager
Stratagem Icons Manager designed to assist with simple quick stratagem selection when in the loadout screen
as well as allowing combining stratagem sprites from multiple packs
This mod has a built in packager that will create a zipfile that can be imported into HD2 Mod Manager
The Mod Manager can be found here: https://www.nexusmods.com/helldivers2/mods/109
Make sure you setup the game directory in the mod manager in order to have your mods applied properly
How to use:
To use the application:
Unzip the archive
if upgrading a previous version just copy all files from the zip archive into the old location to keep your save data and archives.
Open the StratagemIconManager.exe application
If you have any additional packs you would like to include, import them now.
If you would like to delete a pack you previously have imported, select it in the dropdown and click remove archive
A new archive can be created and edited by using the "New sheet" button and then it can be edited in the EditableSheets folder
Favoriting Stratagems:
Once you have selected your starting pack and applied it, you can begin favoriting or swapping icons
By default, the favorites filters are on, nothing is favorited, and original art is selected
Favorites Filters can be turned on or off using the "Enable Favorites" button in the bottom left
Left click each stratagem that you would like to favorite, they will glow in the loadout screen
Right click each stratagem you would like to unfavorite, they will dim in the loadout screen
<- and -> buttons will switch which pack this stratagem comes form.
If favorites are disable the stratagem will be the default color/brightness and right and left click will do nothing.
Dimming or glowing amounts can be adjusted using the settings in the bottom middle of the screen
After you have selected each of your favorites, press the "Create Patch" button
Installing the Mod:
A zip folder will appear based on your chosen name in the
same folder as the application (StratagemIconManager.exe)
After pressing this button, any settings or selections you changed will be saved and be re-loaded next time you open the manager
Now that you have your .zip file, open HD2 Mod Manager
Click "Add" then navigate to the .zip file that was created.
To install the mod you just created, press the "Deploy button"
Due to a limitation of the HD2 Mod Manager, each time you make updates to your favorites,
you will need to remove by pressing the trash, re-add, then re-deploy the mod
Modders / Artists:
A new sprite sheet can be created by using the New sheet button. This will copy the 0riginal icons from resource/archives with a given name
The new sprite sheet will be found in EditableSheets folder as well as a mask that you can use to identify Icon positions.
Any edits here will be used next time the application is launched but the original archive is not modified.
To undo all changes to a sheet, delete the sheet from EditableSheets.
Keep in mind the game interprets green (0x00FF00) to be white and red (0xFF0000) to be the stratagem group color.
Brightness of the red/green can be adjusted dim/brighten the object and this will be reflected in game.
Other colors may not be supported by the mod but unknown if they will display in game.
Once you have created the custom mod, it can be renamed by renaming the zip file and editing the manafest.json file to setup your custom naming
Adding new icons:
IconData.json can also be edited to point to additional icons in the sprite sheet.
If an additional archive is added, the archive must be in the resource/archive/0riginal folder.
The format for the .json is [size,xgridoffset,ygridoffset],[gridindexx,gridindexy],[saveID,group(limited),description]
these grid locations can be easily found by opening a PNG through GIMP and using the grid editor.
Hope you enjoy!
Please post here if you have any suggestions to improve!