


0 of 0


File information
Created by
Dalton Northrup - Akabane101Uploaded by
Akabane101Virus scan
Safe to use
Documentation
Readme
View as plain text
THE FOLLOWING HAS BEEN CONVERTED FROM MY PDF / DOCX FILES.
FOR SCREENSHOTS, PLEASE LOOK AT THE PROVIDED READMES!
You can find the readMe online here: https://drive.google.com/file/d/1gEdsbd56vPqgKAuiHhk-OUPL00fQwcw6/view?usp=drive_link
Last Updated: Friday, 20 December 2024
Install Guide: AutoHotkey & ReShade
Game: Helldivers 2
Mod: Night Vision for HD2
Dalton Northrup (@Akabane101)
http://www.youtube.com/Akabane101
Last Updated: Friday, 20 December 2024
Table of Contents
Pre-Requisites ............................................................................................................................. 3
Full AutoHotKey v2.0 Installation Guide ........................................................................................ 6
Install AutoHotKey v2.0 ............................................................................................................. 6
Install the “NVG” Sound Effect AutoHotKey 2.0 Script .............................................................. 10
Modifying the Script (Advanced Users) .................................................................................... 12
Change the Hotkeys ............................................................................................................ 12
Optional: Update the GUI to reflect the new hotkeys ............................................................. 12
Change the Sound Effects ................................................................................................... 12
Installing ReShade ..................................................................................................................... 14
Fresh Install ReShade ............................................................................................................. 14
Install Skignorf’s “Unofficial Photomode” Shader Plugin (Hide Cape) ........................................ 19
Install ReShade Preset (NVGs) ................................................................................................ 24
ADVANCED TWEAKS ........................................................................................................... 28
Pre-Requisites
Enable “File Name Extensions”.
If you do not see file name extensions, such as “.exe”, “.ini”, “.docx”, “.pdf”, or “.txt”, then you will
need to enable this Windows feature.
1. Open File Explorer.
a. WINDOWS+E (Windows 10, 11)
2. Method 1: Enable File Name Extensions in File Explorer
a. Click “View”
b. Click “Show >”
c. Click to enable (checkmark) “File name extensions”
d. (Optional) Click to enable (checkmark) “Hidden items”
3. Method 2: Disable “Hide extensions for known file types” in Folder Options.
a. Click the “…”
b. Click “Options”.
c. In the Folder Options window, click on the “View” tab for advanced settings.
d. Locate “Hide extensions for known file types”.
e. Toggle this off by ensuring there is no blue checkmark next to it.
f. (Optional): Select the “Show hidden files, folders, and drives” radio wheel.
g. Click “Apply”.
Full AutoHotKey v2.0 Installation Guide
Install AutoHotKey v2.0
If you already have AutoHotkey 2.0 Installed, skip to: Install the “NVG” Sound Effect AutoHotKey
Script
a. Go to: https://www.autohotkey.com/
b. Click: Download
c. Click: Download v2.0
d. Check you downloads for “AutoHotkey_2.0.xx_setup.exe
i. Note that your version number may be different at the time of downloading. As long as
it’s version 2, the installation should be similar if not the same.
https://www.autohotkey.com/
e. Double-click or right-click and run “AutoHotkey_2.0.xx_setup.exe”.
i. In the “Install to:” section, click “Browse”.
1. Select the folder you wish to install AutoHotey (For me, I’ve installed in my
G:\AutoHotKey directory.)
ii. For Install Mode:
1. All Users: if you wish to install for all users on your machine
2. (Recommended) Current User: (only installs for your account on the machine).
iii. Click Install.
f. After installation, you should be greeted with the “AutoHotkey Dash” dashboard.
i. This means that AutoHotkey has installed successfully.
ii. If this did not open automatically, do the following:
1. Press the windows key.
2. Type: “AutoHotkey” into the search bar.
3. Select “AutoHotkey Dash”.
4. You should now see the AutoHotkey Dash window.
g. Close out of the AutoHotkey Dash window.
h. Go to the directory where you installed it (The one you selected in section 1-e).
i. View the contents installed in the directory. You should see the following:
i. UX
ii. V2
iii. license.txt
iv. WindowSpy.ahk
j. You should see “WindowSpy.ahk”, this is a debug tool provided by AutoHotKey.
i. Note that the icon displays an “H”, this means that the file will be run using the newly
installed AutoHotKey.
k. Right-click “WindowSpy.ahk”.
i. Note that you can now open this file using AutoHotKey as the green “H” is to the left of
the “Open” option.
ii. If you do not see this icon, select “Open With”
1. View the options.
2. If you see AutoHotkey Launcher, then click that to open the program with
AutoHotkey Launcher.
3. If you do not see “AutoHotkey Launcher”, click “Choose another app”.
4. Select AutoHotkey Dash from the list. Ensure it will always be used for these file
types by clicking “Always”.
5. If you do not see AutoHotkey Dash on this list, scroll down and click “Choose
another App on your PC.” This will open file explorer with the title “Open with…”.
6. Go to the directory where you installed AutoHotkey.
7. Open the “UX” folder.
8. Select “AutoHotkeyUX.exe”.
9. Click “Open”.
10. The program should now open.
iii. Open WindowSpy.ahk with AutoHotkey Dash (double-click, open with, etc).
iv. Confirm that a Window Spy window appears on screen and is tracking your mouse
movements.
v. Close the program.
---
Install the “NVG” Sound Effect AutoHotKey 2.0 Script
Ensure that you have AutoHotkey v2.0 or greater installed before proceeding.
1. If you haven’t already, download the mod from the Nexus Page here:
a. Download the “(Optional) AutoHotkey NVG Sound Effects” mod.
b. Note the name of the zipped folder: “(Optional) AutoHotkey NVG Sound Effects-#####.zip”.
2. Unzip the downloaded zip using Windows or your favorite unzipper (7zip, Winrar).
3. View the contents of the unzipped folder.
a. Sounds
i. This folder contains the mp3 files for the nvgs, on, off, switch.
b. nvgOnOffv2.ahk
i. This is the AutoHotKey script. This is what we will use to play the sounds with hotkeys.
c. readMe.docx
i. What you are reading right now.
4. BEFORE LAUNCHING THE PROGRAM
a. Turn down your system sounds temporarily as the sound effect can be a bit loud for the first-time setup.
This enables everyone to set the mp3 to the correct sound levels later in this guide.
5. Launch the program by double-clicking “nvgOnOffv2.ahk”.
6. A window will appear called “NVG Sound Toggler”.
a. Use CTRL+ALT+N to enable or disable the hotkeys. Default: Enabled.
b. Use N to play the NVG sound effects.
i. If the state is “Off” it will play the ON sound effect.
ii. If the state is “On” it will play the OFF sound effect.
c. Use `,` or `.` to play the “switch” sound to simulate toggling between the displays.
i. If NVG Hotkeys is disabled, these will not play.
ii. If NVG State is “Off”, these will not play.
d. Close Program will close the program fully so you do not need to go into your taskbar to exit the application.
e. Clicking the X will perform the same action as Close Program.
7. After activating the mod, I highly recommend you go into your volume mixer immediately and adjust the volume for
“AutoHotKey” to be around 30-50%.
a. Set your system sounds back to 100%.
Modifying the Script (Advanced Users)
You are free to modify the nvgOnOffv2.ahk script. I’ll show you what you can change easily.
**Change the Hotkeys**
1. Open nvgOnOffv2 with Notepad or your favorite text editor (I like Notepad++).
2. Line 21: Change the hotkey for enabling/disabling sound effect hotkeys.
3. Line 44: Change the hotkey for the NVG On/Off sound effect.
4. Line 63 & 75: Change these hotkeys for cycling the switch sound.
Available Parameters:
Modifier | Symbol | Description
-------- | ------ | -----------
CTRL | ^ | Control Key
Alt | ! | Alt Key
Shift | + | Shift Key
Win | # | Windows Key
**Optional: Update the GUI to reflect the new hotkeys**
The following is purely cosmetic and will not affect any technical aspects of the script:
1. Line 94: Change the text to reflect the new hotkey for enable/disable SFX hotkeys.
2. Line 96: Change the text to reflect the new hotkey for NVG state SFX.
3. Line 98: Change the text to reflect the new hotkeys for switch SFX.
**Change the Sound Effects**
Method 1: Replace the sound effect files with the same name.
1. Go to the Sounds folder.
2. Swap the sound effect files with another using the exact same name.
a. An easy way to do this is to rename the original sound file to “nvgOff.mp3.old”.
b. Then just add the new file and use “nvgOff.mp3” (in this example).
3. Done!
Method 2: Change the script to reflect the sound effect you want to use.
1. Place the new sound effect file in the Sounds folder.
2. Open nvgOnOffv2 with Notepad or your favorite text editor.
3. Change the names of the sound files to reflect the new sound files you placed in `Sounds`.
a. Line 51: Change `nvgOn.mp3`.
b. Line 56: Change `nvgOff.mp3`.
c. Line 71: Change `switch.mp3`.
d. Line 82: Change `switch.mp3`.
4. Save.
5. Done!
Installing ReShade
There are multiple methods to install ReShade, from installing fresh from their website to installing
someone else’s ReShade package complete with hotkeys and more. This guide covers the recommended
method.
**Fresh Install ReShade**
1. Go to https://reshade.me/.
2. Click “Download”.
3. Download the most recent version with full add-on support.
4. Go to your downloads and run “ReShade_Setup_X.X.X_Addon.exe”.
(Version number may vary at the time of installation.)
5. Accept the warning. Helldivers 2’s anti-cheat “GameGuard” has ReShade whitelisted, so it is okay to use.
6. Locate and select “Helldivers 2 (helldivers2.exe)”.
a. If you have difficulty, navigate to your Helldivers 2 directory:
i. Go to Steam > Library.
ii. Right-click Helldivers 2 (must be installed).
iii. Go to Manage > Browse Local Files.
iv. Open the BIN folder.
v. Copy the address field in File Explorer.
b. Paste the address into the “Open” window in ReShade setup and hit Enter.
c. Select “helldivers2.exe”.
7. With “Helldivers 2 (helldivers2.exe)” selected, click “Next”.
8. Select the “Microsoft Direct X 10/11/12” radio button.
9. In the “Select effects to install” screen, click “Uncheck All”, then click “Check All”.
10. Ensure that all options are checkmarked.
a. Alternatively, if you wish to only install the plugins used in a .ini file (the ReShade preset),
then click “Browse”, then select the ReShade preset file.
b. You can repeat this method by selecting “Update ReShade” next time when running the
“ReShade_Setup_X.X.X_Addon.exe” file.
11. Once satisfied, click “Next”. It will take some time to install the add-ons.
12. In the “Select add-ons to Install” screen, select “ShaderToggler by Otis_Inf”.
a. This will allow you to use the cape hiding mod or Unofficial Photomode more easily.
b. Click “Next”.
c. Click “Finish”.
13. Launch Helldivers 2.
a. On the first launch, the shaders will take a moment to compile.
Give it time. Your game may lag or freeze very briefly. This is normal.
14. Press the “Home” key to open the configuration menu. On first-time installations, it launches the
“Tutorial”. Either do the tutorial or click “Skip”.
You’re all set!
You should now be able to use pretty much any ReShade .ini file, save for those with custom
textures/plugins (these are usually supplied by the mod authors).
**Install Skignorf’s “Unofficial Photomode” Shader Plugin (Hide Cape)**
The Unofficial Photomode is the crème de la crème when it comes to ReShade plugins with easily
customizable hotkeys. Don’t forget to click ENDORSE!
**Features / Controls:**
- F3 - Hide Cape
- F4 - Hide Datapad & Sample Canister
- F8 - Enable Photomode
- Capslock - Disable HUD (won’t disable Helldiver)
*(Controls added in v1.5 from my other mod Minimalist Minimap):*
- F9 - Remove Icons and Terrain, only showing nearby enemies.
- F10 - Remove Icons, only showing Terrain and nearby enemies.
- F11 - Remove Terrain, only showing Icons and nearby enemies.
**Steps to Install:**
1. Go to Unofficial Photomode at Helldivers 2 Nexus - Mods and Community.
2. Go to Files.
3. Download the latest version of “Photomode”.
4. Extract the downloaded .zip to its own folder.
5. Open up the extracted folder.
6. View the files within; there should be the following:
a. reshade-shaders
b. dxgi.dll
c. ReShade.ini
d. ReShadePreset.ini
e. ShaderToggler.addon64
f. ShaderToggler.ini
7. ONLY copy the following files/folders:
a. reshade-shaders
b. ShaderToggler.ini
8. Paste the items directly into your `./Helldivers 2/bin` directory (the one with Helldivers2.exe in it).
9. Select “Replace the files in the destination”; this will overwrite the necessary files needed to make the
plugin work correctly.
10. Launch Helldivers 2.
11. When loaded in, press the “Home” key.
12. Go to the “Add-ons” tab.
13. Scroll down to “Shader Toggler” and expand it by clicking the chevron.
14. Ensure you can see the “List of Toggle Groups” with the hotkeys/options.
15. Test it in-game by pressing “F3”. This should hide your cape.
16. If your cape disappears, you have set up the mod correctly!
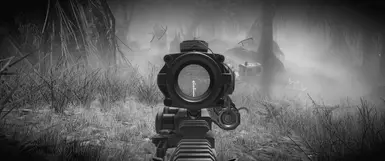
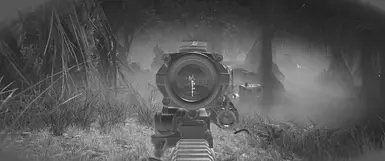
**Install ReShade Preset (NVGs)**
Now that you’ve fully configured your ReShade for Helldivers 2, it should work with virtually
any ReShade on the Nexus. *(Disclaimer: If their ReShade requires custom-made textures, add-ons,
or shaders, you will need to download these as well to ensure they work appropriately. You’ve been
warned~!)*
**Steps:**
1. Go to the Nexus Page for the NVGs mod: (insert link here).
2. Go to Files.
3. Download the NVGs preset.
4. Unzip the downloaded zip file into its own folder.
5. View the contents of the folder:
a. readMe.docx (what you’re reading now!).
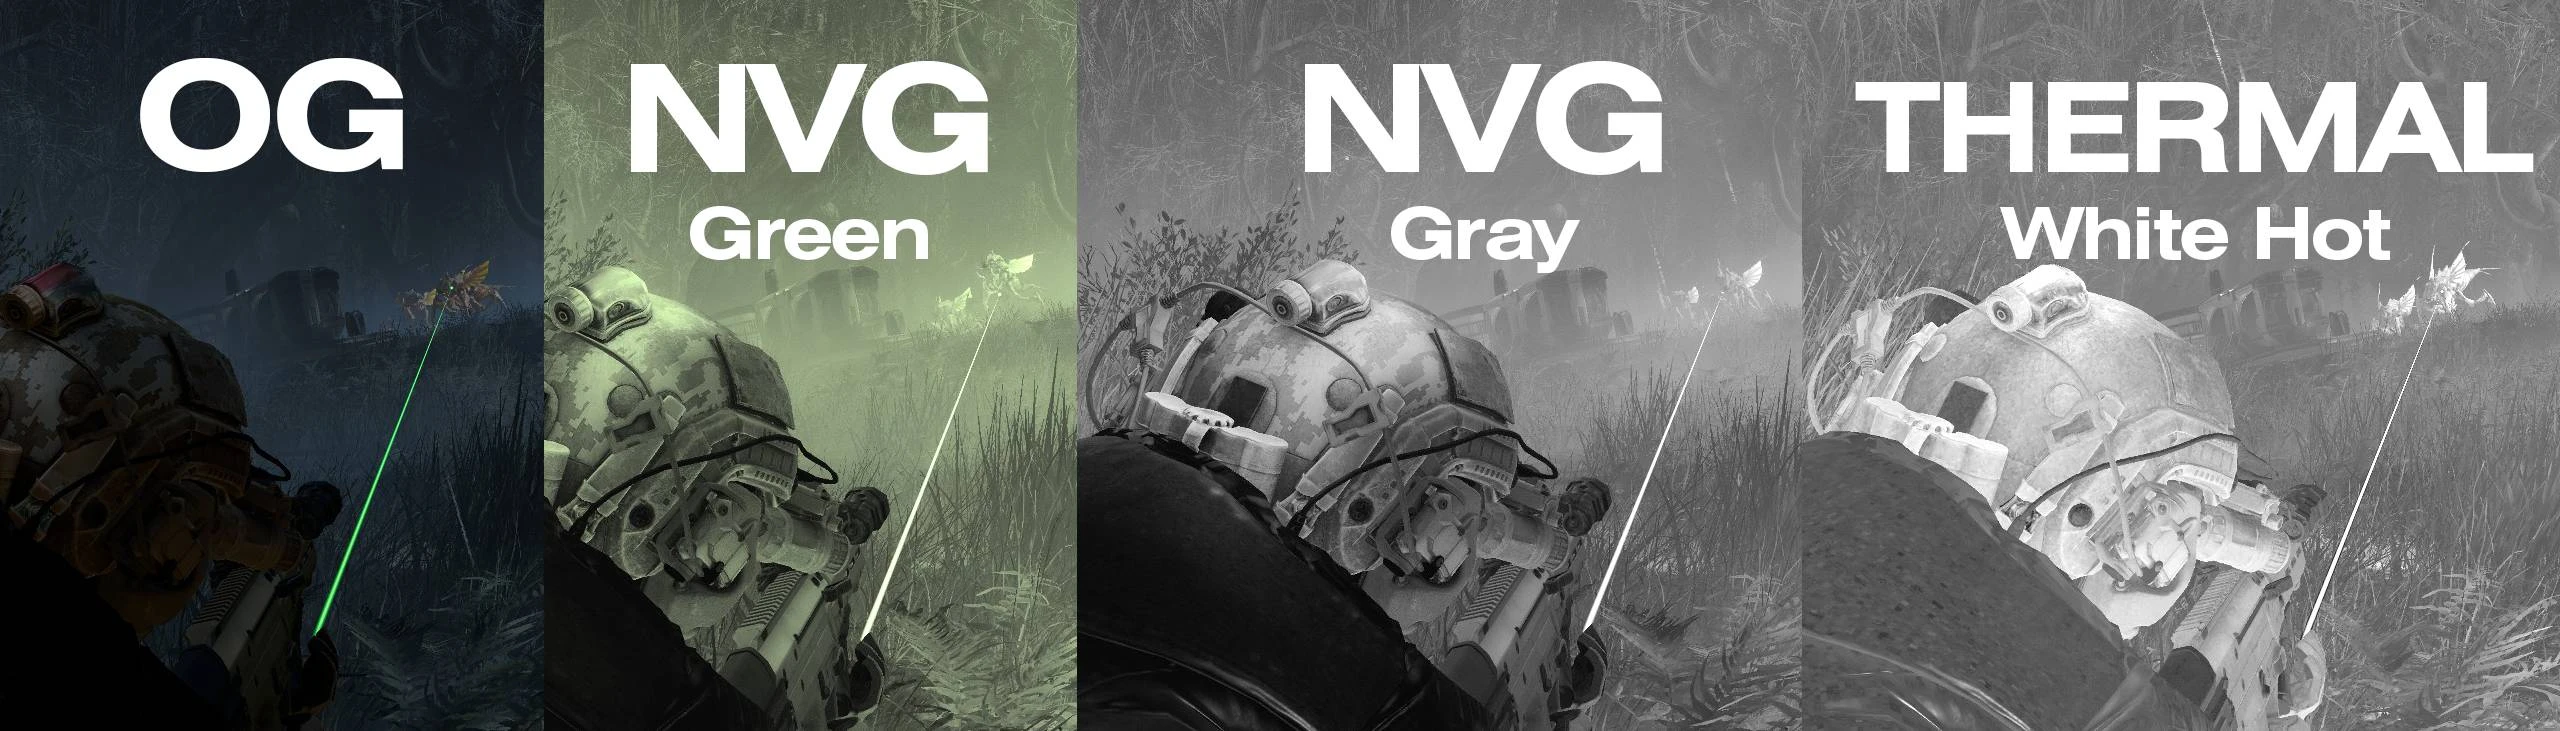
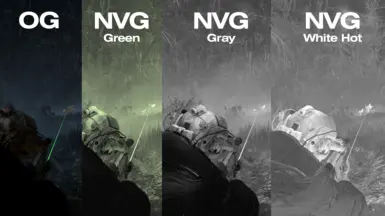
b. 00_nightVisionGreen.ini.
c. 01_nightVisionGray.ini.
d. 02_simpleWH-Bugs-EXPERIMENTAL.ini.
e. 03_simpleWH-BOTS-EXPERIMENTAL.ini.
6. Select the reshades you want to install; in this example, we will install all of them.
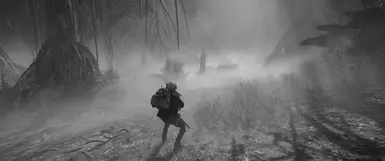
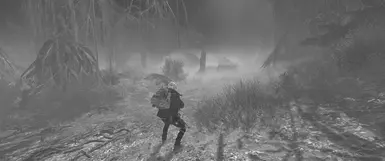
a. Please note that these reshades are designed for night-time missions only.
b. The “EXPERIMENTAL” reshades are just that—experimental. They may work on some
biomes, they may not on others. These are also only designed for night-time operations.
7. Two options for copying/pasting:
a. Option 1: Place the `.ini` files you want to use into your `./Helldivers 2/bin` folder.
b. Option 2: Create a folder inside of Helldivers 2, then place the `.ini` files inside.
8. In-game, open the ReShade menu by pressing the “Home” key.
9. In the “Home” tab, click the selection menu just below it.
10. Locate the `.ini` file in the directory you placed it in and select it by clicking “Select”.
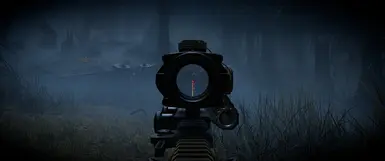
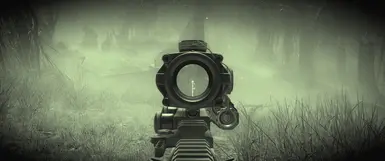
11. You should now see the screen turn green. *(Warning: This will be bright in bright areas.)*
12. Close the ReShade menu by pressing “Home”.
13. Open the in-game menu.
14. Go to Options > Display > Screen Brightness (the top option).
15. Adjust the brightness so that you can very well see the skull on the left half, and that the
white appears overblown (this simulates bright sunlight piercing into the lens).
16. Press the “Home” key to reactivate the ReShade menu.
17. Go to the “Settings” tab.
18. Set “Effect toggle key” to “N” (do not put the quotes).
19. Set “Previous preset key” to “,” (do not put the quotes).
20. Set “Next preset key” to “.” (do not put the quotes).
21. Press the “Home” key again to close out of the ReShade menu.
22. Press “N” to enable/disable the currently selected ReShade.
23. Note how your brightness should be fairly dark. It should be set roughly to the recommended
specifications where the skull on the left side is barely visible.
a. Everyone’s screen is different, so adjust until satisfied.
b. Toggle between NVGs on and off until you feel you have it just right.
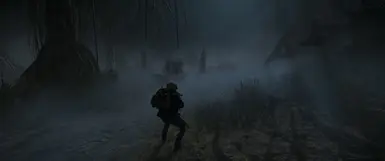
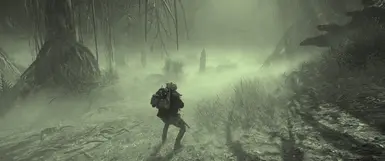
24. Test the NVGs in-game!
a. Hint: Bring FIRE to test the blooming brightness effect.
25. Go to a planet AT NIGHTTIME, preferably between 18:00:00 and 11:59:00 (as daytime will
come quickly if you start later).
26. Run around the planet and try toggling the shader on and off until you have it set up just
right.
ADVANCED TWEAKS
For some, you may need to tweak your ReShade accordingly to better suit your display.
1. Open the ReShade menu by pressing the “Home” key.
2. If you can’t see any of the currently enabled options for the NVGs:
a. Make sure the ReShade is selected.
b. Click “Active to top”. This will display the currently selected shaders at the top.
3. Click on “ColorGrading”.
a. Note how this disables it.
4. Click on “ColorGrading” again to re-enable it.
a. View the “Edit Global PreProcessor Definitions” menu below under
“ColorGrading.fx”.
b. Adjust the settings highlighted above so that the NVGs display to your liking.
Primarily the color grading effect is key when it comes to affecting the brightness. This is the same
for all of my NVG / Thermal mods to keep them as light as possible.
That’s it, happy modding!
Dalton Northrup
http://www.YouTube.com/Akabane101
Join the Modding Discord: https://discord.com/invite/xYeT5tFWRH