


0 of 0
Documentation
Readme
View as plain text
/\
)(
/\_______/][\-^-^-^-^--------------------------------------\
<<()<><><><(ØØ)>>=====--- THE CATICORN HL2:U RESHADE ---=======>
\/¯¯¯¯¯¯¯\][/-v-v-v-v--------------------------------------/
)(
\/ An advanced and comprehensive, yet sober and mature vanilla experience.
===================================================================
Follow installation exactly. The other sections are essentially supplemental and eventually devolve into rambling. If it's not working, or if you have any strong visual artifacts that seem immediately wrong (oversharpening, blurriness), see the Troubleshooting section (VI) and Tweaking sections (IV and V).
This preset also works just fine with official 'Half Life 2' and the episodes, but is particularly calibrated to the visuals of Half Life 2: Update. I strongly recommend Update since certain subtle aspects of Half Life 2 official are still broken as of writing.
=================
TABLE OF CONTENTS
=================
I. ~~~~~ INTRO & DESIGN GOALS
IIa. ~~~ QUICK INSTALLATION
IIb. ~~~ DETAILED INSTALLATION
III. ~~~ HOTKEYS
IV. ~~~~ ARTIFACTS & VISUAL TWEAKS
V. ~~~~~ PERFORMANCE & PERFORMANCE TWEAKS
VI. ~~~~ TROUBLESHOOTING
VII. ~~~ RECOMMENDED COMPANION MODS
VIII. ~~ SHADER LIST AND DESCRIPTIONS
IX. ~~~~ FOOTNOTES & EXTENDED INFORMATION
===============
I. INTRODUCTION and design goals:
===============
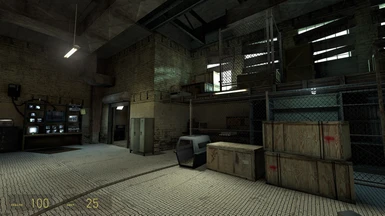
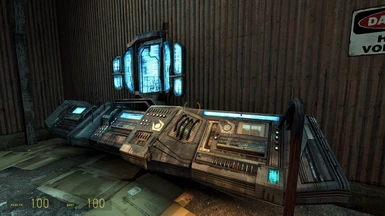
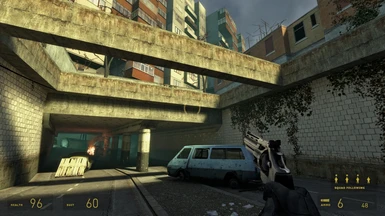
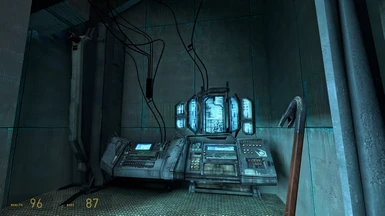
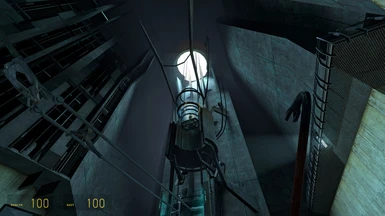
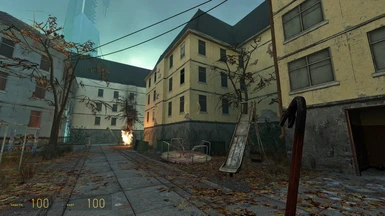
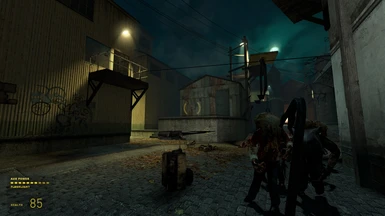
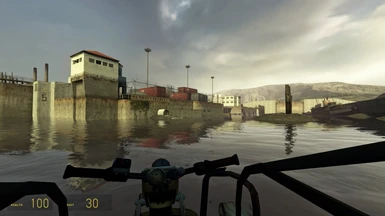
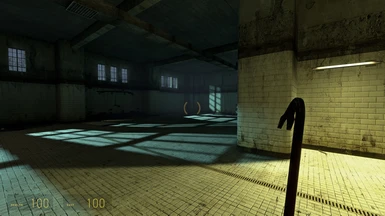
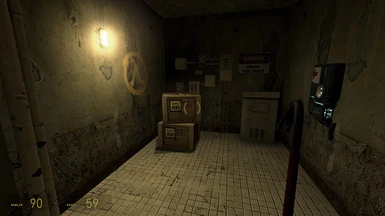
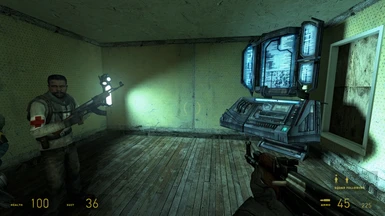
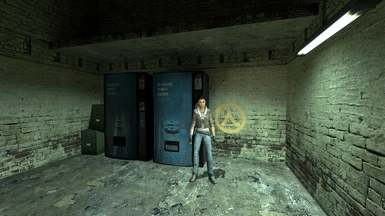
This ReShade preset is aimed to modernize and remaster 'Half Life 2: Update' as much as possible without use of a total overhaul or more extensive mod than ReShade, while retaining the original intended art style. For new and nostalgic players alike to experience Half Life 2 in a way that hits right.
It is a "universal" shader stack designed for authenticity and immersion rather than to show-off cherry-picked screenshots, meaning it enhances all scenes without detrimenting any parts of the game from details lost to overly-dark shadows, or overexposure/oversaturation, HDR intoxication, et cetera. Despite improving contrast, and adding shadows and lighting, the final result has no increased blackclipping than the untouched game, and less white-clipping/oversaturation.
=======================
IIa. QUICK INSTALLATION for experienced ReShade users:
=======================
Install DX9 ReShade for Half Life 2: Update, loading out all shader packages except for the legacy shader package.
Run HL2:U, DISABLE antialiasing, and on the ReShade menu's 'D3D9' tab check "Copy depth buffer before clear operations", and then load the preset. Ensure that MXAO and SSR have depth buffer access by confirming they work via toggling them off and on. If one works the other will, too.
Finally, adjust your brightness (technically gamma) in the game's video tab by adjusting the slider until "barely visible" is (you guessed it) barely visible (yet still legible) WITH ReShade enabled. Depending on your display's calibration, this may be a notch brighter than the unaffected 'barely visible' with ReShade off.
It's recommended to make sure you aren't forcing ambient occlusion in GPU firmware in case it's layering up. Nvidia ambient occlusion in particular looks notoriously bad.
=======================================
IIb. DETAILED, PAINSTAKING INSTALLATION for newcomers worried about fucking it up:
=======================================
Install 'Half Life 2: Update' and then run ReShade. In the ReShade installation, select the HL2:U executable, and then select DX9.
You will then be prompted with a list of what shader packages to loadout. For simplicity's sake, install all shaders of all shader packages (double-clicking each checkbox) EXCEPT for the legacy shaders (the last/bottom option). There is no performance degradation from installing unused shaders.
Start the game. If ReShade installed correctly, you will see the ReShade notification at the top. The first time you open the ReShade menu (HOME key) it will greet you with a short tutorial page. I recommend setting a toggle key in the ReShade 'settings' tab (I use INSERT).
In the game's options menu, under the 'Advanced Video Options' on the 'video' tab, maximize all settings and effects, while making sure to DISABLE anti-aliasing completely - disabling AA allows the most important shaders to function by enabling their access to the depth buffer. The shader preset has its own anti-aliasing and you can force supersampling/upscaling through your GPU firmware if possible (more on AA options in the Tweaking section).
Open the Reshade menu (HOME key) and at the top of the 'home' tab, load the accompanied .ini file. Head to the 'D3D9' tab and check "Copy depth buffer before clear operations". Ensure ReShade has depth buffer access by toggling off and on the MXAO (ambient occlusion) or SSR (ray tracing). If one works the other will, too. After this you won't need to ever open ReShade again unless you wish to tweak settings.
Finally, adjust your brightness (technically gamma) in the game's video tab by adjusting the slider until "barely visible" is (you guessed it) barely visible (yet easily legible) WITH ReShade enabled. Depending on your display's calibration, this may be a notch brighter than the unaffected 'barely visible' with ReShade off.
It's recommended to make sure you aren't forcing ambient occlusion in GPU firmware in case it's layering up. Nvidia ambient occlusion in particular looks notoriously bad.
============
III. HOTKEYS for quick toggling and curiosity:
============
HOME ~~~~~~~~~~~~~~ ReShade menu
PAGE UP ~~~~~~~~~~~ Ambient Occlusion and indirect lighting
PAGE DOWN ~~~~~~~~~ Screen space reflections (ray tracing)
DELETE ~~~~~~~~~~~~ Anti-aliasing
END ~~~~~~~~~~~~~~~ Sharpening
Keypad / ~~~~~~~~~~ Color and contrast adjustments
Keypad * ~~~~~~~~~~ Miscellaneous
Keypad - ~~~~~~~~~~ Depth-effect masking (additional info in the Tweaking section)
Keypad + ~~~~~~~~~~ Bloom
In ReShade's 'settings' tab, you can assign a ReShade toggle key; I use INSERT
You may want to bring up ReShade's 'home' tab every once in a while to see if you've accidentally disabled any shaders off.
======================================================
IV. ARTIFACTS AND LIMITATIONS, ADVANCED VISUAL TWEAKS:
======================================================
- Post-rendered anti-aliasing shaders carry inherent limitations compared to AA directly integreted into the game engine's renderer. This is most noticeable with fine text and objects like chain-link fences and powerlines. To make up for this, no less than (don't laugh) three(!) different types of antialiasing stages are deployed to meet the best trade-off between blur and aliasing artifacts. The larger your resolution, the more adequate post-processing AA can be. Even the best post-render AA has significant aliasing artifacts at resolutions of 1080p and below. Even better would be to force supersampling/upscaling through your GPU firmware, if your videocard allows it. If you do so, you'll likely want to disable the antialiasing shaders (either some individually or all three by quickly toggling the DELETE key) - disabling the AA shaders will likely introduce oversharpening artifacts from the sharpening shaders, which are primarily employed to make up for loss of sharpness from the AA filters. You can disable the sharpening shaders individually to taste (Smart_Sharp, Adaptive_Contrast_Sharpening, and Lumasharpen), or toggle all of them via the END key.
- Since ReShade overlays shaders in post, distant Ambient Occlusion and Ray Tracing are sometimes visible over foreground transparent textures (such as glass) and effects (such as smoke). Most of the of the time depth effect of these transparent effects while other times it looks flawed. However since you are only underwater or looking through smoke a fraction of the time, the trade-off of much added realism during the rest of the game is easily worth it. A special masking companion shader (ReVeil) is deployed to minimize these artifacts.
- Also due to the ray tracing shader being post-rendered, it doesn't know the material of the textures it reflects. You might occasionally see slight reflections where they don't belong, for instance off carpet or grass. Cranking SSR looks great in environments with a lot of polished surfaces (like marble, ice, or steel), but for a universal setting, a middle-matte texture is dialed-in and applied subtly. The result is still far better than the lack of ray tracing.
- If you are running at 4k, I recommend increasing the "Grain Size" parameter of the Film Grain shader (titled PD80_06_Film_Grain) though the difference is subtle.
=======================================
V. REQUIREMENTS AND PERFORMANCE TWEAKS:
=======================================
This preset at 1920x1080 runs at a minimum of 60 FPS on a GTX 960 and i7-7700 @ 3.6GHz, typically hovering between 90 and 120 FPS. This is a mostly-unoptimized ReShade preset in lieu of a no-compromise approach, but you can increase framerate by toggling individual shaders and options on the ReShade menu's 'home' tab.
In order of biggest-performance-boost-versus-least-subjective-visual-impact, try:
- Disabling Bloom, which is only deployed subtly to enhance the game's built-in HDR
- Disabling the depth effect masking shader (ReVeil.fx) by toggling KEYPAD "-" (If disabling manually, disable BOTH!)
- Disabling the Film Grain shader (titled PD80_06_Film_Grain), which is deployed just on the verge of noticeability
- Lowering "Sample Quality" and "Render Size Scale" parameters in Ambient Occlusion (titled MXAO); you may want to slightly increase the total AO amount afterwords.
- Disabling Unsharp (a large-radius balancing shader) and/or Clarity (a medium-radius sharpening/defogging shader)
- Disabling MSAA (MSAA), the most GPU-intensive anti-aliasing shader
You can also pull back settings in the game's video options, but due to the game's age, this shader stack is far more performance-intensive than the entire original game.
====================
VI. TROUBLESHOOTING:
====================
If Reshade doesn't greet you when you start the game, you might have missed a step installing it. You can't miss ReShade's initiation because the top quarter of the screen shows ReShade loading, and compiling the effects will blip and burp your game's early loading screens for a second. Try to install it again, making sure you select DirectX9. If the ReShade installer says it's already installed, disable Steam's overlay - you'll find this option in your Steam Library when you right-click the game in your library, then select Properties > General > Enable Steam Overlay (leave unchecked).
If MXAO and SSR don't work (you notice no difference toggling them on or off in any scene, indoor or outdoor, dark or bright), make absolutely sure that in-game antialiasing is disabled, and that "Copy depth buffer before clear operations" is checked on ReShade's 'D3D9' tab. If you still don't have depth buffer access, disable Steam's overlay. You'll find this option in your Steam Library when you right-click the game in your library, then select Properties > General > Enable Steam Overlay (leave unchecked).
If ambient occlusion looks too heavy-handed, or has shabby/unrealistic curvature, make sure you aren't forcing it in GPU firmware. Nvidia ambient occlusion in particular is notoriously bad-looking and doesn't offer any parameters to tweak it.
If the game is dark, please make sure you adjust the game's brightness (technically gamma) with the ReShade preset enabled. "Barely visible" should be barely visible yet still legible. Properly calibrated, this preset doesn't lose details to increased shadows.
================================
VII. RECOMMENDED COMPANION MODS:
================================
Besides ReShade, the only graphical Half Life 2 mod I consider indispensable is an AI 4X texture pack, available here: https://gamebanana.com/mods/35640 (for posterity, perhaps google if there is a more recent AI-upscaled texture pack, as AI enhancement is getting better all of the time). I strongly, strongly recommend an AI pack rather than a community-developed texture pack, to retain the original Half Life art style. This ReShade preset is specifically made for the factory art, and if you are willing to deviate from the vanilla art, you're better off with a complete HL2 overhaul such as MMOD, which changes every aspect of the game. MMOD looks and plays marvelously; it's just a different game.
Half Life 2's HUD is tiny on higher resolutions. There are a few easy mods floating around so that your crosshair and ammo/health aren't tiny.
While not graphical, I also recommend an edited skill.cfg file to modernize the combat gameplay. This text file (technically .cfg file) adjusts things like hit points and weapon damage. If you don't like how Easy difficulty makes you a bullet sponge, or how Hard difficulty makes enemies bullet sponges, or how Medium makes you both bullet sponges - you can balance the gameplay to your liking by adjusting such parameters by editing this file. Gordon Freeman is practically invincible even on Hard difficulty; buffing headshot multipliers and AR2 damage while making the Combine stronger really changes the gameplay to be much more tactical, forcing you to take cover and think out gunfights rather than letting your HEV suit take all the damage while you run out and Rambo everyone. A shotgun to the face should be lethal going both ways. There are a few skill.cfg files floating around. I might tweak and release mine, but it's easy to find and edit it yourself to suit your playstyle. Don't make it too easy for you.
Otherwise, Half Life 2: Update is itself quite a comprehensive HL2 mod, including many well-needed fixes that Valve still hasn't patched up in HL2 official.
==================================================
VIII. SHADER LIST AND THEIR EXTENSIVE DESCRIPTIONS aka the bestiary:
==================================================
Note: This list is not in order of the shader stack, but rather in order of visual impact.
- AMBIENT OCCLUSION: AO shades along edges and corners to emulate how shadows collect along adjacent surfaces. For instance if you look up into the corners or edges of the room you're in now, you'll likely be able to see how corners are gradiently darker than the shadows along the edges of the room. In this preset two different passes of AO are applied at different scales to reach the right curvature of large and small geometric details. AO inherently requires geometric information from the game's depth buffer.*
- RAY TRACING: RT can be implemented in post-processing, in the form of screen space reflections. SSR uses geometric information from the game's depth buffer to bounce every pixel in the screen space off of any nearby geometry that might aim light rays from that pixel source towards the game's virtual camera/eye, hence 'screen space reflections'.**
- INDIRECT LIGHTING in this case is part of the Ambient Occlusion shader. It's different from ray tracing (confusingly, ray tracing is also technically indirect lighting lol) because it essentially treats bright areas as more omnidirectional whereas Ray Tracing treats every pixel like the path of a laser. A gross oversimplification could be considering it to be a kind of negative AO to bounce color and lumination values off of adjacent surfaces. It's particularly useful for cancelling out AO in brightly lit corners where you wouldn't expect any shadows.
- ANTI-ALIASING covers a variety of methods to avoid the variety of aliasing artifacts, which manifest as forms of pixelated noise, banding/beating patterns, jagged lines, and flickering. It's a particularly harsh type of digital distortion that's universally unwanted. This shader stack features (don't laugh) three(!) different, separate approaches to antialiasing, but you should force supersampling/superscaling/whatever your GPU calls it in its firmware if this approach is available, due to the inherent limitations of post-processing AA algos.†
- SHARPENING - Three different advanced sharpening algorithms are sprinkled throughout the stack. One is dynamic local contrast sharpening, another is a comprehensive sharpening shader that uses both chroma and luma factors, and the finishing sharpener is lumasharpen. All three have different intelligent algorithms that reduce oversharpening artifacts. They are placed after different effects to help the preceding shaders "burn into" the image and collectively restore clarity lost from the antialiasing filters. As such you might want to disable some or all of them if you disable antialiasing, as they will just sharpen aliasing artifacts, making the aliasing even worse.
- LIGHTROOM is a comprehensive set of filters that adjust isolated color and value channels, named after a very copyrighted commercial product. It is used here to balance the saturation of HL2:U compared to HL2 official, especially reducing the amount of oversaturated yellow and orange tones found throughout the game. It also lightens shadows to make up for AO's added shadows. After this reduction of colors, vividity is restored through the vibrance of bloom, indirect lighting, and overall increased contrast.
- REVEIL is the name of a two-part shader that doesn't affect visuals on its own, but effects other depth-based shaders (AO, SSR, IL) placed in between ReVeil_Top and ReVeil_Bottom. It greatly reduces unwanted artifacts of depth-based shaders affecting textures on the far side of fog, particle effects, and semi-transparent textures. It also keeps shadows off of lightsources such as lightbulbs. The analysis and processing required to perform this task is intensive - it sometimes costs more GPU usage than the shaders placed inside it.
- UNSHARP MASKING is an ancient sharpening technique from the analog days (the sharpening dial on analog CRT televisions applied unsharp masking). While unsharp masking is a "dumb" sharpening algorithm that cannot reduce oversharpening artifacts (and thus is archaic for traditional small/local radius sharpening), it has a useful secondary application in a mastering context at very large radius settings. This usage automatically drags extreme bright and dark portions of the screen closer to the middle-value in order to lower contrast in a way that somewhat retains percieved dynamics, wrangling excessive contrast from added light and shadows.
- CLARITY applies intelligent medium-local contrast sharpening to mid-tone colors. It does an uncanny job at reducing fog and grayness, while bringing out medium-frequency marbling textures (such as wood and concrete) and increasing percieved clarity.
- MONOCULAR CUES simulates the diffusion and color scattering of light rays over distance to add depth to the image. It also has a byproduct similar to Clarity and large-radius Unsharp Masking, of emphasizing medium-frequency textures and reducing extremes of light and dark, bringing the aggregate image together. An effect similar to large-radius unsharp masking except it diffuses color instead of reverse-blurring.
- BLOOM selectively applies a glare to the brightest parts of the screen to increase percieved dynamic range and simulate an artifact of brightness found in eyes and cameras. It's very often abused in post-processing to the point of comedy; here it is deployed subtly to enhance HL2's built-in bloom which is itself subtle and somewhat diminished by other shaders in this stack.†
- FILM GRAIN, like bloom, is a joke when applied aggresively, but a bit of a secret sauce when applied subtly. It's not just used to make an output slightly like film, but it has a more important secondary effect of being a type of psychovisual dithering when reduced just above the verge of perceivability, increasing realism.
======================================
IX. FOOTNOTES AND EXTENDED INFORMATION no one fucking asked for:
======================================
* Ambient Occlusion exploded in games of the late 2000's, starting with Crysis, and is sorely missed in 3D games lacking it. Before this, shadows cast from surfaces close to each other had to be designed as part of the level's lightmap, and couldn't be rendered dynamically in realtime onto moving objects. Since the better-looking games rendered shadows as part of the level, it can be difficult to find universal AO settings that don't over-darken lightmap shadows while adequately providing missing shadows. MXAO stands for Matrix Ambient Occlusion which is beyond the scope of this already-bizarrely-extensive readme, but in short MXAO uses a non-random sampling distribution which reduces the need for additional smoothing algorithms required to smooth-out AO's inherent noisiness.
** Post-rendering ray tracing is significantly inferior compared to ray tracing that's directly integrated into the game engine, because in post it is limited to pixels already rendered on the screen, meaning your character in the game could be facing a shiny surface with a massive source of light behind you, but that lightsource's reflections won't be rendered because the source of light is off-screen. Additionally, most post-rendered raytracing algorithms like SSR don't have access to what textures that different surfaces' respective materials are supposed to be, as opposed to integral ray tracing which has access to the texture's bump maps and specular maps. So the texture of a reflection has to be a single value of smoothness/bumpiness applies to all materials regardless of how smooth they are, which is a setback - do you apply a smooth mirror-like reflection that gives grass and carpet textures a mirror-shine? Or do you give mirror-like surfaces like shiny metal and tile a more bumpy/rough reflection? The best you can do is compromise with a middle matte setting that works the best for all scenes and then dial in angular/range parameters to the best of your ability, and the result is still far better than the lack of raytracing at all.
† Teaming-up multiple AA algorithms is quite contentious as many (most?) argue that a single, heavily-applied advanced AA algorithm like is best. But since different AA approaches are better at reducing different AA artifacts, my best results keep coming back to a combination. After extended tweaking and experimentation I've found it's best for more subtle passes of the different types. Additionally in this context these shaders have very different parameters available for adjustment and can tweaked in different ways. FXAA is efficient and good at reducing flicker/shimmering but inadvertantly eats texture details. NFAA is similar to FXAA in that it is efficient and also based off of locally detecting aliased edges, but it's better more for diagonal lines that are supposed to be smooth. SMAA is advanced and can avoid blurring sharp points but it's also the most GPU-intensive, and by the time it's deployed to adequately antialias on its own it's either taking unacceptable resources (in the territory of superscaling which would be better), or unacceptably blurry. TAA is based on hysteresistic (time domain) analysis of aliasing detection and is good for moving water textures and walking by chain-link fences; I didn't deploy it here because it's too expensive and too circumstantially useful. However you can manually enable it.
†† Bloom and other HDR components can be tacky/gaudy as post effects, but have justified usage when post-processing increases contrast. Here HDR is used to bring the excessive dynamics back within the range of the display, while preserving percieved contrast of the mid-tones.