


0 of 0


About this mod
A visual reshade preset made specifically for DayL's Natural Timecycle.
Adds a slightly warmer color palette in general, gets rid of a lot of green/cyan tint and depending on taste will enhance your visual experience.
- Requirements
- Permissions and credits
- Changelogs
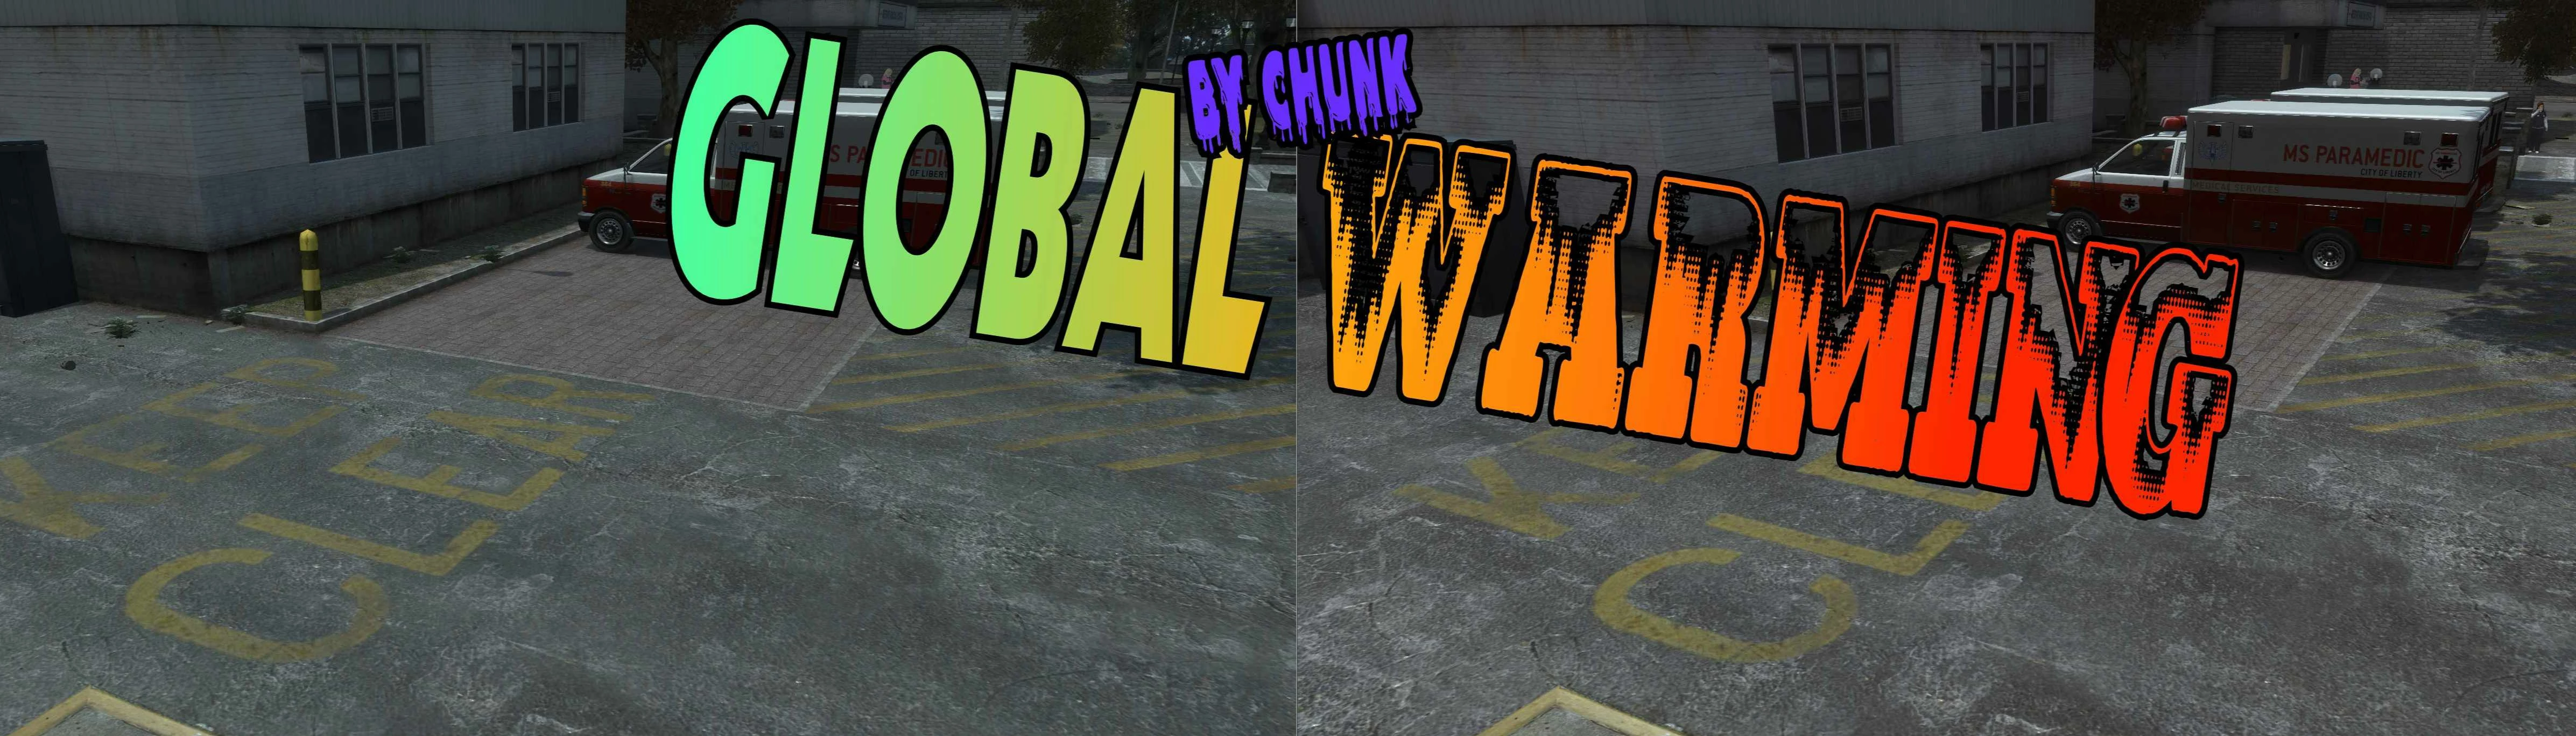
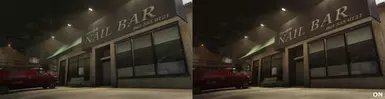
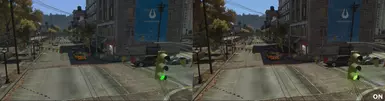
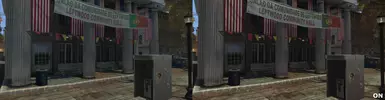
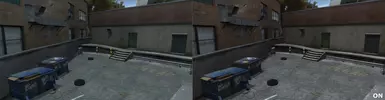
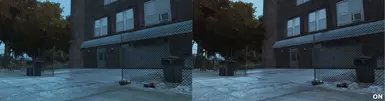
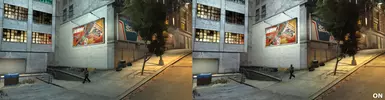
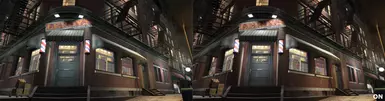
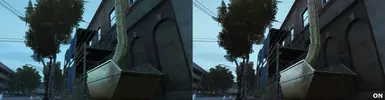
Global Warming - A Natural Timecycle preset by Chunk
!DayL's Natural Timecycle is required!Features:
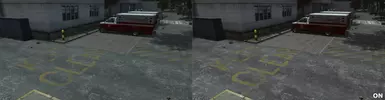
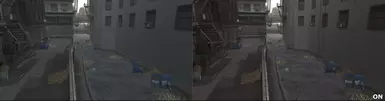
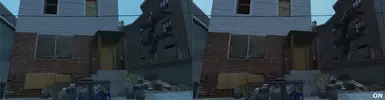
- The highlight of this mod is its meticulously developed custom LUT, thoughtfully designed to enhance every weather condition and time of day. My approach has been to keep the presentation in line with DayL's original vision of Natural Timecycle, while infusing it with a subtle personal touch. This mod introduces a richer, warmer visual palette, effectively reducing the greenish hue present in the original. The color correction has been applied with restraint, ensuring that the overall appearance remains true to a natural, authentic aesthetic.


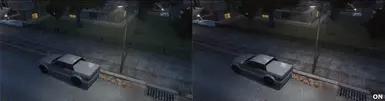
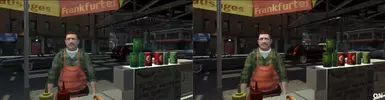
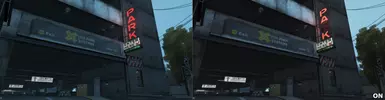
- The mod comes with MXAO because at the moment the game is sorely lacking in this department.I created two presets, MXAO high will give you a few fps extra versus MXAO Ultra.This option can be toggled on and off with a simple button combination. MXAO slightly different between DX9 and DXVK, the DXVK version of MXAO will NOT work in DX9 - download the correct version for your game.
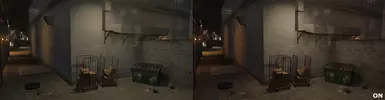
MXAO preset in action:

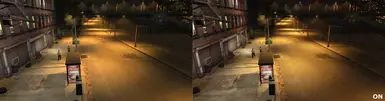
- Also included is a more refined bloom effect in the form of PPFX bloom. I wanted highlights to pop a little more.


Installation:
- Choose ONE of the presets (DXVK presets will not work if you are on DirectX9)
- Put 'GlobalWarming.ini' into tha main folder of GTAIV where the 'GTAIV.exe' is located
- Put the 'reshade-shaders' folder into the main folder as well (there is only 1 file in there and won't overwrite anything)
- Download the newest Reshade (6.2.0 at the time of writing) from https://reshade.me/#download
- Start the Reshade setup and on the first screen you will need to browse
to where GTAIV.exe is located. For example ( 'C:\Games\steamapps\common\Grand Theft Auto IV\GTAIV\GTAIV.EXE' )

- On the next screen you will need to choose either Directx9 or Vulkan (if you are using DXVK choose Vulkan)

- On the following screen it will ask about what effects to install. Simply hit browse on the bottom and select 'GlobalWarming.ini' that you previously put next to 'GTAIV.exe'
- It should automatically select the 2 EFFECTS that are needed: - MartysModsMXAO.fx from iMMERSE by Marty Mcfly
- PPFXBloom.fx from GShade-Shaders by Marot
- Hit next, it will download these shaders and the installation is now finished.

- You can now enter the game - reshade should be working by default
Troubleshooting:
If you experience bad performance you can turn off the effects via a simple shortcut:
Ctrl+ShiFT+M - toggle MXAO
Ctrl+Shift+B - toggle PPFX bloom - Do not recommend turning this off as you might get a picture that is darker than intended.
In case something is not working as intended please check the following:
- Make sure that in your main GTAIV folder there is a folder called 'reshade-shaders' inside there should be a subfolder named 'Textures' and inside you have to see a file called 'chunklut.png'

- Once in game you can bring up the Reshade menu by pressing the 'Home' button by default
Make sure that all effects are loaded properly (by default there are 3 )
- Also make sure that the LUT.fx points to the correct 'chunklut.png' and looks like this:

- If you are still having issues try disabling MXAO first (Ctrl+Shift+M ingame)
- If the issue STILL persists try disabling PPFX Bloom (Ctrl+Shift+B ingame) - not recommended turning this off
Optionals:
1. Depending on your preference I advise to reduce the bloom in visualsettings.dat in GTAIV/common/data/visualsettings.dat or GTAIV/update/common/data/visualsettings.dat (if using FusionFix)
to do this open up the .dat file with notepad or similar (notepad++ advised)
find the lines:
misc.BloomIntensityClamp.HD 10
misc.BloomIntensityClamp.SD 10.00
misc.BloomIntensityClamp.SD.ps3 5.00
and replace them with:
misc.BloomIntensityClamp.HD 5
misc.BloomIntensityClamp.SD 5.00
misc.BloomIntensityClamp.SD.ps3 2.50
2. In case you find headlights a bit too bright you can also reduce their intensity here.
just find this line:
car.headlight.intensity 3.0
and replace with:
car.headlight.intensity 1.55