Documentation
Readme
View as plain text
VIDEOS of this game
Page 1 video will be live at: http://youtu.be/CZqYgAm67VQ
Page 2 video will be live at: http://youtu.be/BkSFQY8scBU
Chapter 1 Your video will be live at: http://youtu.be/3FECYvSEYLg
Chapter 2 Your video will be live at: http://youtu.be/keWgW4mjguM
Chapter 3 video will be live at: http://youtu.be/91vpvTP3iU8
Chapter 4 Your video will be live at: http://youtu.be/64nZ904UZaA
Chapter 5 video will be live at: http://youtu.be/vYt0ndjAOcE
FAILED MISSIONS videos: these videos show missions that came to an abrupt end (still worth a look)
video will be live at: http://youtu.be/-qaAHGNEnXg failsCh2 ten minutes of early failed missions on Cursed Legion Dungeons 2014
video will be live at: http://youtu.be/zuNm8egswZw chapFour fails another ten minutes of failed missions but now the team "should know better" as progress has been made, never mind, see the mistakes another team made
INITIAL SCENE
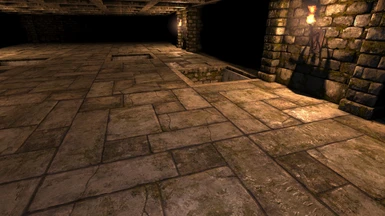
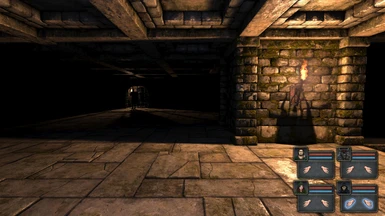
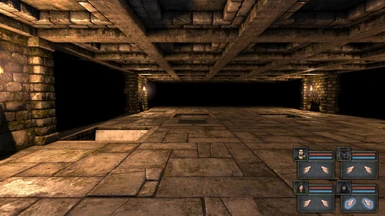
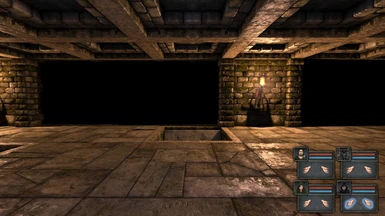
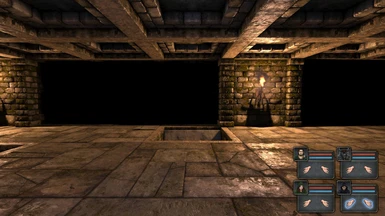
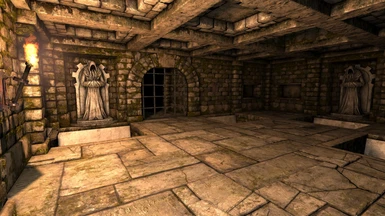
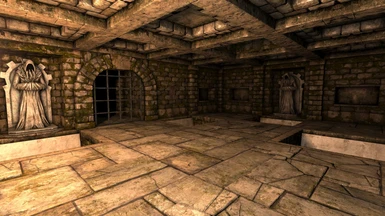
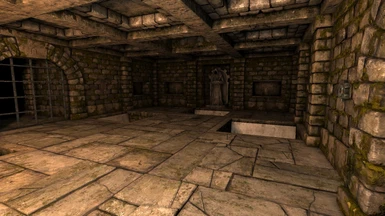
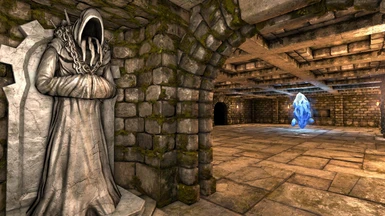
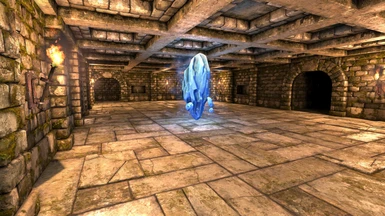
As your intrepid crew arrive in the dungeon they see a strange hall with 4 sentries posted - as your team move around the hall, they see 4 PITS and 4 alcoves behind !
This is the puzzle that slowly presents itself to your team, there are four pits - should the team descend? What is the meaning of the sentries? What is their function?
(ORDER OF PITS 1. ordinary KNIFE 2. BREAD 3. ROCK 4. throwing knife)
STEP ONE, do not remove any torches, these are just for this room only!
STEP TWO find the ordinary Knife and take it, (don't take any other items, they identify the different pits for you) jump down the nearest pit to where the ordinary knife was
STEP THREE smash down the barrels to find the LOCK
STEP FOUR use the KNIFE to force the LOCK
STEP FIVE DO NOT pull the levers (unless you want to bite off more than you can chew!)
STEP SIX for an easy start to the game ... leave the levers alone until later!
STEP SEVEN there are 3 crowerns ahead to defeat but don't worry, all you need to do is zip around them and get past them
NOTE as you zip around them you pass the Crowerns Garrison which is locked by 2 gates at either end, as you look through the gates you can just see a squad of Super Crowerns having a cup of tea within! DON'T WORRY THEY WON'T COME OUT, It'S THEIR TEA TIME
STEP EIGHT close the gates by using the wall buttons which also fire lightning bolts at the gates
STEP NINE use the gate defences to destroy the 3 crowerns then pick up what the Crowerns were carrying 1. brass key 2. knife 3. water flask
TIP, never never close the gates and then go up the stairs exiting the level without reopening the gates. always depart the level with the GATES OPEN because at a later stage in the game you could come back to the first room e.g. via a PIT - if so those gates must be open for you!
STEP TEN your knife will force the next lock as well !
STEP ELEVEN use your knife to force the next lock but going up to the next level - you need some JOKERS in your pack up there, passages are narrow, if you're ambushed it's GAME OVER
STEP TWELVE once the gate is open to the upstairs THEN nip upstairs turn left and left again - get your PIT GLOVES, these help front soldiers FIGHT
STEP 13 ok now turn around and go back to the room where you bashed those barrels around, BOMB STASHES are now open!!
STEP 14 go back up the stairs after finding the bomb stashes and turn right, you find two gates, use the Brass key
STEP 15 you go down the stairs and you're back where you started! however the Crowerns Garrison has now OPENED!! accessing the Garrison hall could yield LOOT! explore it
STEP 16 a second Brass Key is held inside the Crowern Garrison, you must retrieve it, once you do .... look for a secret button, valuable weapons to loot!
STEP 17 go back upstairs and use the second Brass Key to enter a battle zone, however there is a puzzle, each time you try and enter the zone there are many enemies to fight but metal grids descend to stop you actually getting in
STEP 18 SOLUTION go back to the nearest FLAME TORCH (just around the corner) take the Torch but place it back - you hear the noise of a metal grid descending! This has altered the zone defences, now you can enter
STEP 19 Enter the Battle Zone and pick up the Ornate Key. There are 4 pits to choose from, these are missions that start off fairly easy but get more difficult
TIP consider whether to do these missions now OR later, establishing a route to the Blue Stones, which needs both Ornate Key + Prison Key may be a priority but your choice (they are doable without Blue Stones.... just don't lose anyone!)
TIP if you can do it, do these missions now before moving onto the other 3 pits in the main hall
STEP 20 begin with easiest which is at the gate OUT where the soldier is standing and work your way back, each mission gets a little harder and the harder they are the more is to be gained of course!
STEP 21 TIP when you are on the third pit mission you go in a passageway next to a FIREY uGuardian, this leads to a new battle zone, in the first room is a Mortar & Pestle for your Sorcerer
TIP to get the Mortar & Pestle go into the next room and see a strange wall panel, now return to the first room, a secret stash room has opened !
STEP 22 if you have lost a team member go to the LAUNCH ROOM and choose the pit nearest to the BREAD ALCOVE - you must have the Ornate Key for this, remember we found the Ornate Key back in the second smaller pits room !
OPTIONAL MISSION now from original Launch Room, 2 new gates have opened, from one you find 2 Green Slimes loafing about around 3 altars, IF they let you pass (they probably won't, so don't even try) you gain access to the Ugguradians Barracks, here you find the Crossbow and some other worthy loot e.g. Gold! but don't spend too long in the Uguardians barracks, a) you could get killed by the Ugguradians b) those green slimes are still there and you have to go back the way you came (unless you have a Gold Key)
OPTIONAL MISSION : TIP if you do get the Crossbow then go get the Crossbow Ammo!! Find the 1st pit you dropped down, the one near to where you picked the ordinary knife, go there but go there WITH the "Throwing Knife" found in another alcove nearby. Don't go down the pit but go to the nearest DOOR at the side of the room, ascend the stairs and find the nearest LOCK, force it with the Throwing Knife, now find the Crossbow Ammo
TIP choose the pit nearest to the BREAD ALCOVE, descend. as you soon as you insert the ORNATE KEY look for a SECRET BUTTON but dispense with enemies first before pressing it!
TIP this route leads to the BLUE STONES however you need a Prison Key the first time around to open up the Blue Stones for business
TIP on returning with the GOLD KEY your route is blocked by 2 gratings, re-explore the Crowerns Barracks but see where the Green Slimes have emerged from, Shaman Staff in there! (DANGER) (Don't worry if you miss it this time around, you get another chance later!)
STEP 23 return to the LAUNCH ROOM, choose the pit that is nearest to the ROCK ALCOVE, you must have the GOLD KEY for this
STEP 24 on this level is a Prison key, find it and return to the Blue Stones and open up the room for business! or ..... if you don't need Blue Stones just yet ...
NOTE if you have not done the missions in the smaller hall with 4 pits by now - you should do them now or you will not be able to find the GEAR KEY
STEP 25 where you found the Prison Key ... now turn left and re-explore old area, the GEAR KEY can now be found TIP there is a pit near where the Gear Key is found, (next secret corridor down) jump down it IF you have a full team
STEP 26 return to LAUNCH ROOM take the pit nearest to the THROWING KNIFE alcove, you need a GEAR KEY FOR THIS !!
STEP 27 explore the Cubes Level, IF YOU GET STUCK return to the room where you inserted the Gear Key and jump down any open pit
STEP 28 note the statues on Cubes Temple, find the Statues holding an AXE, follow this trail of Axe Statues to the IRON KEY LOCKS
STEP 29 find the Statues holding a SPEAR, follow this trail of Spear Statues to the original room where you inserted the Gear Key and thence Blue Stones
TIP find the Ornate Door with wall text that says "Metal Beings" come back to this point in the future when you have the Ornate Key, this will shortcut through to 'Doom Dungeon approach' for you
STEP 30 you need a minimum of three IRON KEYS to progress passed the Cubes, once you have 3 Iron Keys follow the trail of Axe Statues to the IRON KEY LOCKS
STEP 31 unlock the 3 Iron Locks and proceed with Caution, explore all passsageways - while in Wild Dungeon LOOK OUT for the ORNATE LOCK, when you see it (bottom right of dungeon) remember
TIP if you come to a locked Metal Door .... backtrack and look for a secret button!
STEP 32 watch out for the Prison Key in an alcove while under attack by Archers - take it and leave - do not be tempted by Leather Boots or Leather armour LEAVE in a hurry!
STEP 33 return to Teleporter Room 1 on Level 7 : Abandoned Prison and find the Ornate Key!! You can exit the Cubes Area via The Blue Stones, just descend to Cube Temple and follow the Spear Statues to the Blue Stones, this now allows you exit from Cubes
STEP 34 enter teleporter Room 1 and using the Prison Key you found near the Archers Barracks unlock the remaining Teleporters, use the one near the Brick Archway - find the Ornate Key
TIP there is a shortcut back into the Teleporter Room 1 from the Launch Area. Return to the 2nd room with 4 pits and use the Prison Key there (you will get it back!) this routes you to the Teleporter Room 1
STEP 35 you now need to find the DOZEN holy Brass Keys needed to descend the final route down to the LEVEL 13 prison, where you lay your collected Gold out in the central platform, you then exit the game a proud and accomplished Dungeon Team!
STEP 36 to get the first Brass key choose a mission from the Teleporter Room, there are 3 teleporters, all have Brass keys to be found
EXTRA FOOD MISSION : BONUS AREA : At any point of game take the torch on the other side of the Throwing Knife, PUT IT BACK AGAIN, this opens a staircase to a simple "FOOD SECTION" but is entirely optional, you can do this right from the start if you wish, you accrue a large amount of food straight off. TIP do not use a torch while exploring this simple lay out, there is TEMPLE LIGHTING provided. NOTE no loot or weapons to be found, just food
STEP 37 Use the ornate key in the Doom Dungeon, there is a shortcut to it in Cubes Temple, door with text clues either side! This leads to GOROMORG LAIR, CAUTION!!
STEP 38 to exit remove the junk from the first altar then PUT IT BACK, then scoop all other loot including the Gear Key from the altar tops and leave
STEP 39 return to the Cubes Prison and insert the Gear Key, collect the Golden Dragon from near to the Teleporter Room, now return to the corridor you left
STEP 40 you are back in the Uggardians Base VERY DANGEROUS, see if you can grab the Gold Deity Figure Statue, also the CROSSBOW and make it out, you'll probably lose a few people doing it!
STEP 41 return to the Teleporter Room and take the next mission, find the rest of the Brass keys, you need a dozen to exit the routine levels
STEP 42 follow the route from the Blue Stones after you TELEPORTED THERE that comes up in Level 7 : Abandoned Prison, now return to the pit down mentioned in Step 25, Grab DISMANTLER SWORD and 2 more keys!!
where are weapons?
Level Name Weapon Where?
6 CursedT machete Crowerns Garrison Stash Room 2
6 CursedT WW Wand Crowerns Garrison Stash Room 2
6 CursedT hand axe side corridor by 2 levers
6 CursedT L Sword side corridor A by Crow Garrison
6 CursedT S Bow side corridor B by Crow Garrison
7 AbandPr W Hmmer Mission 3 from 4 pits II
7 AbandPr L Rod Rock Pit Mission from 4 pits I
6 CursedT A Dagger in Ugguradians Base
7 AbandPr Flail after finding the Gear Key, explore
8 P Dung L Blade descend pit from where Flail found
11 W Dung Cutlass after using 3 Iron Keys
11 W Dung A Axe inside Archers Barracks (Temple)
6 CursedT S Staff secret room in Crow Barracks
12 DoomDun NexSword in Goromorg Base after using the...
.......Ornate Key, grab stuff from altars (DANGER!)
6 CursedT Crossbow in Ugguradians Base from Gear Key
7 AbandPr Dismantler check pit down mentioned in Step 25
where are keys?
Level Name Key Where?
6 CursedT Brass Crowern (1 of 3)
6 CursedT Brass secret room in Crow Barracks
5 LaunchD ornate second "Four Pits" arena
7 AbandPr Gold Bread Pit Mission from 4 pits I
7 AbandPr Prison Rock Pit Mission from 4 pits I
7 AbandPr Gear Rock Pit Mission from 4 pits I
9 Cubes P Iron in Cubes Bay
11 W Dung Prison just passed Archers Barracks
4 Beast T Round up from Launch Area
7 AbandPR Brass1 Mission: Teleport to Blue Stones
2 OldDung Brass2 Wardens in Amphitheatre
2 OldDung Brass3 Wardens in Amphitheatre
2 OldDung Brass4 Wardens in Amphitheatre
1 TopTemp Brass5 Central Arena
1 TopTemp Brass6 inside outer cages 1 - 4
1 TopTemp Brass7 inside outer cages 1 - 4
1 TopTemp Brass8 inside outer cages 1 - 4
1 TopTemp Brass9 inside outer cages 1 - 4
6 CursedT Brass10 with Crossbow in alcove
12 DoomDun Brass11 with Nex Sword on Altar
12 DoomDun Brass12 in 3 hordes mission (secret)
12 DoomDun Gear in Goromorg Base after using the...
.......Ornate Key, grab stuff from altars (DANGER!)
DESCENDING THE DOZEN BRASS ROUTE: TIP : when you get to the room with the glass panels all around SAVE IT HERE: tricky wyverns ahead: TIP what to do, at the bottom of the stairs HOLD: fire exploratory arrows and see what responds
where is Gold Loot?
Level Name Gold Where?
7 AbandPr Apparatus after finding the Gear Key, explore
9 Cubes P GoroM press secret button in Cubes Bay
12 DoomDun Crown in Goromorg Base after using the...
.......Ornate Key, grab stuff from altars (DANGER!)
12 DoomDun Chalice in Goromorg Base after using the...
.......Ornate Key, grab stuff from altars (DANGER!)
7 AbandPr Dragon after using Gear Key on Cubes Pris
6 CursedT Statue in Ugguradians Base from Gear Key
1 TopTemp Chalice in side cage
1 TopTemp Goromorg in side cage
8 P Dung GlobeT after getting Dismantler Sword
ROUTES
get to Teleporter Room from "Junior Missions Hall" = jump down pit no 2 ! then jump down next pit!!
