


0 of 0


Documentation
Readme
View as plain text
Dungeon attempts to recreate (at least heavily influenced by) the maze from
Wizardry III (The Legacy of Llylgamyn) in the LoG world.
Place .dat file in:
C:\Users\[username]\Documents\Almost Human\Legend of Grimrock\Dungeons
(windows 7) or wherever your documents are.
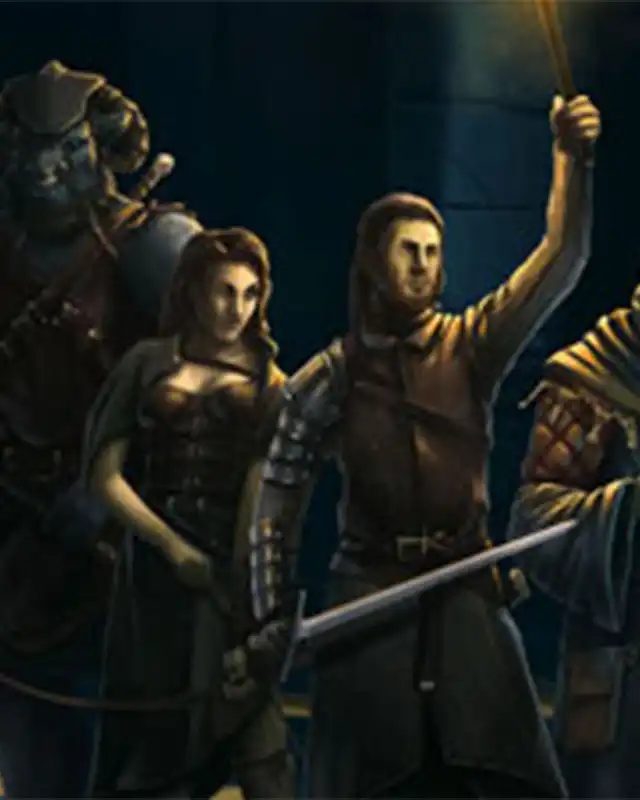
Dungeon is played best with a party of 4 new champions. Requires at least
LoG v1.3.6 to play.
All 6 levels of the maze have been recreated. The levels are similar
to the Apple II version, matching as best as possible. The levels go up,
so level 7 is Llylgamyn, with each level up from the bottom. Level 6
is level 1 (castle ruins), with level 5 = level 2, level 4 = level 3, etc.
Matched or similar listed below for each level:
Level 1 (6) - similar, Other than the stairs down to Llylgamyn, no other stairs
used, setPosition used after for all level moves, unrolled
level, remove a bunch of small rooms/doors, layout changed
slightly (less doors, small rooms), water layout changed
for performance (water is a light source)
Level 2 (5) - similar, removed a lot of doors/small rooms, changed dark
zones a bit
Level 3 (4) - similar, changed significantly the maze area, removed most
wrap-around's, left out some teleporters, didn't cover the
whole middle area with the 'moving walls' - would've
meant ~250 hidden pressure plates, still have ~130
Level 4 (3) - similar, changed around and removed several small rooms, combine
some to bigger rooms, added spinners, changed around a lot
the path to the stairs to level 6
Level 5 (2) - similar, changed around several small rooms, unrolled bits of the
level, decreased the number of 'dark squares' (light
sources) for performance
Level 6 (1) - very close, unrolled the wrap-around's, removed some small rooms
and changed slightly some of the maze to fit LoG assets,
reduced the number of dark squares for performance
Added a 'swap' item routine to Boltac's trading post to allow people to
trade (sell) items for other items. The items received are random and
not selectable, though they should all be useful and most likely will be
better than the item traded. The trade will not let you trade the items
needed to win the game away.
Have renamed (cloned) monsters for about 41 of the monsters available
in Wiz 3 (of 82) using either the LoG monsters or fan provided re-textures.
There's around 41 monsters that there weren't good models for, that, once
they are available, may be added. These include animals such as snakes,
tigers, horses and gorillas; others such as Venus man-trap, ants, angels,
demons, goblins, leprechauns, pixies/faeries and centaurs; in addition to
more humans for fighters, priests, mages, thieves, samurai and ninjas of
various types and configurations.
I defined a bunch of items from the original. Includes a few of
the swords, maces and axes, along with some of the other special items.
Some of the weapons are cursed and/or unidentified. Some items will just
be stock LoG items though.
The magic system is the stock LoG magic spells. May do an update and
include in the spells from Wiz 3 one day. Though some (many?) of the 21
mage spells and 29 priest spells do not make any sense in the LoG world.
Also, assume most people know the stock spells available. Did not include
any spell scrolls in the maze.
Monsters are a little 'soft', though depending on the number generated, might
give a little challenge. The goal is to make a mod more geared towards
exploration and light puzzles rather than combat.
Hints/Warnings:
-------------------------------------------------------------------------------
You should visit the training grounds before heading to the maze.
Don't forget to take advantage of the Boltac's trade.
You will need the mortar this game. You can't get an item needed to win the
game unless you have one.
Once you have the game quest object, return to Llylgamyn. Visit the 'edge of
town' sign...
There is alignment in this game. It's managed simply, but the party alignment
determines which levels you can get to. see the alignment note towards the
bottom of the 'readme' for more information. You also need to have certain
things on you for the final level. Note, the final level is also 'one way'.
Once you're in, you'll need to find the exit to leave...
If using a new party, you should gain a few experience levels on each maze
level prior to going to the next level. This may require going back down to the
previous level and up again to regenerate monsters on the level you're at.
Take advantage of the moat monsters on level 1.
There is a trick that can be used for the moat monsters. They are blocked in
their little area. If you lure them up to the corner, wait till they turn away,
then you can step into the corner and hit them several times before they turn
around. At that point, just step out of the corner and wait till they turn
again. Repeat and rinse...
Monsters are only generated on each level when first entering the level. The
monster generation uses a 'room' approach, so if any monsters from a previous
generation are already in a 'room', no new monsters are generated for that
room. But any rooms without monsters could get monsters generated in the room.
In addition, entering a new level closes the doors on the previous level. This
is so monsters are generated in their rooms/areas and stay.
So, if you leave a level, monsters may be generated in previously empty
rooms/areas and doors may be closed. You should explore the entire level if
you intend to prior to leaving the level.
Due to the way the identify process works, you should not replace a weapon
already in a PCs hands (or pack slot) with another. If the weapon is unidentified,
and it is identified when placed, the previously held/pack weapon item is lost.
Lifting the item and placing it in an empty slot (hands or pack) will attempt to
identify it. Just be careful it's not cursed if placed in one of the hands...
In 'dark' areas, there may be doors. Click on the side where pull-chains
normally are to check to see if a door is there or not. Doors do show up in the
map, so if unsure, just look at the map to see if a door is someplace or not. In
addition, there are a few illusion walls, some with nice things hidden behind
them. Where they are at will be obvious.
Axes became part of the series with LoL. Fighters can be geared with axes, maces,
or swords and tomes are available for any of those.
Things Not Quite Right (bugs or otherwise!):
-------------------------------------------------------------------------------
Had to re-save the dif texture as an uncompressed dds for the ice_guardian
monster. Not sure why, but was getting D3D_errors with the original compressed
version. The living_armor's dif was the same way, it to is uncompressed.
Occasionally, some of the re-textured monsters (mainly dragons) poke through
doors, including the 'hidden door' walls. They can't hit you or you hit them,
but looks funny.
Occasionally, some of the monsters seem to be able to open doors. Not sure
how or why, but I've had it happen a time or two. This is not scripted
behavior as far as I can tell, at least I didn't script it (or include the
LoGFramework module). This effect seems to mainly happen with portcullis
doors, though I've had a monster continue to chase me down a hall even though
I'd shut a wooden door between it and my party. May be the Goromorg brain in
some of the monsters that use it.
Columns on the 'hidden door' walls flicker, at least on my computer. Other
rendering artifacts with wall drawing, lights shining through walls, etc. may
also be experienced (though I like the light shining through the walls effect).
Per discussion on Grimrock forums, added in the allEnt.ties() function fix. The
built in 'allEntities()' was used a couple of times and it would break the game
if users used map markers that stopped the allEntities call from completing.
Fix thanks to Marble Mouth and Komag. May be removed once the allEntities
function is fixed, though may keep it for those still using v1.3.6 or v1.3.7.
Alignment Note:
-------------------------------------------------------------------------------
The alignment needed for each level (or items) is like the original game. There
is a big difference though, instead of good/evil parties allowed on level 2/3,
parties that lean good/evil are allowed. The difference is that all neutral or
equal good/evil members lean good or evil. Should make it easier to explore the
first 3 levels. Note, however, having more good/evil than evil/good leans you
that way and not the other, which will prevent you from getting to the level.
Levels 4 and 5 require that the party be good or evil (more good/evil than
evil/good, neutral don't count). In addition, alignment is not checked when
returning to town to separate the evil from good members.
Level Party PC alignment needed
====== =============================
- town n/a, alignment not checked
- castle n/a, alignment not checked
- 2 lean good (more good, equal good/evil or all neutral lean good)
- 3 lean evil (more evil, equal good/evil or all neutral lean evil)
- 4 good (more good alignment than evil needed)
- 5 evil (more evil alignment than good needed)
- 6 n/a, need special items to get to level 6 from the appropriate levels
Unlike the original game, this mod does not check alignment once you make onto
a level. So if party alignment shifts, you may not be allowed back on the level
once you leave...
The original had random fights be friendly while in the dungeon. This allowed
players to turn good/evil characters evil/good depending on if they attacked
friendly monsters or not. This mod, with some monsters, will just randomly
change characters alignment. In order to give some control to the player,
buttons were added to the temple to allow a player to change alignments
directly. The 'add to' or 'remove from' doesn't really add or remove things
from the character, but just pokes the character alignment either towards
good or evil, depending if you are giving or taking.
Asset Credits:
-------------------------------------------------------------------------------
[objects]
antimagic zone - Grimwold
dark square - Diarmuid
wall plaques - John Wordsworth
grim_bed, grim_rtable, grim_sqtable - germanny
flooded dungeon assets, water fountains - Skuggasveinn
dungeon catacomb alcoves - Neikun, Batty, Crisman and Vice Dellos
fog emitter - Wolfrug
dust emitter - J. Trudel
Desk - buzzj
[items]
grim_mstar, grim_mace_std, gor_coin_gold, grim_firestaff - germanny
[monsters]
dragons - FrEEsiD
mummy_grunt, leech_worm - wallasaurus
cultist - Kuningas/Tursas
slugomorg, skeleton_w_sword, skeleton_w_axe, ghoul - Leki
human bowman - Leki + odinballs
Skeleton Ghost, Flydragon - Pandafox (w/Neikun help - FD)
crowern_diseased, wyvern_diseased, gold_skeletons - Neikun
entrail - odinsballs
uggardians - daniv
ice_guardian, living_armor - hyteria
[misc]
scripting framework - JKos
equipStopper - Diarmuid
pieces of Tome Library (and inspirations of tomes) - Ixnatifual
allEnt.ties - Marble Mouth / Komag
Other scripting inspirations via Grimrock.net forums.
Updates:
-------------------------------------------------------------------------------
2013-06 v1.1 - Resampled a few of the sound files (.wav) to be mono at 44100
in a 16-bit PCM format. Included the metal.wav and sx_fountain
drain wav which were sampled lower and above 44100.
Changed hidden teleport to plaque/button on level 3.
High Level Walk-through: [spoilers]
-------------------------------------------------------------------------------
Get equipped (training grounds).
Trade unused equipment at Boltac's.
Try to get a trollkin amulet, when used heals party.
Explorer first three levels to get more (and better) equipment.
May need to visit the temple to change some characters alignment.
Will have to visit level 4 in order to explorer the rest of level 2.
You will want to, the best mace in the game lies in this area of level 2.
Visit 4th and 5th levels to get good and evil crystals.
Combine using mortar to get neutral crystal.
A ship in the bottle allows party to use short-cuts on level 1 to get to the
4th or 5th levels, depending on alignment.
Go to the 6th level and trade neutral crystal for Orb of Earithin.
To get to the 6th level, you need to be carrying the crystal from the level
you're on (4=evil/5=good), the neutral crystal or one of the
orbs (earithin/mhuuzfes).
Return to town and get to the edge of town sign.
Items that can be used/effect (not obvious):
Trollkin Amulet -> heals party
Amulet of Air -> shoots frost bolt
Alignment Detector -> displays each party members alignment (hudPrint)