


0 of 0


About this mod
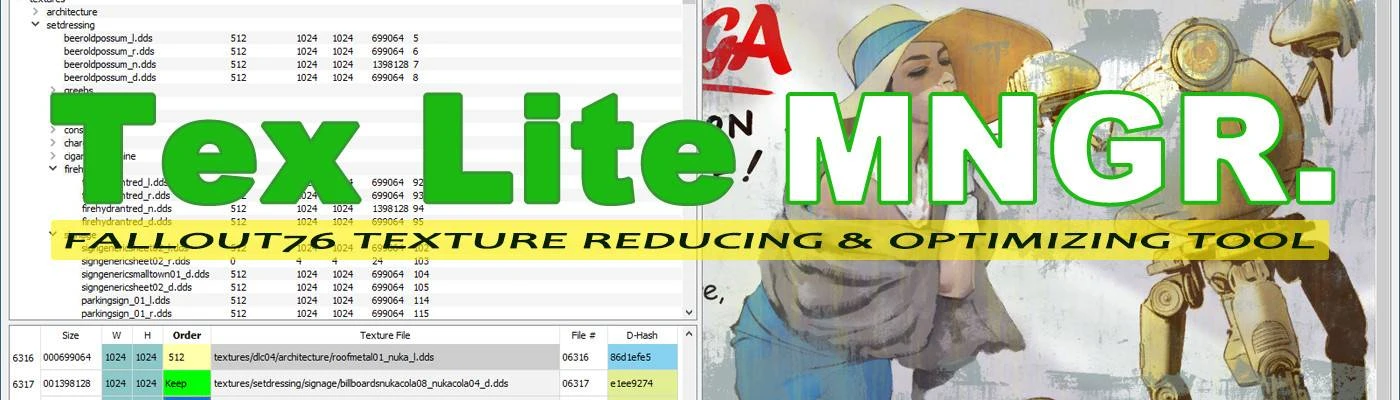
TLM is a Fallout76's textures reducing & optimizing tool.
With this TLM, you can easily and quickly generate textures that fit your PC.
Performance improvement and graphics quality balance, can be done as you wish.
- Permissions and credits
- Changelogs
- Donations
Tex Lite MNGR. - Fallout76 Texture Reducing & Optimizing Tool
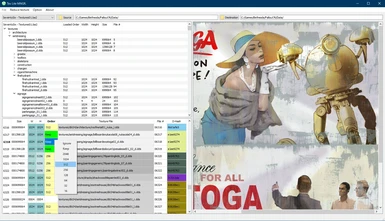
Tex Lite MNGR.(TLM) improves game performance by reducing & optimizing the texture data of Fallout76.
You will get improved video frame rate and reduced game load time.
Users' PC specs vary.
You can create your own texture data that can be played comfortably on your PC.
It's easy and fast.
If you are a new user, please refer to the Basic Tutorial below to learn how to use it. It's easy!
Main features of Tex Lite MNGR.
Notes.
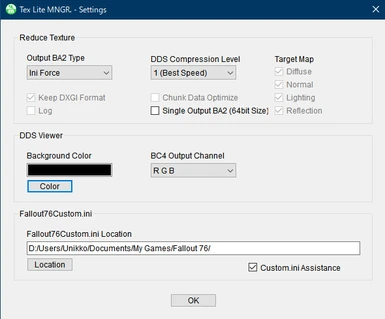
1. Settings:
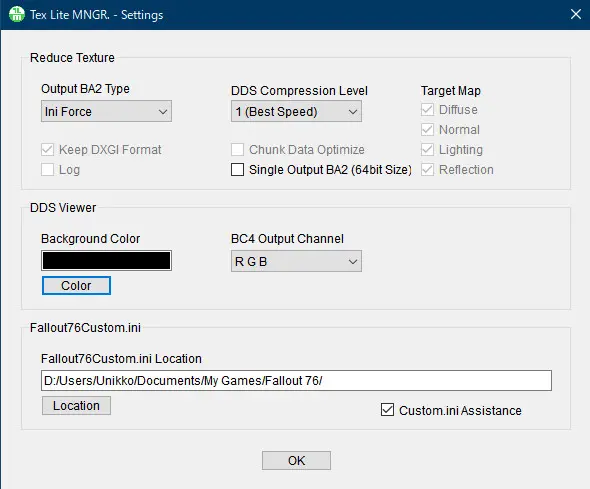
[Section: Reduce Texture]
Output BA2 Type:
TLM outputs BA2 types can be fixed, "Ini Force BA2" or "Replace BA2".
Select "Selectable" if you want to switch for each Reduce operation.
*Replace type is for advanced users.(If you don't understand it well enough. original texture BA2 file may be lost!)
DDS Compression Level:
Select the compression level for each texture. Default, 1(Best Speed) to 9(Best Compression)
Unless you are a speed junky or high compression junky, default is recommended. I use 1 though.
Target Map:
TLM reduces the four texture MAPs(Diffuse/Normal/Lighting/Reflection) in the same way.
It is possible to select the target texture MAP, but I don't think the need to do so, so I have disabled it for now.
Keep DXGI Format:
For now, DXGI Format retains its original format.
Chunk Data Optimize:
Some of the compressed data of the original texture is larger than the uncompressed data, so optimize it.
This is a bit of a critical change and is currently being tested.
(Enabled in version 1.0.3)
(Disabled in version 1.0.4)
Single Output BA2 (64bit Size): (Added Version 1.0.7)
Does not split the merged BA2 file if the size exceeds the 32bit range.
FAT32 users should never use this option.
Log:
Outputs log file. (disabled for now)
[Section: DDS Viewer]
Background Color:
Sets the background color of the texture viewer.
BC4 Output Channel:
BC4 format texture only has a red channel, but change the channel to be displayed in the viewer.
[Section: Fallout76Custom.ini]
Fallout76Custom.ini Location:
Enter the location of the Fallout76Custom.ini file
Custom.ini Assistance:
Use a custom ini assistant. If you don't need the assistant, remove it.
2. Edit Order Data:
Order Value
'Ignore' is Blank. No Reduce processing.
When order data is loaded on top of each other, it does not overwrite the previous order data.
'Keep' is keeps original texture size. as with 'Ignore', no Reduce processing.
difference with 'Ignore' is that it is not blank, so if it is loaded on top of the previous order data, it will overwrite the previous order data.
Input or Edit Order Value
With a texture selected, press the right mouse button to open the context menu. Select the order value from the context menu.
How to select multiple textures
Drag while holding down the left mouse button, or select while holding down the Ctrl or Shift key.
Cell Sorting
In the lower table view, click the header cell.
upper treeview is not sortable.
3. Save/Load Order Data:
TLM's order data is designed to be flexible.If FO76 is updated and the number of textures in texture BA2 changes, no problem. (Probably)
4. Basic Tutorial (For new users):
Try reducing the texture size, which has a significant impact on performance.
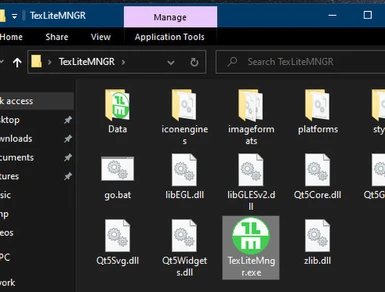
Run TexLiteMNGR.exe.
Make sure you have enough free space on your hard disk or SSD.

For the first time startup, set the location of the source BA2 file.
I recommend the Data directory of Fallout76.
First, let's reduce it simply.
It's simple, but it improves performance.
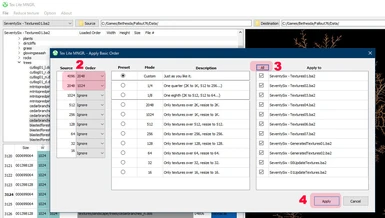
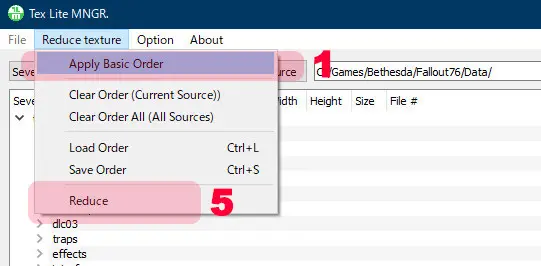
Step 1
Select "Apply Basic Order" from the "Reducetexture" menu.
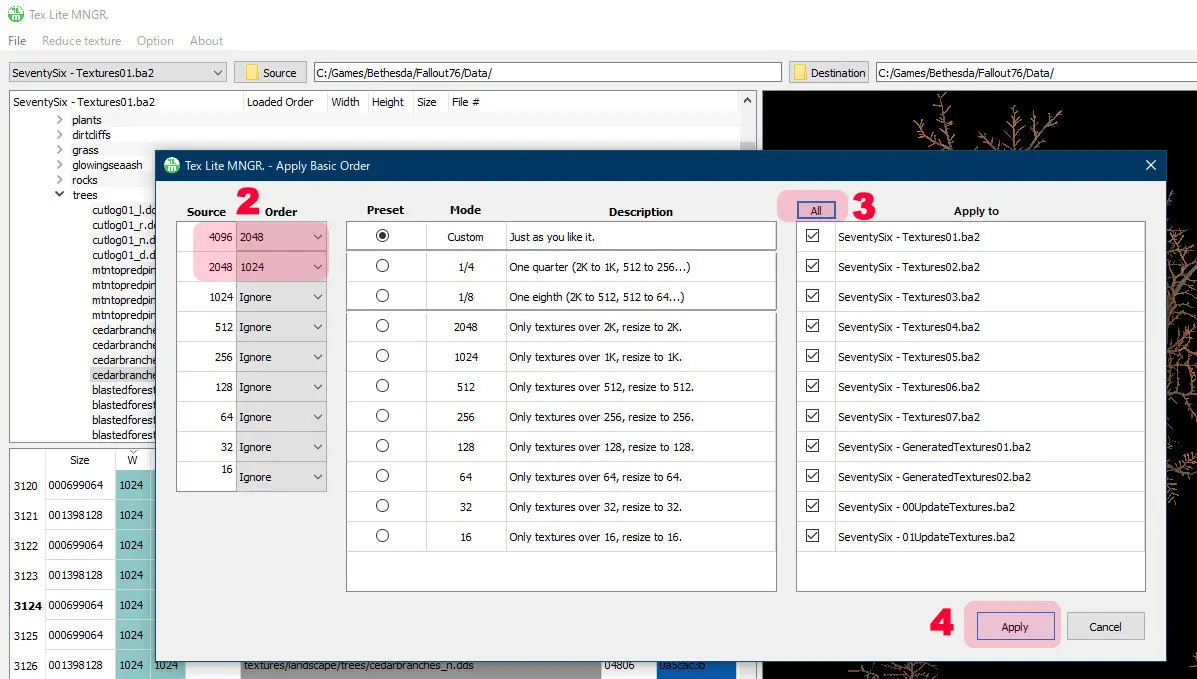
Step2
Determine the order size for the source texture size.
For now, reduce a texture size 4096 to 2048, and, 2048 to 1024.
Likewise, you can specify other texture sizes as you like.
There are also 10 different presets that can be easily specified.
Step3
Select the texture BA2 to which you want to apply the created order.
Press the All button, apply to all textures BA2.
Step4
Press the Apply button to finalize your order.
Step 5
Select "Reduce" from the "Reduce Basic Order" menu.
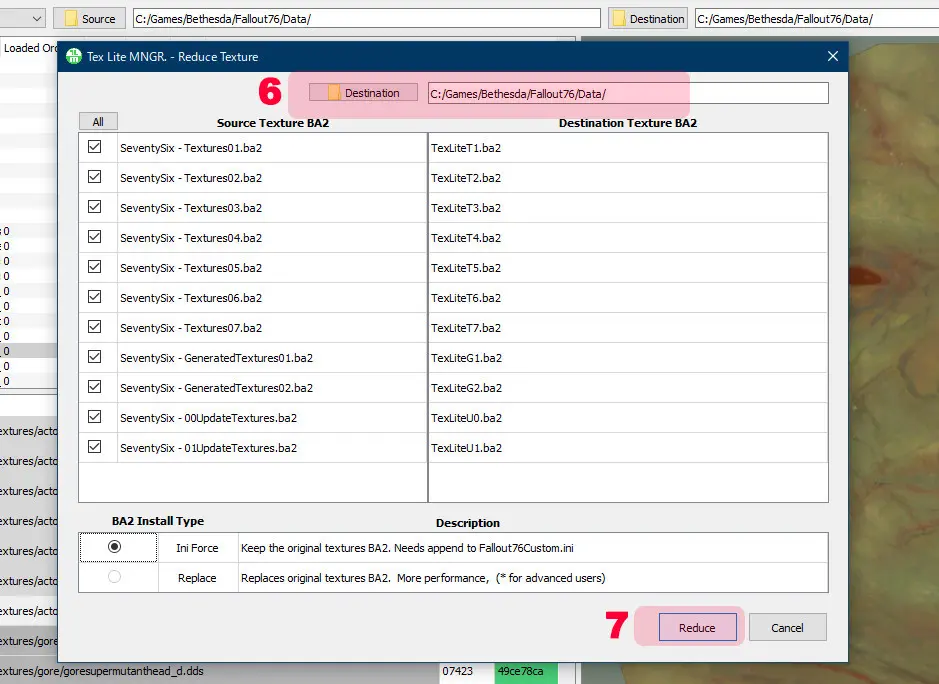
Step 6
Select the output destination for the reduced texture data.
It is useful to select the Fallout76 data directory.
If you want to output BA2 of the replacement type, Do not select the Fallout76 data directory.
Step 7
Press the Reduce button to start reducing process.
Reducing process can be stopped midway.
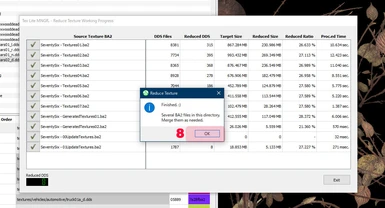
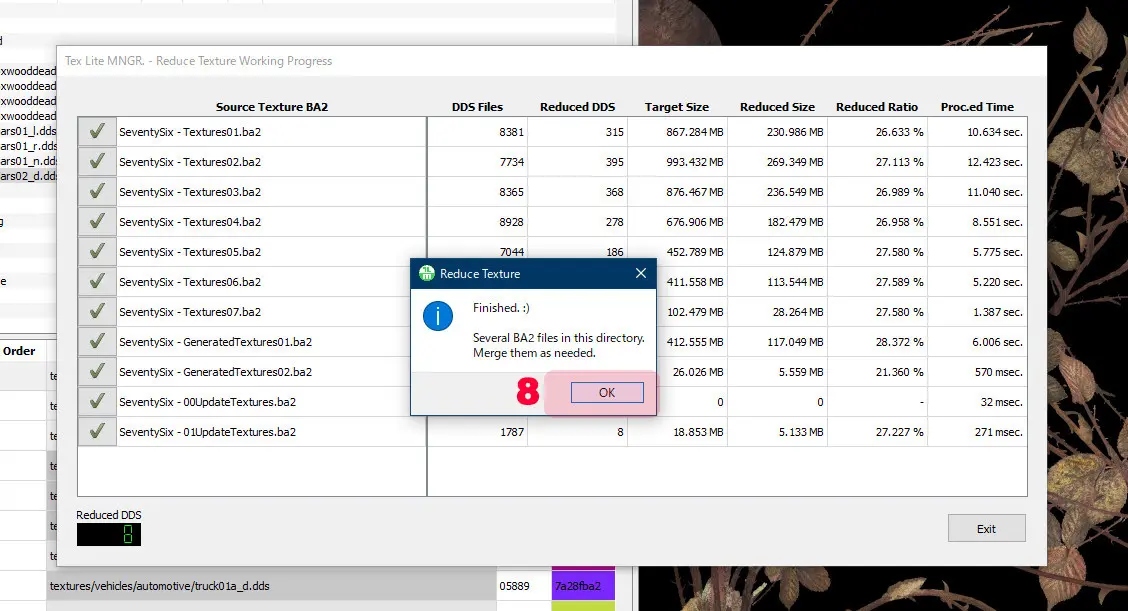
Step 8
Reducing process is finished.
It took about a minute to complete.(using old i7 and SATA-SSD)
10 texture files have been output.
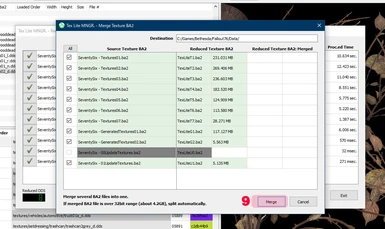
You can use it as is, but Tex Lite MNGR. can merge several BA2s into one.
Let's try it.
Step 9
You can choose which BA2 files to merge, but merge all the BA2 files.
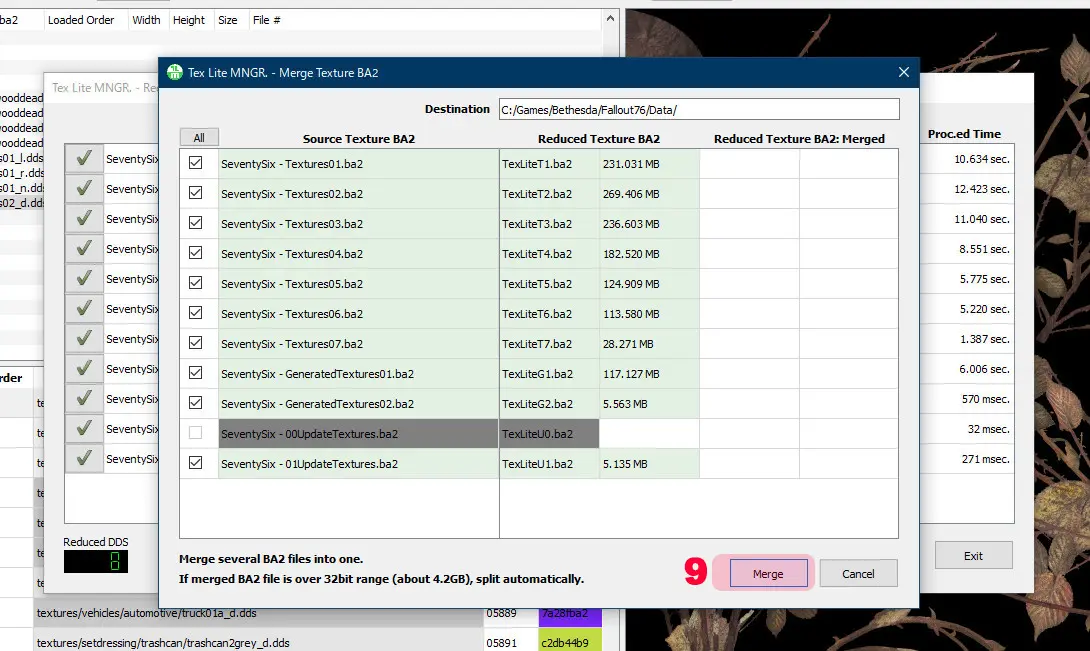
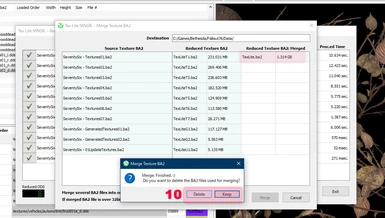
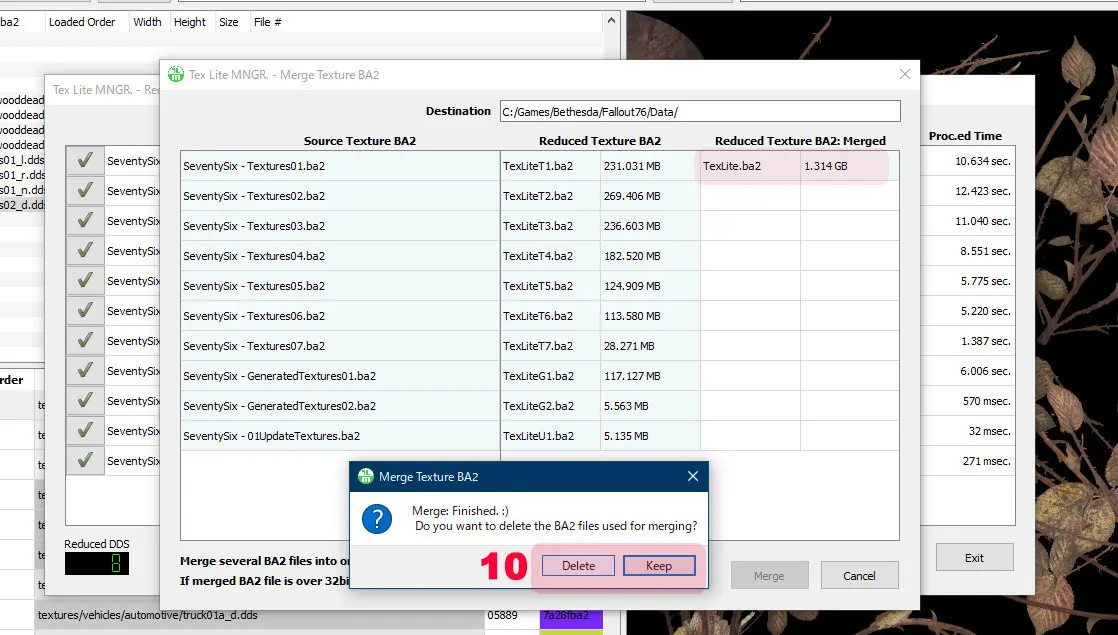
Step 10
Merging is complete.
If merged BA2 file size is over 32bit range (about 4.2GB), split automatically.(BA2 file name will be numbered)
* you can specify whether to split or not in settings.
Choose whether to delete or keep the BA2 file used for the merge.
Step 11
Texture data is now ready.
Now just need to append the BA2 name to Fallout76Custom.ini.
Tex Lite MNGR. can append BA2 file name to Fallout76Custom.ini with a simple operation. (no need to type on a keyboard)
Let's try it.

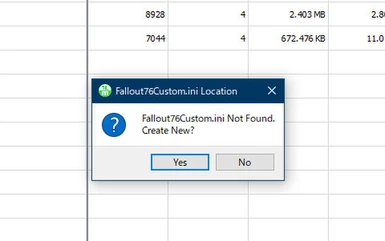
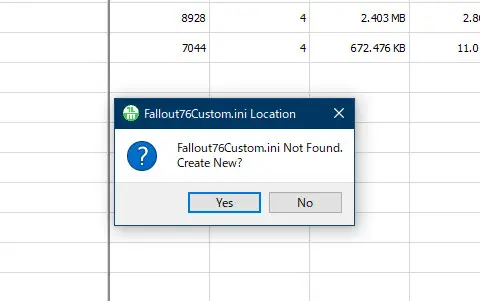
If cannot found Fallout76Custom.ini, it will ask you where to find it.
If you do not have Fallout76Custom.ini in the directory you selected, Tex Lite MNGR. will ask you if you want to create a new Fallout76Custom.ini.
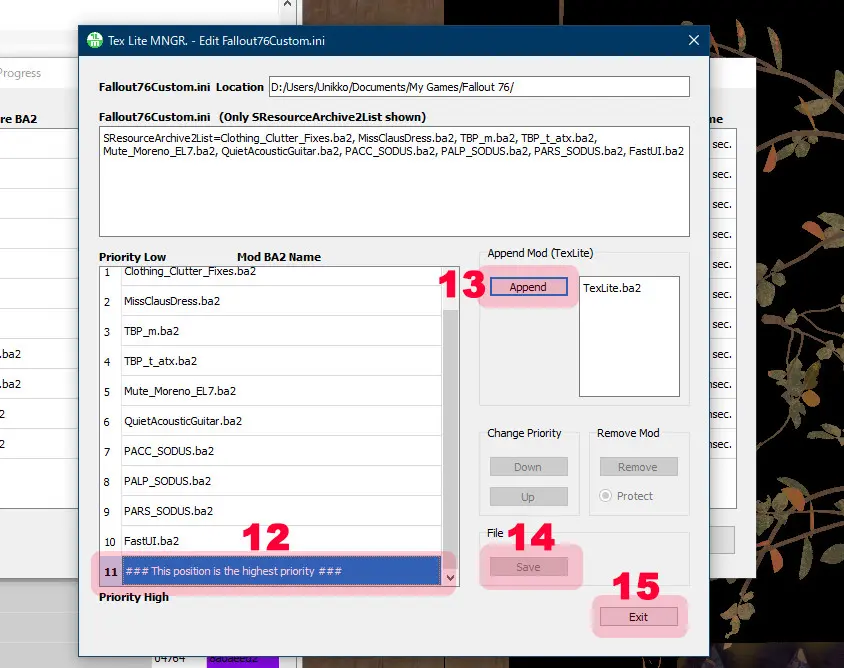
Step 12
Select the Line(Row) where you want to insert TexLite.BA2.
Highest mod priority is bottom line. and, higher the line, the lower the priority.
You can change the priority order later, using up and down buttons.
If there are any mods that you don't need anymore,
you can remove them with the Remove button. (To prevent accidental operation, press the Protect button to activate the remove button)
Step 13
Append TexLite.BA2.
Step 14
Save the Fallout76Custom.ini.
Any modified Fallout76Custom.ini will be automatically backed up to the last 4.
Backup file name is "Fallout76Custom.ini.TLM_BKUP_0" to "Fallout76Custom.ini.TLM_BKUP_3"
Step 15
All done. Exit Tex Lite MNGR. and Jack In to the Appalachia!

Tex Lite MNGR.(TLM) improves game performance by reducing & optimizing the texture data of Fallout76.
You will get improved video frame rate and reduced game load time.
Users' PC specs vary.
You can create your own texture data that can be played comfortably on your PC.
It's easy and fast.
If you are a new user, please refer to the Basic Tutorial below to learn how to use it. It's easy!
Main features of Tex Lite MNGR.
- TLM can change the each texture size.
- Compression level of chunk data can be specified. (10 steps)
- Two types of texture BA2 can be output.(Ini force BA2 type, Replacement BA2 type)
- Save and load order data.
- Built-in texture viewer.
- Built-in BA2 merger.
- Built-in Fallout76Custom.ini Assistant.
Notes.
- Only Fallout76 texture BA2 files can be used.
- TLM dose not resize textures in /facegen and /interface(include /atx/interface) directories.
- TLM add a very small texture data for BA2 merge management, but it is not used in the game, it will not have any impact on the game.
- User-specified data such as directory locations and settings are stored in TexLiteMNGR.ini.
- Texture image displayed in the texture viewer may differ in color from the actual output image.
- TLM does not access to Windows Registry Key and any networks.
- Settings
- Edit Order Data
- Save/Load Order Data
- Basic Tutorial (For new users)
1. Settings:
[Section: Reduce Texture]
Output BA2 Type:
TLM outputs BA2 types can be fixed, "Ini Force BA2" or "Replace BA2".
Select "Selectable" if you want to switch for each Reduce operation.
*Replace type is for advanced users.(If you don't understand it well enough. original texture BA2 file may be lost!)
DDS Compression Level:
Select the compression level for each texture. Default, 1(Best Speed) to 9(Best Compression)
Unless you are a speed junky or high compression junky, default is recommended. I use 1 though.
Target Map:
TLM reduces the four texture MAPs(Diffuse/Normal/Lighting/Reflection) in the same way.
It is possible to select the target texture MAP, but I don't think the need to do so, so I have disabled it for now.
Keep DXGI Format:
For now, DXGI Format retains its original format.
Chunk Data Optimize:
Some of the compressed data of the original texture is larger than the uncompressed data, so optimize it.
(Disabled in version 1.0.4)
Single Output BA2 (64bit Size): (Added Version 1.0.7)
Does not split the merged BA2 file if the size exceeds the 32bit range.
FAT32 users should never use this option.
Log:
Outputs log file. (disabled for now)
[Section: DDS Viewer]
Background Color:
Sets the background color of the texture viewer.
BC4 Output Channel:
BC4 format texture only has a red channel, but change the channel to be displayed in the viewer.
[Section: Fallout76Custom.ini]
Fallout76Custom.ini Location:
Enter the location of the Fallout76Custom.ini file
Custom.ini Assistance:
Use a custom ini assistant. If you don't need the assistant, remove it.
2. Edit Order Data:
Order Value
'Ignore' is Blank. No Reduce processing.
When order data is loaded on top of each other, it does not overwrite the previous order data.
'Keep' is keeps original texture size. as with 'Ignore', no Reduce processing.
difference with 'Ignore' is that it is not blank, so if it is loaded on top of the previous order data, it will overwrite the previous order data.
Input or Edit Order Value
With a texture selected, press the right mouse button to open the context menu. Select the order value from the context menu.
How to select multiple textures
Drag while holding down the left mouse button, or select while holding down the Ctrl or Shift key.
Cell Sorting
In the lower table view, click the header cell.
upper treeview is not sortable.
3. Save/Load Order Data:
TLM's order data is designed to be flexible.If FO76 is updated and the number of textures in texture BA2 changes, no problem. (Probably)
4. Basic Tutorial (For new users):
Try reducing the texture size, which has a significant impact on performance.
Run TexLiteMNGR.exe.
Make sure you have enough free space on your hard disk or SSD.
For the first time startup, set the location of the source BA2 file.
I recommend the Data directory of Fallout76.
First, let's reduce it simply.
It's simple, but it improves performance.
Step 1
Select "Apply Basic Order" from the "Reducetexture" menu.
Step2
Determine the order size for the source texture size.
For now, reduce a texture size 4096 to 2048, and, 2048 to 1024.
Likewise, you can specify other texture sizes as you like.
There are also 10 different presets that can be easily specified.
Step3
Select the texture BA2 to which you want to apply the created order.
Press the All button, apply to all textures BA2.
Step4
Press the Apply button to finalize your order.
Step 5
Select "Reduce" from the "Reduce Basic Order" menu.
Step 6
Select the output destination for the reduced texture data.
It is useful to select the Fallout76 data directory.
If you want to output BA2 of the replacement type, Do not select the Fallout76 data directory.
Step 7
Press the Reduce button to start reducing process.
Reducing process can be stopped midway.
Step 8
Reducing process is finished.
It took about a minute to complete.(using old i7 and SATA-SSD)
10 texture files have been output.
You can use it as is, but Tex Lite MNGR. can merge several BA2s into one.
Let's try it.
Step 9
You can choose which BA2 files to merge, but merge all the BA2 files.
Step 10
Merging is complete.
If merged BA2 file size is over 32bit range (about 4.2GB), split automatically.(BA2 file name will be numbered)
* you can specify whether to split or not in settings.
Choose whether to delete or keep the BA2 file used for the merge.
Step 11
Texture data is now ready.
Now just need to append the BA2 name to Fallout76Custom.ini.
Tex Lite MNGR. can append BA2 file name to Fallout76Custom.ini with a simple operation. (no need to type on a keyboard)
Let's try it.
If cannot found Fallout76Custom.ini, it will ask you where to find it.
If you do not have Fallout76Custom.ini in the directory you selected, Tex Lite MNGR. will ask you if you want to create a new Fallout76Custom.ini.
Step 12
Select the Line(Row) where you want to insert TexLite.BA2.
Highest mod priority is bottom line. and, higher the line, the lower the priority.
You can change the priority order later, using up and down buttons.
If there are any mods that you don't need anymore,
you can remove them with the Remove button. (To prevent accidental operation, press the Protect button to activate the remove button)
Step 13
Append TexLite.BA2.
Step 14
Save the Fallout76Custom.ini.
Any modified Fallout76Custom.ini will be automatically backed up to the last 4.
Backup file name is "Fallout76Custom.ini.TLM_BKUP_0" to "Fallout76Custom.ini.TLM_BKUP_3"
Step 15
All done. Exit Tex Lite MNGR. and Jack In to the Appalachia!